You are viewing a plain text version of this content. The canonical link for it is here.
Posted to commits@weex.apache.org by ha...@apache.org on 2018/03/23 09:44:25 UTC
[02/12] incubator-weex-site git commit: *[doc] update documentation
about custom component and module
*[doc] update documentation about custom component and module
Project: http://git-wip-us.apache.org/repos/asf/incubator-weex-site/repo
Commit: http://git-wip-us.apache.org/repos/asf/incubator-weex-site/commit/926bef07
Tree: http://git-wip-us.apache.org/repos/asf/incubator-weex-site/tree/926bef07
Diff: http://git-wip-us.apache.org/repos/asf/incubator-weex-site/diff/926bef07
Branch: refs/heads/master
Commit: 926bef07d46bfd9dc95eded5fdb7120304c2aed2
Parents: cb0422b
Author: acton393 <zh...@gmail.com>
Authored: Tue Mar 13 21:18:10 2018 +0800
Committer: acton393 <zh...@gmail.com>
Committed: Tue Mar 13 21:18:10 2018 +0800
----------------------------------------------------------------------
source/cn/guide/extend-ios.md | 432 +++++++++++-----------
source/cn/guide/extend-js-framework.md | 2 +-
source/cn/guide/extend-module-using-swift.md | 115 ++++++
source/cn/wiki/component-introduction.md | 21 +-
source/cn/wiki/module-introduction.md | 3 +-
5 files changed, 346 insertions(+), 227 deletions(-)
----------------------------------------------------------------------
http://git-wip-us.apache.org/repos/asf/incubator-weex-site/blob/926bef07/source/cn/guide/extend-ios.md
----------------------------------------------------------------------
diff --git a/source/cn/guide/extend-ios.md b/source/cn/guide/extend-ios.md
index 3b9ba70..bfb1270 100644
--- a/source/cn/guide/extend-ios.md
+++ b/source/cn/guide/extend-ios.md
@@ -6,215 +6,198 @@ order: 6.3
version: 2.1
---
-## 注意
-
+>>> 注意
**Weex 所有暴露给 JS 的内置 module 或 component API 都是安全和可控的, 它们不会去访问系统的私有 API ,也不会去做任何 runtime 上的 hack 更不会去改变应用原有的功能定位。**
**如果需要扩展自定义的 module 或者 component ,一定注意不要将 OC 的 runtime 暴露给 JS , 不要将一些诸如 `dlopen()`, `dlsym()`, `respondsToSelector:`,`performSelector:`,`method_exchangeImplementations()` 的动态和不可控的方法暴露给JS, 也不要将系统的私有API暴露给JS**
-## Module 扩展
+Weex SDK 只提供渲染,提供了一些默认的组件和能力,如果你需要一些特性但 Weex 并未提供,可以通过扩展自定义的一些插件来实现,通过 WeexSDK 加载。这些插件包括 [component](../wiki/component-introduction.html), [module](../wiki/module-introduction.html) 和 [handler](../wiki/handler-introduction.html)。
+>>> 本文都以 Objective-C 为例子书写,如果需要 swift 请参考
-[swift](https://github.com/weexteam/article/issues/55) 扩展 module
+## 自定义 module
-Weex SDK 只提供渲染,而不是其他的能力,如果你需要 像网络,图片,URL跳转这些特性,需要自己动手实现他们
-例如,如果你想实现一个url地址跳转函数,你可以按照如下步骤实现一个 Module
+自定义 module, 需要让自己的 class 遵循 `WXModuleProtocol` 这个protocol, 通过 `WX_EXPORT_METHOD` 这个宏暴露出需要透出到 `JavaScript` 调用的方法,注册 module , 就可以完成一个简单 module 的自定义。
-### **自定义module的步骤**
-1. 自定义的module类 必须实现 `WXModuleProtocol`
-2. 必须添加宏`WX_EXPORT_METHOD`, 它可以被weex识别,它的参数是 JavaScript调用 module指定方法的参数
-3. 添加`@synthesized weexInstance`,每个moudle对象被绑定到一个指定的实例上
-4. Module 方法会在UI线程中被调用,所以不要做太多耗时的任务在这里,如果要在其他线程执行整个module 方法,需要实现`WXModuleProtocol`中`- (NSThread *)targetExecuteThread`的方法,这样,分发到这个module的任务会在指定的线程中运行
-5. Weex 的参数可以是 String 或者Map
-6. Module 支持返回值给 JavaScript中的回调,回调的类型是`WXModuleCallback`,回调的参数可以是String或者Map
+- module 自定义初阶
- ```object-c
- @implementation WXEventModule
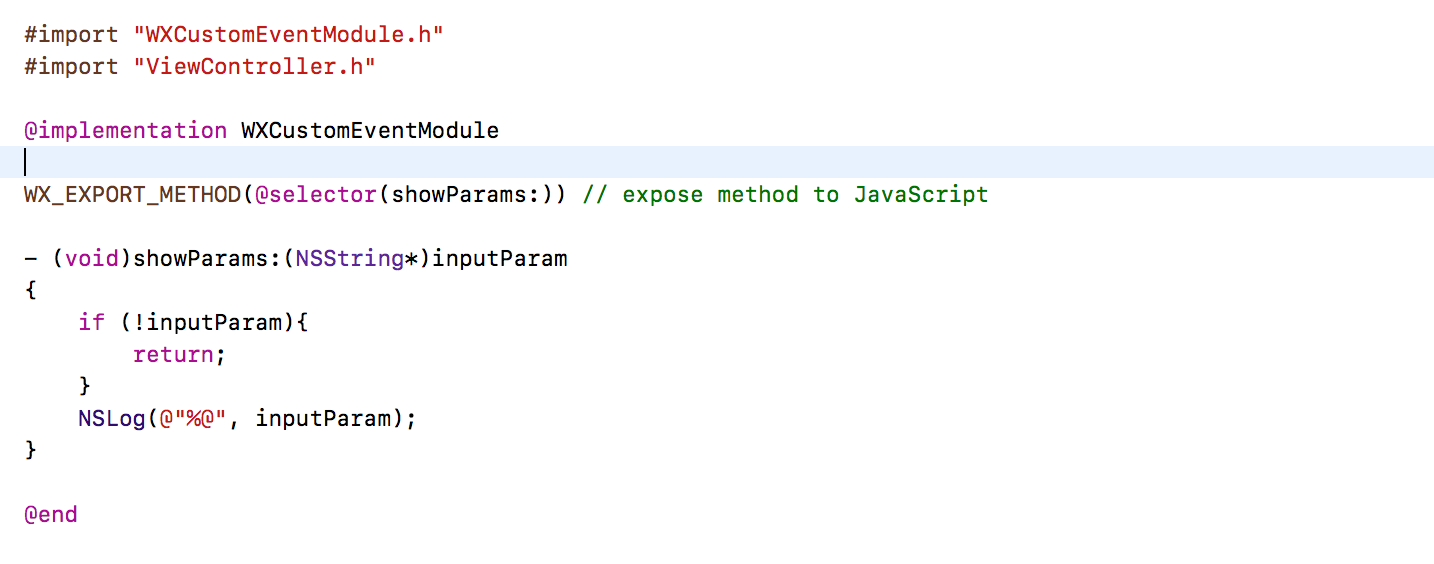
+ 下面完成一个 `module`, 该 `module` 暴露一个打印输入参数的方法
- @synthesize weexInstance;
- WX_EXPORT_METHOD(@selector(openURL:callback:))
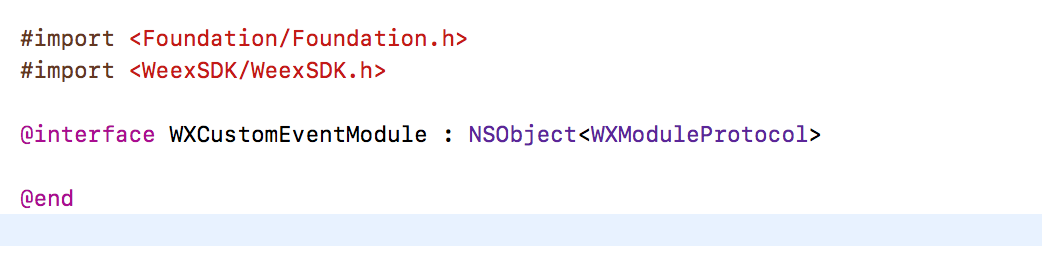
+ 1. 新建一个 基类为 NSObject 的 class `WXCustomEventModule`, 让该类遵循 `WXModuleProtocol` 的协议
+ 
- - (void)openURL:(NSString *)url callback:(WXModuleCallback)callback
- {
- NSString *newURL = url;
- if ([url hasPrefix:@"//"]) {
- newURL = [NSString stringWithFormat:@"http:%@", url];
- } else if (![url hasPrefix:@"http"]) {
- newURL = [NSURL URLWithString:url relativeToURL:weexInstance.scriptURL].absoluteString;
- }
+ 2. 添加打印的方法,通过 `WX_EXPORT_METHOD` 暴露该方法
+ 
- UIViewController *controller = [[WXDemoViewController alloc] init];
- ((WXDemoViewController *)controller).url = [NSURL URLWithString:newURL];
+ 3. 在初始化完成 Weex SDK 之后注册该 module
+ 
- [[weexInstance.viewController navigationController] pushViewController:controller animated:YES];
- callback(@{@"result":@"success"});
- }
+ 到此,我们已经完成了一个简单的 module 方法的封装,javaScript 端的使用如下:
- @end
+ ```javaScript
+ weex.requireModule("event").showParams("hello Weex)
```
-#### 暴露同步方法<span class="api-version">v0.10+</span>
-
-如果你想要暴露同步的native方法给JS, 即JS可以直接拿到Native的返回值。 你可以使用`WX_EXPORT_METHOD_SYNC` 宏。
-
-native 代码:
-
-```objective-c
-@implementation WXEventModule
-
-WX_EXPORT_METHOD_SYNC(@selector(getString))
-
-- (NSString *)getString
-{
- return @"testString";
-}
-
-@end
-```
-
-js 代码:
-
-```javascript
-const eventModule = weex.requireModule('event')
-const returnString = syncTest.getString() // return "testString"
-```
-
-除了string, 你也可以返回 `number/array/dictionary` 类型.
-
-`注意:` 暴露的同步方法只能在 JS 线程执行,请不要做太多同步的工作导致JS执行阻塞。
-
-`注意:` Vue 2.0 还未支持这个特性,最早会在 0.12 版本支持
-
-
-
-### 注册 module
-
-通过调用 WXSDKEngine 中的 `registerModule:withClass`方法来注册自己的module
-
-```object-c
-WXSDKEngine.h
-/**
-* @abstract Registers a module for a given name
-* @param name The module name to register
-* @param clazz The module class to register
-**/
-+ (void)registerModule:(NSString *)name withClass:(Class)clazz;
-[WXSDKEngine registerModule:@"event" withClass:[WXEventModule class]];
-```
-
-### 使用自己的 module
-
-这里的 require 里面的 event 就是在 上一步调用 `registerModule:` 注册 module 时候的 name
-
-```javascript
-var eventModule = weex.requireModule('event');
-eventModule.openURL('url',function(ret) {
- nativeLog(ret);
-});
+- module 高阶用法
+ 1. `weexInstance`
+ 在一个 Weex 页面中,默认 WXSDKInstance 的 Object 持有 多个 module 的 Object, 而 module 的 object 是没有对 WXSDKInstance 做持有的, 在自定义的module 中添加 `@synthesize weexInstance`, module Object 可以对 持有它本身的 WXSDKInstance Object 做一个 弱引用, 通过 weexInstance 可以拿到调用该 module 的页面的一些信息。
+ 2. `targetExecuteThread`
+ Module 方法默认会在UI线程中被调用,建议不要在这做太多耗时的任务,如果要在其他线程执行整个module 方法,需要实现`WXModuleProtocol`中`- (NSThread *)`的方法,这样,分发到这个module的任务会在指定的线程中运行
+
+ 3. `WXModuleKeepAliveCallback`
+ Module 支持返回值给 JavaScript中的回调,回调的类型是`WXModuleKeepAliveCallback`,回调的参数可以是String或者Map, 该 block 第一个参数为回调给 JavaScript 的数据,第二参数是一个 BOOL 值,表示该回调执行完成之后是否要被清除,JavaScript 每次调用都会产生一个回调,但是对于单独一次调用,是否要在完成该调用之后清除掉回调函数 id 就由这个选项控制,如非特殊场景,建议传 NO。
+ 4. `WX_EXPORT_METHOD_SYNC`
+ >>> WeexSDK 0.10 版本后才支持,暴露的同步方法只能在 JS 线程执行,请不要做太多同步的工作导致JS执行阻塞。
+
+ 使用 `WX_EXPORT_METHOD` 暴露到前端的方法都是异步方法(获得结果需要通过回调函数获得), 如果期望获得同步调用结果,可以使用`WX_EXPORT_METHOD_SYNC` 暴露module 方法。
+
+## Component 扩展
+
+可能 WeexSDK 内置提供的组件并不能满足你的开发需求,比如需要期望使用地图这样一个复杂的组件,可以通过自定义一个组件,注册到 WeexSDK engine 中, 可以很方便的使用起来。
+
+### component 基础生命周期
+
+- 新建一个基类为 `WXComponent` 的 class
+ 如果此时我们什么都不做,将改组件注册进 WeexSDK engine,它的功能就跟内置的 `div` 组件功能是一致的。
+
+- 覆盖 `WXComponent` 中的生命周期方法
+
+ - `loadView`
+ 一个 component 默认对应于一个 view , 如果未覆盖 `loadView` 提供自定义 `view`, 会使用 `WXComponent` 基类中的 `WXView`, `WXView` 是继承自 UIView 的一个派生 view。
+ 要实现地图功能,我们需要对应的地图 view, 比如系统的 `MKMapView`
+
+ ```
+ - (UIView *)loadView {
+ return [MKMapView new];
+ }
+ ```
+
+ - `viewDidLoad`
+ 对组件 view 需要做一些配置,比如设置 delegate, 可以在 `viewDidLoad` 生命周期做,如果当前 view 没有添加 subview 的话,不要设置 view 的 frame,WeexSDK 会根据 style 设置。
+
+ ```
+ - (void)viewDidLoad {
+ ((MKMapView*)self.view).delegate = self;
+ }
+ ```
+- 注册 component
+
+ ```
+ [WXSDKEngine registerComponent:@"map" withClass:[WXMapComponent class]];
+ ```
+ 在前端页面直接可以使用 `map` 标签,如下所示
+
```
-
-Weex SDK 没有 图片下载,navigation 操作的能力,请大家自己实现这些 protocol
-
-## WXImgLoaderProtocol
-
-weexSDK 没有图片下载的能力,需要实现 WXImgLoaderProtocol, 参考下面的例子
-
-```object-c
-WXImageLoaderProtocol.h
-@protocol WXImgLoaderProtocol <WXModuleProtocol>
-/**
-* @abstract Creates a image download handler with a given URL
-* @param imageUrl The URL of the image to download
-* @param imageFrame The frame of the image you want to set
-* @param options : The options to be used for this download
-* @param completedBlock : A block called once the download is completed.
- image : the image which has been download to local.
- error : the error which has happened in download.
- finished : a Boolean value indicating whether download action has finished.
-*/
--(id<WXImageOperationProtocol>)downloadImageWithURL:(NSString *)url imageFrame:(CGRect)imageFrame userInfo:(NSDictionary *)options completed:(void(^)(UIImage *image, NSError *error, BOOL finished))completedBlock;
-@end
+ <template>
+ <div>
+ <map style="width:200px;height:200px"></map>
+ </div>
+ </template>
```
-实现上述协议
-
-```object-c
-@implementation WXImgLoaderDefaultImpl
-#pragma mark -
-#pragma mark WXImgLoaderProtocol
+- 支持自定义事件
-- (id<WXImageOperationProtocol>)downloadImageWithURL:(NSString *)url imageFrame:(CGRect)imageFrame userInfo:(NSDictionary *)userInfo completed:(void(^)(UIImage *image, NSError *error, BOOL finished))completedBlock
-{
- if ([url hasPrefix:@"//"]) {
- url = [@"http:" stringByAppendingString:url];
- }
- return (id<WXImageOperationProtocol>)[[SDWebImageManager sharedManager] downloadImageWithURL:[NSURL URLWithString:url] options:0 progress:^(NSInteger receivedSize, NSInteger expectedSize) {
- } completed:^(UIImage *image, NSError *error, SDImageCacheType cacheType, BOOL finished, NSURL *imageURL) {
- if (completedBlock) {
- completedBlock(image, error, finished);
+ 给 map 组件支持 `mapLoaded` 事件
+ ```
+ <template>
+ <div>
+ <map style="width:200px;height:200px" @mapLoaded="onMapLoaded"></map>
+ </div>
+ </template>
+
+ <script>
+ export default {
+ methods: {
+ onMapLoaded:function(e) {
+ console.log("map loaded"+JSON.stringify(e))
+ }
+ }
}
- }];
-}
-@end
-```
-
-### handler注册
-
-你可以通过WXSDKEngine 中的 `registerHandler:withProtocol`注册handler
-
-```object-c
-WXSDKEngine.h
-/**
-* @abstract Registers a handler for a given handler instance and specific protocol
-* @param handler The handler instance to register
-* @param protocol The protocol to confirm
-*/
-+ (void)registerHandler:(id)handler withProtocol:(Protocol *)protocol;
-
-[WXSDKEngine registerHandler:[WXImgLoaderDefaultImpl new] withProtocol:@protocol(WXImgLoaderProtocol)]
-```
+ </script>
+ ```
+ 给当前组件添加 `BOOL` 成员 mapLoaded,记录当前事件是否被添加
+
+ - 覆盖组件生命周期方法添加和移除事件
+
+ 覆盖 `addEvent` 和 `removeEvent` 方法
-## Components 扩展
+ ```
+ - (void)addEvent:(NSString *)eventName {
+ if ([eventName isEqualToString:@"mapLoaded"]) {
+ _mapLoaded = YES;
+ }
+ }
-虽然 WeexSDK 中有很多的 native 的 Component,但这有可能并不能满足你的需求。在之前你可能已经写了一些很酷炫 native 的组件,想包装一下,导入到 Weex 中,因此我们提供了让开发者实现自己的 native Component。下面将以 WeexSDK 中已经存在的 Component:`image` 为例子,介绍一下如何构建一个 native Component。假设你已经了解 iOS 开发
+ - (void)removeEvent:(NSString *)eventName
+ {
+ if ([eventName isEqualToString:@"mapLoaded"]) {
+ _mapLoaded = NO;
+ }
+ }
+ ```
+ - 在适宜的时间发事件通知
-### 注册 Component
+ 在 MKMapView 加载完成的 delegate 方法中,发事件通知自定义事件
-注册一个 component 比较简单,调用 `WXSDKEngine` 中的 `registerComponent:withClass:` 方法,传入组件的标签名称,还有对应的 class 然后你可以创建一个 `WXImageComponent` 表示 `image` 组件的实现。在 `.we` 文件中,只需要写 `<image></image>`
+ ```
+ - (void)mapViewDidFinishLoadingMap:(MKMapView *)mapView {
+ if (_mapLoaded) {
+ [self fireEvent:@"mapLoaded" params:@{@"customKey":@"customValue"} domChanges:nil]
+ }
+ }
+ ```
-### 添加属性
-现在我们要做一些让 image component 更加强大的事情。既然作为一个图片的 component,那它应该要有源,给他加上一个 `src` 的属性,同时给它加上一个 `resize` 的属性(可以配置的有 `contain/cover/stretch`)
-```object-c
-@interface WXImageComponent ()
+- 支持自定义属性
-@property (nonatomic, strong) NSString *imageSrc;
-@property (nonatomic, assign) UIViewContentMode resizeMode;
+ 添加自定义属性 showTraffic
-@end
-```
+ ```
+ <template>
+ <div>
+ <map style="width:200px;height:200px" showTraffic="true"></map>
+ </div>
+ </template>
+ ```
+ - 覆盖组件初始化方法 `initWithRef...`
-component 中所有的 style,attribute,events 都会被传递到 Component 的初始化方法中,所以,你可以在初始化方法中存储你感兴趣的一些属性值
+ 当前component 添加 `BOOL` 成员 showsTraffic,接受保存用户输入值,添加到当前组件上的所有属性都会在初始化方法中 `attributes` 中传过来,此处我们处理我们感兴趣的属性即可。
-```object-c
-@implementation WXImageComponent
+ ```
+ - (instancetype)initWithRef:(NSString *)ref type:(NSString *)type styles:(NSDictionary *)styles attributes:(NSDictionary *)attributes events:(NSArray *)events weexInstance:(WXSDKInstance *)weexInstance {
+ if(self = [super initWithRef:ref type:type styles:styles attributes:attributes events:events weexInstance:weexInstance]) {
+
+ if (attributes[@"showsTraffic"]) {
+ _showsTraffic = [WXConvert BOOL: attributes[@"showsTraffic"]];
+ }
+ }
+ return self;
+ }
+ ```
-- (instancetype)initWithRef:(NSString *)ref type:(NSString *)type styles:(NSDictionary *)styles attributes:(NSDictionary *)attributes events:(NSArray *)events weexInstance:(WXSDKInstance *)weexInstance
-{
- if (self = [super initWithRef:ref type:type styles:styles attributes:attributes events:events weexInstance:weexInstance]) {
- _imageSrc = [WXConvert NSString:attributes[@"src"]];
- _resizeMode = [WXConvert UIViewContentMode:attributes[@"resize"]];
-}
+ - 在 `viewDidLoad` 中设置该属性
+
+ ```
+ - (void)viewDidLoad {
+ ((MKMapView*)self.view).showsTraffic = _showsTraffic;
+ }
+ ```
- return self;
-}
+ - 支持属性更新
+
+ ```
+ - (void)updateAttributes:(NSDictionary *)attributes
+ {
+ if (attributes[@"showsTraffic"]) {
+ _showsTraffic = [WXConvert BOOL: attributes[@"showsTraffic"]];
+ ((MKMapView*)self.view).showsTraffic = _showsTraffic;
+ }
+ }
-@end
-```
+ ```
-attribute 中拿到的值的类型都是 `id`,我们可以用转换方法把它转换到任何值。Weex SDK 提供了一些基础的转换方法,可以参考 `WXConvert` 类,或者你可以添加自己的转换函数。
-### Hooking 渲染生命周期
+### 更多 component 生命周期
native 的 component 是由 Weex 管理的,Weex 创建,布局,渲染,销毁。Weex 的 component 生命周期都是可以 hook 的,你可以在这些生命周期中去做自己的事情。
@@ -232,59 +215,11 @@ native 的 component 是由 Weex 管理的,Weex 创建,布局,渲染,销
| addEvent: | 给component添加event的时候调用. |
| removeEvent: | 在event移除的时候调用. |
-在 image component 的例子里面,如果我们需要我们自己的 image view 的话,可以复写 `loadView`这个方法.
-
-```object-c
-- (UIView *)loadView
-{
-return [[WXImageView alloc] init];
-}
-```
-
-现在我们使用 `WXImageView` 渲染 `image` component。
-作为一个 image component,我们需要拿到服务器图片,而且把它设置进 image view 里. 这个操作可以在 `viewDidLoad` 方法中做,这个方法是在 view 已经被创建而且加载了时候 Weex SDK 会调用到,而且 `viewDidLoad` 这个方法是你做额外初始化工作比如改变 content mode(也就是设置resize) 的最好时间.
-
-```object-c
-- (void)viewDidLoad
-{
- UIImageView *imageView = (UIImageView *)self.view;
- imageView.contentMode = _resizeMode;
- imageView.userInteractionEnabled = YES;
- imageView.clipsToBounds = YES;
- imageView.exclusiveTouch = YES;
-
- // Do your image fetching and updating logic
-}
-```
-
-如果可以改变 image 的 src,也可以 hook `updateAttributes:` 方法来做属性更新操作,当 `updateAttributes:` 或者 `updateStyles:` 被调用的时候, component 的 view 已经加载完成
-
-```object-c
-- (void)updateAttributes:(NSDictionary *)attributes
-{
- if (attributes[@"src"]) {
- _imageSrc = [WXConvert NSString:attributes[@"src"]];
- // Do your image updating logic
- }
-
- if (attributes[@"resize"]) {
- _resizeMode = [WXConvert UIViewContentMode:attributes[@"resize"]];
- self.view.contentMode = _resizeMode;
- }
-}
-```
-
或许你需要考虑更多的生命周期方法去 Hook,当布局完成时候,像 `layoutDidFinish`,如果你想了解更多,可以参考一下`WXComponent.h` 声明的方法。
-现在你可以用在任何 `.we` 文件里面使用 `<image>`,而且可以加上 image 的属性。
-
-```html
-<image style="your-custom-style" src="image-remote-source" resize="contain/cover/stretch"></image>
-```
-
-##### component 方法
+### component 方法
-WeexSDK 0.9.5 之后支持了在 js 中直接调用 component 的方法,这里提供一个例子
+WeexSDK 0.9.5 之后支持了在 js 中直接调用 component 的方法,自定义完组件后,下面的例子可以指引你完成 component 方法。
- 自定义一个 WXMyCompoenent 的组件
@@ -324,3 +259,54 @@ WeexSDK 0.9.5 之后支持了在 js 中直接调用 component 的方法,这里
}
</script>
```
+
+## 自定义 handler
+
+ weexSDK 目前没有提供图片下载的能力,在`WXImgLoaderProtocol` 定义了一些获取图片的接口, image 组件正是通过 `WXImgLoaderProtocol` 获得并展示图片,开发者可以实现该 protocol 中的接口方法,这样 `image` 标签才能正常展示图片。
+
+ 开发者也可以定义自己的 `protocol` 和对应的实现来使用 `handler` 机制
+
+- 新建基类为 NSObject 的 class 实现 `WXImgLoaderProtocol` 协议, 实现 `WXImgLoaderProtocol` 的方法
+
+ ```object-c
+ @implementation WXImgLoaderDefaultImpl
+ - (id<WXImageOperationProtocol>)downloadImageWithURL:(NSString *)url imageFrame:(CGRect)imageFrame userInfo:(NSDictionary *)userInfo completed:(void(^)(UIImage *image, NSError *error, BOOL finished))completedBlock
+ {
+ if ([url hasPrefix:@"//"]) {
+ url = [@"http:" stringByAppendingString:url];
+ }
+ return (id<WXImageOperationProtocol>)[[SDWebImageManager sharedManager] downloadImageWithURL:[NSURL URLWithString:url] options:0 progress:^(NSInteger receivedSize, NSInteger expectedSize) {
+ } completed:^(UIImage *image, NSError *error, SDImageCacheType cacheType, BOOL finished, NSURL *imageURL) {
+ if (completedBlock) {
+ completedBlock(image, error, finished);
+ }
+ }];
+ }
+ @end
+ ```
+
+- 注册 handler
+
+ 你可以通过WXSDKEngine 中的 `registerHandler:withProtocol` 注册handler
+
+ ```object-c
+ WXSDKEngine.h
+ /**
+ * @abstract Registers a handler for a given handler instance and specific protocol
+ * @param handler The handler instance to register
+ * @param protocol The protocol to confirm
+ */
+ + (void)registerHandler:(id)handler withProtocol:(Protocol *)protocol;
+
+ [WXSDKEngine registerHandler:[WXImgLoaderDefaultImpl new] withProtocol:@protocol(WXImgLoaderProtocol)]
+
+ ```
+- 使用 handler
+
+ handler 可以在 native 的 module 或者 component 实现中使用
+
+ ```objective-c
+ id<WXImgLoaderProtocol> imageLoader = [WXSDKEngine handlerForProtocol:@protocol(WXImgLoaderProtocol)];
+ [iamgeLoader downloadImageWithURL:imageURl imageFrame:frame userInfo:customParam completed:^(UIImage *image, NSError *error, BOOL finished){
+ }];
+ ```
http://git-wip-us.apache.org/repos/asf/incubator-weex-site/blob/926bef07/source/cn/guide/extend-js-framework.md
----------------------------------------------------------------------
diff --git a/source/cn/guide/extend-js-framework.md b/source/cn/guide/extend-js-framework.md
index 1e9db01..fbdb86e 100644
--- a/source/cn/guide/extend-js-framework.md
+++ b/source/cn/guide/extend-js-framework.md
@@ -2,7 +2,7 @@
title: 拓展 JS framework
type: guide
group: 扩展
-order: 6.4
+order: 6.5
version: 2.1
---
http://git-wip-us.apache.org/repos/asf/incubator-weex-site/blob/926bef07/source/cn/guide/extend-module-using-swift.md
----------------------------------------------------------------------
diff --git a/source/cn/guide/extend-module-using-swift.md b/source/cn/guide/extend-module-using-swift.md
new file mode 100644
index 0000000..3098284
--- /dev/null
+++ b/source/cn/guide/extend-module-using-swift.md
@@ -0,0 +1,115 @@
+---
+title: iOS 扩展
+type: guide
+group: 扩展
+order: 6.4
+version: 2.1
+---
+
+## Swift In Weex
+
+[Swift和Objective-C](https://developer.apple.com/library/ios/documentation/Swift/Conceptual/BuildingCocoaApps/MixandMatch.html#//apple_ref/doc/uid/TP40014216-CH10-ID122) 混编
+
+参考完整 [例子](https://github.com/acton393/WeexSwiftSample.git)
+
+### 使用 Swift 进行 module 扩展
+
+因为 module 暴露 method 是通过`Objective-C`宏来做的,调用的时候是通过反射,所以Swift扩展 module 通过`extension` `Objective-C`的类。
+- 新建 `WXSwiftTestModule.h/m` 和 `WXSwiftTestModule.swift`文件, 在新建Swift文件的时候会提示
+ 
+ 选择 `Create Bridging Header`, 因为我们要在 Swift 中访问 `Objective-C` 的一些类,正是通过这个 header暴露 OC 的类给 Swift,header 格式为 `yourTarget-Bridging-Header.h`,我这里创建完header文件名称为:`WeexDemo-Bridging-Header.h`
+- `WXSwiftTestModule.h/m`中实现
+ - WXSwiftTestModule.h 中
+
+ ```
+ #import <Foundation/Foundation.h>
+ #import <WeexSDK/WeexSDK.h>
+
+ @interface WXSwiftTestModule : NSObject <WXModuleProtocol>
+
+ @end
+
+ ```
+ - WXSwiftTestModule.m 中
+
+ WeexDemo-Swift.h 这个文件需要编译一下才可以搜索到,具体的路径
+
+ ```
+ weex/ios/playground/DerivedData/WeexDemo/Build/Intermediates/WeexDemo.build/Debug-iphonesimulator/WeexDemo.build/DerivedSources/WeexDemo-Swift.h
+ ```
+
+ 路径具体需要根据自己工程而定
+
+ ```
+ #import "WXSwiftTestModule.h"
+ #import "WeexDemo-Swift.h" // Swift类和方法 被 `Objective-C` 识别需要导入
+
+ @implementation WXSwiftTestModule
+ #pragma clang diagnostic push //关闭unknow selector的warrning
+ #pragma clang diagnostic ignored "-Wundeclared-selector"
+
+ WX_EXPORT_METHOD(@selector(printSome:callback:)) //Swift 中定义的方法,XCode 转换成的最终的方法名称,在`WeexDemo-Swift.h`里面查看
+
+ #pragma clang diagnostic pop
+
+ @end
+
+ ```
+- Swift 中实现
+ 扩展 OC 的类 `WXSwiftTestModule`,增加了一个方法,这个方法就是我们要暴露出来,在 js 中可以调到的
+ - WXSwiftTestModule.swift
+
+ ```
+ import Foundation
+ public extension WXSwiftTestModule {
+ public func printSome(someThing:String, callback:WXModuleCallback) {
+ print(someThing)
+ callback(someThing)
+ }
+ }
+ ```
+
+ `WXSwiftTestModule` 和`WXModuleCallback` 因为是 OC 的,需要在 `WeexDemo-Bridging-Header` 中暴露
+ - WeexDemo-Bridging-Header.h中
+
+ ```
+ //
+ // Use this file to import your target's public headers that you would like to expose to Swift.
+ //
+ #import "WXSwiftTestModule.h"
+ #import "WeexSDK.h"
+ ```
+
+ 至此这个使用 Swift 开发的简单的 module 已经完成
+
+ ### module 使用
+ - 注册 module
+
+ ```
+ [WXSDKEngine registerModule:@"swifter" withClass:[WXSwiftTestModule class]];
+
+ ```
+ - we 文件中使用
+
+ ```
+ <template>
+ <text>Swift Module</text>
+ </template>
+
+ <script>
+ require('weex-components');
+
+ module.exports = {
+ data: {
+
+ },
+ ready: function() {
+ var swifter = require('@weex-module/swifter');
+ swifter.printSome("https://www.taobao.com",function(param){
+ nativeLog(param);
+ });
+ }
+
+ };
+ </script>
+ ```
http://git-wip-us.apache.org/repos/asf/incubator-weex-site/blob/926bef07/source/cn/wiki/component-introduction.md
----------------------------------------------------------------------
diff --git a/source/cn/wiki/component-introduction.md b/source/cn/wiki/component-introduction.md
index 33c6f32..a7e1d53 100644
--- a/source/cn/wiki/component-introduction.md
+++ b/source/cn/wiki/component-introduction.md
@@ -7,5 +7,22 @@ version: 2.1
---
### 什么是 component
- 简单来讲,`component` 就类似 `Weex` 渲染引擎上的 `Widget`, 符合一定的规则的 `Widget`, 可以被 Weex engine 在初始化的时候正确的加载,开发者在 `DSL` 书写对应的标签名字(在注册的时提供的注册名字), 比如内置的一些组件 `div`,`image` 和 `text`。它可以读取特定的属性,展示用户数据,承载和触发事件。
-
\ No newline at end of file
+ 简单来讲,`component` 就类似 `Weex` 渲染引擎上的 `Widget`, 符合一定的规则的 `Widget`, 可以被 Weex engine 在初始化的时候正确的加载,开发者在 `DSL` 书写对应的标签名字(在注册的时提供的注册名字), 比如内置的一些组件 `div`,`image` 和 `text`。它可以读取特定的属性,展示用户数据,承载和触发事件,如果 Weex 内置的组件不能满足你的开发需求,可以自定义你自己的 component。
+
+
+### component 方法
+
+ component 方法是组件支持的方法,JavaScript 可以直接对对应标签声明 `ref` 属性之后,直接可以调用对应方法的一个特性,例如下面例子。
+
+ ```html
+ <template>
+ <mycomponent ref='mycomponent'></mycomponent>
+ </template>
+ <script>
+ module.exports = {
+ created:function() {
+ this.$refs.mycomponent.focus();
+ }
+ }
+ </script>
+ ```
http://git-wip-us.apache.org/repos/asf/incubator-weex-site/blob/926bef07/source/cn/wiki/module-introduction.md
----------------------------------------------------------------------
diff --git a/source/cn/wiki/module-introduction.md b/source/cn/wiki/module-introduction.md
index d3f6507..b6bfc5d 100644
--- a/source/cn/wiki/module-introduction.md
+++ b/source/cn/wiki/module-introduction.md
@@ -28,4 +28,5 @@ version: 2.1
```
查看 [stream](../references/modules/stream.html) 完整文档
-## module 和 [handler](./handler-introduction.html) 区别
\ No newline at end of file
+## module 方法
+ require 之后直接可以调用,相对于 [component 方法](./component-introduction.html) 可以不依赖特定的组件实例。
\ No newline at end of file