You are viewing a plain text version of this content. The canonical link for it is here.
Posted to commits@mxnet.apache.org by la...@apache.org on 2020/10/29 22:01:41 UTC
[incubator-mxnet] branch master updated: [TUTORIAL] Update
crashcourse for MXNet 2 (#19345)
This is an automated email from the ASF dual-hosted git repository.
lausen pushed a commit to branch master
in repository https://gitbox.apache.org/repos/asf/incubator-mxnet.git
The following commit(s) were added to refs/heads/master by this push:
new 0514233 [TUTORIAL] Update crashcourse for MXNet 2 (#19345)
0514233 is described below
commit 0514233103baff5e1581cf2057f561f7a36616c2
Author: Vidya Sagar Ravipati <vi...@gmail.com>
AuthorDate: Thu Oct 29 15:00:47 2020 -0700
[TUTORIAL] Update crashcourse for MXNet 2 (#19345)
Co-authored-by: Vidya Sagar Ravipati <ra...@amazon.com>
Co-authored-by: Erika Pelaez Coyotl <er...@amazon.com>
Co-authored-by: Corey Barrett <co...@amazon.com>
Co-authored-by: Gaurav Rele <gr...@amazon.com>
Co-authored-by: James Golden <ja...@amazon.com>
Co-authored-by: Francisco Calderon Rodriguez <fc...@amazon.com>
---
.../getting-started/crash-course/0-introduction.md | 78 +++
.../getting-started/crash-course/1-ndarray.md | 121 -----
.../getting-started/crash-course/1-nparray.md | 211 ++++++++
.../getting-started/crash-course/2-create-nn.md | 532 +++++++++++++++++++++
.../tutorials/getting-started/crash-course/2-nn.md | 150 ------
.../getting-started/crash-course/3-autograd.md | 214 +++++++--
.../getting-started/crash-course/4-components.md | 379 +++++++++++++++
.../getting-started/crash-course/4-train.md | 178 -------
.../getting-started/crash-course/5-datasets.md | 310 ++++++++++++
.../getting-started/crash-course/5-predict.md | 159 ------
.../getting-started/crash-course/6-train-nn.md | 442 +++++++++++++++++
.../getting-started/crash-course/6-use_gpus.md | 151 ------
.../getting-started/crash-course/7-use-gpus.md | 253 ++++++++++
.../getting-started/crash-course/index.rst | 22 +-
.../crash-course/prepare_dataset.py | 58 +++
15 files changed, 2461 insertions(+), 797 deletions(-)
diff --git a/docs/python_docs/python/tutorials/getting-started/crash-course/0-introduction.md b/docs/python_docs/python/tutorials/getting-started/crash-course/0-introduction.md
new file mode 100644
index 0000000..190bf13
--- /dev/null
+++ b/docs/python_docs/python/tutorials/getting-started/crash-course/0-introduction.md
@@ -0,0 +1,78 @@
+<!--- Licensed to the Apache Software Foundation (ASF) under one -->
+<!--- or more contributor license agreements. See the NOTICE file -->
+<!--- distributed with this work for additional information -->
+<!--- regarding copyright ownership. The ASF licenses this file -->
+<!--- to you under the Apache License, Version 2.0 (the -->
+<!--- "License"); you may not use this file except in compliance -->
+<!--- with the License. You may obtain a copy of the License at -->
+
+<!--- http://www.apache.org/licenses/LICENSE-2.0 -->
+
+<!--- Unless required by applicable law or agreed to in writing, -->
+<!--- software distributed under the License is distributed on an -->
+<!--- "AS IS" BASIS, WITHOUT WARRANTIES OR CONDITIONS OF ANY -->
+<!--- KIND, either express or implied. See the License for the -->
+<!--- specific language governing permissions and limitations -->
+<!--- under the License. -->
+
+# Introduction
+
+
+## About MXNet
+
+Apache MXNet is an open-source deep learning framework that provides a comprehensive and flexible API to create deep learning models. Some of the key features of MXNet are:
+
+1. **Fast and Scalable:** Easily supports multiple GPU's and distributed multi-host jobs.
+2. **Multiple Programming language support:** Python, Scala, R, Java, C++, Julia, Matlab, JavaScript and Go interfaces.
+3. **Supported:** Backed by Apache Software Foundation and supported by Amazon Web Services (AWS), Microsoft Azure and highly active open-source community.
+4. **Portable:** Supports an efficient deployment on a wide range of hardware configurations and platforms i.e. low end devices, internet of things devices, serverless computing and containers.
+5. **Flexible:** Supports both imperative and symbolic programming.
+
+
+### Basic building blocks
+
+#### Tensors A.K.A Arrays
+
+Tensors give us a generic way of describing $n$-dimensional **arrays** with an arbitrary number of axes. Vectors, for example, are first-order tensors, and matrices are second-order tensors. Tensors with more than two orders(axes) do not have special mathematical names. The [ndarray](https://mxnet.apache.org/versions/1.7/api/python/docs/api/ndarray/index.html) package in MXNet provides a tensor implementation. This class is similar to NumPy's ndarray with additional features. First, MXNe [...]
+
+You will get familiar to arrays in the [next section](1-nparray.md) of this crash course.
+
+### Computing paradigms
+
+#### Block
+
+Neural network designs like [ResNet-152](https://www.cv-foundation.org/openaccess/content_cvpr_2016/papers/He_Deep_Residual_Learning_CVPR_2016_paper.pdf) have a fair degree of regularity. They consist of _blocks_ of repeated (or at least similarly designed) layers; these blocks then form the basis of more complex network designs. A block can be a single layer, a component consisting of multiple layers, or the entire complex neural network itself! One benefit of working with the block abs [...]
+
+
+From a programming standpoint, a block is represented by a class and [Block](https://mxnet.apache.org/versions/1.7/api/python/docs/api/gluon/nn/index.html#mxnet.gluon.nn.Block) is the base class for all neural networks layers in MXNet. Any subclass of it must define a forward propagation function that transforms its input into output and must store any necessary parameters if required.
+
+You will see more about blocks in [Array](1-nparray.md) and [Create neural network](2-create-nn.md) sections.
+
+#### HybridBlock
+
+Imperative and symbolic programming represents two styles or paradigms of deep learning programming interface and historically most deep learning frameworks choose either imperative or symbolic programming. For example, both Theano and TensorFlow (inspired by the latter) make use of symbolic programming, while Chainer and its predecessor PyTorch utilize imperative programming.
+
+The differences between imperative (interpreted) and symbolic programming are as follows:
+
+* __Imperative programming__ is easier. When imperative programming is used in Python, the majority of the code is straightforward and easy to write. It is also easier to debug imperative programming code. This is because it is easier to obtain and print all relevant intermediate variable values, or use Pythonʼs built-in debugging tools.
+
+* __Symbolic programming__ is more efficient and easier to port. It makes it easier to optimize the code during compilation, while also having the ability to port the program into a format independent of Python. This allows the program to be run in a non-Python environment, thus avoiding any potential performance issues related to the Python interpreter.
+
+You can learn more about the difference between symbolic vs. imperative programming from this [deep learning programming paradigm](https://mxnet.apache.org/versions/1.6/api/architecture/program_model) article
+
+When designing MXNet, developers considered whether it was possible to harness the benefits of both imperative and symbolic programming. The developers believed that users should be able to develop and debug using pure imperative programming, while having the ability to convert most programs into symbolic programming to be run when product-level computing performance and deployment are required.
+
+In hybrid programming, you can build models using either the [HybridBlock](https://mxnet.apache.org/versions/1.7/api/python/docs/api/gluon/hybrid_block.html) or the [HybridSequential](https://mxnet.apache.org/versions/1.6/api/python/docs/api/gluon/nn/index.html#mxnet.gluon.nn.HybridSequential) and [HybridConcurrent](https://mxnet.incubator.apache.org/versions/1.7/api/python/docs/api/gluon/contrib/index.html#mxnet.gluon.contrib.nn.HybridConcurrent) classes. By default, they are executed i [...]
+
+You will learn more about hybrid blocks and use them in the upcoming sections of the course.
+
+### Gluon
+
+Gluon is an imperative high-level front end API in MXNet for deep learning that’s flexible and easy-to-use which comes with a lot of great features, and it can provide you everything you need: from experimentation to deploying the model without sacrificing training speed. This is because, as discussed above, you have access to both imperative and symbolic APIs through the introduction of hybrid programming. Gluon provides State of the Art models for many of the standard tasks such as Cla [...]
+
+## Next steps
+
+Dive deeper on [array representations](1-nparray.md) in MXNet.
+
+## References
+1. [Dive into Deep Learning](http://d2l.ai/)
diff --git a/docs/python_docs/python/tutorials/getting-started/crash-course/1-ndarray.md b/docs/python_docs/python/tutorials/getting-started/crash-course/1-ndarray.md
deleted file mode 100644
index 52835b4..0000000
--- a/docs/python_docs/python/tutorials/getting-started/crash-course/1-ndarray.md
+++ /dev/null
@@ -1,121 +0,0 @@
-<!--- Licensed to the Apache Software Foundation (ASF) under one -->
-<!--- or more contributor license agreements. See the NOTICE file -->
-<!--- distributed with this work for additional information -->
-<!--- regarding copyright ownership. The ASF licenses this file -->
-<!--- to you under the Apache License, Version 2.0 (the -->
-<!--- "License"); you may not use this file except in compliance -->
-<!--- with the License. You may obtain a copy of the License at -->
-
-<!--- http://www.apache.org/licenses/LICENSE-2.0 -->
-
-<!--- Unless required by applicable law or agreed to in writing, -->
-<!--- software distributed under the License is distributed on an -->
-<!--- "AS IS" BASIS, WITHOUT WARRANTIES OR CONDITIONS OF ANY -->
-<!--- KIND, either express or implied. See the License for the -->
-<!--- specific language governing permissions and limitations -->
-<!--- under the License. -->
-
-# Step 1: Manipulate data with NP on MXNet
-
-This getting started exercise introduces the `np` package, which is similar to Numpy. For more information, please see [Differences between NP on MXNet and NumPy](/api/python/docs/tutorials/getting-started/np/np-vs-numpy.html).
-
-## Import packages and create an array
-
-
-To get started, run the following commands to import the `np` package together with the NumPy extensions package `npx`. Together, `np` with `npx` make up the NP on MXNet front end.
-
-```{.python .input n=1}
-from mxnet import np, npx
-npx.set_np() # Activate NumPy-like mode.
-```
-
-In this step, create a 2D array (also called a matrix). The following code example creates a matrix with values from two sets of numbers: 1, 2, 3 and 4, 5, 6. This might also be referred to as a tuple of a tuple of integers.
-
-```{.python .input n=2}
-np.array(((1,2,3),(5,6,7)))
-```
-
-You can also create a very simple matrix with the same shape (2 rows by 3 columns), but fill it with 1s.
-
-```{.python .input n=3}
-x = np.ones((2,3))
-x
-```
-
-You can create arrays whose values are sampled randomly. For example, sampling values uniformly between -1 and 1. The following code example creates the same shape, but with random sampling.
-
-```{.python .input n=15}
-y = np.random.uniform(-1,1, (2,3))
-y
-```
-
-As with NumPy, the dimensions of each ndarray are shown by accessing the `.shape` attribute. As the following code example shows, you can also query for `size`, which is equal to the product of the components of the shape. In addition, `.dtype` tells the data type of the stored values.
-
-```{.python .input n=17}
-(x.shape, x.size, x.dtype)
-```
-
-## Performing operations on an array
-
-An ndarray supports a large number of standard mathematical operations. Here are three examples. You can perform element-wise multiplication by using the following code example.
-
-```{.python .input n=18}
-x * y
-```
-
-You can perform exponentiation by using the following code example.
-
-```{.python .input n=23}
-np.exp(y)
-```
-
-You can also find a matrix’s transpose to compute a proper matrix-matrix product by using the following code example.
-
-```{.python .input n=24}
-np.dot(x, y.T)
-```
-
-## Indexing an array
-
-The ndarrays support slicing in many ways you might want to access your data. The following code example shows how to read a particular element, which returns a 1D array with shape `(1,)`.
-
-```{.python .input n=25}
-y[1,2]
-```
-
-This example shows how to read the second and third columns from `y`.
-
-```{.python .input n=26}
-y[:,1:3]
-```
-
-This example shows how to write to a specific element.
-
-```{.python .input n=27}
-y[:,1:3] = 2
-y
-```
-
-You can perform multi-dimensional slicing, which is shown in the following code example.
-
-```{.python .input n=28}
-y[1:2,0:2] = 4
-y
-```
-
-## Converting between MXNet ndarrays and NumPy ndarrays
-
-You can convert MXNet ndarrays to and from NumPy ndarrays, as shown in the following example. The converted arrays do not share memory.
-
-```{.python .input n=29}
-a = x.asnumpy()
-(type(a), a)
-```
-
-```{.python .input n=30}
-np.array(a)
-```
-
-## Next steps
-
-Learn how to construct a neural network with the Gluon module: [Step 2: Create a neural network](2-nn.md).
diff --git a/docs/python_docs/python/tutorials/getting-started/crash-course/1-nparray.md b/docs/python_docs/python/tutorials/getting-started/crash-course/1-nparray.md
new file mode 100644
index 0000000..79f2d9c
--- /dev/null
+++ b/docs/python_docs/python/tutorials/getting-started/crash-course/1-nparray.md
@@ -0,0 +1,211 @@
+<!--- Licensed to the Apache Software Foundation (ASF) under one -->
+<!--- or more contributor license agreements. See the NOTICE file -->
+<!--- distributed with this work for additional information -->
+<!--- regarding copyright ownership. The ASF licenses this file -->
+<!--- to you under the Apache License, Version 2.0 (the -->
+<!--- "License"); you may not use this file except in compliance -->
+<!--- with the License. You may obtain a copy of the License at -->
+
+<!--- http://www.apache.org/licenses/LICENSE-2.0 -->
+
+<!--- Unless required by applicable law or agreed to in writing, -->
+<!--- software distributed under the License is distributed on an -->
+<!--- "AS IS" BASIS, WITHOUT WARRANTIES OR CONDITIONS OF ANY -->
+<!--- KIND, either express or implied. See the License for the -->
+<!--- specific language governing permissions and limitations -->
+<!--- under the License. -->
+
+# Step 1: Manipulate data with NP on MXNet
+
+This getting started exercise introduces the MXNet `np` package for ndarrays.
+These ndarrays extend the functionality of the common NumPy ndarrays, by adding
+support for gpu's and by adding auto-differentiation with autograd. Now, many
+NumPy methods are available within MXNet; therefore, we will only briefly cover
+some of what is available.
+
+## Import packages and create an array
+To get started, run the following commands to import the `np` package together
+with the NumPy extensions package `npx`. Together, `np` with `npx` make up the
+NP on MXNet front end.
+
+```python
+import mxnet as mx
+from mxnet import np, npx
+npx.set_np() # Activate NumPy-like mode.
+```
+
+In this step, create a 2D array (also called a matrix). The following code
+example creates a matrix with values from two sets of numbers: 1, 2, 3 and 4, 5,
+6. This might also be referred to as a tuple of a tuple of integers.
+
+```python
+np.array(((1, 2, 3), (5, 6, 7)))
+```
+
+You can also create a very simple matrix with the same shape (2 rows by 3
+columns), but fill it with 1's.
+
+```python
+x = np.full((2, 3), 1)
+x
+```
+
+Alternatively, you could use the following array creation routine.
+
+```python
+x = np.ones((2, 3))
+x
+```
+
+You can create arrays whose values are sampled randomly. For example, sampling
+values uniformly between -1 and 1. The following code example creates the same
+shape, but with random sampling.
+
+```python
+y = np.random.uniform(-1, 1, (2, 3))
+y
+```
+
+As with NumPy, the dimensions of each ndarray are shown by accessing the
+`.shape` attribute. As the following code example shows, you can also query for
+`size`, which is equal to the product of the components of the shape. In
+addition, `.dtype` tells the data type of the stored values. As you notice when
+we generate random uniform values we generate `float32` not `float64` as normal
+NumPy arrays.
+
+```python
+(x.shape, x.size, x.dtype)
+```
+
+You could also specifiy the datatype when you create your ndarray.
+
+```python
+x = np.full((2, 3), 1, dtype="int8")
+x.dtype
+```
+
+Versus the default of `float32`.
+
+```python
+x = np.full((2, 3), 1)
+x.dtype
+```
+
+When we multiply, by default we use the datatype with the most precision.
+
+```python
+x = x.astype("int8") + x.astype(int) + x.astype("float32")
+x.dtype
+```
+
+## Performing operations on an array
+
+A ndarray supports a large number of standard mathematical operations. Here are
+some examples. You can perform element-wise multiplication by using the
+following code example.
+
+```python
+x * y
+```
+
+You can perform exponentiation by using the following code example.
+
+```python
+np.exp(y)
+```
+
+You can also find a matrix’s transpose to compute a proper matrix-matrix product
+by using the following code example.
+
+```python
+np.dot(x, y.T)
+```
+
+Alternatively, you could use the matrix multiplication function.
+
+```python
+np.matmul(x, y.T)
+```
+
+You can leverage built in operators, like summation.
+
+```python
+x.sum()
+```
+
+You can also gather a mean value.
+
+```python
+x.mean()
+```
+
+You can perform flatten and reshape just like you normally would in NumPy!
+
+```python
+x.flatten()
+```
+
+```python
+x.reshape(6, 1)
+```
+
+## Indexing an array
+
+The ndarrays support slicing in many ways you might want to access your data.
+The following code example shows how to read a particular element, which returns
+a 1D array with shape `(1,)`.
+
+```python
+y[1, 2]
+```
+
+This example shows how to read the second and third columns from `y`.
+
+```python
+y[:, 1:3]
+```
+
+This example shows how to write to a specific element.
+
+```python
+y[:, 1:3] = 2
+y
+```
+
+You can perform multi-dimensional slicing, which is shown in the following code
+example.
+
+```python
+y[1:2, 0:2] = 4
+y
+```
+
+## Converting between MXNet ndarrays and NumPy arrays
+
+You can convert MXNet ndarrays to and from NumPy ndarrays, as shown in the
+following example. The converted arrays do not share memory.
+
+```python
+a = x.asnumpy()
+(type(a), a)
+```
+
+```python
+a = np.array(a)
+(type(a), a)
+```
+
+Additionally, you can move them to different GPU contexts. You will dive more
+into this later, but here is an example for now.
+
+```python
+a.copyto(mx.gpu(0))
+```
+
+## Next Steps
+
+Ndarrays also have some additional features which make Deep Learning possible
+and efficient. Namely, differentiation, and being able to leverage GPU's.
+Another important feature of ndarrays that we will discuss later is
+autograd. But first, we will abstract an additional level and talk about building
+Neural Network Layers [Step 2: Create a neural network](2-create-nn.md)
diff --git a/docs/python_docs/python/tutorials/getting-started/crash-course/2-create-nn.md b/docs/python_docs/python/tutorials/getting-started/crash-course/2-create-nn.md
new file mode 100644
index 0000000..cbae261
--- /dev/null
+++ b/docs/python_docs/python/tutorials/getting-started/crash-course/2-create-nn.md
@@ -0,0 +1,532 @@
+<!--- Licensed to the Apache Software Foundation (ASF) under one -->
+<!--- or more contributor license agreements. See the NOTICE file -->
+<!--- distributed with this work for additional information -->
+<!--- regarding copyright ownership. The ASF licenses this file -->
+<!--- to you under the Apache License, Version 2.0 (the -->
+<!--- "License"); you may not use this file except in compliance -->
+<!--- with the License. You may obtain a copy of the License at -->
+
+<!--- http://www.apache.org/licenses/LICENSE-2.0 -->
+
+<!--- Unless required by applicable law or agreed to in writing, -->
+<!--- software distributed under the License is distributed on an -->
+<!--- "AS IS" BASIS, WITHOUT WARRANTIES OR CONDITIONS OF ANY -->
+<!--- KIND, either express or implied. See the License for the -->
+<!--- specific language governing permissions and limitations -->
+<!--- under the License. -->
+# Step 2: Create a neural network
+
+In this step, you learn how to use NP on Apache MXNet to create neural networks
+in Gluon. In addition to the `np` package that you learned about in the previous
+step [Step 1: Manipulate data with NP on MXNet](1-nparray.md), you also need to
+import the neural network modules from `gluon`. Gluon includes built-in neural
+network layers in the following two modules:
+
+1. `mxnet.gluon.nn`: NN module that maintained by the mxnet team
+2. `mxnet.gluon.contrib.nn`: Experiemental module that is contributed by the
+community
+
+Use the following commands to import the packages required for this step.
+
+```python
+from mxnet import np, npx
+from mxnet.gluon import nn
+npx.set_np() # Change MXNet to the numpy-like mode.
+```
+
+## Create your neural network's first layer
+
+In this section, you will create a simple neural network with Gluon. One of the
+simplest network you can create is a single **Dense** layer or **densely-
+connected** layer. A dense layer consists of nodes in the input that are
+connected to every node in the next layer. Use the following code example to
+start with a dense layer with five output units.
+
+```python
+layer = nn.Dense(5)
+layer
+# output: Dense(-1 -> 5, linear)
+```
+
+In the example above, the output is `Dense(-1 -> 5, linear)`. The **-1** in the
+output denotes that the size of the input layer is not specified during
+initialization.
+
+You can also call the **Dense** layer with an `in_units` parameter if you know
+the shape of your input unit.
+
+```python
+layer = nn.Dense(5,in_units=3)
+layer
+```
+
+In addition to the `in_units` param, you can also add an activation function to
+the layer using the `activation` param. The Dense layer implements the operation
+
+$$output = \sigma(W \cdot X + b)$$
+
+Call the Dense layer with an `activation` parameter to use an activation
+function.
+
+```python
+layer = nn.Dense(5, in_units=3,activation='relu')
+```
+
+Voila! Congratulations on creating a simple neural network. But for most of your
+use cases, you will need to create a neural network with more than one dense
+layer or with multiple types of other layers. In addition to the `Dense` layer,
+you can find more layers at [mxnet nn
+layers](https://mxnet.apache.org/versions/1.6/api/python/docs/api/gluon/nn/index.html#module-
+mxnet.gluon.nn)
+
+So now that you have created a neural network, you are probably wondering how to
+pass data into your network?
+
+First, you need to initialize the network weights, if you use the default
+initialization method which draws random values uniformly in the range $[-0.7,
+0.7]$. You can see this in the following example.
+
+**Note**: Initialization is discussed at a little deeper detail in the next
+notebook
+
+```python
+layer.initialize()
+```
+
+Now that you have initialized your network, you can give it data. Passing data
+through a network is also called a forward pass. You can do a forward pass with
+random data, shown in the following example. First, you create a `(10,3)` shape
+random input `x` and feed the data into the layer to compute the output.
+
+```python
+x = np.random.uniform(-1,1,(10,3))
+layer(x)
+```
+
+The layer produces a `(10,5)` shape output from your `(10,3)` input.
+
+**When you don't specify the `in_unit` parameter, the system automatically
+infers it during the first time you feed in data during the first forward step
+after you create and initialize the weights.**
+
+
+```python
+layer.params
+```
+
+The `weights` and `bias` can be accessed using the `.data()` method.
+
+```python
+layer.weight.data()
+```
+
+## Chain layers into a neural network using nn.Sequential
+
+Sequential provides a special way of rapidly building networks when when the
+network architecture follows a common design pattern: the layers look like a
+stack of pancakes. Many networks follow this pattern: a bunch of layers, one
+stacked on top of another, where the output of each layer is fed directly to the
+input to the next layer. To use sequential, simply provide a list of layers
+(pass in the layers by calling `net.add(<Layer goes here!>`). To do this you can
+use your previous example of Dense layers and create a 3-layer multi layer
+perceptron. You can create a sequential block using `nn.Sequential()` method and
+add layers using `add()` method.
+
+```python
+net = nn.Sequential()
+
+net.add(nn.Dense(5,in_units=3,activation='relu'),
+ nn.Dense(25, activation='relu'), nn.Dense(2) )
+net
+```
+
+The layers are ordered exactly the way you defined your neural network with
+index starting from 0. You can access the layers by indexing the network using
+`[]`.
+
+```python
+net[1]
+```
+
+## Create a custom neural network architecture flexibly
+
+`nn.Sequential()` allows you to create your multi-layer neural network with
+existing layers from `gluon.nn`. It also includes a pre-defined `forward()`
+function that sequentially executes added layers. But what if the built-in
+layers are not sufficient for your needs. If you want to create networks like
+ResNet which has complex but repeatable components, how do you create such a
+network?
+
+In gluon, every neural network layer is defined by using a base class
+`nn.Block()`. A Block has one main job - define a forward method that takes some
+input x and generates an output. A Block can just do something simple like apply
+an activation function. It can combine multiple layers together in a single
+block or also combine a bunch of other Blocks together in creative ways to
+create complex networks like Resnet. In this case, you will construct three
+Dense layers. The `forward()` method can then invoke the layers in turn to
+generate its output.
+
+Create a subclass of `nn.Block` and implement two methods by using the following
+code.
+
+- `__init__` create the layers
+- `forward` define the forward function.
+
+```
+class Net(nn.Block):
+ def __init__(self): super().__init__()
+ def forward(self, x): return x```
+
+```python
+class MLP(nn.Block):
+ def __init__(self): super().__init__() self.dense1 = nn.Dense(5,activation='relu') self.dense2 = nn.Dense(25,activation='relu') self.dense3 = nn.Dense(2)
+ def forward(self, x): layer1 = self.dense1(x) layer2 = self.dense2(layer1) layer3 = self.dense3(layer2) return layer3 net = MLP()
+net
+```
+
+```python
+net.dense1.params
+```
+Each layer includes parameters that are stored in a `Parameter` class. You can
+access them using the `params()` method.
+
+## Creating custom layers using Parameters (Blocks API)
+
+MXNet includes a `Parameter` method to hold your parameters in each layer. You
+can create custom layers using the `Parameter` class to include computation that
+may otherwise be not included in the built-in layers. For example, for a dense
+layer, the weights and biases will be created using the `Parameter` method. But
+if you want to add additional computation to the dense layer, you can create it
+using parameter method.
+
+Instantiate a parameter, e.g weights with a size `(5,0)` using the `shape`
+argument.
+
+```python
+from mxnet.gluon import Parameter
+
+weight = Parameter("custom_parameter_weight",shape=(5,-1))
+bias = Parameter("custom_parameter_bias",shape=(5,-1))
+
+weight,bias
+```
+
+The `Parameter` method includes a `grad_req` argument that specifies how you
+want to capture gradients for this Parameter. Under the hood, that lets gluon
+know that it has to call `.attach_grad()` on the underlying array. By default,
+the gradient is updated everytime the gradient is written to the grad
+`grad_req='write'`.
+
+Now that you know how parameters work, you are ready to create your very own
+fully-connected custom layer.
+
+To create the custom layers using parameters, you can use the same skeleton with
+`nn.Block` base class. You will create a custom dense layer that takes parameter
+x and returns computed `w*x + b` without any activation function
+
+```python
+class custom_layer(nn.Block):
+ def __init__(self,out_units,in_units=0): super().__init__() self.weight = Parameter("weight",shape=(in_units,out_units),allow_deferred_init=True) self.bias = Parameter("bias",shape=(out_units,),allow_deferred_init=True)
+ def forward(self, x): return np.dot(x, self.weight.data()) + self.bias.data()```
+
+Parameter can be instantiated before the corresponding data is instantiated. For
+example, when you instantiate a Block but the shapes of each parameter still
+need to be inferred, the Parameter will wait for the shape to be inferred before
+allocating memory.
+
+```python
+dense = custom_layer(3,in_units=5)
+dense.initialize()
+dense(np.random.uniform(size=(4, 5)))
+```
+
+Similarly, you can use the following code to implement a famous network called
+[LeNet](http://yann.lecun.com/exdb/lenet/) through `nn.Block` using the built-in
+`Dense` layer and using `custom_layer` as the last layer
+
+```python
+class LeNet(nn.Block):
+ def __init__(self): super().__init__() self.conv1 = nn.Conv2D(channels=6, kernel_size=3, activation='relu') self.pool1 = nn.MaxPool2D(pool_size=2, strides=2) self.conv2 = nn.Conv2D(channels=16, kernel_size=3, activation='relu') self.pool2 = nn.MaxPool2D(pool_size=2, strides=2) self.dense1 = nn.Dense(120, activation="relu") self.dense2 = nn.Dense(84, activation="relu") self.dense3 = nn.Dense(10)
+ def forward(self, x): x = self.conv1(x) x = self.pool1(x) x = self.conv2(x) x = self.pool2(x) x = self.dense1(x) x = self.dense2(x) x = self.dense3(x) return x Lenet = LeNet()
+```
+
+```python
+class LeNet_custom(nn.Block):
+ def __init__(self): super().__init__() self.conv1 = nn.Conv2D(channels=6, kernel_size=3, activation='relu') self.pool1 = nn.MaxPool2D(pool_size=2, strides=2) self.conv2 = nn.Conv2D(channels=16, kernel_size=3, activation='relu') self.pool2 = nn.MaxPool2D(pool_size=2, strides=2) self.dense1 = nn.Dense(120, activation="relu") self.dense2 = nn.Dense(84, activation="relu") self.dense3 = custom_layer(10,84)
+ def forward(self, x): x = self.conv1(x) x = self.pool1(x) x = self.conv2(x) x = self.pool2(x) x = self.dense1(x) x = self.dense2(x) x = self.dense3(x) return x Lenet_custom = LeNet_custom()
+```
+
+```python
+image_data = np.random.uniform(-1,1, (1,1,28,28))
+
+Lenet.initialize()
+Lenet_custom.initialize()
+
+print("Lenet:")
+print(Lenet(image_data))
+
+print("Custom Lenet:")
+print(Lenet_custom(image_data))
+```
+
+
+You can use `.data` method to access the weights and bias of a particular layer.
+For example, the following accesses the first layer's weight and sixth layer's bias.
+
+```python
+Lenet.conv1.weight.data().shape, Lenet.dense1.bias.data().shape
+```
+
+## Using predefined (pretrained) architectures
+
+Till now, you have seen how to create your own neural network architectures. But
+what if you want to replicate or baseline your dataset using some of the common
+models in computer visions or natural language processing (NLP). Gluon includes
+common architectures that you can directly use. The Gluon Model Zoo provides a
+collection of off-the-shelf models e.g. RESNET, BERT etc. These architectures
+are found at:
+
+- [Gluon CV model zoo](https://gluon-cv.mxnet.io/model_zoo/index.html)
+
+- [Gluon NLP model zoo](https://gluon-nlp.mxnet.io/model_zoo/index.html)
+
+```python
+from mxnet.gluon import model_zoo
+
+net = model_zoo.vision.resnet50_v2(pretrained=True)
+net.hybridize()
+
+dummy_input = np.ones(shape=(1,3,224,224))
+output = net(dummy_input)
+output.shape
+```
+
+## Deciding the paradigm for your network
+
+In MXNet, Gluon API (Imperative programming paradigm) provides a user friendly
+way for quick prototyping, easy debugging and natural control flow for people
+familiar with python programming.
+
+However, at the backend, MXNET can also convert the network using Symbolic or
+Declarative programming into static graphs with low level optimizations on
+operators. However, static graphs are less flexible because any logic must be
+encoded into the graph as special operators like scan, while_loop and cond. It’s
+also hard to debug.
+
+So how can you make use of symbolic programming while getting the flexibility of
+imperative programming to quickly prototype and debug?
+
+Enter **HybridBlock**
+
+HybridBlocks can run in a fully imperatively way where you define their
+computation with real functions acting on real inputs. But they’re also capable
+of running symbolically, acting on placeholders. Gluon hides most of this under
+the hood so you will only need to know how it works when you want to write your
+own layers.
+
+```python
+net_hybrid_seq = nn.HybridSequential()
+
+net_hybrid_seq.add(nn.Dense(5,in_units=3,activation='relu'),
+ nn.Dense(25, activation='relu'), nn.Dense(2) )
+net_hybrid_seq
+```
+
+To compile and optimize `HybridSequential`, you can call its `hybridize` method.
+
+```python
+net_hybrid_seq.hybridize()
+```
+
+
+## Creating custom layers using Parameters (HybridBlocks API)
+
+When you instantiated your custom layer, you specified the input dimension
+`in_units` that initializes the weights with the shape specified by `in_units`
+and `out_units`. If you leave the shape of `in_unit` as unknown, you defer the
+shape to the first forward pass. For the custom layer, you define the
+`infer_shape()` method and let the shape be inferred at runtime.
+
+```python
+class custom_layer(nn.HybridBlock):
+ def __init__(self,out_units,in_units=-1): super().__init__() self.weight = Parameter("weight",shape=(in_units,out_units),allow_deferred_init=True) self.bias = Parameter("bias",shape=(out_units,),allow_deferred_init=True) def forward(self, x):
+ print(self.weight.shape,self.bias.shape) return np.dot(x, self.weight.data()) + self.bias.data() def infer_shape(self, x):
+ print(self.weight.shape,x.shape) self.weight.shape = (x.shape[-1],self.weight.shape[1]) dense = custom_layer(3)
+dense.initialize()
+dense(np.random.uniform(size=(4, 5)))
+```
+
+### Performance
+
+To get a sense of the speedup from hybridizing, you can compare the performance
+before and after hybridizing by measuring the time it takes to make 1000 forward
+passes through the network.
+
+```python
+from time import time
+
+def benchmark(net, x):
+ y = net(x) start = time() for i in range(1,1000): y = net(x) return time() - start
+x_bench = np.random.normal(size=(1,512))
+
+net_hybrid_seq = nn.HybridSequential()
+
+net_hybrid_seq.add(nn.Dense(256,activation='relu'),
+ nn.Dense(128, activation='relu'), nn.Dense(2) )net_hybrid_seq.initialize()
+
+print('Before hybridizing: %.4f sec'%(benchmark(net_hybrid_seq, x_bench)))
+net_hybrid_seq.hybridize()
+print('After hybridizing: %.4f sec'%(benchmark(net_hybrid_seq, x_bench)))
+```
+
+Peeling back another layer, you also have a `HybridBlock` which is the hybrid
+version of the `Block` API.
+
+Similar to the `Blocks` API, you define a `forward` function for `HybridBlock`
+that takes an input `x`. MXNet takes care of hybridizing the model at the
+backend so you don't have to make changes to your code to convert it to a
+symbolic paradigm.
+
+```python
+from mxnet.gluon import HybridBlock
+
+class MLP_Hybrid(HybridBlock):
+ def __init__(self): super().__init__() self.dense1 = nn.Dense(256,activation='relu') self.dense2 = nn.Dense(128,activation='relu') self.dense3 = nn.Dense(2)
+ def forward(self, x): layer1 = self.dense1(x) layer2 = self.dense2(layer1) layer3 = self.dense3(layer2) return layer3 net_Hybrid = MLP_Hybrid()
+net_Hybrid.initialize()
+
+print('Before hybridizing: %.4f sec'%(benchmark(net_Hybrid, x_bench)))
+net_Hybrid.hybridize()
+print('After hybridizing: %.4f sec'%(benchmark(net_Hybrid, x_bench)))
+```
+
+Given a HybridBlock whose forward computation consists of going through other
+HybridBlocks, you can compile that section of the network by calling the
+HybridBlocks `.hybridize()` method.
+
+All of MXNet’s predefined layers are HybridBlocks. This means that any network
+consisting entirely of predefined MXNet layers can be compiled and run at much
+faster speeds by calling `.hybridize()`.
+
+## Saving and Loading your models
+
+The Blocks API also includes saving your models during and after training so
+that you can host the model for inference or avoid training the model again from
+scratch. Another reason would be to train your model using one language (like
+Python that has a lot of tools for training) and run inference using a different
+language.
+
+There are two ways to save your model in MXNet.
+1. Save/load the model weights/parameters only
+2. Save/load the model weights/parameters and the architectures
+
+### 1. Save/load the model weights/parameters only
+
+You can use `save_parameters` and `load_parameters` method to save and load the
+model weights. Take your simplest model `layer` and save your parameters first.
+The model parameters are the params that you save **after** you train your
+model.
+
+```python
+file_name = 'layer.params'
+layer.save_parameters(file_name)
+```
+
+And now load this model again. To load the parameters into a model, you will
+first have to build the model. To do this, you will need to create a simple
+function to build it.
+
+```python
+def build_model():
+ layer = nn.Dense(5, in_units=3,activation='relu') return layer
+layer_new = build_model()
+```
+
+```python
+layer_new.load_parameters('layer.params')
+```
+
+**Note**: The `save_parameters` and `load_parameters` method is used for models
+that use a `Block` method instead of `HybridBlock` method to build the model.
+These models may have complex architectures where the model architectures may
+change during execution. E.g. if you have a model that uses an if-else
+conditional statement to choose between two different architectures.
+
+### 2. Save/load the model weights/parameters and the architectures
+
+For models that use the **HybridBlock**, the model architecture stays static and
+do no change during execution. Therefore both model parameters **AND**
+architecture can be saved and loaded using `export`, `imports` methods.
+
+Now look at your `MLP_Hybrid` model and export the model using the `export`
+function. The export function will export the model architecture into a `.json`
+file and model parameters into a `.params` file.
+
+```python
+net_Hybrid.export('MLP_hybrid')
+```
+
+```python
+net_Hybrid.export('MLP_hybrid')
+```
+
+Similarly, to load this model back, you can use `gluon.nn.SymbolBlock`. To
+demonstrate that, load the network serialized above.
+
+```python
+import warnings
+with warnings.catch_warnings():
+ warnings.simplefilter("ignore") net_loaded = nn.SymbolBlock.imports("MLP_hybrid-symbol.json", ['data'], "MLP_hybrid-0000.params",ctx=None)```
+
+```python
+net_loaded(x_bench)
+```
+
+## Visualizing your models
+
+In MXNet, the `Block.Summary()` method allows you to view the block’s shape
+arguments and view the block’s parameters. When you combine multiple blocks into
+a model, the `summary()` applied on the model allows you to view each block’s
+summary, the total parameters, and the order of the blocks within the model. To
+do this the `Block.summary()` method requires one forward pass of the data,
+through your network, in order to create the graph necessary for capturing the
+corresponding shapes and parameters. Additionally, this method should be called
+before the hybridize method, since the hybridize method converts the graph into
+a symbolic one, potentially changing the operations for optimal computation.
+
+Look at the following examples
+
+- layer: our single layer network
+- Lenet: a non-hybridized LeNet network
+- net_Hybrid: our MLP Hybrid network
+
+```python
+layer.summary(x)
+```
+
+```python
+Lenet.summary(image_data)
+```
+
+You are able to print the summaries of the two networks `layer` and `Lenet`
+easily since you didn't hybridize the two networks. However, the last network
+`net_Hybrid` was hybridized above and throws an `AssertionError` if you try
+`net_Hybrid.summary(x_bench)`. To print the summary for `net_Hybrid`, call
+another instance of the same network and instantiate it for our summary and then
+hybridize it
+
+```python
+net_Hybrid_summary = MLP_Hybrid()
+
+net_Hybrid_summary.initialize()
+
+net_Hybrid_summary.summary(x_bench)
+
+net_Hybrid_summary.hybridize()
+```
+
+## Next steps:
+
+Now that you have created a neural network, learn how to automatically compute
+the gradients in [Step 3: Automatic differentiation with
+autograd](3-autograd.md).
diff --git a/docs/python_docs/python/tutorials/getting-started/crash-course/2-nn.md b/docs/python_docs/python/tutorials/getting-started/crash-course/2-nn.md
deleted file mode 100644
index f2ea348..0000000
--- a/docs/python_docs/python/tutorials/getting-started/crash-course/2-nn.md
+++ /dev/null
@@ -1,150 +0,0 @@
-<!--- Licensed to the Apache Software Foundation (ASF) under one -->
-<!--- or more contributor license agreements. See the NOTICE file -->
-<!--- distributed with this work for additional information -->
-<!--- regarding copyright ownership. The ASF licenses this file -->
-<!--- to you under the Apache License, Version 2.0 (the -->
-<!--- "License"); you may not use this file except in compliance -->
-<!--- with the License. You may obtain a copy of the License at -->
-
-<!--- http://www.apache.org/licenses/LICENSE-2.0 -->
-
-<!--- Unless required by applicable law or agreed to in writing, -->
-<!--- software distributed under the License is distributed on an -->
-<!--- "AS IS" BASIS, WITHOUT WARRANTIES OR CONDITIONS OF ANY -->
-<!--- KIND, either express or implied. See the License for the -->
-<!--- specific language governing permissions and limitations -->
-<!--- under the License. -->
-
-# Step 2: Create a neural network
-
-In this step, you learn how to use NP on MXNet to create neural networks in Gluon. In addition to the `np` package that you learned about in the previous step [Step 1: Manipulate data with NP on MXNet](1-ndarray.md), you also import the neural network `nn` package from `gluon`.
-
-Use the following commands to import the packages required for this step.
-
-```{.python .input n=2}
-from mxnet import np, npx
-from mxnet.gluon import nn
-npx.set_np() # Change MXNet to the numpy-like mode.
-```
-
-## Create your neural network's first layer
-
-Use the following code example to start with a dense layer with two output units.
-<!-- mention what the none and the linear parts mean? -->
-
-```{.python .input n=31}
-layer = nn.Dense(2)
-layer
-```
-
-Initialize its weights with the default initialization method, which draws random values uniformly from $[-0.7, 0.7]$. You can see this in the following example.
-
-```{.python .input n=32}
-layer.initialize()
-```
-
-Do a forward pass with random data, shown in the following example. We create a $(3,4)$ shape random input `x` and feed into the layer to compute the output.
-
-```{.python .input n=34}
-x = np.random.uniform(-1,1,(3,4))
-layer(x)
-```
-
-As can be seen, the layer's input limit of two produced a $(3,2)$ shape output from our $(3,4)$ input. You didn't specify the input size of `layer` before, though you can specify it with the argument `in_units=4` here. The system automatically infers it during the first time you feed in data, create, and initialize the weights. You can access the weight after the first forward pass, as shown in this example.
-
-```{.python .input n=35}
-layer.weight.data()
-```
-
-## Chain layers into a neural network
-
-Consider a simple case where a neural network is a chain of layers. During the forward pass, you run layers sequentially one-by-one. Use the following code to implement a famous network called [LeNet](http://yann.lecun.com/exdb/lenet/) through `nn.Sequential`.
-
-```{.python .input}
-net = nn.Sequential()
-# Add a sequence of layers.
-net.add(# Similar to Dense, it is not necessary to specify the input channels
- # by the argument `in_channels`, which will be automatically inferred
- # in the first forward pass. Also, we apply a relu activation on the
- # output. In addition, we can use a tuple to specify a non-square
- # kernel size, such as `kernel_size=(2,4)`
- nn.Conv2D(channels=6, kernel_size=5, activation='relu'),
- # One can also use a tuple to specify non-symmetric pool and stride sizes
- nn.MaxPool2D(pool_size=2, strides=2),
- nn.Conv2D(channels=16, kernel_size=3, activation='relu'),
- nn.MaxPool2D(pool_size=2, strides=2),
- # The dense layer will automatically reshape the 4-D output of last
- # max pooling layer into the 2-D shape: (x.shape[0], x.size/x.shape[0])
- nn.Dense(120, activation="relu"),
- nn.Dense(84, activation="relu"),
- nn.Dense(10))
-net
-```
-
-<!--Mention the tuple option for kernel and stride as an exercise for the reader? Or leave it out as too much info for now?-->
-
-Using `nn.Sequential` is similar to `nn.Dense`. In fact, both of them are subclasses of `nn.Block`. Use the following code to initialize the weights and run the forward pass.
-
-```{.python .input}
-net.initialize()
-# Input shape is (batch_size, color_channels, height, width)
-x = np.random.uniform(size=(4,1,28,28))
-y = net(x)
-y.shape
-```
-
-You can use `[]` to index a particular layer. For example, the following
-accesses the first layer's weight and sixth layer's bias.
-
-```{.python .input}
-(net[0].weight.data().shape, net[5].bias.data().shape)
-```
-
-## Create a neural network flexibly
-
-In `nn.Sequential`, MXNet will automatically construct the forward function that sequentially executes added layers.
-Here is another way to construct a network with a flexible forward function.
-
-Create a subclass of `nn.Block` and implement two methods by using the following code.
-
-- `__init__` create the layers
-- `forward` define the forward function.
-
-```{.python .input n=6}
-class MixMLP(nn.Block):
- def __init__(self, **kwargs):
- # Run `nn.Block`'s init method
- super(MixMLP, self).__init__(**kwargs)
- self.blk = nn.Sequential()
- self.blk.add(nn.Dense(3, activation='relu'),
- nn.Dense(4, activation='relu'))
- self.dense = nn.Dense(5)
- def forward(self, x):
- y = npx.relu(self.blk(x))
- print(y)
- return self.dense(y)
-
-net = MixMLP()
-net
-```
-
-In the sequential chaining approach, you can only add instances with `nn.Block` as the base class and then run them in a forward pass. In this example, you used `print` to get the intermediate results and `nd.relu` to apply relu activation. This approach provides a more flexible way to define the forward function.
-
-The following code example uses `net` in a similar manner as earlier.
-
-```{.python .input}
-net.initialize()
-x = np.random.uniform(size=(2,2))
-net(x)
-```
-
-Finally, access a particular layer's weight with this code.
-
-```{.python .input n=8}
-net.blk[1].weight.data()
-```
-
-## Next steps
-
-After you create a neural network, learn how to automatically
-compute the gradients in [Step 3: Automatic differentiation with autograd](3-autograd.md).
diff --git a/docs/python_docs/python/tutorials/getting-started/crash-course/3-autograd.md b/docs/python_docs/python/tutorials/getting-started/crash-course/3-autograd.md
index b959b4d..3271eba 100644
--- a/docs/python_docs/python/tutorials/getting-started/crash-course/3-autograd.md
+++ b/docs/python_docs/python/tutorials/getting-started/crash-course/3-autograd.md
@@ -17,63 +17,182 @@
# Step 3: Automatic differentiation with autograd
-In this step, you learn how to use the MXNet `autograd` package to perform gradient calculations by automatically calculating derivatives.
-
-This is helpful because it will help you save time and effort. You train models to get better as a function of experience. Usually, getting better means minimizing a loss function. To achieve this goal, you often iteratively compute the gradient of the loss with respect to weights and then update the weights accordingly. Gradient calculations are straightforward through a chain rule. However, for complex models, working this out manually is challenging.
-
-The `autograd` package helps you by automatically calculating derivatives.
+In this step, you learn how to use the MXNet `autograd` package to perform
+gradient calculations.
## Basic use
-To get started, import the `autograd` package as in the following code.
+To get started, import the `autograd` package with the following code.
-```{.python .input}
+```python
from mxnet import np, npx
from mxnet import autograd
npx.set_np()
```
-As an example, you could differentiate a function $f(x) = 2 x^2$ with respect to parameter $x$. You can start by assigning an initial value of $x$, as follows:
+As an example, you could differentiate a function $f(x) = 2 x^2$ with respect to
+parameter $x$. For Autograd, you can start by assigning an initial value of $x$,
+as follows:
-```{.python .input n=3}
+```python
x = np.array([[1, 2], [3, 4]])
x
```
-After you compute the gradient of $f(x)$ with respect to $x$, you need a place to store it. In MXNet, you can tell an ndarray that you plan to store a gradient by invoking its `attach_grad` method, shown in the following example.
+After you compute the gradient of $f(x)$ with respect to $x$, you need a place
+to store it. In MXNet, you can tell a ndarray that you plan to store a gradient
+by invoking its `attach_grad` method, as shown in the following example.
-```{.python .input n=6}
+```python
x.attach_grad()
```
-Next, define the function $y=f(x)$. To let MXNet store $y$, so that you can compute gradients later, use the following code to put the definition inside an `autograd.record()` scope.
+Next, define the function $y=f(x)$. To let MXNet store $y$, so that you can
+compute gradients later, use the following code to put the definition inside an
+`autograd.record()` scope.
-```{.python .input n=7}
+```python
with autograd.record():
y = 2 * x * x
```
-You can invoke back propagation (backprop) by calling `y.backward()`. When $y$ has more than one entry, `y.backward()` is equivalent to `y.sum().backward()`.
-<!-- I'm not sure what this second part really means. I don't have enough context. TMI?-->
+You can invoke back propagation (backprop) by calling `y.backward()`. When $y$
+has more than one entry, `y.backward()` is equivalent to `y.sum().backward()`.
-```{.python .input n=8}
+```python
y.backward()
```
-Next, verify whether this is the expected output. Note that $y=2x^2$ and $\frac{dy}{dx} = 4x$, which should be `[[4, 8],[12, 16]]`. Check the automatically computed results.
+Next, verify whether this is the expected output. Note that $y=2x^2$ and
+$\frac{dy}{dx} = 4x$, which should be `[[4, 8],[12, 16]]`. Check the
+automatically computed results.
-```{.python .input n=9}
+```python
x.grad
```
-## Using Python control flows
+Now you get to dive into `y.backward()` by first discussing a bit on gradients. As
+alluded to earlier `y.backward()` is equivalent to `y.sum().backward()`.
+
+```python
+with autograd.record():
+ y = np.sum(2 * x * x)
+y.backward()
+x.grad
+```
+
+Additionally, you can only run backward once. Unless you use the flag
+`retain_graph` to be `True`.
+
+```python
+with autograd.record():
+ y = np.sum(2 * x * x)
+y.backward(retain_graph=True)
+print(x.grad)
+print("Since you have retained your previous graph you can run backward again")
+y.backward()
+print(x.grad)
+
+try:
+ y.backward()
+except:
+ print("However, you can't do backward twice unless you retain the graph.")
+```
-Sometimes you want to write dynamic programs where the execution depends on real-time values. MXNet records the execution trace and computes the gradient as well.
+## Custom MXNet ndarray operations
-Consider the following function `f` in the following example code. The function doubles the inputs until its `norm` reaches 1000. Then it selects one element depending on the sum of its elements.
-<!-- I wonder if there could be another less "mathy" demo of this -->
+In order to understand the `backward()` method it is beneficial to first
+understand how you can create custom operations. MXNet operators are classes
+with a forward and backward method. Where the number of args in `backward()`
+must equal the number of items returned in the `forward()` method. Additionally,
+the number of arguments in the `forward()` method must match the number of
+output arguments from `backward()`. You can modify the gradients in backward to
+return custom gradients. For instance, below you can return a different gradient then
+the actual derivative.
-```{.python .input}
+```python
+class My_First_Custom_Operation(autograd.Function):
+ def __init__(self):
+ super().__init__()
+ def forward(self,x,y):
+ return 2 * x, 2 * x * y, 2 * y
+ def backward(self, dx, dxy, dy):
+ """
+ The input number of arguments must match the number of outputs from forward.
+ Furthermore, the number of output arguments must match the number of inputs from forward.
+ """
+ return x, y
+```
+
+Now you can use the first custom operation you have built.
+
+```python
+x = np.random.uniform(-1, 1, (2, 3))
+y = np.random.uniform(-1, 1, (2, 3))
+x.attach_grad()
+y.attach_grad()
+with autograd.record():
+ z = My_First_Custom_Operation()
+ z1, z2, z3 = z(x, y)
+ out = z1 + z2 + z3
+out.backward()
+print(np.array_equiv(x.asnumpy(), x.asnumpy()))
+print(np.array_equiv(y.asnumpy(), y.asnumpy()))
+```
+
+Alternatively, you may want to have a function which is different depending on
+if you are training or not.
+
+```python
+def my_first_function(x):
+ if autograd.is_training(): # Return something else when training
+ return(4 * x)
+ else:
+ return(x)
+```
+
+```python
+y = my_first_function(x)
+print(np.array_equiv(y.asnumpy(), x.asnumpy()))
+with autograd.record(train_mode=False):
+ y = my_first_function(x)
+y.backward()
+print(x.grad)
+with autograd.record(train_mode=True): # train_mode = True by default
+ y = my_first_function(x)
+y.backward()
+print(x.grad)
+```
+
+You could create functions with `autograd.record()`.
+
+```python
+def my_second_function(x):
+ with autograd.record():
+ return(2 * x)
+```
+
+```python
+y = my_second_function(x)
+y.backward()
+print(x.grad)
+```
+
+You can also combine multiple functions.
+
+```python
+y = my_second_function(x)
+with autograd.record():
+ z = my_second_function(y) + 2
+z.backward()
+print(x.grad)
+```
+
+Additionally, MXNet records the execution trace and computes the gradient
+accordingly. The following function `f` doubles the inputs until its `norm`
+reaches 1000. Then it selects one element depending on the sum of its elements.
+
+```python
def f(a):
b = a * 2
while np.abs(b).sum() < 1000:
@@ -87,7 +206,7 @@ def f(a):
In this example, you record the trace and feed in a random value.
-```{.python .input}
+```python
a = np.random.uniform(size=2)
a.attach_grad()
with autograd.record():
@@ -95,12 +214,49 @@ with autograd.record():
c.backward()
```
-You can see that `b` is a linear function of `a`, and `c` is chosen from `b`. The gradient with respect to `a` be will be either `[c/a[0], 0]` or `[0, c/a[1]]`, depending on which element from `b` is picked. You see the results of this example with this code:
+You can see that `b` is a linear function of `a`, and `c` is chosen from `b`.
+The gradient with respect to `a` be will be either `[c/a[0], 0]` or `[0,
+c/a[1]]`, depending on which element from `b` is picked. You see the results of
+this example with this code:
+
+```python
+a.grad == c / a
+```
+
+As you can notice there are 3 values along the dimension 0, so taking a `mean`
+along this axis is the same as summing that axis and multiplying by `1/3`.
+
+## Advanced MXNet ndarray operations with Autograd
+
+You can control gradients for different ndarray operations. For instance,
+perhaps you want to check that the gradients are propagating properly?
+the `attach_grad()` method automatically detaches itself from the gradient.
+Therefore, the input up until y will no longer look like it has `x`. To
+illustrate this notice that `x.grad` and `y.grad` is not the same in the second
+example.
+
+```python
+with autograd.record():
+ y = 3 * x
+ y.attach_grad()
+ z = 4 * y + 2 * x
+z.backward()
+print(x.grad)
+print(y.grad)
+```
+
+Is not the same as:
-```{.python .input}
-a.grad == c/a
+```python
+with autograd.record():
+ y = 3 * x
+ z = 4 * y + 2 * x
+z.backward()
+print(x.grad)
+print(y.grad)
```
-## Next Steps
+## Next steps
-After you have used `autograd`, learn about training a neural network. See [Step 4: Train the neural network](4-train.md).
+Learn how to initialize weights, choose loss function, metrics and optimizers for training your neural network [Step 4: Necessary components
+to train the neural network](4-components.md).
diff --git a/docs/python_docs/python/tutorials/getting-started/crash-course/4-components.md b/docs/python_docs/python/tutorials/getting-started/crash-course/4-components.md
new file mode 100644
index 0000000..1c8f95e
--- /dev/null
+++ b/docs/python_docs/python/tutorials/getting-started/crash-course/4-components.md
@@ -0,0 +1,379 @@
+<!--- Licensed to the Apache Software Foundation (ASF) under one -->
+<!--- or more contributor license agreements. See the NOTICE file -->
+<!--- distributed with this work for additional information -->
+<!--- regarding copyright ownership. The ASF licenses this file -->
+<!--- to you under the Apache License, Version 2.0 (the -->
+<!--- "License"); you may not use this file except in compliance -->
+<!--- with the License. You may obtain a copy of the License at -->
+
+<!--- http://www.apache.org/licenses/LICENSE-2.0 -->
+
+<!--- Unless required by applicable law or agreed to in writing, -->
+<!--- software distributed under the License is distributed on an -->
+<!--- "AS IS" BASIS, WITHOUT WARRANTIES OR CONDITIONS OF ANY -->
+<!--- KIND, either express or implied. See the License for the -->
+<!--- specific language governing permissions and limitations -->
+<!--- under the License. -->
+# Necessary components that are not in the network
+
+
+Data and models are not the only components that
+you need to train a deep learning model. In this notebook, you will
+learn about the common components involved in training deep learning models.
+Here is a list of components necessary for training models in MXNet.
+
+1. Initialization
+2. Loss functions
+ 1. Built-in
+ 2. Custom
+3. Optimizers
+4. Metrics
+
+```python
+from mxnet import np, npx,gluon
+import mxnet as mx
+from mxnet.gluon import nn
+npx.set_np()
+
+ctx = mx.cpu()
+```
+
+## Initialization
+
+In a previous notebook, you used `net.initialize()` to initialize the network
+before a forward pass. Now, you will learn about initialization in a little more
+detail.
+
+First, define and initialize the `sequential` network from earlier.
+After you initialize it, print the parameters using `collect_params()` method.
+
+```python
+net = nn.Sequential()
+
+net.add(nn.Dense(5, in_units=3, activation="relu"),
+ nn.Dense(25, activation="relu"),
+ nn.Dense(2)
+ )
+
+net
+```
+
+```python
+net.initialize()
+params = net.collect_params()
+
+for key, value in params.items():
+ print(key, value)
+
+
+```
+
+Next, you will print shape and params after the first forward pass.
+
+```python
+x = np.random.uniform(-1, 1, (10, 3))
+net(x) # Forward computation
+
+params = net.collect_params()
+for key, value in params.items():
+ print(key, value)
+
+
+```
+
+#### Built-in Initialization
+
+MXNet makes it easy to initialize by providing many common initializers. A subset that you will be using in the following sections include:
+
+- Constant
+- Normal
+
+For more information, see
+[Initializers](https://mxnet.apache.org/versions/1.6/api/python/docs/api/initializer/index.html)
+
+When you use `net.intialize()`, MXNet, by default, initializes the weight matrices uniformly
+by drawing random values with a uniform-distribution between −0.07 and 0.07 and
+updates the bias parameters by setting them all to 0.
+
+To initialize your network using different built-in types, you have to use the
+`init` keyword argument in the `initialize()` method. Here is an example using
+`constant` and `normal` initialization.
+
+```python
+from mxnet import init
+
+# Constant init initializes the weights to be a constant value for all the params
+net.initialize(init=init.Constant(3), ctx=ctx)
+print(net[0].weight.data()[0])
+```
+
+If you use Normal to initialize your weights then you will use a normal
+distribution with a mean of zero and standard deviation of sigma. If you have
+already initialized the weight but want to reinitialize the weight, set the
+`force_reinit` flag to `True`.
+
+```python
+net.initialize(init=init.Normal(sigma=0.2), force_reinit=True, ctx=ctx)
+print(net[0].weight.data()[0])
+```
+
+## Components used in a training loop
+
+Till now you have seen how to create an algorithm and how to initialize it using mxnet
+APIs; additionally you have learned the basics of using mxnet. When you start training the
+ML algorithm, how do you actually teach the algorithm to learn or train?
+
+There are three main components for training an algorithm.
+
+1. Loss function: calculates how far the model is from the true distribution
+2. Autograd: the mxnet auto differentiation tool that calculates the gradients to
+optimize the parameters
+3. Optimizer: updates the parameters based on an optimization algorithm
+
+You have already learned about autograd in the previous notebook. In this
+notebook, you will learn more about loss functions and optimizers.
+
+## Loss function
+
+Loss functions are used to train neural networks and help the algorithm learn
+from the data. The loss function computes the difference between the
+output from the neural network and ground truth. This output is used to
+update the neural network weights during training. Next, you will look at a
+simple example.
+
+Suppose you have a neural network `net` and the data is stored in a variable
+`data`. The data consists of 5 total records (rows) and two features (columns)
+and the output from the neural network after the first epoch is given by the
+variable `nn_output`.
+
+```python
+net = gluon.nn.Dense(1)
+net.initialize()
+
+nn_input = np.array([[1.2, 0.56],
+ [3.0, 0.72],
+ [0.89, 0.9],
+ [0.89, 2.3],
+ [0.99, 0.52]])
+
+nn_output = net(nn_input)
+nn_output
+```
+
+The ground truth value of the data is stored in `groundtruth_label` is
+
+```python
+groundtruth_label = np.array([[0.0083],
+ [0.00382],
+ [0.02061],
+ [0.00495],
+ [0.00639]]).reshape(5, 1)
+```
+
+For this problem, you will use the L2 Loss. L2Loss, also called Mean Squared Error, is a
+regression loss function that computes the squared distances between the target
+values and the output of the neural network. It is defined as:
+
+$$L = \frac{1}{2N}\sum_i{|label_i − pred_i|)^2}$$
+
+The L2 loss function creates larger gradients for loss values which are farther apart due to the
+square operator and it also smooths the loss function space.
+
+```python
+def L2Loss(output_values, true_values):
+ return np.mean((output_values - true_values) ** 2, axis=1) / 2
+
+L2Loss(nn_output, groundtruth_label)
+```
+
+Now, you can do the same thing using the mxnet API
+
+```python
+from mxnet.gluon import nn, loss as gloss
+loss = gloss.L2Loss()
+
+loss(nn_output, groundtruth_label)
+```
+
+A network can improve by iteratively updating its weights to minimise the loss.
+Some tasks use a combination of multiple loss functions, but often you will just
+use one. MXNet Gluon provides a number of the most commonly used loss functions.
+The choice of your loss function will depend on your network and task. Some
+common tasks and loss function pairs include:
+
+- regression: L1Loss, L2Loss
+
+- classification: SigmoidBinaryCrossEntropyLoss, SoftmaxCrossEntropyLoss
+
+- embeddings: HingeLoss
+
+#### Customizing your Loss functions
+
+You can also create custom loss functions using **Loss Blocks**.
+
+You can inherit the base `Loss` class and write your own `forward` method. The
+backward propagation will be automatically computed by autograd. However, that
+only holds true if you can build your loss from existing mxnet operators.
+
+```python
+from mxnet.gluon.loss import Loss
+
+class custom_L1_loss(Loss):
+ def __init__(self, weight=None, batch_axis=0, **kwargs):
+ super(custom_L1_loss, self).__init__(weight, batch_axis, **kwargs)
+
+ def forward(self, pred, label):
+ l = np.abs(label - pred)
+ l = l.reshape(len(l),)
+ return l
+
+L1 = custom_L1_loss()
+L1(nn_output, groundtruth_label)
+```
+
+```python
+l1=gloss.L1Loss()
+l1(nn_output, groundtruth_label)
+```
+
+## Optimizer
+
+The loss function determines how much to change the parameters based on how far the
+model is from the groundtruth. Optimizer determines how the model
+weights or parameters are updated based on the loss function. In Gluon, this
+optimization step is performed by the `gluon.Trainer`.
+
+Here is a basic example of how to call the `gluon.Trainer` method.
+
+```python
+from mxnet import optimizer
+```
+
+```python
+trainer = gluon.Trainer(net.collect_params(),
+ optimizer="Adam",
+ optimizer_params={
+ "learning_rate":0.1,
+ "wd":0.001
+ })
+```
+
+When creating a **Gluon Trainer**, you must provide the trainer object with
+1. A collection of parameters that need to be learnt. The collection of
+parameters will be the weights and biases of your network that you are training.
+2. An Optimization algorithm (optimizer) that you want to use for training. This
+algorithm will be used to update the parameters every training iteration when
+`trainer.step` is called. For more information, see
+[optimizers](https://mxnet.apache.org/versions/1.6/api/python/docs/api/optimizer/index.html)
+
+```python
+curr_weight = net.weight.data()
+print(curr_weight)
+```
+
+```python
+batch_size = len(nn_input)
+trainer.step(batch_size)
+print(net.weight.data())
+```
+
+```python
+print(curr_weight - net.weight.grad() * 1 / 5)
+
+```
+
+## Metrics
+
+MXNet includes a `metrics` API that you can use to evaluate how your model is
+performing. This is typically used during training to monitor performance on the
+validation set. MXNet includes many commonly used metrics, a few are listed below:
+
+-
+[Accuracy](https://mxnet.apache.org/versions/1.6/api/python/docs/api/metric/index.html#mxnet.metric.Accuracy)
+-
+[CrossEntropy](https://mxnet.apache.org/versions/1.6/api/python/docs/api/metric/index.html#mxnet.metric.CrossEntropy)
+- [Mean squared
+error](https://mxnet.apache.org/versions/1.6/api/python/docs/api/metric/index.html#mxnet.metric.MSE)
+- [Root mean squared error
+(RMSE)](https://mxnet.apache.org/versions/1.6/api/python/docs/api/metric/index.html#mxnet.metric.RMSE)
+
+Now, you will define two arrays for a dummy binary classification example.
+
+```python
+# Vector of likelihoods for all the classes
+pred = np.array([[0.1, 0.9], [0.05, 0.95], [0.83, 0.17], [0.63, 0.37]])
+
+labels = np.array([1, 1, 0, 1])
+```
+
+Before you can calculate the accuracy of your model, the metric (accuracy)
+should be instantiated before the training loop
+
+```python
+from mxnet.gluon.metric import Accuracy
+
+acc = Accuracy()
+```
+
+To run and calculate the updated accuracy for each batch or epoch, you can call
+the `update()` method. This method uses labels and predictions which can be
+either class indexes or a vector of likelihoods for all of the classes.
+
+```python
+acc.update(labels=labels, preds=pred)
+```
+
+#### Creating custom metrics
+
+In addition to built-in metrics, if you want to create a custom metric, you can
+use the following skeleton code. This code inherits from the `EvalMetric` base
+class.
+
+```
+def custom_metric(EvalMetric):
+ def __init__(self):
+ super().init()
+
+ def update(self, labels, preds):
+ pass
+
+```
+
+Here is an example using the Precision metric. First, define the two values
+`labels` and `preds`.
+
+```python
+labels = np.array([0, 1, 1, 0, 0, 1, 0, 0, 1, 0, 1, 1])
+preds = np.array([0, 1, 1, 1, 1, 0, 0, 1, 0, 0, 0, 0])
+```
+
+Next, define the custom metric class `precision` and instantiate it
+
+```python
+from mxnet.gluon.metric import EvalMetric
+
+class precision(EvalMetric):
+ def __init__(self):
+ super().__init__(name="Precision")
+
+ def update(self,labels, preds):
+ tp_labels = (labels == 1)
+ true_positives = sum(preds[tp_labels] == 1)
+ fp_labels = (labels == 0)
+ false_positives = sum(preds[fp_labels] == 1)
+ return true_positives / (true_positives + false_positives)
+
+p = precision()
+```
+
+And finally, call the `update` method to return the results of `precision` for your data
+
+```python
+p.update(np.array(y_true), np.array(y_pred))
+```
+
+## Next steps
+
+Now that you have learned all the components required to train a neural network,
+you will see how to load your data using the Gluon API in [Step 5: Gluon
+Datasets and DataLoader](5-datasets.md)
diff --git a/docs/python_docs/python/tutorials/getting-started/crash-course/4-train.md b/docs/python_docs/python/tutorials/getting-started/crash-course/4-train.md
deleted file mode 100644
index ec3a07e..0000000
--- a/docs/python_docs/python/tutorials/getting-started/crash-course/4-train.md
+++ /dev/null
@@ -1,178 +0,0 @@
-<!--- Licensed to the Apache Software Foundation (ASF) under one -->
-<!--- or more contributor license agreements. See the NOTICE file -->
-<!--- distributed with this work for additional information -->
-<!--- regarding copyright ownership. The ASF licenses this file -->
-<!--- to you under the Apache License, Version 2.0 (the -->
-<!--- "License"); you may not use this file except in compliance -->
-<!--- with the License. You may obtain a copy of the License at -->
-
-<!--- http://www.apache.org/licenses/LICENSE-2.0 -->
-
-<!--- Unless required by applicable law or agreed to in writing, -->
-<!--- software distributed under the License is distributed on an -->
-<!--- "AS IS" BASIS, WITHOUT WARRANTIES OR CONDITIONS OF ANY -->
-<!--- KIND, either express or implied. See the License for the -->
-<!--- specific language governing permissions and limitations -->
-<!--- under the License. -->
-
-# Step 4: Train the neural network
-
-In this step, you learn how to train the previously defined network with data. First, import the libraries. The new ones are `mxnet.init` for more weight initialization methods. Import the `datasets` and `transforms` to load and transform computer vision datasets. Import `matplotlib` for drawing, and `time` for benchmarking. The example command here shows this.
-
-```{.python .input n=1}
-# Uncomment the following line if matplotlib is not installed.
-# !pip install matplotlib
-
-from mxnet import np, npx, gluon, init, autograd
-from mxnet.gluon import nn
-from IPython import display
-import matplotlib.pyplot as plt
-import time
-npx.set_np()
-```
-
-## Get data
-
-The handwritten digit, MNIST dataset is one of the most commonly used datasets in deep learning. However, it's too simple to get 99 percent accuracy. For this tutorial, you use a similar but slightly more complicated dataset called FashionMNIST. The end-goal is to classify clothing types.
-
-The dataset can be automatically downloaded through Gluon's `data.vision.datasets` module. The following code downloads the training dataset and shows the first example.
-
-```{.python .input n=2}
-mnist_train = gluon.data.vision.datasets.FashionMNIST(train=True)
-X, y = mnist_train[0]
-('X shape: ', X.shape, 'X dtype', X.dtype, 'y:', y)
-```
-
-Each example in this dataset is a $28\times 28$ size grey image, which is presented as ndarray with the shape format of `(height, width, channel)`. The label is a `numpy` scalar.
-
-Next, visualize the first six examples.
-
-```{.python .input n=3}
-text_labels = ['t-shirt', 'trouser', 'pullover', 'dress', 'coat',
- 'sandal', 'shirt', 'sneaker', 'bag', 'ankle boot']
-X, y = mnist_train[0:10]
-# plot images
-display.set_matplotlib_formats('svg')
-_, figs = plt.subplots(1, X.shape[0], figsize=(15, 15))
-for f, x, yi in zip(figs, X, y):
- # 3D->2D by removing the last channel dim
- f.imshow(x.reshape((28,28)).asnumpy())
- ax = f.axes
- ax.set_title(text_labels[int(yi)])
- ax.title.set_fontsize(14)
- ax.get_xaxis().set_visible(False)
- ax.get_yaxis().set_visible(False)
-plt.show()
-```
-
-In order to feed data into a Gluon model, convert the images to the `(channel, height, width)` format with a floating point data type. It can be done by `transforms.ToTensor`. In addition, normalize all pixel values with `transforms.Normalize` with the real mean 0.13 and standard deviation 0.31. You can chain these two transforms together and apply it to the first element of the data pair, namely the images.
-
-```{.python .input n=4}
-transformer = gluon.data.vision.transforms.Compose([
- gluon.data.vision.transforms.ToTensor(),
- gluon.data.vision.transforms.Normalize(0.13, 0.31)])
-mnist_train = mnist_train.transform_first(transformer)
-```
-
-`FashionMNIST` is a subclass of `gluon.data.Dataset`, which defines how to get the `i`-th example. In order to use it in training, you need to get a (randomized) batch of examples. Do this by using `gluon.data.DataLoader`. The example here uses four works to process data in parallel, which is often necessary especially for complex data transforms.
-
-```{.python .input n=5}
-batch_size = 256
-train_data = gluon.data.DataLoader(
- mnist_train, batch_size=batch_size, shuffle=True, num_workers=4)
-```
-
-The returned `train_data` is an iterable object that yields batches of images and labels pairs.
-
-```{.python .input n=6}
-for data, label in train_data:
- print(data.shape, label.shape)
- break
-```
-
-Finally, create a validation dataset and data loader.
-
-```{.python .input n=7}
-mnist_valid = gluon.data.vision.FashionMNIST(train=False)
-valid_data = gluon.data.DataLoader(
- mnist_valid.transform_first(transformer),
- batch_size=batch_size, num_workers=4)
-```
-
-## Define the model
-
-Implement the network called [LeNet](http://yann.lecun.com/exdb/lenet/). One difference here is that you change the weight initialization method to `Xavier`, which is a popular choice for deep convolutional neural networks.
-
-```{.python .input n=8}
-net = nn.Sequential()
-net.add(nn.Conv2D(channels=6, kernel_size=5, activation='relu'),
- nn.MaxPool2D(pool_size=2, strides=2),
- nn.Conv2D(channels=16, kernel_size=3, activation='relu'),
- nn.MaxPool2D(pool_size=2, strides=2),
- nn.Dense(120, activation="relu"),
- nn.Dense(84, activation="relu"),
- nn.Dense(10))
-net.initialize(init=init.Xavier())
-```
-
-In addition to the neural network, define the loss function and optimization method for training. Use standard softmax cross entropy loss for classification problems. It first performs softmax on the output to obtain the predicted probability, and then compares the label with the cross entropy.
-
-```{.python .input n=9}
-softmax_cross_entropy = gluon.loss.SoftmaxCrossEntropyLoss()
-```
-
-The optimization method you pick is the standard stochastic gradient descent with constant learning rate of 0.1.
-
-```{.python .input n=10}
-trainer = gluon.Trainer(net.collect_params(), 'sgd', {'learning_rate': 0.1})
-```
-
-The `trainer` is created with all parameters (both weights and gradients) in `net`. Later on, you only need to call the `step` method to update its weights.
-
-## Train the model
-
-Create an auxiliary function to calculate the model accuracy.
-
-```{.python .input n=11}
-def acc(output, label):
- # output: (batch, num_output) float32 ndarray
- # label: (batch, ) int32 ndarray
- return (output.argmax(axis=1) == label.astype('float32')).mean()
-```
-
-Implement the complete training loop.
-
-```{.python .input n=12}
-for epoch in range(10):
- train_loss, train_acc, valid_acc = 0., 0., 0.
- tic = time.time()
- for data, label in train_data:
- # forward + backward
- with autograd.record():
- output = net(data)
- loss = softmax_cross_entropy(output, label)
- loss.backward()
- # update parameters
- trainer.step(batch_size)
- # calculate training metrics
- train_loss += loss.mean()
- train_acc += acc(output, label)
- # calculate validation accuracy
- for data, label in valid_data:
- valid_acc += acc(net(data), label)
- print("Epoch %d: loss %.3f, train acc %.3f, test acc %.3f, in %.1f sec" % (
- epoch, train_loss/len(train_data), train_acc/len(train_data),
- valid_acc/len(valid_data), time.time()-tic))
-```
-
-## Save the model
-
-Finally, save the trained parameters onto disk, so that you can use them later.
-
-```{.python .input n=13}
-net.save_parameters('net.params')
-```
-
-## Next Steps
-
-After the model is trained and saved, learn how to use it to predict new examples: [Step 5: Predict with a pretrained model](5-predict.md).
diff --git a/docs/python_docs/python/tutorials/getting-started/crash-course/5-datasets.md b/docs/python_docs/python/tutorials/getting-started/crash-course/5-datasets.md
new file mode 100644
index 0000000..1abbde4
--- /dev/null
+++ b/docs/python_docs/python/tutorials/getting-started/crash-course/5-datasets.md
@@ -0,0 +1,310 @@
+<!--- Licensed to the Apache Software Foundation (ASF) under one -->
+<!--- or more contributor license agreements. See the NOTICE file -->
+<!--- distributed with this work for additional information -->
+<!--- regarding copyright ownership. The ASF licenses this file -->
+<!--- to you under the Apache License, Version 2.0 (the -->
+<!--- "License"); you may not use this file except in compliance -->
+<!--- with the License. You may obtain a copy of the License at -->
+
+<!--- http://www.apache.org/licenses/LICENSE-2.0 -->
+
+<!--- Unless required by applicable law or agreed to in writing, -->
+<!--- software distributed under the License is distributed on an -->
+<!--- "AS IS" BASIS, WITHOUT WARRANTIES OR CONDITIONS OF ANY -->
+<!--- KIND, either express or implied. See the License for the -->
+<!--- specific language governing permissions and limitations -->
+<!--- under the License. -->
+
+
+# Step 5: `Dataset`s and `DataLoader`
+-----------
+
+One of the most critical steps for model training and inference is loading the data: without data you can't do Machine Learning! In this tutorial you will use the Gluon API to define a Dataset and use a DataLoader to iterate through the dataset in mini-batches.
+
+
+```python
+import mxnet as mx
+import os
+import time
+import tarfile
+```
+
+## Introduction to `Dataset`s
+--------
+Dataset objects are used to represent collections of data, and include methods to load and parse the data (that is often stored on disk). Gluon has a number of different `Dataset` classes for working with image data straight out-of-the-box, but you'll use the ArrayDataset to introduce the idea of a `Dataset`.
+
+You will first start by generating random data `X` (with 3 variables) and corresponding random labels `y` to simulate a typical supervised learning task. You will generate 10 samples and pass them all to the `ArrayDataset`.
+
+
+
+```python
+mx.random.seed(42) # Fix the seed for reproducibility
+X = mx.random.uniform(shape=(10, 3))
+y = mx.random.uniform(shape=(10, 1))
+dataset = mx.gluon.data.dataset.ArrayDataset(X, y)
+```
+
+A key feature of a `Dataset` is the __*ability to retrieve a single sample given an index*__. Our random data and labels were generated in memory, so this `ArrayDataset` doesn't have to load anything from disk, but the interface is the same for all `Dataset`'s.
+
+
+
+```python
+
+sample_idx = 4
+sample = dataset[sample_idx]
+
+assert len(sample) == 2
+assert sample[0].shape == (3, )
+assert sample[1].shape == (1, )
+print(sample)
+```
+
+
+You get a tuple of a data sample and its corresponding label, which makes sense because you passed the data `X` and the labels `y` in that order when you instantiated the `ArrayDataset`. You don't usually retrieve individual samples from `Dataset` objects though (unless you're quality checking the output samples). Instead you use a `DataLoader`.
+
+## Introduction to `DataLoader`
+----------
+
+A DataLoader is used to create mini-batches of samples from a Dataset, and provides a convenient iterator interface for looping these batches. It's typically much more efficient to pass a mini-batch of data through a neural network than a single sample at a time, because the computation can be performed in parallel. A required parameter of `DataLoader` is the size of the mini-batches you want to create, called `batch_size`.
+
+Another benefit of using `DataLoader` is the ability to easily load data in parallel using multiprocessing. You can set the `num_workers` parameter to the number of CPUs available on your machine for maximum performance, or limit it to a lower number to spare resources.
+
+
+
+
+```python
+
+from multiprocessing import cpu_count
+CPU_COUNT = cpu_count()
+
+data_loader = mx.gluon.data.DataLoader(dataset, batch_size=5, num_workers=CPU_COUNT)
+
+for X_batch, y_batch in data_loader:
+ print("X_batch has shape {}, and y_batch has shape {}".format(X_batch.shape, y_batch.shape))
+```
+
+
+
+You can see 2 mini-batches of data (and labels), each with 5 samples, which makes sense given that you started with a dataset of 10 samples. When comparing the shape of the batches to the samples returned by the `Dataset`,you've gained an extra dimension at the start which is sometimes called the batch axis.
+
+Our `data_loader` loop will stop when every sample of `dataset` has been returned as part of a batch. Sometimes the dataset length isn't divisible by the mini-batch size, leaving a final batch with a smaller number of samples. `DataLoader`'s default behavior is to return this smaller mini-batch, but this can be changed by setting the `last_batch` parameter to `discard` (which ignores the last batch) or `rollover` (which starts the next epoch with the remaining samples).
+
+## Machine learning with `Dataset`s and `DataLoader`s
+---------
+
+You will often use a few different `Dataset` objects in your Machine Learning project. It's essential to separate your training dataset from testing dataset, and it's also good practice to have validation dataset (a.k.a. development dataset) that can be used for optimising hyperparameters.
+
+Using Gluon `Dataset` objects, you define the data to be included in each of these separate datasets. It's simple to create your own custom `Dataset` classes for other types of data. You can even use included `Dataset` objects for common datasets if you want to experiment quickly; they download and parse the data for you! In this example you use the [Fashion MNIST](https://github.com/zalandoresearch/fashion-mnist) dataset from Zalando Research.
+
+Many of the image `Dataset`'s accept a function (via the optional `transform` parameter) which is applied to each sample returned by the `Dataset`. It's useful for performing data augmentation, but can also be used for more simple data type conversion and pixel value scaling as seen below.
+
+
+
+
+```python
+
+def transform(data, label):
+ data = data.astype('float32')/255
+ return data, label
+
+train_dataset = mx.gluon.data.vision.datasets.FashionMNIST(train=True, transform=transform)
+valid_dataset = mx.gluon.data.vision.datasets.FashionMNIST(train=False, transform=transform)
+```
+
+
+```python
+%matplotlib inline
+from matplotlib.pylab import imshow
+
+sample_idx = 234
+sample = train_dataset[sample_idx]
+data = sample[0]
+label = sample[1]
+label_desc = {0:'T-shirt/top', 1:'Trouser', 2:'Pullover', 3:'Dress', 4:'Coat', 5:'Sandal', 6:'Shirt', 7:'Sneaker', 8:'Bag', 9:'Ankle boot'}
+
+print("Data type: {}".format(data.dtype))
+print("Label: {}".format(label))
+print("Label description: {}".format(label_desc[label]))
+imshow(data[:,:,0].asnumpy(), cmap='gray')
+```
+
+
+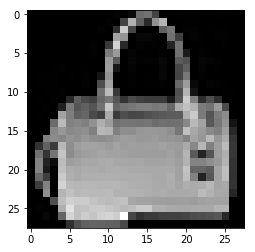
+
+When training machine learning models it is important to shuffle the training samples every time you pass through the dataset (i.e. each epoch). Sometimes the order of your samples will have a spurious relationship with the target variable, and shuffling the samples helps remove this. With DataLoader it's as simple as adding `shuffle=True`. You don't need to shuffle the validation and testing data though.
+
+
+```python
+
+batch_size = 32
+train_data_loader = mx.gluon.data.DataLoader(train_dataset, batch_size, shuffle=True, num_workers=CPU_COUNT)
+valid_data_loader = mx.gluon.data.DataLoader(valid_dataset, batch_size, num_workers=CPU_COUNT)
+```
+
+With both `DataLoader`s defined, you can now train a model to classify each image and evaluate the validation loss at each epoch. See the next tutorial for how this is done.
+
+# Using own data with included `Dataset`s
+-------
+Gluon has a number of different Dataset classes for working with your own image data straight out-of-the-box. You can get started quickly using the mxnet.gluon.data.vision.datasets.ImageFolderDataset which loads images directly from a user-defined folder, and infers the label (i.e. class) from the folders.
+
+Here you will run through an example for image classification, but a similar process applies for other vision tasks. If you already have your own collection of images to work with you should partition your data into training and test sets, and place all objects of the same class into seperate folders. Similar to:
+
+```
+ ./images/train/car/abc.jpg
+ ./images/train/car/efg.jpg
+ ./images/train/bus/hij.jpg
+ ./images/train/bus/klm.jpg
+ ./images/test/car/xyz.jpg
+ ./images/test/bus/uvw.jpg
+```
+
+You can download the Caltech 101 dataset if you don't already have images to work with for this example, but please note the download is 126MB.
+
+
+```python
+data_folder = "data"
+dataset_name = "101_ObjectCategories"
+archive_file = "{}.tar.gz".format(dataset_name)
+archive_path = os.path.join(data_folder, archive_file)
+data_url = "https://s3.us-east-2.amazonaws.com/mxnet-public/"
+
+if not os.path.isfile(archive_path):
+ mx.test_utils.download("{}{}".format(data_url, archive_file), dirname = data_folder)
+ print('Extracting {} in {}...'.format(archive_file, data_folder))
+ tar = tarfile.open(archive_path, "r:gz")
+ tar.extractall(data_folder)
+ tar.close()
+ print('Data extracted.')
+```
+
+After downloading and extracting the data archive, you have two folders: `data/101_ObjectCategories` and `data/101_ObjectCategories_test`. You can then load the data into separate training and testing ImageFolderDatasets.
+
+training_path = os.path.join(data_folder, dataset_name)
+testing_path = os.path.join(data_folder, "{}_test".format(dataset_name))
+
+You instantiate the ImageFolderDatasets by providing the path to the data, and the folder structure will be traversed to determine which image classes are available and which images correspond to each class. You must take care to ensure the same classes are both the training and testing datasets, otherwise the label encodings can get muddled.
+
+Optionally, you can pass a `transform` parameter to these `Dataset`'s as you've seen before.
+
+
+```python
+cd data
+```
+
+
+```python
+!ls
+```
+
+
+```python
+training_path='/home/ec2-user/SageMaker/data/101_ObjectCategories'
+testing_path='/home/ec2-user/SageMaker/data/101_ObjectCategories_test'
+train_dataset = mx.gluon.data.vision.datasets.ImageFolderDataset(training_path)
+test_dataset = mx.gluon.data.vision.datasets.ImageFolderDataset(testing_path)
+```
+
+Samples from these datasets are tuples of data and label. Images are loaded from disk, decoded and optionally transformed when the `__getitem__(i)` method is called (equivalent to `train_dataset[i]`).
+
+As with the Fashion MNIST dataset the labels will be integer encoded. You can use the `synsets` property of the ImageFolderDatasets to retrieve the original descriptions (e.g. `train_dataset.synsets[i]`).
+
+
+```python
+
+sample_idx = 539
+sample = train_dataset[sample_idx]
+data = sample[0]
+label = sample[1]
+
+print("Data type: {}".format(data.dtype))
+print("Label: {}".format(label))
+print("Label description: {}".format(train_dataset.synsets[label]))
+assert label == 1
+
+imshow(data.asnumpy(), cmap='gray')
+```
+
+
+<!--notebook-skip-line-->
+
+# Using your own data with custom `Dataset`s
+------
+Sometimes you have data that doesn't quite fit the format expected by the included Datasets. You might be able to preprocess your data to fit the expected format, but it is easy to create your own dataset to do this.
+
+All you need to do is create a class that implements a `__getitem__` method, that returns a sample (i.e. a tuple of mx.nd.NDArrays).
+
+# New in MXNet 2.0: faster C++ backend dataloaders
+------
+As part of an effort to speed up the current data loading pipeline using gluon dataset and dataloader, a new dataloader was created that uses only a C++ backend and avoids potentially slow calls to Python functions.
+
+See [original issue](https://github.com/apache/incubator-mxnet/issues/17269), [pull request](https://github.com/apache/incubator-mxnet/pull/17464) and [implementation](https://github.com/apache/incubator-mxnet/pull/17841).
+
+The current data loading pipeline is the major bottleneck for many training tasks. The flow can be summarized as:
+
+
+```python
+| Dataset.__getitem__ ->
+| Transform.__call__()/forward() ->
+| Batchify ->
+| (optional communicate through shared_mem) ->
+| split_and_load(ctxs) ->
+| <training on GPUs> ->
+```
+
+Performance concerns include slow python dataset/transform functions, multithreading issues due to global interpreter lock, Python multiprocessing issues due to speed, and batchify issues due to poor memory management.
+
+This new dataloader provides:
+- common C++ batchify functions that are split and context aware
+- a C++ MultithreadingDataLoader which inherit the same arguments as gluon.data.DataLoader but use MXNet internal multithreading rather than python multiprocessing.
+- fallback to python multiprocessing whenever the dataset is not fully supported by backend (e.g., there are custom python datasets) in the case that:
+ - the transform is not fully hybridizable
+ - batchify is not fully supported by backend
+
+Users can continue to with the traditional gluon.data.Dataloader and the C++ backend will be applied automatically. The 'try_nopython' default is 'Auto', which detects whether the C++ backend is available given the dataset and transforms.
+
+Here you will show a performance increase on a t3.2xl instance for the CIFAR10 dataset with the C++ backend.
+
+### Using the C++ backend:
+
+
+```python
+cpp_dl = mx.gluon.data.DataLoader(
+ mx.gluon.data.vision.CIFAR10(train=True, transform=None), batch_size=32, num_workers=2,try_nopython=True)
+```
+
+
+```python
+start = time.time()
+for _ in range(3):
+ print(len(cpp_dl))
+ for _ in cpp_dl:
+ pass
+print('Elapsed time for backend dataloader:', time.time() - start)
+```
+
+
+### Using the Python backend:
+
+
+```python
+dl = mx.gluon.data.DataLoader(
+ mx.gluon.data.vision.CIFAR10(train=True, transform=None), batch_size=32, num_workers=2,try_nopython=False)
+```
+
+
+```python
+start = time.time()
+for _ in range(3):
+ print(len(dl))
+ for _ in dl:
+ pass
+print('Elapsed time for python dataloader:', time.time() - start)
+```
+
+
+### The C++ backend loader was almost 3X faster for this particular use case
+This improvement in performance will not be seen in all cases, but when possible you are encouraged to compare the dataloader throughput for these two options.
+
+## Next Steps
+-----
+Now that you have some experience with MXNet's datasets and dataloaders, it's time to use them for [Step 6: Training a Neural Network](https://github.com/vidyaravipati/incubator-mxnet/blob/mxnet2.0_crashcourse/docs/python_docs/python/tutorials/getting-started/crash-course/6-train-nn.md).
diff --git a/docs/python_docs/python/tutorials/getting-started/crash-course/5-predict.md b/docs/python_docs/python/tutorials/getting-started/crash-course/5-predict.md
deleted file mode 100644
index a0b948a..0000000
--- a/docs/python_docs/python/tutorials/getting-started/crash-course/5-predict.md
+++ /dev/null
@@ -1,159 +0,0 @@
-<!--- Licensed to the Apache Software Foundation (ASF) under one -->
-<!--- or more contributor license agreements. See the NOTICE file -->
-<!--- distributed with this work for additional information -->
-<!--- regarding copyright ownership. The ASF licenses this file -->
-<!--- to you under the Apache License, Version 2.0 (the -->
-<!--- "License"); you may not use this file except in compliance -->
-<!--- with the License. You may obtain a copy of the License at -->
-
-<!--- http://www.apache.org/licenses/LICENSE-2.0 -->
-
-<!--- Unless required by applicable law or agreed to in writing, -->
-<!--- software distributed under the License is distributed on an -->
-<!--- "AS IS" BASIS, WITHOUT WARRANTIES OR CONDITIONS OF ANY -->
-<!--- KIND, either express or implied. See the License for the -->
-<!--- specific language governing permissions and limitations -->
-<!--- under the License. -->
-
-# Step 5: Predict with a pretrained model
-
-In this step, you learn how to predict new examples using a pretrained model. A saved model can be used in multiple places, such as to continue training, to fine tune the model, and for prediction.
-
-## Prerequisites
-
-Before you begin the procedures here, run :label:`crash_course_train` to train the network and save its parameters to file. You use this file to run the following steps.
-
-```{.python .input n=1}
-from mxnet import np, npx, gluon, image
-from mxnet.gluon import nn
-from IPython import display
-import matplotlib.pyplot as plt
-npx.set_np()
-```
-
-To start, copy a simple model's definition by using the following code.
-
-```{.python .input n=2}
-net = nn.Sequential()
-net.add(nn.Conv2D(channels=6, kernel_size=5, activation='relu'),
- nn.MaxPool2D(pool_size=2, strides=2),
- nn.Conv2D(channels=16, kernel_size=3, activation='relu'),
- nn.MaxPool2D(pool_size=2, strides=2),
- nn.Dense(120, activation="relu"),
- nn.Dense(84, activation="relu"),
- nn.Dense(10))
-```
-
-In the previous step, you saved all parameters to a file. Now load it back.
-
-```{.python .input n=3}
-net.load_parameters('net.params')
-```
-
-## Predict
-
-Remember the data transformation you did for the training step? The following code provides the same transformation for predicting.
-
-```{.python .input n=4}
-transformer = gluon.data.vision.transforms.Compose([
- gluon.data.vision.transforms.ToTensor(),
- gluon.data.vision.transforms.Normalize(0.13, 0.31)])
-```
-
-Use the following code to predict the first six images in the validation dataset and store the predictions into `preds`.
-
-```{.python .input n=5}
-mnist_valid = gluon.data.vision.datasets.FashionMNIST(train=False)
-X, y = mnist_valid[:10]
-preds = []
-for x in X:
- x = np.expand_dims(transformer(x), axis=0)
- pred = net(x).argmax(axis=1)
- preds.append(int(pred))
-```
-
-Finally, use the following code to visualize the images and compare the prediction with the ground truth.
-
-```{.python .input n=15}
-_, figs = plt.subplots(1, 10, figsize=(15, 15))
-text_labels = ['t-shirt', 'trouser', 'pullover', 'dress', 'coat',
- 'sandal', 'shirt', 'sneaker', 'bag', 'ankle boot']
-display.set_matplotlib_formats('svg')
-for f, x, yi, pyi in zip(figs, X, y, preds):
- f.imshow(x.reshape((28,28)).asnumpy())
- ax = f.axes
- ax.set_title(text_labels[int(yi)]+'\n'+text_labels[pyi])
- ax.title.set_fontsize(14)
- ax.get_xaxis().set_visible(False)
- ax.get_yaxis().set_visible(False)
-plt.show()
-```
-
-## Predict with models from Gluon model zoo
-
-
-The LeNet, trained on FashionMNIST, is a good example to start with. However, it's too simple to predict real-life pictures. In order to save the time and effort of training a large-scale model from scratch, the [Gluon model zoo](https://mxnet.incubator.apache.org/api/python/gluon/model_zoo.html) provides multiple pre-trained models. For example, with the following code example, you can download a pre-trained ResNet-50 V2 model that was trained on the ImageNet dataset.
-
-```{.python .input n=7}
-net = gluon.model_zoo.vision.resnet50_v2(pretrained=True)
-```
-
-You'll also need to download the text labels for each class, as in the following example.
-
-```{.python .input n=8}
-url = 'http://data.mxnet.io/models/imagenet/synset.txt'
-fname = gluon.utils.download(url)
-with open(fname, 'r') as f:
- text_labels = [' '.join(l.split()[1:]) for l in f]
-```
-
-The following example shows how to select a dog image from Wikipedia as a test, download and read it.
-
-```{.python .input n=9}
-url = 'https://upload.wikimedia.org/wikipedia/commons/thumb/b/b5/\
-Golden_Retriever_medium-to-light-coat.jpg/\
-365px-Golden_Retriever_medium-to-light-coat.jpg'
-fname = gluon.utils.download(url)
-x = image.imread(fname) # TODO, use npx.image instead
-```
-
-Following the conventional way of preprocessing ImageNet data, do the following:
-
-1. Resize the short edge into 256 pixes.
-2. Perform a center crop to obtain a 224-by-224 image.
-
-```{.python .input n=10}
-x = image.resize_short(x, 256)
-x, _ = image.center_crop(x, (224,224))
-plt.imshow(x.asnumpy())
-plt.show()
-```
-
-Now you can see it is a golden retriever. You can also infer it from the image URL.
-
-The next data transformation is similar to FashionMNIST. Here, you subtract the RGB means and divide by the corresponding variances to normalize each color channel.
-
-```{.python .input n=11}
-def transform(data):
- data = np.expand_dims(np.transpose(data, (2,0,1)), axis=0)
- rgb_mean = np.array([0.485, 0.456, 0.406]).reshape((1,3,1,1))
- rgb_std = np.array([0.229, 0.224, 0.225]).reshape((1,3,1,1))
- return (data.astype('float32') / 255 - rgb_mean) / rgb_std
-```
-
-Now you can recognize the object in the image. Perform an additional softmax on the output to obtain probability scores. Print the top-5 recognized objects.
-
-```{.python .input n=12}
-prob = npx.softmax(net(transform(x)))
-idx = npx.topk(prob, k=5)[0]
-for i in idx:
- print('With prob = %.5f, it contains %s' % (
- prob[0, int(i)], text_labels[int(i)]))
-```
-
-As can be seen, the model is fairly confident that the image contains a golden retriever.
-
-## Next Steps
-
-You might find that both training and prediction are a little bit slow. If you have a GPU
-available, learn how to accomplish your tasks faster in [Step 6: Use GPUs to increase efficiency](6-use_gpus.md).
diff --git a/docs/python_docs/python/tutorials/getting-started/crash-course/6-train-nn.md b/docs/python_docs/python/tutorials/getting-started/crash-course/6-train-nn.md
new file mode 100644
index 0000000..fce21b9
--- /dev/null
+++ b/docs/python_docs/python/tutorials/getting-started/crash-course/6-train-nn.md
@@ -0,0 +1,442 @@
+<!--- Licensed to the Apache Software Foundation (ASF) under one -->
+<!--- or more contributor license agreements. See the NOTICE file -->
+<!--- distributed with this work for additional information -->
+<!--- regarding copyright ownership. The ASF licenses this file -->
+<!--- to you under the Apache License, Version 2.0 (the -->
+<!--- "License"); you may not use this file except in compliance -->
+<!--- with the License. You may obtain a copy of the License at -->
+
+<!--- http://www.apache.org/licenses/LICENSE-2.0 -->
+
+<!--- Unless required by applicable law or agreed to in writing, -->
+<!--- software distributed under the License is distributed on an -->
+<!--- "AS IS" BASIS, WITHOUT WARRANTIES OR CONDITIONS OF ANY -->
+<!--- KIND, either express or implied. See the License for the -->
+<!--- specific language governing permissions and limitations -->
+<!--- under the License. -->
+# Step 6: Train a Neural Network
+
+Now that you have seen all the necessary components for creating a neural network, you are
+now ready to put all the pieces together and train a model end to end.
+
+## 1. Data preparation
+
+The typical process for creating and training a model starts with loading and
+preparing the datasets. For this Network you will use a [dataset of leaf
+images](https://data.mendeley.com/datasets/hb74ynkjcn/1) that consists of healthy
+and diseased examples of leafs from twelve different plant species. To get this
+dataset you have to download and extract it with the following commands.
+
+```{.python .input}
+# Download dataset
+!wget https://md-datasets-cache-zipfiles-prod.s3.eu-west-1.amazonaws.com/hb74ynkjcn-1.zip
+```
+
+```{.python .input}
+# Extract the dataset in a folder that create and call plants
+!mkdir plants
+!unzip hb74ynkjcn-1.zip -d plants
+!rm hb74ynkjcn-1.zip
+```
+
+#### Data inspection
+
+If you take a look at the dataset you find the following structure for the directories:
+
+```
+plants
+|-- Alstonia Scholaris (P2)
+|-- Arjun (P1)
+|-- Bael (P4)
+ |-- diseased
+ |-- 0016_0001.JPG
+ |-- .
+ |-- .
+ |-- .
+ |-- 0016_0118.JPG
+|-- .
+|-- .
+|-- .
+|-- Mango (P0)
+ |-- diseased
+ |-- healthy
+```
+
+Each plant species has its own directory, for each of those directories you might
+find subdirectories with examples of diseased leaves, healthy
+leaves, or both. With this dataset you can formulate different classification
+problems; for example, you can create a multi-class classifier that determines
+the species of a plant based on the leaves; you can instead create a binary
+classifier that tells you whether the plant is healthy or diseased. Additionally, you can create
+a multi-class, multi-label classifier that tells you both: what species a
+plant is and whether the plant is diseased or healthy. In this example you will stick to
+the simplest classification question, which is whether a plant is healthy or not.
+
+To do this, you need to manipulate the dataset in two ways. First, you need to
+combine all images with labels consisting of healthy and diseased, regardless of the species, and then you
+need to split the data into train, validation, and test sets. We prepared a
+small utility script that does this to get the dataset ready for you.
+Once you run this utility code on the data, the structure will be
+already organized in folders containing the right images in each of the classes,
+you can use the `ImageFolderDataset` class to import the images from the file to MXNet.
+
+```{.python .input}
+# Import all the necessary libraries to train
+import time
+
+import mxnet as mx
+from mxnet import np, npx, gluon, init, autograd
+from mxnet.gluon import nn
+from mxnet.gluon.data.vision import transforms
+
+import matplotlib.pyplot as plt
+import matplotlib.pyplot as plt
+import numpy as np
+
+from prepare_dataset import process_dataset #utility code to rearrange the data
+
+mx.random.seed(42)
+```
+
+```python
+# Call the utility function to rearrange the images
+process_dataset('plants')
+```
+
+The dataset is located in the `datasets` folder and the new structure
+looks like this:
+
+```
+datasets
+|-- test
+ |-- diseased
+ |-- healthy
+|-- train
+|-- validation
+ |-- diseased
+ |-- healthy
+ |-- image1.JPG
+ |-- image2.JPG
+ |-- .
+ |-- .
+ |-- .
+ |-- imagen.JPG
+```
+
+Now, you need to create three different Dataset objects from the `train`,
+`validation`, and `test` folders, and the `ImageFolderDataset` class takes
+care of inferring the classes from the directory names. If you don't remember
+how the `ImageFolderDataset` works, take a look at [Step 5](5-datasets.md)
+of this course for a deeper description.
+
+```{.python .input}
+# Use ImageFolderDataset to create a Dataset object from directory structure
+train_dataset = gluon.data.vision.ImageFolderDataset('./datasets/train')
+val_dataset = gluon.data.vision.ImageFolderDataset('./datasets/validation')
+test_dataset = gluon.data.vision.ImageFolderDataset('./datasets/test')
+```
+
+The result from this operation is a different Dataset object for each folder.
+These objects hold a collection of images and labels and as such they can be
+indexed, to get the $i$-th element from the dataset. The $i$-th element is a
+tuple with two objects, the first object of the tuple is the image in array
+form and the second is the corresponding label for that image.
+
+```{.python .input}
+sample_idx = 888 # choose a random sample
+sample = train_dataset[sample_idx]
+data = sample[0]
+label = sample[1]
+
+plt.imshow(data.asnumpy())
+print(f"Data type: {data.dtype}")
+print(f"Label: {label}")
+print(f"Label description: {train_dataset.synsets[label]}")
+print(f"Image shape: {data.shape}")
+```
+
+As you can see from the plot, the image size is very large 4000 x 6000 pixels.
+Usually, you downsize images before passing them to a neural network to reduce the training time.
+It is also customary to make slight modifications to the images to improve generalization. That is why you add
+transformations to the data in a process called Data Augmentation.
+
+You can augment data in MXNet using `transforms`. For a complete list of all
+the available transformations in MXNet check out [this link.](https://mxnet.apache.org/versions/1.6/api/python/docs/api/gluon/data/vision/transforms/index.html)
+It is very common to use more than one transform per image, and it is also
+common to process transforms sequentially. To this end, you can use the `transforms.Compose` class.
+This class is very useful to create a transformation pipeline for your images.
+
+You have to compose two different transformation pipelines, one for training
+and the other one for validating and testing. This is because each pipeline
+serves different pursposes. You need to downsize, convert to tensor and normalize
+images across all the different datsets; however, you typically do not want to randomly flip
+or add color jitter to the validation or test images since you could reduce performance.
+
+```{.python .input}
+# Import transforms as compose a series of transformations to the images
+from mxnet.gluon.data.vision import transforms
+
+jitter_param = 0.05
+
+# mean and std for normalizing image value in range (0,1)
+mean = [0.485, 0.456, 0.406]
+std = [0.229, 0.224, 0.225]
+
+training_transformer = transforms.Compose([
+ transforms.Resize(size=224, keep_ratio=True),
+ transforms.CenterCrop(128),
+ transforms.RandomFlipLeftRight(),
+ transforms.RandomColorJitter(contrast=jitter_param),
+ transforms.ToTensor(),
+ transforms.Normalize(mean, std)
+])
+
+validation_transformer = transforms.Compose([
+ transforms.Resize(size=224, keep_ratio=True),
+ transforms.CenterCrop(128),
+ transforms.ToTensor(),
+ transforms.Normalize(mean, std)
+])
+```
+
+With your augmentations ready, you can create the `DataLoaders` to use them. To
+do this the `gluon.data.DataLoader` class comes in handy. You have to pass the dataset with
+the applied transformations (notice the `.transform_first()` method on the datasets)
+to `gluon.data.DataLoader`. Additionally, you need to decide the batch size,
+which is how many images you will be passing to the network,
+and whether you want to shuffle the dataset.
+
+```{.python .input}
+# Create data loaders
+batch_size = 4
+train_loader = gluon.data.DataLoader(train_dataset.transform_first(training_transformer),
+ batch_size=batch_size,
+ shuffle=True,
+ try_nopython=True)
+validation_loader = gluon.data.DataLoader(val_dataset.transform_first(validation_transformer),
+ batch_size=batch_size,
+ try_nopython=True)
+test_loader = gluon.data.DataLoader(test_dataset.transform_first(validation_transformer),
+ batch_size=batch_size,
+ try_nopython=True)
+```
+
+Now, you can inspect the transformations that you made to the images. A prepared
+utility function has been provided for this.
+
+```{.python .input}
+# Function to plot batch
+def show_batch(batch, columns=4, fig_size=(9, 5), pad=1):
+ labels = batch[1].asnumpy()
+ batch = batch[0] / 2 + 0.5 # unnormalize
+ batch = np.clip(batch.asnumpy(), 0, 1) # clip values
+ size = batch.shape[0]
+ rows = int(size / columns)
+ fig, axes = plt.subplots(rows, columns, figsize=fig_size)
+ for ax, img, label in zip(axes.flatten(), batch, labels):
+ ax.imshow(np.transpose(img, (1, 2, 0)))
+ ax.set(title=f"Label: {label}")
+ fig.tight_layout(h_pad=pad, w_pad=pad)
+ plt.show()
+```
+
+```{.python .input}
+for batch in train_loader:
+ a = batch
+ break
+```
+
+```{.python .input}
+show_batch(a)
+```
+
+You can see that the original images changed to have different sizes and variations
+in color and lighting. These changes followed the specified transformations you stated
+in the pipeline. You are now ready to go to the next step: **Create the
+architecture**.
+
+## 2. Create Neural Network
+
+Convolutional neural networks are a great tool to capture the spatial
+relationship of pixel values within images, for this reason they have become the
+gold standard for computer vision. In this example you will create a small convolutional neural
+network using what you learned from [Step 2](2-create-nn.md) of this crash course series.
+First, you can set up two functions that will generate the two types of blocks
+you intend to use, the convolution block and the dense block. Then you can create an
+entire network based on these two blocks using a custom class.
+
+```{.python .input}
+# The convolutional block has a convolution layer, a max pool layer and a batch normalization layer
+def conv_block(filters, kernel_size=2, stride=2, batch_norm=True):
+ conv_block = nn.HybridSequential()
+ conv_block.add(nn.Conv2D(channels=filters, kernel_size=kernel_size, activation='relu'),
+ nn.MaxPool2D(pool_size=4, strides=stride))
+ if batch_norm:
+ conv_block.add(nn.BatchNorm())
+ return conv_block
+
+# The dense block consists of a dense layer and a dropout layer
+def dense_block(neurons, activation='relu', dropout=0.2):
+ dense_block = nn.HybridSequential()
+ dense_block.add(nn.Dense(neurons, activation=activation))
+ if dropout:
+ dense_block.add(nn.Dropout(dropout))
+ return dense_block
+```
+
+```{.python .input}
+# Create neural network blueprint using the blocks
+class LeafNetwork(nn.HybridBlock):
+ def __init__(self):
+ super(LeafNetwork, self).__init__()
+ self.conv1 = conv_block(32)
+ self.conv2 = conv_block(64)
+ self.conv3 = conv_block(128)
+ self.flatten = nn.Flatten()
+ self.dense1 = dense_block(100)
+ self.dense2 = dense_block(10)
+ self.dense3 = nn.Dense(2)
+
+ def forward(self, batch):
+ batch = self.conv1(batch)
+ batch = self.conv2(batch)
+ batch = self.conv3(batch)
+ batch = self.flatten(batch)
+ batch = self.dense1(batch)
+ batch = self.dense2(batch)
+ batch = self.dense3(batch)
+
+ return batch
+```
+
+You have concluded the architecting part of the network, so now you can actually
+build a model from that architecture for training. As you have seen
+previously on [Step 4](4-components.md) of this
+crash course series, to use the network you need to initialize the parameters and
+hybridize the model.
+
+```{.python .input}
+# Create the model based on the blueprint provided and initialize the parameters
+ctx = mx.cpu()
+
+initializer = mx.initializer.Xavier()
+
+model = LeafNetwork()
+model.initialize(initializer, ctx=ctx)
+model.summary(mx.nd.random.uniform(shape=(4, 3, 128, 128)))
+model.hybridize()
+```
+
+## 3. Choose Optimizer and Loss function
+
+With the network created you can move on to choosing an optimizer and a loss
+function. The network you created uses these components to make an informed decision on how
+to tune the parameters to fit the final objective better. You can use the `gluon.Trainer` class to
+help with optimizing these parameters. The `gluon.Trainer` class needs two things to work
+properly: the parameters needing to be tuned and the optimizer with its
+corresponding hyperparameters. The trainer uses the error reported by the loss
+function to optimize these parameters.
+
+For this particular dataset you will use Stochastic Gradient Descent as the
+optimizer and Cross Entropy as the loss function.
+
+```{.python .input}
+# SGD optimizer
+optimizer = 'sgd'
+
+# Set parameters
+optimizer_params = {'learning_rate': 0.001}
+
+# Define the trainer for the model
+trainer = gluon.Trainer(model.collect_params(), optimizer, optimizer_params)
+
+# Define the loss function
+loss_fn = gluon.loss.SoftmaxCrossEntropyLoss()
+```
+
+Finally, you have to set up the training loop, and you need to create a function to evaluate the performance of the network on the validation dataset.
+
+```{.python .input}
+# Function to return the accuracy for the validation and test set
+def test(val_data):
+ acc = gluon.metric.Accuracy()
+ for batch in val_data:
+ data = batch[0]
+ labels = batch[1]
+ outputs = model(data)
+ acc.update([labels], [outputs])
+
+ _, accuracy = acc.get()
+ return accuracy
+```
+
+## 4. Training Loop
+
+Now that you have everything set up, you can start training your network. This might
+take some time to train depending on the hardware, number of layers, batch size and
+images you use. For this particular case, you will only train for 2 epochs.
+
+```{.python .input}
+# Start the training loop
+epochs = 2
+accuracy = gluon.metric.Accuracy()
+log_interval = 5
+
+for epoch in range(epochs):
+ tic = time.time()
+ btic = time.time()
+ accuracy.reset()
+
+ for idx, batch in enumerate(train_loader):
+ data = batch[0]
+ label = batch[1]
+ with mx.autograd.record():
+ outputs = model(data)
+ loss = loss_fn(outputs, label)
+ mx.autograd.backward(loss)
+ trainer.step(batch_size)
+ accuracy.update([label], [outputs])
+ if log_interval and (idx + 1) % log_interval == 0:
+ _, acc = accuracy.get()
+
+ print(f"""Epoch[{epoch + 1}] Batch[{idx + 1}] Speed: {batch_size / (time.time() - btic)} samples/sec \
+ batch loss = {loss.mean().asscalar()} | accuracy = {acc}""")
+ btic = time.time()
+
+ _, acc = accuracy.get()
+
+ acc_val = test(validation_loader)
+ print(f"[Epoch {epoch + 1}] training: accuracy={acc}")
+ print(f"[Epoch {epoch + 1}] time cost: {time.time() - tic}")
+ print(f"[Epoch {epoch + 1}] validation: validation accuracy={acc_val}")
+```
+
+## 5. Test on the test set
+
+Now that your network is trained and has reached a decent accuracy, you can
+evaluate the performance on the test set. For that, you can use the `test_loader` data
+loader and the test function you created previously.
+
+```{.python .input}
+test(test_loader)
+```
+
+You have a trained network that can confidently discriminate between plants that
+are healthy and the ones that are diseased. You can now start your garden and
+set cameras to automatically detect plants in distress! Or change your classification
+problem to create a model that classify the species of the plants! Either way you
+might be able to impress your botanist friends.
+
+## 6. Save the parameters
+
+If you want to preserve the trained weights of the network you can save the
+parameters in a file. Later, when you want to use the network to make predictions
+you can load the parameters back!
+
+```{.python .input}
+# Save parameters in the
+model.save_parameters('leaf_models.params')
+```
+
+This is the end of this tutorial, to see how you can speed up the training by
+using GPU hardware continue to the [next tutorial](7-use-gpus.md)
\ No newline at end of file
diff --git a/docs/python_docs/python/tutorials/getting-started/crash-course/6-use_gpus.md b/docs/python_docs/python/tutorials/getting-started/crash-course/6-use_gpus.md
deleted file mode 100644
index 6f9cc5d..0000000
--- a/docs/python_docs/python/tutorials/getting-started/crash-course/6-use_gpus.md
+++ /dev/null
@@ -1,151 +0,0 @@
-<!--- Licensed to the Apache Software Foundation (ASF) under one -->
-<!--- or more contributor license agreements. See the NOTICE file -->
-<!--- distributed with this work for additional information -->
-<!--- regarding copyright ownership. The ASF licenses this file -->
-<!--- to you under the Apache License, Version 2.0 (the -->
-<!--- "License"); you may not use this file except in compliance -->
-<!--- with the License. You may obtain a copy of the License at -->
-
-<!--- http://www.apache.org/licenses/LICENSE-2.0 -->
-
-<!--- Unless required by applicable law or agreed to in writing, -->
-<!--- software distributed under the License is distributed on an -->
-<!--- "AS IS" BASIS, WITHOUT WARRANTIES OR CONDITIONS OF ANY -->
-<!--- KIND, either express or implied. See the License for the -->
-<!--- specific language governing permissions and limitations -->
-<!--- under the License. -->
-
-# Step 6: Use GPUs to increase efficiency
-
-In this step, you learn how to use graphics processing units (GPUs) with MXNet. If you use GPUs to train and deploy neural networks, you get significantly more computational power when compared to central processing units (CPUs).
-
-## Prerequisites
-
-Before you start the other steps here, make sure you have at least one Nvidia GPU in your machine and CUDA properly installed. GPUs from AMD and Intel are not supported. Install the GPU-enabled version of MXNet.
-
-Use the following commands to check the number GPUs that are available.
-
-```{.python .input n=2}
-from mxnet import np, npx, gluon, autograd
-from mxnet.gluon import nn
-import time
-npx.set_np()
-
-npx.num_gpus()
-```
-
-## Allocate data to a GPU
-
-MXNet's ndarray is very similar to NumPy. One major difference is MXNet's ndarray has a `context` attribute that specifies which device an array is on. By default, it is on `npx.cpu()`. Change it to the first GPU with the following code. Use `npx.gpu()` or `npx.gpu(0)` to indicate the first GPU.
-
-```{.python .input n=10}
-gpu = npx.gpu() if npx.num_gpus() > 0 else npx.cpu()
-x = np.ones((3,4), ctx=gpu)
-x
-```
-
-If you're using a CPU, MXNet allocates data on main memory and tries to use as many CPU cores as possible. This is true even if there is more than one CPU socket. If there are multiple GPUs, MXNet specifies which GPUs the ndarray is allocated.
-
-Assume there is a least one more GPU. Create another ndarray and assign it there. If you only have one GPU, then you get an error. In the example code here, you copy `x` to the second GPU, `npx.gpu(1)`:
-
-```{.python .input n=11}
-gpu_1 = npx.gpu(1) if npx.num_gpus() > 1 else npx.cpu()
-x.copyto(gpu_1)
-```
-
-MXNet requries that users explicitly move data between devices. But several operators such as `print`, and `asnumpy`, will implicitly move data to main memory.
-
-## Run an operation on a GPU
-
-To perform an operation on a particular GPU, you only need to guarantee that the input of an operation is already on that GPU. The output is allocated on the same GPU as well. Almost all operators in the `np` and `npx` module support running on a GPU.
-
-```{.python .input n=21}
-y = np.random.uniform(size=(3,4), ctx=gpu)
-x + y
-```
-
-Remember that if the inputs are not on the same GPU, you get an error.
-
-## Run a neural network on a GPU
-
-To run a neural network on a GPU, you only need to copy and move the input data and parameters to the GPU. Reuse the previously defined LeNet. The following code example shows this.
-
-```{.python .input n=16}
-net = nn.Sequential()
-net.add(nn.Conv2D(channels=6, kernel_size=5, activation='relu'),
- nn.MaxPool2D(pool_size=2, strides=2),
- nn.Conv2D(channels=16, kernel_size=3, activation='relu'),
- nn.MaxPool2D(pool_size=2, strides=2),
- nn.Dense(120, activation="relu"),
- nn.Dense(84, activation="relu"),
- nn.Dense(10))
-```
-
-Load the saved parameters into GPU 0 directly as shown here, or use `net.collect_params().reset_ctx` to change the device.
-
-```{.python .input n=20}
-net.load_parameters('net.params', ctx=gpu)
-```
-
-Use the following command to create input data on GPU 0. The forward function will then run on GPU 0.
-
-```{.python .input n=22}
-# x = np.random.uniform(size=(1,1,28,28), ctx=gpu)
-# net(x) FIXME
-```
-
-## Training with multiple GPUs
-
-Finally, you can see how to use multiple GPUs to jointly train a neural network through data parallelism. Assume there are *n* GPUs. Split each data batch into *n* parts, and then each GPU will run the forward and backward passes using one part of the data.
-
-First copy the data definitions with the following commands, and the transform function from the [Predict tutorial](5-predict.md).
-
-```{.python .input}
-batch_size = 256
-transformer = gluon.data.vision.transforms.Compose([
- gluon.data.vision.transforms.ToTensor(),
- gluon.data.vision.transforms.Normalize(0.13, 0.31)])
-train_data = gluon.data.DataLoader(
- gluon.data.vision.datasets.FashionMNIST(train=True).transform_first(
- transformer), batch_size, shuffle=True, num_workers=4)
-valid_data = gluon.data.DataLoader(
- gluon.data.vision.datasets.FashionMNIST(train=False).transform_first(
- transformer), batch_size, shuffle=False, num_workers=4)
-```
-
-The training loop is quite similar to that shown earlier. The major differences are highlighted in the following code.
-
-```{.python .input}
-# Diff 1: Use two GPUs for training.
-devices = [gpu, gpu_1]
-# Diff 2: reinitialize the parameters and place them on multiple GPUs
-net.collect_params().initialize(force_reinit=True, ctx=devices)
-# Loss and trainer are the same as before
-softmax_cross_entropy = gluon.loss.SoftmaxCrossEntropyLoss()
-trainer = gluon.Trainer(net.collect_params(), 'sgd', {'learning_rate': 0.1})
-for epoch in range(10):
- train_loss = 0.
- tic = time.time()
- for data, label in train_data:
- # Diff 3: split batch and load into corresponding devices
- data_list = gluon.utils.split_and_load(data, devices)
- label_list = gluon.utils.split_and_load(label, devices)
- # Diff 4: run forward and backward on each devices.
- # MXNet will automatically run them in parallel
- with autograd.record():
- losses = [softmax_cross_entropy(net(X), y)
- for X, y in zip(data_list, label_list)]
- for l in losses:
- l.backward()
- trainer.step(batch_size)
- # Diff 5: sum losses over all devices. Here float will copy data
- # into CPU.
- train_loss += sum([float(l.sum()) for l in losses])
- print("Epoch %d: loss %.3f, in %.1f sec" % (
- epoch, train_loss/len(train_data)/batch_size, time.time()-tic))
-```
-
-## Next steps
-
-Now you have completed training and predicting with a neural network by using NP on MXNet and
-Gluon. You can check the guides to these two front ends: [What is NP on MXNet](../np/index.html) and [gluon](../gluon_from_experiment_to_deployment.md).
diff --git a/docs/python_docs/python/tutorials/getting-started/crash-course/7-use-gpus.md b/docs/python_docs/python/tutorials/getting-started/crash-course/7-use-gpus.md
new file mode 100644
index 0000000..c2701c7
--- /dev/null
+++ b/docs/python_docs/python/tutorials/getting-started/crash-course/7-use-gpus.md
@@ -0,0 +1,253 @@
+<!--- Licensed to the Apache Software Foundation (ASF) under one -->
+<!--- or more contributor license agreements. See the NOTICE file -->
+<!--- distributed with this work for additional information -->
+<!--- regarding copyright ownership. The ASF licenses this file -->
+<!--- to you under the Apache License, Version 2.0 (the -->
+<!--- "License"); you may not use this file except in compliance -->
+<!--- with the License. You may obtain a copy of the License at -->
+
+<!--- http://www.apache.org/licenses/LICENSE-2.0 -->
+
+<!--- Unless required by applicable law or agreed to in writing, -->
+<!--- software distributed under the License is distributed on an -->
+<!--- "AS IS" BASIS, WITHOUT WARRANTIES OR CONDITIONS OF ANY -->
+<!--- KIND, either express or implied. See the License for the -->
+<!--- specific language governing permissions and limitations -->
+<!--- under the License. -->
+
+# Step 7: Load and Run a NN using GPU
+
+In this step, you will learn how to use graphics processing units (GPUs) with MXNet. If you use GPUs to train and deploy neural networks, you may be able to train or perform inference quicker than with central processing units (CPUs).
+
+## Prerequisites
+
+Before you start the steps, make sure you have at least one Nvidia GPU on your machine and make sure that you have CUDA properly installed. GPUs from AMD and Intel are not supported. Additionally, you will need to install the GPU-enabled version of MXNet. You can find information about how to install the GPU version of MXNet for your system [here](https://mxnet.apache.org/versions/1.4.1/install/ubuntu_setup.html).
+
+You can use the following command to view the number GPUs that are available to MXNet.
+
+```{.python .input n=2}
+from mxnet import np, npx, gluon, autograd
+from mxnet.gluon import nn
+import time
+npx.set_np()
+
+npx.num_gpus() #This command provides the number of GPUs MXNet can access
+```
+
+## Allocate data to a GPU
+
+MXNet's ndarray is very similar to NumPy's. One major difference is that MXNet's ndarray has a `context` attribute specifieing which device an array is on. By default, arrays are stored on `npx.cpu()`. To change it to the first GPU, you can use the following code, `npx.gpu()` or `npx.gpu(0)` to indicate the first GPU.
+
+```{.python .input n=10}
+gpu = npx.gpu() if npx.num_gpus() > 0 else npx.cpu()
+x = np.ones((3,4), ctx=gpu)
+x
+```
+
+If you're using a CPU, MXNet allocates data on the main memory and tries to use as many CPU cores as possible. If there are multiple GPUs, MXNet will tell you which GPUs the ndarray is allocated on.
+
+Assuming there is at least two GPUs. You can create another ndarray and assign it to a different GPU. If you only have one GPU, then you will get an error trying to run this code. In the example code here, you will copy `x` to the second GPU, `npx.gpu(1)`:
+
+```{.python .input n=11}
+gpu_1 = npx.gpu(1) if npx.num_gpus() > 1 else npx.cpu()
+x.copyto(gpu_1)
+```
+
+MXNet requries that users explicitly move data between devices. But several operators such as `print`, and `asnumpy`, will implicitly move data to main memory.
+
+## Choosing GPU Ids
+If you have multiple GPUs on your machine, MXNet can access each of them through 0-indexing with `npx`. As you saw before, the first GPU was accessed using `npx.gpu(0)`, and the second using `npx.gpu(1)`. This extends to however many GPUs your machine has. So if your machine has eight GPUs, the last GPU is accessed using `npx.gpu(7)`. This allows you to select which GPUs to use for operations and training. You might find it particularly useful when you want to leverage multiple GPUs whil [...]
+
+## Run an operation on a GPU
+
+To perform an operation on a particular GPU, you only need to guarantee that the input of an operation is already on that GPU. The output is allocated on the same GPU as well. Almost all operators in the `np` and `npx` module support running on a GPU.
+
+```{.python .input n=21}
+y = np.random.uniform(size=(3,4), ctx=gpu)
+x + y
+```
+
+Remember that if the inputs are not on the same GPU, you will get an error.
+
+## Run a neural network on a GPU
+
+To run a neural network on a GPU, you only need to copy and move the input data and parameters to the GPU. To demonstrate this you can reuse the previously defined LeafNetwork in [Training Neural Networks](6-train-nn.md). The following code example shows this.
+
+```{.python .input n=16}
+# The convolutional block has a convolution layer, a max pool layer and a batch normalization layer
+def conv_block(filters, kernel_size=2, stride=2, batch_norm=True):
+ conv_block = nn.HybridSequential()
+ conv_block.add(nn.Conv2D(channels=filters, kernel_size=kernel_size, activation='relu'),
+ nn.MaxPool2D(pool_size=4, strides=stride))
+ if batch_norm:
+ conv_block.add(nn.BatchNorm())
+ return conv_block
+
+# The dense block consists of a dense layer and a dropout layer
+def dense_block(neurons, activation='relu', dropout=0.2):
+ dense_block = nn.HybridSequential()
+ dense_block.add(nn.Dense(neurons, activation=activation))
+ if dropout:
+ dense_block.add(nn.Dropout(dropout))
+ return dense_block
+
+# Create neural network blueprint using the blocks
+class LeafNetwork(nn.HybridBlock):
+ def __init__(self):
+ super(LeafNetwork, self).__init__()
+ self.conv1 = conv_block(32)
+ self.conv2 = conv_block(64)
+ self.conv3 = conv_block(128)
+ self.flatten = nn.Flatten()
+ self.dense1 = dense_block(100)
+ self.dense2 = dense_block(10)
+ self.dense3 = nn.Dense(2)
+
+ def forward(self, batch):
+ batch = self.conv1(batch)
+ batch = self.conv2(batch)
+ batch = self.conv3(batch)
+ batch = self.flatten(batch)
+ batch = self.dense1(batch)
+ batch = self.dense2(batch)
+ batch = self.dense3(batch)
+
+ return batch
+```
+
+Load the saved parameters onto GPU 0 directly as shown below; additionally, you could use `net.collect_params().reset_ctx(gpu)` to change the device.
+
+```{.python .input n=20}
+net.load_parameters('leaf_models.params', ctx=gpu)
+```
+
+Use the following command to create input data on GPU 0. The forward function will then run on GPU 0.
+
+```{.python .input n=22}
+x = np.random.uniform(size=(1, 3, 128, 128), ctx=gpu)
+net(x)
+```
+
+## Training with multiple GPUs
+
+Finally, you will see how you can use multiple GPUs to jointly train a neural network through data parallelism. To elaborate on what data parallelism is, assume there are *n* GPUs, then you can split each data batch into *n* parts, and use a GPU on each of these parts to run the forward and backward passes on the seperate chunks of the data.
+
+First copy the data definitions with the following commands, and the transform functions from the tutorial [Training Neural Networks](6-train-nn.md).
+
+```{.python .input}
+# Import transforms as compose a series of transformations to the images
+from mxnet.gluon.data.vision import transforms
+
+jitter_param = 0.05
+
+# mean and std for normalizing image value in range (0,1)
+mean = [0.485, 0.456, 0.406]
+std = [0.229, 0.224, 0.225]
+
+training_transformer = transforms.Compose([
+ transforms.Resize(size=224, keep_ratio=True),
+ transforms.CenterCrop(128),
+ transforms.RandomFlipLeftRight(),
+ transforms.RandomColorJitter(contrast=jitter_param),
+ transforms.ToTensor(),
+ transforms.Normalize(mean, std)
+])
+
+validation_transformer = transforms.Compose([
+ transforms.Resize(size=224, keep_ratio=True),
+ transforms.CenterCrop(128),
+ transforms.ToTensor(),
+ transforms.Normalize(mean, std)
+])
+
+# Create data loaders
+batch_size = 4
+train_loader = gluon.data.DataLoader(train_dataset.transform_first(training_transformer),batch_size=batch_size, shuffle=True, try_nopython=True)
+validation_loader = gluon.data.DataLoader(val_dataset.transform_first(validation_transformer), batch_size=batch_size, try_nopython=True)
+test_loader = gluon.data.DataLoader(test_dataset.transform_first(validation_transformer), batch_size=batch_size, try_nopython=True)
+```
+
+### Define a helper function
+This is the same test function defined previously in the **Step 6**.
+
+```{.python .input}
+# Function to return the accuracy for the validation and test set
+def test(val_data):
+ acc = gluon.metric.Accuracy()
+ for batch in val_data:
+ data = batch[0]
+ labels = batch[1]
+ outputs = model(data)
+ acc.update([labels], [outputs])
+
+ _, accuracy = acc.get()
+ return accuracy
+```
+
+The training loop is quite similar to that shown earlier. The major differences are highlighted in the following code.
+
+```{.python .input}
+# Diff 1: Use two GPUs for training.
+available_gpus = [npx.gpu(i) for i in range(npx.num_gpus())]
+num_gpus = 2
+devices = available_gpus[:num_gpus]
+print('Using {} GPUs'.format(len(devices)))
+
+# Diff 2: reinitialize the parameters and place them on multiple GPUs
+net.initialize(force_reinit=True, ctx=devices)
+
+# Loss and trainer are the same as before
+loss_fn = gluon.loss.SoftmaxCrossEntropyLoss()
+optimizer = 'sgd'
+optimizer_params = {'learning_rate': 0.001}
+trainer = gluon.Trainer(net.collect_params(), optimizer, optimizer_params)
+
+epochs = 2
+accuracy = gluon.metric.Accuracy()
+log_interval = 5
+
+for epoch in range(10):
+ train_loss = 0.
+ tic = time.time()
+ btic = time.time()
+ accuracy.reset()
+ for idx, batch in enumerate(train_loader):
+ data, label = batch[0], batch[1]
+
+ # Diff 3: split batch and load into corresponding devices
+ data_list = gluon.utils.split_and_load(data, devices)
+ label_list = gluon.utils.split_and_load(label, devices)
+
+ # Diff 4: run forward and backward on each devices.
+ # MXNet will automatically run them in parallel
+ with autograd.record():
+ outputs = [net(X)
+ for X in data_list]
+ losses = [loss_fn(output, label)
+ for output, label in zip(outputs, label_list)]
+ for l in losses:
+ l.backward()
+ trainer.step(batch_size)
+
+ # Diff 5: sum losses over all devices. Here, the float
+ # function will copy data into CPU.
+ train_loss += sum([float(l.sum()) for l in losses])
+ accuracy.update(label_list, outputs)
+ if log_interval and (idx + 1) % log_interval == 0:
+ _, acc = accuracy.get()
+
+ print(f"""Epoch[{epoch + 1}] Batch[{idx + 1}] Speed: {batch_size / (time.time() - btic)} samples/sec \
+ batch loss = {train_loss} | accuracy = {acc}""")
+ btic = time.time()
+
+ _, acc = accuracy.get()
+
+ acc_val = test(validation_loader)
+ print(f"[Epoch {epoch + 1}] training: accuracy={acc}")
+ print(f"[Epoch {epoch + 1}] time cost: {time.time() - tic}")
+ print(f"[Epoch {epoch + 1}] validation: validation accuracy={acc_val}")
+```
+
+## Next steps
+
+Now that you have completed training and predicting with a neural network on GPUs, you can dive deep into other gluon packages: [GluonCV](https://cv.gluon.ai/tutorials/index.html) and [GluonNLP](https://nlp.gluon.ai) if you want to understand those better. Otherwise, this is the conclusion of the crash course.
diff --git a/docs/python_docs/python/tutorials/getting-started/crash-course/index.rst b/docs/python_docs/python/tutorials/getting-started/crash-course/index.rst
index a69dda2..2b1977c 100644
--- a/docs/python_docs/python/tutorials/getting-started/crash-course/index.rst
+++ b/docs/python_docs/python/tutorials/getting-started/crash-course/index.rst
@@ -15,19 +15,23 @@
specific language governing permissions and limitations
under the License.
-Getting started with NP on MXNet
-================================
+Crash Course
+=============
+
+This crash course will give you a quick overview of MXNet. You will review core concepts like NDArray (manipulating multiple dimensional arrays) and Gluon (create and train neural networks on CPU and GPU). The intended audience for this crash course is people already familiar with deep learning theory or other deep learning frameworks. For a deep dive into MXNet and deep learning architectures, please refer to [Dive Into Deep learning](http://d2l.ai/) textbook or [Introduction to Deep Le [...]
+
+The course is structured in different sections that can be studied independently or as a whole. If you have a particular question you can consult only the section related to your question, but if you are new to the framework and have time, you can do the course from start to end.
-This crash course shows how to get started with NP on MXNet. The topics here provide a quick overview of the core concepts for both NP on MXNet, which helps you manipulate multiple dimensional arrays, and Gluon, which helps you create and train neural
-networks. This is a good place to start if you are already familiar with machine learning or other deep learning frameworks.
.. toctree::
:maxdepth: 1
:caption: Contents
- 1-ndarray
- 2-nn
+ 0-introduction
+ 1-nparray
+ 2-create-nn
3-autograd
- 4-train
- 5-predict
- 6-use_gpus
+ 4-components
+ 5-datasets
+ 6-train-nn
+ 7-use-gpus
\ No newline at end of file
diff --git a/docs/python_docs/python/tutorials/getting-started/crash-course/prepare_dataset.py b/docs/python_docs/python/tutorials/getting-started/crash-course/prepare_dataset.py
new file mode 100644
index 0000000..2f7d388
--- /dev/null
+++ b/docs/python_docs/python/tutorials/getting-started/crash-course/prepare_dataset.py
@@ -0,0 +1,58 @@
+# Licensed to the Apache Software Foundation (ASF) under one
+# or more contributor license agreements. See the NOTICE file
+# distributed with this work for additional information
+# regarding copyright ownership. The ASF licenses this file
+# to you under the Apache License, Version 2.0 (the
+# "License"); you may not use this file except in compliance
+# with the License. You may obtain a copy of the License at
+#
+# http://www.apache.org/licenses/LICENSE-2.0
+#
+# Unless required by applicable law or agreed to in writing,
+# software distributed under the License is distributed on an
+# "AS IS" BASIS, WITHOUT WARRANTIES OR CONDITIONS OF ANY
+# KIND, either express or implied. See the License for the
+# specific language governing permissions and limitations
+# under the License.
+
+# coding: utf-8
+
+
+import shutil, random, glob, os, logging
+from pathlib import Path
+
+logging.basicConfig(level=logging.INFO)
+logger = logging.getLogger()
+
+splits = ('train', 'validation', 'test')
+targets = ('healthy', 'diseased')
+
+def split_file_list(file_list, train_split=0.7, val_split=0.2, test_split=0.2):
+ random.shuffle(file_list)
+ files = len(file_list)
+ train_items = round(files * train_split)
+ validation_items = round(files * val_split)
+ train = file_list[:train_items]
+ validation = file_list[train_items: train_items + validation_items]
+ test = file_list[train_items + validation_items:]
+
+ return train, validation, test
+
+def process_dataset(root_directory, splits=splits, classes=targets, train=0.7, val=0.2, test=0.2):
+
+ # Get healthy and diseased file lists
+ for target in targets:
+ file_list = glob.glob(f"{root_directory}/**/{target}/*.JPG")
+ dataset_splits = split_file_list(file_list, train, val, test)
+ logger.info(f"Starting transferring files from the {target} class")
+ for idx, split in enumerate(dataset_splits):
+ new_path = os.path.join("datasets", splits[idx], target)
+ logger.info(f"Moving {splits[idx]} files")
+ Path(new_path).mkdir(parents=True, exist_ok=True)
+ for file_path in split:
+ shutil.move(file_path, new_path)
+ logger.info(f"Finished moving {splits[idx]} files")
+ logger.info(f"Finished moving files")
+ logger.info("Removing old folders")
+ shutil.rmtree(root_directory)
+ logger.info("Finished!")