You are viewing a plain text version of this content. The canonical link for it is here.
Posted to commits@dubbo.apache.org by li...@apache.org on 2020/10/23 02:44:38 UTC
[dubbo-website] 01/12: update home page
This is an automated email from the ASF dual-hosted git repository.
liujun pushed a commit to branch mkdocs
in repository https://gitbox.apache.org/repos/asf/dubbo-website.git
commit 0fa766fe9c316ca33ff9a31f9fb42b9383e4a779
Author: ken.lj <ke...@gmail.com>
AuthorDate: Thu Oct 22 16:08:01 2020 +0800
update home page
---
en-us/blog/2.7.5-release.md | 274 -------
.../Dubbo-supporting-gRPC-HTTP2-and-protobuf.md | 726 ------------------
en-us/blog/apache-dubbo-2019-2020.md | 312 --------
en-us/blog/apachecon-na-2018.md | 8 +-
en-us/blog/build-new-docker-image-in-dockerhub.md | 58 --
en-us/blog/connect-heterogeneous-microservices.md | 290 -------
en-us/blog/download.md | 22 +-
en-us/blog/dubbo-101.md | 301 ++++----
en-us/blog/dubbo-27-features.md | 230 ------
en-us/blog/dubbo-admin.md | 71 --
en-us/blog/dubbo-annotation-driven.md | 809 --------------------
en-us/blog/dubbo-annotation.md | 230 +++---
...bbo-basic-usage-dubbo-consumer-configuration.md | 180 +++--
...bbo-basic-usage-dubbo-provider-configuration.md | 234 +++---
en-us/blog/dubbo-cluster-error-handling.md | 270 -------
en-us/blog/dubbo-compatible.md | 197 -----
en-us/blog/dubbo-consistent-hash-implementation.md | 284 -------
en-us/blog/dubbo-context-information.md | 60 --
en-us/blog/dubbo-contribute-to-opensource.md | 196 -----
en-us/blog/dubbo-copywriting-style.md | 272 -------
en-us/blog/dubbo-echo-test.md | 93 ---
en-us/blog/dubbo-externalized-configuration.md | 690 -----------------
en-us/blog/dubbo-fescar.md | 62 +-
en-us/blog/dubbo-generic-invoke.md | 96 +--
en-us/blog/dubbo-gracefully-shutdown.md | 114 ---
en-us/blog/dubbo-heartbeat-design.md | 386 ----------
en-us/blog/dubbo-integrate-with-hystrix.md | 207 -----
en-us/blog/dubbo-invoke.md | 116 +--
en-us/blog/dubbo-k8s.md | 143 ++--
en-us/blog/dubbo-loadbalance.md | 192 ++---
en-us/blog/dubbo-local-call.md | 139 ----
en-us/blog/dubbo-meet-arthas.md | 365 ---------
en-us/blog/dubbo-meetup-beijing-may-12th-2018.md | 19 +-
en-us/blog/dubbo-meetup-chengdu.md | 25 +-
en-us/blog/dubbo-meetup-hangzhou.md | 24 +-
en-us/blog/dubbo-meetup-shanghai-jun-23rd-2018.md | 22 +-
en-us/blog/dubbo-meetup-shenzhen.md | 20 +-
en-us/blog/dubbo-mesh-in-thinking.md | 135 ----
en-us/blog/dubbo-mesh-service-mesh-exploring.md | 157 ----
en-us/blog/dubbo-network-interfaces.md | 526 -------------
en-us/blog/dubbo-new-async.md | 421 ++++++----
en-us/blog/dubbo-practice-from-guazi.md | 169 -----
en-us/blog/dubbo-protocol.md | 157 ++--
en-us/blog/dubbo-registry-nacos-integration.md | 284 +++----
en-us/blog/dubbo-rest.md | 845 ---------------------
en-us/blog/dubbo-stub-mock.md | 313 --------
en-us/blog/dubbo-zk.md | 157 ++--
en-us/blog/dubbo2-js.md | 171 ++---
en-us/blog/dubboAsync_client.md | 66 +-
en-us/blog/dubboAsync_server.md | 71 +-
en-us/blog/first-dubbo-filter.md | 67 +-
en-us/blog/gsoc-2018.md | 8 +-
en-us/blog/how-to-involve-dubbo-community.md | 112 ---
en-us/blog/introduction-to-dubbo-qos.md | 136 ++--
en-us/blog/introduction-to-dubbo-spi-2.md | 163 ++--
en-us/blog/introduction-to-dubbo-spi.md | 201 ++---
en-us/blog/introduction-to-dubbo-url.md | 176 -----
en-us/blog/meet-dubbo.md | 64 --
en-us/blog/optimization-branch-prediction.md | 140 ----
en-us/blog/pinpoint.md | 110 ++-
en-us/blog/prepare-an-apache-release.md | 488 ++++++------
en-us/blog/qcon-beijing-2018.md | 9 +-
en-us/blog/rpc-introduction.md | 132 ----
en-us/blog/sentinel-introduction-for-dubbo.md | 136 ++--
en-us/blog/service-and-version.md | 195 -----
en-us/blog/service-test.md | 63 +-
.../blog/spring-boot-dubbo-start-stop-analysis.md | 159 ++--
en-us/blog/test-verification.md | 92 ---
en-us/blog/tracing-with-skywalking.md | 104 +--
en-us/blog/use-zipkin-in-dubbo.md | 604 ---------------
material/.icons/material/apache.svg | 35 +
material/overrides/home_en.html | 36 +-
material/overrides/home_zh.html | 42 +-
mkdocs_en.yml | 26 +-
mkdocs_zh.yml | 21 +-
{overrides => overrides-unused}/404.html | 0
{overrides => overrides-unused}/home_en.html | 3 +-
{overrides => overrides-unused}/home_zh.html | 0
.../partials/header.html | 0
.../partials/language-change.html | 0
.../partials/nav-item.html | 0
{overrides => overrides-unused}/partials/nav.html | 0
.../partials/tabs-item.html | 0
83 files changed, 2474 insertions(+), 12057 deletions(-)
diff --git a/en-us/blog/2.7.5-release.md b/en-us/blog/2.7.5-release.md
deleted file mode 100644
index 743904e..0000000
--- a/en-us/blog/2.7.5-release.md
+++ /dev/null
@@ -1,274 +0,0 @@
-# 2.7.5 功能解析
-
-近日,备受瞩目的 Dubbo 2.7.5 版本正式发布,在 2.7.5 版本中,Dubbo 引入了很多新的特性、对现有的很多功能做了增强、同时在性能上也有了非常大的提升,这个版本无论对 Dubbo 社区亦或是开发者来说,都将是一个里程碑式的版本。
-
-* 应用粒度服务注册【beta】
-* HTTP/2 (gRPC) 协议支持
-* Protobuf 支持
-* 性能优化,调用链路性能提升 30%
-* 支持 TLS 安全传输链路
-* 优化的消费端线程模型
-* 新增更适应多集群部署场景的负载均衡策略
-* 全新的应用开发 API (兼容老版本应用)【beta】
-* 其他一些功能增强与 bugfix
-
-首先,从服务发现上,新版本突破以往基于接口粒度的模型,引入了全新的基于应用粒度的服务发现机制 - 服务自省,虽然该机制当前仍处于 beta 阶段,但对于 Dubbo 向整个微服务云原生体系靠齐,都打下了非常好的基础;得益于紧凑的协议设计和代码实现上的优化,Dubbo 一直以来都具有较好的性能表现,在 2.7.5 版本中,性能上有了进一步的提升,根据来自官方维护团队的压测,新版本在调用链路上性能提升达到 30%;云原生微服务时代,多语言需求变得越来越普遍,协议的通用性和穿透性对于构建打通前后端的整套微服务体系也变得非常关键,Dubbo 通过实现 gRPC 协议实现了对 HTTP/2 协议的支持,同时增加了与 Protobuf 的结合。
-
-## 1. 应用粒度服务注册【beta】
-
-从 Java 实现版本的角度来说,Dubbo 是一个面向接口代理的服务开发框架,服务定义、服务发布以及服务引用都是基于接口,服务治理层面包括服务发现、各种规则定义也都是基于接口定义的,基于接口可以说是 Dubbo 的一大优势,比如向开发者屏蔽了远程调用细节、治理粒度更精细等。但基于接口的服务定义同时也存在一些问题,如服务,与业界通用的微服务体系等。
-
-
-
-针对以上问题,2.7.5 版本引入了一种新的服务定义/治理机制:**服务自省**,简单来说这是一种基于应用粒度的服务治理方案。一个实例只向注册中心注册一条记录,彻底解决服务推送性能瓶颈,同时由于这样的模型与主流微服务体系如 SpringCloud、K8S 等天然是对等的,因此为 Dubbo 解决和此类异构体系间的互联互通清除了障碍。有兴趣进一步了解 Dubbo 服务自省机制如何解决异构微服务体系互联互通问题的,可具体参考我们之前的文章解析《Dubbo 如何成为联通异构微服务体系的最佳服务开发框架》。
-
-以下是服务自省机制的基本工作原理图。
-
-
-
-要了解更多关于服务自省工作原理的细节,请参与官方文档及后续文章。
-
-服务自省与当前已有的机制之间可以说是互补的关系,Dubbo 框架会继续保持接口粒度的服务治理的优势,实现接口和应用两个粒度互为补充的局面,兼顾性能、灵活性和通用性,力争使 Dubbo 成为微服务开发的最佳框架。
-
-## 2. HTTP/2 (gRPC) 协议支持
-
-Dubbo RPC 协议是构建在 TCP 之上,这有很多优势也有一些缺点,缺点比如通用性、协议穿透性不强,对多语言实现不够友好等。HTTP/2 由于其标准 HTTP 协议的属性,无疑将具有更好的通用性,现在或将来在各层网络设备上肯定都会得到很好的支持,gRPC 之所以选在 HTTP/2 作为传输层载体很大程度上也是因为这个因素。当前 gRPC 在云原生、Mesh 等体系下的认可度和采用度逐步提升,俨然有成为 RPC 协议传输标准的趋势,Dubbo 和 gRPC 在协议层面是对等竞争的,但是在框架实现上却各有侧重,Dubbo 无疑有更丰富的服务开发和治理体验 。
-
-Dubbo 支持 gRPC 协议带来的直观好处有:
-
-* 正式支持基于 HTTP/2 的远程通信,在协议通用性和穿透性上进一步提升。
-* 支持跨进程的 Stream 流式通信,支持 Reactive 风格的 RPC 编程。
-* 解决了 gRPC 框架难以直接用于微服务开发的问题,将其纳入 Dubbo 的服务治理体系。
-* 为联通组织内部已有的 gRPC 或多语言体系提供支持。
-
-2.7.5 版本开始,gRPC (HTTP/2) 成为 Dubbo 协议体系中的一等公民,对于有需求的开发者完全可以在 Dubbo 开发的微服务体系中启用 gRPC 协议,而不必束缚在 Dubbo 协议自身上,关于这点我们在《Dubbo 如何成为联通异构微服务体系的最佳服务开发框架》一文中也有类似的观点表述。
-
-关于 Dubbo 中如何开发 grpc (HTTP/2) 服务的细节,请参考文章《Dubbo 在跨语言与协议穿透性等方面的探索》,关于如何开启 TLS 和使用 Reactive RPC 编程,请参见示例。另外,Dubbo 的 go 版本目前同样也提供了对 gRPC 协议对等的支持,具体请关注 dubbogo 社区的发版计划。
-
-## 3. Protobuf 支持
-
-支持 Protobuf 更多的是从解决 Dubbo 跨语言易用性的角度考虑的。
-
-跨语言的服务开发涉及到多个方面,从服务定义、RPC 协议到序列化协议都要做到语言中立,同时还针对每种语言有对应的 SDK 实现。虽然得益于社区的贡献,现在 Dubbo 在多语言 SDK 实现上逐步有了起色,已经提供了包括 Java, Go, PHP, C#, Python, NodeJs, C 等版本的客户端或全量实现版本,但在以上提到的跨语言友好性方面,以上三点还是有很多可改进之处。
-
- 协议上 2.7.5 版本支持了 gRPC,而关于服务定义与序列化,Protobuf 则提供了很好的解决方案。
-
-* 服务定义。当前 Dubbo 的服务定义和具体的编程语言绑定,没有提供一种语言中立的服务描述格式,比如 Java 就是定义 Interface 接口,到了其他语言又得重新以另外的格式定义一遍。因此 Dubbo 通过支持 Protobuf 实现了语言中立的服务定义。
-* 序列化。Dubbo 当前支持的序列化包括 Json、Hessian2、Kryo、FST、Java 等,而这其中支持跨语言的只有 Json、Hessian2,通用的 Json 有固有的性能问题,而 Hessian2 无论在效率还是多语言 SDK 方面都有所欠缺。为此,Dubbo 通过支持 Protobuf 序列化来提供更高效、易用的跨语言序列化方案。
-
-日后,不论我们使用什么语言版本来开发 Dubbo 服务,都可以直接使用 IDL 定义如下服务,具体请参见示例
-
-```idl
-syntax = "proto3";
-
-option java_multiple_files = true;
-option java_package = "org.apache.dubbo.demo";
-option java_outer_classname = "DemoServiceProto";
-option objc_class_prefix = "DEMOSRV";
-
-package demoservice;
-
-// The demo service definition.
-service DemoService {
- rpc SayHello (HelloRequest) returns (HelloReply) {}
-}
-
-// The request message containing the user's name.
-message HelloRequest {
- string name = 1;
-}
-
-// The response message containing the greetings
-message HelloReply {
- string message = 1;
-}
-```
-
-## 4. 性能优化
-
-### 4.1 调用链路优化
-
-2.7.5 版本对整个调用链路做了全面的优化,根据压测结果显示,总体 QPS 性能提升将近 30%,同时也减少了调用过程中的内存分配开销。其中一个值得提及的设计点是 2.7.5 引入了 Servicerepository 的概念,在服务注册阶段提前生成 ServiceDescriptor 和 MethodDescriptor,以减少 RPC 调用阶段计算 Service 原信息带来的资源消耗。
-
-### 4.2 消费端线程池模型优化
-
-对 2.7.5 版本之前的 Dubbo 应用,尤其是一些消费端应用,当面临需要消费大量服务且并发数比较大的大流量场景时(典型如网关类场景),经常会出现消费端线程数分配过多的问题,具体问题讨论可参见以下 issue :
-
-https://github.com/apache/dubbo/issues/2013
-
-改进后的消费端线程池模型,通过复用业务端被阻塞的线程,很好的解决了这个问题。
-
-**老的线程池模型**
-
-
-
-我们重点关注 Consumer 部分:
-
-1. 业务线程发出请求,拿到一个 Future 实例。
-2. 业务线程紧接着调用 future.get 阻塞等待业务结果返回。
-3. 当业务数据返回后,交由独立的 Consumer 端线程池进行反序列化等处理,并调用 future.set 将反序列化后的业务结果置回。
-4. 业务线程拿到结果直接返回
-
-
-
-**2.7.5 版本引入的线程池模型**
-
-
-
-1. 业务线程发出请求,拿到一个 Future 实例。
-2. 在调用 future.get() 之前,先调用 ThreadlessExecutor.wait(),wait 会使业务线程在一个阻塞队列上等待,直到队列中被加入元素。
-3. 当业务数据返回后,生成一个 Runnable Task 并放入 ThreadlessExecutor 队列
-4. 业务线程将 Task 取出并在本线程中执行:反序列化业务数据并 set 到 Future。
-5. 业务线程拿到结果直接返回
-
-这样,相比于老的线程池模型,由业务线程自己负责监测并解析返回结果,免去了额外的消费端线程池开销。
-
-关于性能优化,在接下来的版本中将会持续推进,主要从以下两个方面入手:
-
-1. RPC 调用链路。目前能看到的点包括:进一步减少执行链路的内存分配、在保证协议兼容性的前提下提高协议传输效率、提高 Filter、Router 等计算效率。
-2. 服务治理链路。进一步减少地址推送、服务治理规则推送等造成的内存、cpu 资源消耗。
-
-## 5. TLS 安全传输链路
-
-2.7.5 版本在传输链路的安全性上做了很多工作,对于内置的 Dubbo Netty Server 和新引入的 gRPC 协议都提供了基于 TLS 的安全链路传输机制。
-
-TLS 的配置都有统一的入口,如下所示:
-
-**Provider 端**
-
-```java
-SslConfig sslConfig = new SslConfig();
-sslConfig.setServerKeyCertChainPath("path to cert");
-sslConfig.setServerPrivateKeyPath(args[1]);
-// 如果开启双向 cert 认证
-if (mutualTls) {
- sslConfig.setServerTrustCertCollectionPath(args[2]);
-}
-
-ProtocolConfig protocolConfig = new ProtocolConfig("dubbo/grpc");
-protocolConfig.setSslEnabled(true);
-```
-
-
-
-**Consumer 端**
-
-```java
-if (!mutualTls) {}
- sslConfig.setClientTrustCertCollectionPath(args[0]);
-} else {
- sslConfig.setClientTrustCertCollectionPath(args[0]);
- sslConfig.setClientKeyCertChainPath(args[1]);
- sslConfig.setClientPrivateKeyPath(args[2]);
-}
-```
-
-为尽可能保证应用启动的灵活性,TLS Cert 的指定还能通过 -D 参数或环境变量等方式来在启动阶段根据部署环境动态指定,具体请参见 Dubbo 配置读取规则与 TLS 示例
-
-Dubbo 配置读取规则:http://dubbo.apache.org/zh-cn/docs/user/configuration/configuration-load-process.html
-
-TLS 示例:https://github.com/apache/dubbo-samples/tree/master/java/dubbo-samples-ssl
-
-> 如果要使用的是 gRPC 协议,在开启 TLS 时会使用到协议协商机制,因此必须使用支持 ALPN 机制的 Provider,推荐使用的是 netty-tcnative,具体可参见 gRPC Java 社区的总结: https://github.com/grpc/grpc-java/blob/master/SECURITY.md
-
-在服务调用的安全性上,Dubbo 在后续的版本中会持续投入,其中服务发现/调用的鉴权机制预计在接下来的版本中就会和大家见面。
-
-## 6. Bootstrap API【beta】
-
-在上面讲《服务自省》时,我们提到了 Dubbo 面向接口的设计,面向接口编程、面向接口做服务发现和服务治理。在引入应用粒度服务发现的同时,2.7.5 版本对编程入口也做了优化,在兼容老版本 API 的同时,新增了新的面向应用的编程接口 - DubboBootstrap。
-
-以面向 Dubbo API 编程为例,以前我们要这么写:
-
-```java
-ServiceConfig<GreetingsService> service1 = new ServiceConfig<>();
-service1.setApplication(new ApplicationConfig("first-dubbo-provider"));
-service1.setRegistry(new RegistryConfig("zookeeper://" + zookeeperHost + ":2181"));
-service1.export();
-
-ServiceConfig<GreetingsService> service2 = new ServiceConfig<>();
-service2.setApplication(new ApplicationConfig("first-dubbo-provider"));
-service2.setRegistry(new RegistryConfig("zookeeper://" + zookeeperHost + ":2181"));
-service2.export();
-
-......
-```
-
-ApplicationConfig、RegistryConfig、ProtocolConfig 等全局性的配置要在每个服务上去配置;并且从 Dubbo 框架的角度,由于缺少一个统一的 Server 入口,一些实例级别的配置如 ShutdownHook、ApplicationListener、应用级服务治理组件等都缺少一个加载驱动点。
-
-在引入 DubboBootstrap 后,新的编程模型变得更简单,并且也为解决了缺少实例级启动入口的问题
-
-```java
-ProtocolConfig protocolConfig = new ProtocolConfig("grpc");
-protocolConfig.setSslEnabled(true);
-
-SslConfig sslConfig = new SslConfig();
-sslConfig.setXxxCert(...);
-
-DubboBootstrap bootstrap = DubboBootstrap.getInstance();
-bootstrap.application(new ApplicationConfig("ssl-provider"))
- .registry(new RegistryConfig("zookeeper://127.0.0.1:2181"))
- .protocol(protocolConfig)
- .ssl(sslConfig);
-
-ServiceConfig<GreetingsService> service1 = new ServiceConfig<>();
-ServiceConfig<GreetingsService> service2 = new ServiceConfig<>();
-
-bootstrap.service(service1).service(service2);
-bootstrap.start();
-```
-
-## 7. 多注册中心集群负载均衡
-
-对于多注册中心订阅的场景,选址时的多了一层注册中心集群间的负载均衡:
-
-
-
-在 Cluster Invoker 这一级,我们支持的选址策略有(2.7.5+ 版本,具体使用请参见文档):
-
-* 指定优先级
-
- ```xml
- <!-- 来自 preferred=“true” 注册中心的地址将被优先选择,只有该中心无可用地址时才 Fallback 到其他注册中心 -->
- <dubbo:registry address="zookeeper://${zookeeper.address1}" preferred="true" />
- ```
-
-* 同 zone 优先
-
- ```xml
- <!-- 选址时会和流量中的 zone key 做匹配,流量会优先派发到相同 zone 的地址 -->
- <dubbo:registry address="zookeeper://${zookeeper.address1}" zone="beijing" />
- ```
-
-* 权重轮询
-
- ```xml
- <!-- 来自北京和上海集群的地址,将以 10:1 的比例来分配流量 -->
- <dubbo:registry id="beijing" address="zookeeper://${zookeeper.address1}" weight=”100“ />
- <dubbo:registry id="shanghai" address="zookeeper://${zookeeper.address2}" weight=”10“ />
- ```
-
-* 默认,stick to 任意可用
-
->关于多注册中心订阅模型,Dubbo 同时也提供了 Multi-Registry 合并的解决思路,欢迎参与到以下 PR 的讨论中: https://github.com/apache/dubbo/issues/5399
-
-## 8. 其他功能增强
-
-* 新增地址变更事件通知接口,方便业务侧感知地址变化
-
-* 新增外围配置加载入口,方便开发者在启动阶段定制服务启动参数
-
-* config 模块重构
-
-* parameters 扩展配置增强
-* 其他一些 Bugfix
-
-从 Dubbo 框架自身的角度来说,2.7.5 版本也做了很多的重构与优化(比如说 config 模块的重构),这些改动对于使用者来说并无感知的,但是从优化整个 Dubbo 代码内部结构的角度来说,这些改动对后续的功能开发与新机制的引入是一个很好的铺垫。
-
-## 9. 总结与展望
-
-在后续的版本中,Dubbo 会持续快速的优化与迭代,主要从以下几个方面发力:
-
-* 继续探索服务自省成为 Dubbo 主推的服务治理模型。
-* 对于企业用户关心的微服务解决方案场景,会持续推进框架的演进,包括当前正在开发的配置、服务鉴权机制、熔断等功能。后续还会尝试联合社区推动周边配套设施如网关、治理平台 Admin 等的建设,非常期待社区能踊跃参与到此部分的建设中。
-* 性能优化上。主要从两个方面着手,一是调用链路的持续优化,同时继续探索新的更通用的 RPC 协议;另一方面是在服务治理推送机制上的优化,以进一步提高 Dubbo 在大规模服务地址推送场景下的表现。
-* 云原生方向。接下来的版本将重点探索,1. 如何更好的支持 Dubbo 在 Kubernetes 上的部署和服务治理;2. 对于混合部署的场景,如传统 VM 和 K8S 体系混合部署、SDK Dubbo 与 Mesh 混合部署的场景,如何提供更好的支持以实现混部场景的长期共存或迁移。
\ No newline at end of file
diff --git a/en-us/blog/Dubbo-supporting-gRPC-HTTP2-and-protobuf.md b/en-us/blog/Dubbo-supporting-gRPC-HTTP2-and-protobuf.md
deleted file mode 100644
index e57e56d..0000000
--- a/en-us/blog/Dubbo-supporting-gRPC-HTTP2-and-protobuf.md
+++ /dev/null
@@ -1,726 +0,0 @@
-# Dubbo 在跨语言和协议穿透性方向上的探索:支持 HTTP/2 gRPC 和 Protobuf
-
-本文整理自刘军在 Dubbo 成都 meetup 上分享的《Dubbo 在多语言和协议穿透性方向上的探索》。
-
-本文总体上可分为基础产品简介、Dubbo 对 gRPC (HTTP/2) 和 Protobuf 的支持及示例演示三部分,在简介部分介绍了 Dubbo、HTTP/2、gRPC、Protobuf 的基本概念和特点;第二部分介绍了 Dubbo 为何要支持 gRPC (HTTP/2) 和 Protobuf,以及这种支持为 gRPC 和 Dubbo 开发带来的好处与不同;第三部分通过两个实例分别演示了 Dubbo gRPC 和 Dubbo Protobuf 的使用方式。
-
-## 基本介绍
-
-### Dubbo 协议
-
-从协议层面展开,以下是当前 2.7 版本支持的 Dubbo 协议
-
-
-
-众所周知,Dubbo 协议是直接定义在 TCP 传输层协议之上,由于 TCP 高可靠全双工的特点,为 Dubbo 协议的定义提供了最大的灵活性,但同时也正是因为这样的灵活性,RPC 协议普遍都是定制化的私有协议,Dubbo 同样也面临这个问题。在这里我们着重讲一下 Dubbo 在协议通用性方面值得改进的地方,关于协议详细解析请参见[官网博客](http://dubbo.apache.org/zh-cn/blog/dubbo-protocol.html)
-
-* Dubbo 协议体 Body 中有一个可扩展的 attachments 部分,这给 RPC 方法之外额外传递附加属性提供了可能,是一个很好的设计。但是类似的 Header 部分,却缺少类似的可扩展 attachments,这点可参考 HTTP 定义的 Ascii Header 设计,将 Body Attachments 和 Header Attachments 做职责划分。
-* Body 协议体中的一些 RPC 请求定位符如 Service Name、Method Name、Version 等,可以提到 Header 中,和具体的序列化协议解耦,以更好的被网络基础设施识别或用于流量管控。
-* 扩展性不够好,欠缺协议升级方面的设计,如 Header 头中没有预留的状态标识位,或者像 HTTP 有专为协议升级或协商设计的特殊 packet。
-* 在 Java 版本的代码实现上,不够精简和通用。如在链路传输中,存在一些语言绑定的内容;消息体中存在冗余内容,如 Service Name 在 Body 和 Attachments 中都存在。
-
-### HTTP/1
-
-相比于直接构建与 TPC 传输层的私有 RPC 协议,构建于 HTTP 之上的远程调用解决方案会有更好的通用性,如WebServices 或 REST 架构,使用 HTTP + JSON 可以说是一个事实标准的解决方案。
-
-之所有选择构建在 HTTP 之上,我认为有两个最大的优势:
-
-1. HTTP 的语义和可扩展性能很好的满足 RPC 调用需求。
-2. 通用性,HTTP 协议几乎被网络上的所有设备所支持,具有很好的协议穿透性。
-
-
-
-具体来说,HTTP/1 的优势和限制是:
-
-* 典型的 Request – Response 模型,一个链路上一次只能有一个等待的 Request 请求
-
-* HTTP/1 支持 Keep-Alive 链接,避免了链接重复创建开销
-
-* Human Readable Headers,使用更通用、更易于人类阅读的头部传输格式
-
-* 无直接 Server Push 支持,需要使用 Polling Long-Polling 等变通模式
-
-
-
-### HTTP/2
-
-HTTP/2 保留了 HTTP/1 的所有语义,在保持兼容的同时,在通信模型和传输效率上做了很大的改进。
-
-
-
-* 支持单条链路上的 Multiplexing,相比于 Request - Response 独占链路,基于 Frame 实现更高效利用链路
-
-* Request - Stream 语义,原生支持 Server Push 和 Stream 数据传输
-
-* Flow Control,单条 Stream 粒度的和整个链路粒度的流量控制
-
-* 头部压缩 HPACK
-
-* Binary Frame
-
-* 原生 TLS 支持
-
-
-
-### gRPC
-
-上面提到了在 HTTP 及 TCP 协议之上构建 RPC 协议各自的优缺点,相比于 Dubbo 构建于 TPC 传输层之上,Google 选择将 gRPC 直接定义在 HTTP/2 协议之上,关于 gRPC 的 [基本介绍](https://platformlab.stanford.edu/Seminar Talks/gRPC.pdf)和 [设计愿景](https://grpc.io/blog/principles/?spm=ata.13261165.0.0.2be55017XbUhs8) 请参考以上两篇文章,我这里仅摘取 设计愿景 中几个能反映 gRPC 设计目的特性来做简单说明。
-
-* Coverage & Simplicity,协议设计和框架实现要足够通用和简单,能运行在任何设备之上,甚至一些资源首先的如 IoT、Mobile 等设备。
-
-* Interoperability & Reach,要构建在更通用的协议之上,协议本身要能被网络上几乎所有的基础设施所支持。
-
-* General Purpose & Performant,要在场景和性能间做好平衡,首先协议本身要是适用于各种场景的,同时也要尽量有高的性能。
-
-* Payload Agnostic,协议上传输的负载要保持语言和平台中立。
-
-* Streaming,要支持 Request - Response、Request - Stream、Bi-Steam 等通信模型。
-
-* Flow Control,协议自身具备流量感知和限制的能力。
-
-* Metadata Exchange,在 RPC 服务定义之外,提供额外附加数据传输的能力。
-
-总的来说,在这样的设计理念指导下,gRPC 最终被设计为一个跨语言、跨平台的、通用的、高性能的、基于 HTTP/2 的 RPC 协议和框架。
-
-
-
-### Protobuf
-
-[Protocol buffers (Protobuf)](https://developers.google.com/protocol-buffers/docs/overview) 是 Google 推出的一个跨平台、语言中立的结构化数据描述和序列化的产品,它定义了一套结构化数据定义的协议,同时也提供了相应的 [Compiler](https://github.com/protocolbuffers/protobuf/releases/tag/v3.10.0) 工具,用来将语言中立的描述转化为相应语言的具体描述。
-
-它的一些特性包括:
-
-* 跨语言 跨平台,语言中立的数据描述格式,默认提供了生成多种语言的 Compiler 工具。
-
-* 安全性,由于反序列化的范围和输出内容格式都是 Compiler 在编译时预生成的,因此绕过了类似 Java Deserialization Vulnarability 的问题。
-
-* 二进制 高性能
-
-* 强类型
-
-* 字段变更向后兼容
-
-```idl
-message Person {
- required string name = 1;
- required int32 id = 2;
- optional string email = 3;
-
- enum PhoneType {
- MOBILE = 0;
- HOME = 1;
- WORK = 2;
- }
-
- message PhoneNumber {
- required string number = 1;
- optional PhoneType type = 2 [default = HOME];
- }
-
- repeated PhoneNumber phone = 4;
-}
-```
-
-
-
-除了结构化数据描述之外,Protobuf 还支持定义 RPC 服务,它允许我们定义一个 `.proto` 的服务描述文件,进而利用 Protobuf Compiler 工具生成特定语言和 RPC 框架的接口和 stub。后续将要具体讲到的 gRPC + Protobuf、Dubbo-gRPC + Protobuf 以及 Dubbo + Protobuf 都是通过定制 Compiler 类实现的。
-
- ```idl
-service SearchService {
- rpc Search (SearchRequest) returns (SearchResponse);
-}
- ```
-
-
-
-## Dubbo 所做的支持
-
-跨语言的服务开发涉及到多个方面,从服务定义、RPC 协议到序列化协议都要做到语言中立,同时还针对每种语言有对应的 SDK 实现。虽然得益于社区的贡献,现在 Dubbo 在多语言 SDK 实现上逐步有了起色,已经提供了包括 Java, Go, PHP, C#, Python, NodeJs, C 等版本的客户端或全量实现版本,但在以上提到的跨语言友好型方面,以上三点还是有很多可改进之处。
-
-* 协议,上面我们已经分析过 Dubbo 协议既有的缺点,如果能在 HTTP/2 之上构建应用层协议,则无疑能避免这些弊端,同时最大可能的提高协议的穿透性,避免网关等协议转换组件的存在,更有利于链路上的流量管控。考虑到 gRPC 是构建在 HTTP/2 之上,并且已经是云原生领域推荐的通信协议,Dubbo 在第一阶段选择了直接支持 gRPC 协议作为当前的 HTTP/2 解决方案。我们也知道 gRPC 框架自身的弊端在于易用性不足以及服务治理能力欠缺(这也是目前绝大多数厂商不会直接裸用 gRPC 框架的原因),通过将其集成进 Dubbo 框架,用户可以方便的使用 Dubbo 编程模型 + Dubbo 服务治理 + gRPC 协议通信的组合。
-
-* 服务定义,当前 Dubbo 的服务定义和具体的编程语言绑定,没有提供一种语言中立的服务描述格式,比如 Java 就是定义 Interface 接口,到了其他语言又得重新以另外的格式定义一遍。因此 Dubbo 通过支持 Protobuf 实现了语言中立的服务定义。
-* 序列化,Dubbo 当前支持的序列化包括 Json、Hessian2、Kryo、FST、Java 等,而这其中支持跨语言的只有 Json、Hessian2,通用的 Json 有固有的性能问题,而 Hessian2 无论在效率还是多语言 SDK 方面都有所欠缺。为此,Dubbo 通过支持 Protobuf 序列化来提供更高效、易用的跨语言序列化方案。
-
-
-
-## 示例
-
-### 示例 1,使用 Dubbo 开发 gRPC 服务
-
-[gRPC](https://grpc.io/) 是 Google 开源的构建在 HTTP/2 之上的一个 PRC 通信协议。Dubbo 依赖其灵活的协议扩展机制,增加了对 gRPC (HTTP/2) 协议的支持。
-
-目前的支持限定在 Dubbo Java 语言版本,后续 Go 语言或其他语言版本将会以类似方式提供支持。下面,通过一个[简单的示例](https://github.com/apache/dubbo-samples/tree/master/dubbo-samples-grpc)来演示如何在 Dubbo 中使用 gRPC 协议通信。
-
-#### 1. 定义服务 IDL
-
-首先,通过标准的 Protobuf 协议定义服务如下:
-
-```idl
-syntax = "proto3";
-
-option java_multiple_files = true;
-option java_package = "io.grpc.examples.helloworld";
-option java_outer_classname = "HelloWorldProto";
-option objc_class_prefix = "HLW";
-
-package helloworld;
-
-// The greeting service definition.
-service Greeter {
- // Sends a greeting
- rpc SayHello (HelloRequest) returns (HelloReply) {}
-}
-
-// The request message containing the user's name.
-message HelloRequest {
- string name = 1;
-}
-
-// The response message containing the greetings
-message HelloReply {
- string message = 1;
-}
-
-```
-
-在此,我们定义了一个只有一个方法 sayHello 的 Greeter 服务,同时定义了方法的入参和出参,
-
-#### 2. PCompiler 生成 Stub
-
-1. 定义 Maven Protobuf Compiler 插件工具。这里我们扩展了 Protobuf 的 Compiler 工具,以用来生成 Dubbo 特有的 RPC stub,此当前以 Maven 插件的形式发布。
-
-```xml
-<plugin>
- <groupId>org.xolstice.maven.plugins</groupId>
- <artifactId>protobuf-maven-plugin</artifactId>
- <version>0.5.1</version>
- <configuration>
- <protocArtifact>com.google.protobuf:protoc:3.7.1:exe:${os.detected.classifier}
- </protocArtifact>
- <pluginId>dubbo-grpc-java</pluginId>
- <pluginArtifact>org.apache.dubbo:protoc-gen-dubbo-java:1.19.0-SNAPSHOT:exe:${os.detected.classifier}</pluginArtifact>
- <outputDirectory>build/generated/source/proto/main/java</outputDirectory>
- <clearOutputDirectory>false</clearOutputDirectory>
- <pluginParameter>grpc</pluginParameter>
- </configuration>
- <executions>
- <execution>
- <goals>
- <goal>compile</goal>
- <goal>compile-custom</goal>
- </goals>
- </execution>
- </executions>
-</plugin>
-```
-
-其中,
-
-pluginArtifact 指定了 Dubbo 定制版本的 Java Protobuf Compiler 插件,通过这个插件来在编译过程中生成 Dubbo 定制版本的 gRPC stub。
-
-```xml
- <pluginArtifact>org.apache.dubbo:protoc-gen-dubbo-java:1.19.0-SNAPSHOT:exe:${os.detected.classifier}</pluginArtifact>
-```
-
-由于 `protoc-gen-dubbo-java` 支持 gRPC 和 Dubbo 两种协议,可生成的 stub 类型,默认值是 gRPC,关于 dubbo 协议的使用可参见 [使用 Protobuf 开发 Dubbo 服务]()。
-
-```xml
-<pluginParameter>grpc</pluginParameter>
-```
-
-
-
-2. 生成 Java Bean 和 Dubbo-gRPC stub
-
- ```sh
- # 运行以下 maven 命令
- $ mvn clean compile
- ```
-
- 生成的 Stub 和消息类 如下:
- 
-
- 重点关注 GreeterGrpc ,包含了所有 gRPC 标准的 stub 类/方法,同时增加了 Dubbo 特定的接口,之后 Provider 端的服务暴露和 Consumer 端的服务调用都将依赖这个接口。
-
- ```java
- /**
- * Code generated for Dubbo
- */
- public interface IGreeter {
-
- default public io.grpc.examples.helloworld.HelloReply sayHello(io.grpc.examples.helloworld.HelloRequest request) {
- throw new UnsupportedOperationException("No need to override this method, extend XxxImplBase and override all methods it allows.");
- }
-
- default public com.google.common.util.concurrent.ListenableFuture<io.grpc.examples.helloworld.HelloReply> sayHelloAsync(
- io.grpc.examples.helloworld.HelloRequest request) {
- throw new UnsupportedOperationException("No need to override this method, extend XxxImplBase and override all methods it allows.");
- }
-
- public void sayHello(io.grpc.examples.helloworld.HelloRequest request,
- io.grpc.stub.StreamObserver<io.grpc.examples.helloworld.HelloReply> responseObserver);
-
- }
- ```
-
-
-
-#### 3. 业务逻辑开发
-
-继承 `GreeterGrpc.GreeterImplBase` (来自第 2 步),编写业务逻辑,这点和原生 gRPC 是一致的。
-
-```java
-package org.apache.dubbo.samples.basic.impl;
-
-import io.grpc.examples.helloworld.GreeterGrpc;
-import io.grpc.examples.helloworld.HelloReply;
-import io.grpc.examples.helloworld.HelloRequest;
-import io.grpc.stub.StreamObserver;
-
-public class GrpcGreeterImpl extends GreeterGrpc.GreeterImplBase {
- @Override
- public void sayHello(HelloRequest request, StreamObserver<HelloReply> responseObserver) {
- System.out.println("Received request from client.");
- System.out.println("Executing thread is " + Thread.currentThread().getName());
- HelloReply reply = HelloReply.newBuilder()
- .setMessage("Hello " + request.getName()).build();
- responseObserver.onNext(reply);
- responseObserver.onCompleted();
- }
-}
-```
-
-
-
-#### 4. Provider 端暴露 Dubbo 服务
-
-以 Spring XML 为例
-
-```xml
-<dubbo:application name="demo-provider"/>
-
-<!-- 指定服务暴露协议为 gRPC -->
-<dubbo:protocol id="grpc" name="grpc"/>
-
-<dubbo:registry address="zookeeper://${zookeeper.address:127.0.0.1}:2181"/>
-
-<bean id="greeter" class="org.apache.dubbo.samples.basic.impl.GrpcGreeterImpl"/>
-
-<!-- 指定 protoc-gen-dubbo-java 生成的接口 -->
-<dubbo:service interface="io.grpc.examples.helloworld.GreeterGrpc$IGreeter" ref="greeter" protocol="grpc"/>
-```
-
-```java
-public static void main(String[] args) throws Exception {
- ClassPathXmlApplicationContext context =
- new ClassPathXmlApplicationContext("spring/dubbo-demo-provider.xml");
- context.start();
-
- System.out.println("dubbo service started");
- new CountDownLatch(1).await();
-}
-```
-
-
-
-#### 5. 引用 Dubbo 服务
-
-```xml
-<dubbo:application name="demo-consumer"/>
-
-<dubbo:registry address="zookeeper://${zookeeper.address:127.0.0.1}:2181"/>
-
-<!-- 指定 protoc-gen-dubbo-java 生成的接口 -->
-<dubbo:reference id="greeter" interface="io.grpc.examples.helloworld.GreeterGrpc$IGreeter" protocol="grpc"/>
-```
-
-```java
-public static void main(String[] args) throws IOException {
- ClassPathXmlApplicationContext context =
- new ClassPathXmlApplicationContext("spring/dubbo-demo-consumer.xml");
- context.start();
-
- GreeterGrpc.IGreeter greeter = (GreeterGrpc.IGreeter) context.getBean("greeter");
-
- HelloReply reply = greeter.sayHello(HelloRequest.newBuilder().setName("world!").build());
- System.out.println("Result: " + reply.getMessage());
-
- System.in.read();
-}
-```
-
-
-
-#### 示例1附:高级用法
-
-**一、异步调用**
-
-再来看一遍 `protoc-gen-dubbo-java` 生成的接口:
-
-```java
-/**
- * Code generated for Dubbo
- */
-public interface IGreeter {
- default public HelloReply sayHello(HelloRequest request) {
- // ......
- }
- default public ListenableFuture<HelloReply> sayHelloAsync(HelloRequest request) {
- // ......
- }
- public void sayHello(HelloRequest request, StreamObserver<HelloReply> responseObserver);
-}
-```
-
-这里为 sayHello 方法生成了三种类型的重载方法,分别用于同步调用、异步调用和流式调用,如果消费端要进行异步调用,直接调用 sayHelloAsync() 即可:
-
-```java
-public static void main(String[] args) throws IOException {
- // ...
- GreeterGrpc.IGreeter greeter = (GreeterGrpc.IGreeter) context.getBean("greeter");
- ListenableFuture<HelloReply> future =
- greeter.sayHAsyncello(HelloRequest.newBuilder().setName("world!").build());
- // ...
-}
-```
-
-
-
-**二、高级配置**
-
-由于当前实现方式是直接集成了 gRPC-java SDK,因此很多配置还没有和 Dubbo 侧对齐,或者还没有以 Dubbo 的配置形式开放,因此,为了提供最大的灵活性,我们直接把 gRPC-java 的配置接口暴露了出来。
-
-绝大多数场景下,你可能并不会用到以下扩展,因为它们更多的是对 gRPC 协议的拦截或者 HTTP/2 层面的配置。同时使用这些扩展点可能需要对 HTTP/2 或 gRPC 有基本的了解。
-
-**扩展点**
-
-目前支持的扩展点如下:
-
-* org.apache.dubbo.rpc.protocol.grpc.interceptors.ClientInterceptor
-
-* org.apache.dubbo.rpc.protocol.grpc.interceptors.GrpcConfigurator
-
-* org.apache.dubbo.rpc.protocol.grpc.interceptors.ServerInterceptor
-
-* org.apache.dubbo.rpc.protocol.grpc.interceptors.ServerTransportFilter
-
-
-
-GrpcConfigurator 是最通用的扩展点,我们以此为例来说明一下,其基本定义如下:
-
-```java
-public interface GrpcConfigurator {
- // 用来定制 gRPC NettyServerBuilder
- default NettyServerBuilder configureServerBuilder(NettyServerBuilder builder, URL url) {
- return builder;
- }
- // 用来定制 gRPC NettyChannelBuilder
- default NettyChannelBuilder configureChannelBuilder(NettyChannelBuilder builder, URL url) {
- return builder;
- }
- // 用来定制 gRPC CallOptions, 定义某个服务在每次请求间传递数据
- default CallOptions configureCallOptions(CallOptions options, URL url) {
- return options;
- }
-}
-```
-
-以下是一个示例扩展实现:
-
-```java
-public class MyGrpcConfigurator implements GrpcConfigurator {
- private final ExecutorService executor = Executors
- .newFixedThreadPool(200, new NamedThreadFactory("Customized-grpc", true));
-
- @Override
- public NettyServerBuilder configureServerBuilder(NettyServerBuilder builder, URL url) {
- return builder.executor(executor);
- }
-
- @Override
- public NettyChannelBuilder configureChannelBuilder(NettyChannelBuilder builder, URL url)
- {
- return builder.flowControlWindow(10);
- }
-
- @Override
- public CallOptions configureCallOptions(CallOptions options, URL url) {
- return options.withOption(CallOptions.Key.create("key"), "value");
- }
-}
-
-```
-
-配置为 Dubbo SPI,`resources/META-INF/services 增加配置文件
-
-```properties
-default=org.apache.dubbo.samples.basic.comtomize.MyGrpcConfigurator
-```
-
-1. 指定 Provider 端线程池
-
- 默认用的是 Dubbo 的线程池,有 fixed (默认)、cached、direct 等类型。以下演示了切换为业务自定义线程池。
-
- ```java
- private final ExecutorService executor = Executors
- .newFixedThreadPool(200, new NamedThreadFactory("Customized-grpc", true));
-
- public NettyServerBuilder configureServerBuilder(NettyServerBuilder builder, URL url)
- {
- return builder.executor(executor);
- }
-
- ```
-
-
-
-2. 指定 Consumer 端限流值
-
- 设置 Consumer 限流值为 10
-
- ```java
- @Override
- public NettyChannelBuilder configureChannelBuilder(NettyChannelBuilder builder, URL url)
- {
- return builder.flowControlWindow(10);
- }
-
- ```
-
-
-
-3. 传递附加参数
-
- DemoService 服务调用传递 key
-
- ```java
- @Override
- public CallOptions configureCallOptions(CallOptions options, URL url) {
- if (url.getServiceInterface().equals("xxx.DemoService")) {
- return options.withOption(CallOptions.Key.create("key"), "value");
- } else {
- return options;
- }
- }
-
- ```
-
-
-
-**三、TLS 配置**
-
-配置方式和 Dubbo 提供的通用的 [TLS 支持]()一致,具体请参见文档
-
-
-
-### 示例 2, 使用 Protobuf 开发 Dubbo 服务
-
-下面,我们以一个[具体的示例](https://github.com/apache/dubbo-samples/tree/master/dubbo-samples-protobuf)来看一下基于 Protobuf 的 Dubbo 服务开发流程。
-
-
-
-#### 1. 定义服务
-
-通过标准 Protobuf 定义服务
-
-```idl
-syntax = "proto3";
-
-option java_multiple_files = true;
-option java_package = "org.apache.dubbo.demo";
-option java_outer_classname = "DemoServiceProto";
-option objc_class_prefix = "DEMOSRV";
-
-package demoservice;
-
-// The demo service definition.
-service DemoService {
- rpc SayHello (HelloRequest) returns (HelloReply) {}
-}
-
-// The request message containing the user's name.
-message HelloRequest {
- string name = 1;
-}
-
-// The response message containing the greetings
-message HelloReply {
- string message = 1;
-}
-
-```
-
-这里定义了一个 DemoService 服务,服务只包含一个 sayHello 方法,同时定义了方法的入参和出参。
-
-
-
-#### 2. Compiler 编译服务
-
-1. 引入 Protobuf Compiler Maven 插件,同时指定 `protoc-gen-dubbo-java` RPC 扩展
-
-```xml
-<plugin>
- <groupId>org.xolstice.maven.plugins</groupId>
- <artifactId>protobuf-maven-plugin</artifactId>
- <version>0.5.1</version>
- <configuration>
- <protocArtifact>com.google.protobuf:protoc:3.7.1:exe:${os.detected.classifier}
- </protocArtifact>
- <pluginId>dubbo-grpc-java</pluginId>
- <pluginArtifact>org.apache.dubbo:protoc-gen-dubbo-java:1.19.0-SNAPSHOT:exe:${os.detected.classifier}</pluginArtifact>
- <outputDirectory>build/generated/source/proto/main/java</outputDirectory>
- <clearOutputDirectory>false</clearOutputDirectory>
- <pluginParameter>dubbo</pluginParameter>
- </configuration>
- <executions>
- <execution>
- <goals>
- <goal>compile</goal>
- <goal>compile-custom</goal>
- </goals>
- </execution>
- </executions>
-</plugin>
-```
-
-注意,这里与 [Dubbo 对 gRPC](https://github.com/apache/dubbo-samples/tree/master/dubbo-samples-grpc) 支持部分的区别在于:
-` <pluginParameter>dubbo</pluginParameter>`
-
-2. 生成 Dubbo stub
-
- ```shell
- # 运行以下 maven 命令
- $mvn clean compile
- ```
-
- 生成的 Java 类如下:
-
- 
-
- DemoServiceDubbo 为 Dubbo 定制的 stub
-
- ```java
- public final class DemoServiceDubbo {
-
- private static final AtomicBoolean registered = new AtomicBoolean();
-
- private static Class<?> init() {
- Class<?> clazz = null;
- try {
- clazz = Class.forName(DemoServiceDubbo.class.getName());
- if (registered.compareAndSet(false, true)) {
- org.apache.dubbo.common.serialize.protobuf.support.ProtobufUtils.marshaller(
- org.apache.dubbo.demo.HelloRequest.getDefaultInstance());
- org.apache.dubbo.common.serialize.protobuf.support.ProtobufUtils.marshaller(
- org.apache.dubbo.demo.HelloReply.getDefaultInstance());
- }
- } catch (ClassNotFoundException e) {
- // ignore
- }
- return clazz;
- }
-
- private DemoServiceDubbo() {}
-
- public static final String SERVICE_NAME = "demoservice.DemoService";
-
- /**
- * Code generated for Dubbo
- */
- public interface IDemoService {
-
- static Class<?> clazz = init();
- org.apache.dubbo.demo.HelloReply sayHello(org.apache.dubbo.demo.HelloRequest request);
-
- java.util.concurrent.CompletableFuture<org.apache.dubbo.demo.HelloReply> sayHelloAsync(
- org.apache.dubbo.demo.HelloRequest request);
-
- }
-
- }
- ```
-
- 最值得注意的是 `IDemoService` 接口,它会作为 Dubbo 服务定义基础接口。
-
-
-
-#### 3. 开发业务逻辑
-
-从这一步开始,所有开发流程就和直接定义 Java 接口一样了。实现接口定义业务逻辑。
-
-```java
-public class DemoServiceImpl implements DemoServiceDubbo.IDemoService {
- private static final Logger logger = LoggerFactory.getLogger(DemoServiceImpl.class);
-
- @Override
- public HelloReply sayHello(HelloRequest request) {
- logger.info("Hello " + request.getName() + ", request from consumer: " + RpcContext.getContext().getRemoteAddress());
- return HelloReply.newBuilder()
- .setMessage("Hello " + request.getName() + ", response from provider: "
- + RpcContext.getContext().getLocalAddress())
- .build();
- }
-
- @Override
- public CompletableFuture<HelloReply> sayHelloAsync(HelloRequest request) {
- return CompletableFuture.completedFuture(sayHello(request));
- }
-}
-```
-
-
-
-#### 4. 配置 Provider
-
-暴露 Dubbo 服务
-
-```xml
-<dubbo:application name="demo-provider"/>
-
-<dubbo:registry address="zookeeper://127.0.0.1:2181"/>
-
-<dubbo:protocol name="dubbo"/>
-
-<bean id="demoService" class="org.apache.dubbo.demo.provider.DemoServiceImpl"/>
-
-<dubbo:service interface="org.apache.dubbo.demo.DemoServiceDubbo$IDemoService" ref="demoService"/>
-
-```
-
-```java
-public static void main(String[] args) throws Exception {
- ClassPathXmlApplicationContext context =
- new ClassPathXmlApplicationContext("spring/dubbo-provider.xml");
- context.start();
- System.in.read();
-}
-```
-
-
-
-#### 5. 配置 Consumer
-
-引用 Dubbo 服务
-
-```xml
-<dubbo:application name="demo-consumer"/>
-
-<dubbo:registry address="zookeeper://127.0.0.1:2181"/>
-
-<dubbo:reference id="demoService" check="false" interface="org.apache.dubbo.demo.DemoServiceDubbo$IDemoService"/>
-```
-
-```java
-public static void main(String[] args) throws Exception {
- ClassPathXmlApplicationContext context =
- new ClassPathXmlApplicationContext("spring/dubbo-consumer.xml");
- context.start();
- IDemoService demoService = context.getBean("demoService", IDemoService.class);
- HelloRequest request = HelloRequest.newBuilder().setName("Hello").build();
- HelloReply reply = demoService.sayHello(request);
- System.out.println("result: " + reply.getMessage());
- System.in.read();
-}
-```
-
diff --git a/en-us/blog/apache-dubbo-2019-2020.md b/en-us/blog/apache-dubbo-2019-2020.md
deleted file mode 100644
index 279a5e4..0000000
--- a/en-us/blog/apache-dubbo-2019-2020.md
+++ /dev/null
@@ -1,312 +0,0 @@
-# 从 2019 到 2020,Apache Dubbo 年度回顾与总结
-
-非常感谢大家对 Dubbo 社区的关注,通过这篇文章我们将:总结过去一年 Dubbo 社区取得的成绩,包括社区和框架演进两个方面;展望未来 Dubbo 社区和框架的新的规划(roadmap)。社区建设是推动 Dubbo 健康持续发展的一个非常重要的环节,我们需要与社区保持良性的互动、有活跃的贡献者、有积极的富有建设性的讨论,而整个 Dubbo 社区过去一年在这方面都做的不错;在框架演进上,我们主要发布了 2.7.0 - 2.7.5 共 6 个特性版本,功能层面涵盖编程模型、协议、服务治理、性能优化等多个方面;除了已经发布的功能外,我们在 Dubbo 3.0 协议、服务自省和云原生等方向上也做了深入的探索,对这些方向的支持将是 Dubbo 接下来的重要工作方向,希望能通过这篇文章将其中更详细的思考和计划同步给大家。
-
-## 社区回顾
-
-回顾 Dubbo 社区过去一年的发展,其中一个重要的节点就是 2019 年 5 月从 Apache 孵化毕业。成为第二个由 Alibaba 捐献后从 Apache 毕业的项目,我有幸参与到了从重启开源、进入 Apache 孵化到毕业的整个过程,社区在此过程中做了大量的工作,包括邮件列表建设、代码规范检查、文档和代码国际化、issue/pr 处理等,这些一方面是 Apache 社区要求的工作,同时也为推动 Dubbo 的发展起到了正面的作用。
-
-在从 Apache 毕业之后,Dubbo 相关的项目也进行了迁移,都迁移到了 [Apache](https://github.com/apache?utf8=✓&q=dubbo&type=&language=) 组织之下:
-
-Dubbo 社区的项目总共有 24 个之多,维护如此多的项目,并不是单纯靠几个活跃的开发者就能做到的,而是靠整个社区努力的结果。我总结了过去一年提名的所有 Committer/PMC,总过有 27 人获得提名(23 名 committer、4 名 PMC),通过下方的饼状图可以看出,只有不到 20% 的贡献者是来自于 Alibaba,而 80% 以上是来自各个不同组织的开发者或爱好者。这样的 Committer 分布,是加入 Apache 带给 Dubbo 社区的一个最重要的变化之一:Dubbo 项目是属于整个社区的,反映的是不同组织不同开发者的共同诉求,它的发展不是由一个公司控制或决定的,而是由社区共同讨论后决定的。如果你对参与到 Dubbo 社区感兴趣,都可以参与到 Dubbo 发展的讨论、决策和 coding 中来,也非常期待各位能成为下一个 Committer。
-
-
-
-
-过去一年 Dubbo 社区组织了超过 10 场的线下 meetup 活动,覆盖了国内基本所有的开发者聚集的城市,与广大 Dubbo 开发者和使用者保持了密切交流。通过这些线下或线上的直播活动,分享了超过 100 个 topic 的演讲,深度讲解了 Dubbo 社区最新动态、功能模块开发和近期规划等。并且在所有的这些主题演讲中,绝大多数都是通过社区采集的方式,最终由 Dubbo 的深度企业分享的实践主题,其中典型的代表包括携程、工商银行、考拉、信用算力等。
-
-
-
-从 Github 上来看,Dubbo 在过去一年也受到了非常高的关注度,一个重要的里程碑是 Star 数突破 3w,相比重启开源时增长了近 5 倍;贡献者由最初的几十个增长到现在的 282 个,而这其中有六七十个已经被提名为 committer,不论是贡献者数量还是 committer 比例都得到很大的提升;另一个数据是发布的版本,总共发布了 64 个版本,大家如果要了解每个版本的具体信息,也可以从这里点进去查看。
-
-
-
-当前社区维护的大版本主要有 3 个,分别是 2.5.x 2.6.x 和 2.7.x。
-
-其中,2.7.x 是我们的主要开发版本,在过去的一年共发布了 6 个版本(2.7.0 - 2.7.5),每个版本都带来了一些值得关注的特性或功能升级,涵盖从编程模型、服务治理、性能到协议的多个方面的增强。
-
-2.6.x 版本则定位为 bugfix 版本,过去一年共发布了 3 个版本,主要以修复问题和安全漏洞为主,并没有增加什么新 feature,因此这一系列的版本在稳定性上是得到保证的。
-
-2.5.x 版本当前从去年初开始已宣布 EOF,只做安全修复;而到了下半年已经完全停止了维护。还在使用这个版本的用户建议尽快升级到 2.6 或 2.7 版本。
-
-关于 2.6 和 2.7 版本的用户分布情况,目前并没有官方的统计数据,但是根据我们从 issue 分布及一些深度用户的跟踪情况来看,这两个版本的使用分布大概是 40% - 60% 的状态。同时我们还观察到一个趋势,即很大一部分 2.6 的用户都已经开始调研升级到 2.7 版本或在升级的过程中,毕竟一个框架是否能很好的满足业务开发诉求,一个重要的因素是其是否不断的有功能的加入,是否能跟进新的技术趋势,2.6 版本已很难满足这些诉求。
-
-对于很多开发者来说,要升级到 2.7 版本,当前最大的顾虑即是其稳定性。因为 2.7 每个版本都会增加很多新内容且迭代速度较快,要保证每个发布版本的稳定性对社区来说也是一个充满挑战的事情。为了方便用户更好的完成升级评估,我们近期在 github 上列出了单独列了一个 issue 来统计现在包括未来版本的稳定性:[Dubbo 各版本总结与升级建议 #5669](https://github.com/apache/dubbo/issues/5669)
-
-| | **版本** | **重要功能** | **升级建议** |
-| -------- | ------------ | ------------------------------------------------------------ | ------------------------------- |
-| 1 | 2.7.5 | 服务自省 HTTP/2(gRPC) Protobuf TLS 性能优化 https://github.com/apache/dubbo/releases/tag/dubbo-2.7.5 | 不建议大规模生产使用 |
-| 2 | 2.7.4.1 | [bugfixes and enhancements of 2.7.3](https://github.com/apache/dubbo/releases/tag/dubbo-2.7.4.1) | **推荐生产使用** |
-| 3 | 2.7.3 | [bigfixes of and enhancements of 2.7.2](https://github.com/apache/dubbo/releases/tag/dubbo-2.7.3) | **推荐生产使用** |
-| 4 | 2.7.2 | [bigfixes of and enhancements of 2.7.1](https://github.com/apache/dubbo/releases/tag/dubbo-2.7.2) | 不建议大规模生产使用 |
-| 5 | 2.7.1 | [bigfixes of and enhancements of 2.7.0](https://github.com/apache/dubbo/releases/tag/dubbo-2.7.1) | 不建议大规模生产使用 |
-| 6 | 2.7.0 | 异步编程模型 - 消费端/提供端异步 服务治理规则增强 简化的注册模型 配置中心、元数据中心 package 重构 https://github.com/apache/dubbo/releases/tag/dubbo-2.7.0 | beta 版本,2.6.x 重构后首个版本 |
-
-其中 2.7.5 版本预计将在接下来的 1-2 个版本之后逐步达到稳定状态。
-
-对于后续的版本是否通过标识性的后缀如 -beta、RC 等来区分不同阶段的发布版本,社区也有过类似的讨论,后续我们将视未来发展情况而定。
-
-## 重点功能回顾
-
-接下来针对 2.7 版本中发布的新功能,从编程模型、性能优化、服务治理、传输协议、生态发展等几个角度来做具体的讲解。
-
-### 编程模型
-
-Dubbo 中涉及编程模型相关的改动主要是以下几点:
-
-* CompletableFuture 异步方法签名的服务
-* 服务端异步支持 API
-* IDL 跨语言服务定义
-* Reactive-style 方法签名的服务
-
-首先,我们先来看一下异步化相关的增强。
-Dubbo Java 版本的典型服务定义如下:
-
-```java
-public interface HelloService {
- // Synchronous style
- String sayHello(String name);
-}
-```
-
-如果要实现消费端的异步服务调用,则需要单独配置异步标识,并通过 RpcContext API 配合使用
-
-```java
-String result = helloService.sayHello("world"); // result is always null
-Future future = RpcContext.getContext().getFuture();
-```
-
-在 2.7 版本之后,我们可以直接定义如下方法接口,以更直观的实现消费端/提供端异步:
-
-```java
-public interface HelloService {
- // Asynchronous style
- CompletableFuture<String> sayHello(String name);
-}
-
-CompletableFuture<String> future = helloService.sayHello("world");
-```
-
-以上示例都是基于 Java Interface 来描述 Dubbo 服务的,如果要和多语言异构的微服务实现互调,则服务又需要用相应语言的方式重新定义一遍,无法实现跨语言的服务复用;另外跨语言的序列化也是需要注意的一个问题。
-
-为此 2.7.5 版本引入了对 IDL + Protobuf 的支持,以解决跨语言的服务定义问题,具体可参见示例:
-
-[dubbo-samples-protobuf](https://github.com/apache/dubbo-samples/tree/master/java/dubbo-samples-protobuf)
-
-
-
-对 Reactive-style API 的支持则和上面 CompletableFuture 有些类似,允许用户定义 RxJava、Reactor API 的服务接口
-
-
-
-但是需要注意的一定是,由于外围的 Reactive API 需要有底层传输协议的支持才有意义,因此,目前 Reactive API 只能在使用 gRPC 协议时才有意义,具体请参见示例以及下面关于 ”[Dubbo 对 gRPC 的支持](https://github.com/apache/dubbo-samples/tree/master/java/dubbo-samples-grpc/dubbo-samples-rxjava)” 一节的讲解。
-
-### 性能优化
-
-2.7 版本在性能优化方面也做了很多的工作,对 Dubbo 业务系统的吞吐量、调用链路响应速度、服务治理链路性能等都有明显提升。
-
-1. 系统吞吐量
-
- 和提升系统吞吐量相关的增强主要有框架的全异步化改造、消费端线程模型优化、引入 Stream 语义协议等。
-
- 全异步化改造,很关键的一点是 Filter 链路的异步化,之前的 Filter 只有一个同步的 invoke 方法,现在为了支持异步回调,增加了 Listener 回调监听器,从而可以实现对异步调用结果的监听与拦截。
-
-
-
- 关于消费端线程模型的优化,对于网关类应用,需要消费大量服务的应用,都会在系统稳定性和性能表现上有很大提升,其优化后的总体工作原理图所下所示,具体解析可以参见之前发布的文章:[《消费端线程池模型》](http://dubbo.apache.org/zh-cn/docs/user/demos/consumer-threadpool.html)
-
-
- 老线程模型工作原理:
-
- 
-
- 新线程模型工作原理:
-
- 
-
-
-2. RPC 调用链路
-
- 从 2.7.0 到 2.7.5,从我们的测试数据来看,通过一系列的优化调用链路性能提升在 30% 以上。总体来说,优化的目标是减少调用过程中的内存分配和 cpu 计算,主要有两个方面的改造:
-
- * 服务元数据静态化,在启动阶段尽可能多的计算并缓存,以减少调用过程中的计算成本,加快响应速度
- * 减少调用过程中的 URL 操作产生的内存分配
-
-3. 服务治理链路
-
- 服务治理链路上主要有以下几点值得关注:地址推送、服务治理规则推送、服务治理规则计算、路由选址等,尤其是在大规模服务集群的场景下,以上每个点都可能成为性能或稳定性瓶颈。在 2.7 版本中,目前着重对 “地址推送” 相关计算路径做了优化,简单概括起来主要是以下几点:
-
- * 地址推送事件合并,避免短时间重复计算
- * 全量地址推送时,避免 URL 重新分配
- * 在 URL 合并链路上,引入 URL 可变状态,避免 URL 拷贝造成的开销
-
-### 服务治理
-
-服务治理也是 2.7 版本中着重增强的一个模块。总体上可以分为三部分
-
-* 普通路由规则相关的优化和增强
-* 增强对跨区域、跨机房部署的路由支持
-* 元数据中心、配置中心
-
-我们针对这三部分逐步展开讲解。以下是 2.7 版本路由规则的几个例子。
-
-
-
-
-
-其中,最明显的一个变化是路由规则都以 YAML 进行了重写,并且后续所有的路由规则都计划以 YAML 为基本描述语言;相比于之前路由规则直接存储于注册中心,在 2.7 版本中增加了配置中心后,新版本的路由规则默认将存储在于独立的配置中心,配置格式推送机制都得到了优化;另外,2.7 版本中还增加了应用粒度的路由规则,方便从整个应用的角度去设置流量规则。
-
-新增加的跨注册中心的路由机制,可以实现调用流量在多个注册中心间的负载均衡,对于需要做异地容灾、同机房优先或者注册中心迁移的场景比较有用处。
-
-
-
-当前支持的注册中心集群负载均衡策略有:
-
-- 同区域优先
-- 权重轮询
-- 指定优先级
-- 任意可用
-
-元数据中心存储了 Dubbo 服务方法定义的描述,目前主要的用途是服务测试,将来也可用作服务 API 管理、网关参数映射等。
-
-新增的配置中心主要有两个用途:存储/推送配置规则、应用配置托管,接下来着重讲解应用配置托管相关功能,看其对 Dubbo 的开发与运维配置的影响。Dubbo 当前支持 JVM 动态参数、配置中心、API、本地配置文件等几种配置源,他们之间按照优先级从高到低的顺序实现配置覆盖,如下图所示:
-
-
-
-配置中心相当于是共享版本的 `dubbo.properties` 的远程托管,其中,key 值有特定的命名规范:
-
-```properties
-# 应⽤用级别
-dubbo.{config-type}[.{config-id}].{config-item} {config-item-value}
-# 服务级别
-dubbo.service.{interface-name}[.{method-name}].{config-item} {config-item-value}
-dubbo.reference.{interface-name}[.{method-name}].{config-item} {config-item-value}
-# 多配置项
-dubbo.{config-type}s.{config-id}.{config-item} {config-item-value}
-```
-
-### 传输协议
-
-2.7 版本在 RPC 协议层和序列化层进行了扩展,RPC 协议层增加了对 gRPC 协议的支持,序列化层增加了对 Protobuf 协议的支持。
-
-支持 gRPC 其中一个重要原因是其基于 HTTP/2 协议构建,HTTP/2 协议作为 HTTP 标准协议,在各个层次的网络设备及网关代理上都得到了很好的支持,因此具有更好的穿透性和通用性。通过支持 gRPC 协议,对于期望使用 HTTP/2 的 Dubbo 用户提供了一种传输协议选择。
-
-gRPC 在 HTTP/2 上构建了 Stream 的 RPC 语义,支持 Request - Response、Stream - Response、Request - Stream、Bi-Stream 等多种语义,能满足不同的业务调用场景。
-
-
-
-在 Dubbo 的设计中,所有的 RPC 协议都处于一个平等的地位,无论是自有的 Dubbo 协议,还是扩展的其他三方协议如 Thrift、Hessian、gRPC 等,得益于这样的设计,我们可以扩展任何新协议支持。关于如何扩展 RPC 协议及其应用场景,请参见之前发布的[《使用 Dubbo 连接异构微服务体系》](https://mp.weixin.qq.com/s/-fvDeGlCLjz0n60naZJnQg)文章。
-
-Protobuf 序列化协议支持更多的是考虑其在跨语言、安全性和性能方面。
-
-## Roadmap
-
-未来社区将会持续推动 Dubbo 的发展,重点来说有以下几个方向:
-
-* 继续增强服务治理相关能力,以更好的满足微服务开发和运维的需求;
-* 协议层面,着手研发下一代的 RPC 协议,新协议将提供更丰富的如 Stream、Flow Control 等内置语义,同时将具有更好的扩展性、网关的友好性等;
-* 基于应用粒度的服务发现机制,
-* 云原生带来了底层基础设施的变化,同时在此基础上衍生出了如 ServiceMesh 的微服务解决方案,我们需要继续探索 Dubbo ;
-
-### 微服务功能
-
-目前正在开发或规划中的微服务功能有服务鉴权、熔断、路由规则增强等,预计将在接下来的 2.7.6 等版本中陆续发布。后续也将会根据社区中的诉求,陆续增加其他的微服务功能支持。
-
-以当前正在开发的服务鉴权功能为例,这是社区中很多 Dubbo 使用者在实际使用中遇到的需求:虽然 Dubbo 服务主要是在内部运转,但有些服务仍期望只对部分场景或用户开放,比如某些涉及到敏感数据操作的服务,这就需要有鉴权能力的支持。
-
-[Dubbo调用鉴权认证方案 #5461](https://github.com/apache/dubbo/issues/5461) 中有关于 Dubbo 当前正在开发中的鉴权功能的详细讨论,总体来说 Dubbo 提供的鉴权功能约束了 Dubbo 侧鉴权的基本流程,这是一套通用鉴权的方案,在 token 计算、校验等环节都被设计为可扩展的,因此可以方便的对接到各种认证及权限管理系统。
-
-非常感谢社区的活跃开发者,现就职于爱奇艺的 [CodingSinger](https://github.com/CodingSinger),其是鉴权模块的发起者和主要开发贡献者。
-
-
-### 协议 - 3.0
-
-以下是 Dubbo 2.0 协议,我们之前已经在多个场合做过详细的讲解
-
-
-
-Dubbo 2.0 协议在云原生、mesh 等场景下暴露出一些问题,如:
-
-* 协议缺少扩展性
-* RPC 协议层和 payload 耦合在一起
-* 基于 TCP 构建的二进制私有协议
-* 缺少 Stream 语义的支持
-
-所以,针对以上问题,新一代的 Dubbo 协议将突出以下特点:
-
-**Reactive Stream**
-Reactive Stream 引入 RPC,带来更丰富的通信语义和 API 编程模型支持,如 Request-Stream、Bi-Stream 等
-
-**协议升级**
-协议内置应⽤层协议协商机制,包括自建协议升级机制、ALPN 等,以方面将来协议升级或兼容老版本协议的迁移
-
-**HTTP/2**
-微服务云原⽣生场景下,基于 HTTP/2 构建的通信协议具有更更好的通⽤用性和穿透性
-
-**可扩展**
-协议可扩展,区分协议头 Metadata 与 RPC 方法的参数
-
-**多语⾔支持**
-如通过支持 Protobuf 提供了更完善的 跨语言服务定义 与 序列化传输 的支持
-
-**Mesh**
-协议对 Mesh 更友好,方便完成与 Mesh 的协作,包括流量控制机制、应用层配置协商等
-
-**流量控制**
-协议内置流控机制,支持类似 Reqctive Stream 的 Request (n) 流控机制
-
-**协议通用性**
-兼顾通用性与性能,支持协议能在各种设备上运行
-
-### 服务自省 - 应用粒度的服务注册
-
-Dubbo 最大的优势之一在于其易用性,其面向接口(RPC 方法)的编程模型。同时,面向接口的治理也带来了一些问题:
-
-* 地址数量成倍增长,给地址推送带来很大压力
-* 和主流微服务体系模型不匹配,如 SpringCloud、Kubernetes 等
-
-为此,我们计划引入应用粒度的服务注册机制,主要有以下几个重点:
-
-* 注册中心按 “应用 - 实例IP” 组织,不再关心 RPC 接口同步
-* 引入独立的元数据服务完成 RPC 接口同步工作
-
-以下是应用粒度服务注册(服务自省)的基本工作原理,请持续关注后续对这部分的具体解析和开发进展。
-
-
-
-### 云原生
-
-云原生带来了底层基础设施,应用开发、部署和运维等全方位的变化:
-
-**基础设施**
-
-* 基础设施调度机制变化,带来运维(生命周期)、服务治理等方面的变化。
-* 服务发现能力下沉, Kubernetes 抽象了 Native Service Discovery。
-
-**Service Mesh - 云原生微服务解决方案**
-
-* Mesh 为跨语言、sdk 升级等提供了解决方案,Dubbo sdk 要与 Mesh 协作,做到功能、协议、服务治理等多方便的适配。
-* Mesh 尚未大规模铺开,且其更适合对流量管控更关注的应用,传统 SDK 的性能优势仍旧存在,两者混部迁移场景可能会长期存在。
-
-从应用场景上,Dubbo 可能的部署环境包括:
-
-1. 不使用 Kubernetes Native Service,Kubernetes 只作为容器编排调度设施,继续使用 Dubbo 自建的服务注册、发现机制。
-2. 复用 Kubernetes Native Service,Dubbo 不再关心服务注册,Dubbo Client 负责服务发现与流量分配。
-3. Dubbo sdk 往 Mesh 迁移,一方面要做到适应 Mesh 架构,成为 Mesh 体系下的 RPC 编程和通信方案;另一方面要做到 Dubbo 与 Mesh 架构长期共存,互相打通服务发现和治理体系。
-4. Kubernetes 上与云下混合部署的平滑迁移支持,包括服务发现的统一与网络通信方案的打通。
-
-从 Dubbo 功能划分上,将着重从以下方面提供对云原生基础设施的支持:
-
-**生命周期:** Dubbo 与 Kubernetes 调度机制绑定,保持服务生命周期与 Pod 容器等生命周期的自动对齐
-**治理规则:** 服务治理规则在规则体、规则格式方面进行优化,如规则体以 YAML 描述、取消过滤规则对 IP 的直接依赖,定义规则特有的 CRD 资源等。
-**服务发现:** 支持 K8S Native Service 的服务发现,包括 DNS、API-Server,支持 xDS 的服务发现
-**Mesh 架构协作:** 构建下一代的基于 HTTP/2 的通信协议,支持 xDS 的标准化的数据下发
-
-
-
-
-
-
-
-
-
diff --git a/en-us/blog/apachecon-na-2018.md b/en-us/blog/apachecon-na-2018.md
index 942df23..cd61182 100644
--- a/en-us/blog/apachecon-na-2018.md
+++ b/en-us/blog/apachecon-na-2018.md
@@ -1,10 +1,10 @@
---
-title: ApacheCon大会议程公布
+title: The ApacheCon NA schedule has been announced
keywords: Dubbo, ApacheCon NA
-description: 本文将向你介绍在ApacheCon大会议程公布上相关Dubbo议题演讲。
+description: This article will introduce you that the ApacheCon NA schedule has been announced attention.
---
-ApacheCon大会议程公布
+The ApacheCon NA schedule has been announced
---
-罗毅/刘军将在蒙特利尔举办的 ApacheCon 大会上进行题为"Introducing Apache Dubbo(Incubating): What is Dubbo and How it Works"的演讲。请点击[此处](https://apachecon.dukecon.org/acna/2018/#/scheduledEvent/b8db9dc580d85853f)查看大会议程,并在[此处](https://www.eventbrite.com/e/apachecon-north-america-2018-registration-43200327342)中进行注册。
+Ian Luo(PMC) and Jun Liu(PMC) will talk about "Introducing Apache Dubbo(Incubating): What is Dubbo and How it Works" at ApacheCon NA this year in Montréal! Please check out the schedule [here](https://apachecon.dukecon.org/acna/2018/#/scheduledEvent/b8db9dc580d85853f) and register [here](https://www.eventbrite.com/e/apachecon-north-america-2018-registration-43200327342).
diff --git a/en-us/blog/build-new-docker-image-in-dockerhub.md b/en-us/blog/build-new-docker-image-in-dockerhub.md
deleted file mode 100644
index db4968b..0000000
--- a/en-us/blog/build-new-docker-image-in-dockerhub.md
+++ /dev/null
@@ -1,58 +0,0 @@
----
-title: 在DockerHub发布Dubbo Admin镜像
-keywords: Dubbo Admin,Docker,Dockerhub
-description: 本文将介绍如何在Dockerhub上发布Dubbo Admin镜像。
----
-
-# 在DockerHub发布Dubbo Admin镜像
-
-Dubbo Admin是Dubbo的服务治理中心,提供了大量日常运维所需的服务治理、配置管理等功能。
-
-Dubbo Admin同时包含了前端代码和后端代码,如果用户需要自己下载源码并编译打包,需要花费一定时间。
-特别是对于一些希望快速调研和试用Dubbo Admin的用户,这种流程的体验并不是很好。
-
-Docker是一个开源的应用容器引擎,让开发者可以打包应用以及依赖包到一个可移植的镜像中,社区对于提供Dubbo Admin镜像的呼声较高。
-Docker官方维护了一个公共仓库DockerHub,该仓库还有很多国内镜像,访问速度快,将Dubbo Admin镜像发布到DockerHub是一个较好的选择。
-
-
-## DockerHub账号申请
-要在DockerHub上发布镜像,自然需要对应的账号。
-而DockerHub有两种常见账号,一种是面向个人的,一种是面向组织的。Apache在DockerHub上有一个组织账号[^apache-repo]。
-自然我们首选是发布在组织账号下。
-
-DockerHub对于组织账号的管理是基于组的,也就是一个组织账号下有多个组,每个组有不同的成员,而一个组可以管理一个或者多个镜像。
-
-所以要做的第一步就是申请权限,这个需要提一个issue给Apache Infrastructure团队,申请DockerHub的镜像仓库和组权限。
-目前镜像和组已经申请好了,只需要申请组的权限就行了,可以参考之前的申请[^request-ticket]。
-
-申请完权限以后使用Apache账号登陆应该就可以看到对应的镜像和配置选项了。
-
-## 添加新的构建规则
-发布镜像到DockerHub有两种办法,一种是本地构建好镜像以后远程push到DockerHub,另外一种是提供Dockerfile并借助DockerHub提供的构建功能直接在DockerHub构建。
-后者明显操作性和便捷性要好很多,目前Dubbo Admin的镜像也是这样构建发布的。
-
-当Dubbo Admin有新版本发布以后,需要在项目的docker目录新增一个Dockerfile文件,可以参考目前0.1.0版本的Dockerfile[^docker-file],其中的配置根据具体的版本可能有细微差别,但是大致上是一致的。
-
-在添加了Dockerfile之后,进入DockerHub对应的管理界面新增Build Rules
-
-
-
-
-根据实际情况填写即可。这里需要注意两点:
-+ latest 版本要和最新的版本配置一致
-+ 不要勾选Autobuild
-
-勾选Autobuild会导致每次git提交都会触发自动构建,但是由于Dubbo Admin不提供snapshot的Docker镜像,所以只有发布新版本的时候才需要构建发布。
-
-修改以后点Save,然后手动触发构建即可。
-
-## 总结
-总的来说DockerHub上发布镜像的步骤并不复杂,如果已经申请过权限的话,操作起来是很流畅的。
-
-另外DockerHub的构建是需要排队的,有时候会遇到长时间没有开始构建的情况,需要耐心等待。
-
-
-
-[^apache-repo]: https://hub.docker.com/r/apache
-[^request-ticket]: https://issues.apache.org/jira/browse/INFRA-18167
-[^docker-file]: https://github.com/apache/dubbo-admin/blob/develop/docker/0.1.0/Dockerfile
diff --git a/en-us/blog/connect-heterogeneous-microservices.md b/en-us/blog/connect-heterogeneous-microservices.md
deleted file mode 100644
index 7ae6c6f..0000000
--- a/en-us/blog/connect-heterogeneous-microservices.md
+++ /dev/null
@@ -1,290 +0,0 @@
-# 使用 Dubbo 连接异构微服务体系
-
-从编程开发的角度来说,Dubbo 首先是一款 RPC 服务框架,它最大的优势在于提供了面向接口代理的服务编程模型,对开发者屏蔽了底层的远程通信细节。同时 Dubbo 也是一款服务治理框架,它为分布式部署的微服务提供了服务发现、流量调度等服务治理解决方案。
-
-在这篇文章中,我们将以以上基础能力为背景,尝试突破 Dubbo 体系自身,探索如何利用 Dubbo 对多协议、多服务发现模型的支持,来实现异构微服务体系间的互联互通。在实际业务场景中,这可以用来解决异构技术体系共存场景下的通信问题,帮助公司实现在异构技术体系间作平滑迁移,解决大规模跨区域、多集群部署场景的地址发现及流量调度等问题。
-
-## 面向接口代理的透明服务开发框架
-
-我们还是从 **Dubbo 是一个微服务开发框架** 这个大家熟知的概念开始。就像 Spring 是开发 Java 应用的基础框架一样,我们经常会选用 Dubbo 作为开发微服务业的基础框架。 Dubbo 框架的最大优势我认为就在其面向接口的编程模型,使得开发远程服务调用就像开发本地服务一样(以 Java 语言为例):
-
-1. 服务定义
-
-```java
-public interface GreetingsService {
- String sayHi(String name);
-}
-```
-
-2. 消费方调用服务
-
-```java
-// 和调用本地服务一样,完全透明。
-@Reference
-private GreetingService greetingService;
-
-public void doSayHello(String name) {
- greetingService.sayHi("Hello world!");
-}
-```
-
-下图是 Dubbo 的基本工作原理图,服务提供者与服务消费者之间通过注册中心协调地址,通过约定的协议实现数据交换。
-
-
-
-
-## 同构/异构微服务体系面临的问题
-
-关于 Dubbo 协议本身及其服务治理相关功能细节并不是本文的重点,我们今天将从一个更高的层次,来看看公司内部构建微服务体系所面的挑战,以及 Dubbo 能为架构选型和迁移等提供哪些解决思路。
-
-一个公司内部的微服务可能都是基于某一个相同的服务框架开发的,比如说 Dubbo,对于这样的架构,我们称之为是**同构的微服务体系**;而有些公司的微服务可能是使用多个不同的服务框架所建设,我们称之为**异构的微服务体系**,多个不同技术栈微服务体系的共存在大型组织内还是非常普遍的,造成这种局面可能有很多原因。比如,可能是遗留系统带来的,也可能是公司正在做技术栈迁移,或者就是不同业务部门为了满足各自特殊需求而做的独立选型(这也意味着异构微服务体系的长期共存)。
-
-**1. 异构微服务体系共存**
-
-我们很容易想到的一个挑战是:**不同的体系间通常是使用不同的 RPC 通信协议、部署独立的注册中心集群,面对这种多协议、多注册中心集群的场景,要如何实现相互之间透明的地址发现和透明的 RPC 调用?**如果我们什么都不做,那么每个微服务体系就只能感知到自己体系内的服务状态,流量也在各自的体系内封闭。而要做到从体系 A 平滑的迁移到体系 B,或者想长期的保持公司内部多个体系的共存,则解决不同体系间的互联互通,实现流量的透明调度将是非常重要的环节。
-
-
-
-
-**2. Dubbo 体系内部**
-
-**多协议、多注册中心集群的问题在同构的微服务体系中也可能存在,尤其是当一个组织内部的微服务规模增长到一定量级的时候。**
-
-* 我们可能要在不同的服务之间采用不同的通信协议,因为不同的服务面临不同的业务场景,而这也进一步导致了数据传输特点的不同,我们需要分别采用更适合各类业务特点的协议。比如典型的场景:我们可能对于普通的业务服务采用 Dubbo 协议,对于和 FrontEnd 交互的服务需要 HTTP 协议,而对于需要流式数据传输的业务则采用 gRPC 协议等等。
-
-* Dubbo 体系内部另一个常出现的问题是,在大规模分布式部署的场景下,微服务系统会做跨区域、跨注册中心的部署,这个时候就会出现多集群间地址同步和流量调度的问题。
-
-总结起来,**不论是同构体系还是异构体系,都面临对多协议通信、多注册中心集群地址发现的问题。**Dubbo 目前是支持多协议、多注册中心的,可以说就是为解决我们上面分析的 Dubbo 同构体系内的场景而设计的,因此下面我们从同构体系的多协议、多注册中心场景讲起,先了解 Dubbo 多协议、多注册中心的基本支持情况以及它们是如何工作的。而在后面的一章再进一步探索怎么扩展这个能力来支持异构微服务体系的互联互通。
-
-## Dubbo 体系内的多协议、多注册中心机制
-
-我们将通过两个场景示例,来分别具体的讲一下 Dubbo 的多协议、多注册中心机制的使用方式和工作原理。
-
-### 多协议
-
-
-
-以上是使用 Dubbo 开发的一套微服务,服务间通信使用到了不同的协议,根据我们的调研发现,公司内部启用多协议其实是非常普遍需求,具体场景在此我们暂不做解释。
-
-应用 B 作为服务提供者,发布了 5 个服务,其中:
-
-* `DemoService1` `DemoService2` 通过 `dubbo` 协议发布
-* `DemoService3` `DemoService4` 通过 `gRPC` 协议发布
-* `DemoService0` 通过 `dubbo` 、`gRPC` 双协议发布
-
-应用 A 作为消费者,使用 dubbo 协议消费 `DemoService1` `DemoService2`,使用 gRPC 协议消费 `DemoService0`。
-
-应用 B 作为消费者,使用 gRPC 协议消费 `DemoService2` `DemoService4`,使用 dubbo 协议消费 `DemoService0`。
-
-以下是具体的代码配置:
-
-1. 提供端应用 B
-
-```xml
-<dubbo:service interface="org.apache.dubbo.samples.basic.api.DemoService1" protocol="dubbo"/>
-<dubbo:service interface="org.apache.dubbo.samples.basic.api.DemoService2" protocol="dubbo"/>
-
-<dubbo:service interface="org.apache.dubbo.samples.basic.api.DemoService3" protocol="grpc"/>
-<dubbo:service interface="org.apache.dubbo.samples.basic.api.DemoService4" protocol="grpc"/>
-
-<dubbo:service interface="org.apache.dubbo.samples.basic.api.DemoService0" protocol="dubbo, grpc"/>
-```
-
-2. 消费端应用 A
-
-```xml
-<dubbo:reference protocol="dubbo" interface="org.apache.dubbo.samples.basic.api.DemoService1"/>
-<dubbo:reference protocol="dubbo" interface="org.apache.dubbo.samples.basic.api.DemoService2"/>
-
-<dubbo:reference protocol="grpc" interface="org.apache.dubbo.samples.basic.api.DemoService0"/>
-```
-
-3. 消费端应用 C
-
-```xml
-<dubbo:reference protocol="grpc" interface="org.apache.dubbo.samples.basic.api.DemoService3"/> <dubbo:reference protocol="grpc" interface="org.apache.dubbo.samples.basic.api.DemoService4"/>
-
-<dubbo:reference protocol="dubbo" interface="org.apache.dubbo.samples.basic.api.DemoService0"/>
-
-```
-
-#### Dubbo 多协议支持现状
-
-Dubbo 目前所支持的协议包括 Dubbo、REST、Thrift、gRPC、JsonRPC、Hessian 等,基本涵盖了业界大多数主流的 RPC 通信协议。需要注意的是,这些协议的支持都是以直接集成官方 Release 实现的形式来做的,我认为这是一个很好的选择,既保证了协议解析自身的稳定性,又能使 Dubbo 社区更专注的将更多的精力放在 Dubbo 外围服务治理能力的改善上。试想如果 Dubbo 社区自己为每个协议提供实现,那是要花费多少精力和时间才能使每种协议达到稳定的生产可用。
-
-除了以上官方提供支持的协议之外,得益于 Dubbo 灵活的扩展机制,想要为 Dubbo 扩展协议非常容易,开发者可以随时为 Dubbo 增加更多的协议支持,包括自有协议扩展。
-
-关于对 gRPC (HTTP/2) 协议的支持,请参阅上期文档
-
-
-
-#### 多协议能解决的问题
-
-* 将 RPC 框架无缝地接入 Dubbo 的服务治理体系。
-
- 通过协议扩展将 RPC 协议纳入 Dubbo 服务开发体系,从而复用 Dubbo 的编程模型和服务发现、流量管控等能力。比如 gRPC,其服务治理体系相对比较弱、编程 API 不够友好,很难直接用于微服务开发。
-
-* 满足不同场景的调用需求。
-
- 各个服务可能是为了满足不同业务需求而开发,同时外围消费端应用的技术栈也可能多种多样,通过启用不同的通信协议,可以最优化不同场景的通信需求。
-
-* 实现协议间的迁移。
-
- 通过支持多种协议,借助注册中心的协调,可以快速满足公司内协议迁移的需求。如从自有协议升级到 Dubbo 协议,Dubbo 协议自身升级,从 Dubbo 协议迁移到 gRPC,从 REST 迁移到 Dubbo 协议等。
-
-
-### 多注册中心
-
-当服务集群规模小的时候,一个中心化的集群部署方案能很好的解决我们的业务问题。但是随着应用规模的增长、用户流量的增加,我们就不得不考虑要为业务系统引入跨区域、多集群的部署方案,而此时同业务系统密切相关的注册中心集群也面临部署方案的选型:
-
-1. 继续维持全局共享的注册中心集群。这种架构方案的优点是简单;缺点是注册中心集群由于要保存全量的地址数据,存储和推送压力会变得很大,另外对于一些注册中心产品(如 Zookeeper 等)在跨集群网络部署的场景下稳定性和性能可能都会面临挑战。
-
-2. 每个业务集群部署独立的注册中心集群。多注册中心集群的优点是能解决跨集群网络可用性的问题,同时也能够减轻注册中心的存储和推送压力;缺点则是要求服务框架(如 Dubbo 等)能有同时发布/监听多个注册中心集群的能力。
-
-下面我们具体看一下,Dubbo 为多注册中心集群场景提供的解决方案。
-
-
-
-上图有两个业务集群,分别部署在北京和上海,每个业务集群有自己独立的注册中心集群,要解决两个业务集群间服务的透明 RPC 通信问题。
-
-1. 服务提供端,双注册中心发布
-
-```xml
-<dubbo:registry id="beijingRegistry" address="zookeeper://${zookeeper.address1}" default="false"/> <dubbo:registry id="shanghaiRegistry" address="zookeeper://${zookeeper.address2}" />
-
-<dubbo:service interface="org.apache.dubbo.samples.multi.registry.api.HelloService" ref="helloService" registry="shanghaiRegistry,beijingRegistry"/>
-<dubbo:service interface="org.apache.dubbo.samples.multi.registry.api.DemoService" ref="demoService" registry="shanghaiRegistry,beijingRegistry"/>
-
-```
-
-2. 服务消费端,根据消费需求做单/双注册中心订阅
-
-```xml
-<dubbo:registry id="beijingRegistry" address="zookeeper://${zookeeper.address1}" default="false" preferred="true" weight="100"/> <dubbo:registry id="shanghaiRegistry" address="zookeeper://${zookeeper.address2}" default="true" weight="20"/>
-
-<dubbo:reference interface="org.apache.dubbo.samples.multi.registry.api.DemoService"/>
-
-<dubbo:reference interface="org.apache.dubbo.samples.multi.registry.api.DemoService" registry="beijingRegistry, shanghaiRegistry"/>
-
-<dubbo:reference interface="org.apache.dubbo.samples.multi.registry.api.HelloService" registry="beijingRegistry"/>
-
-<dubbo:reference interface="org.apache.dubbo.samples.multi.registry.api.HelloService" registry="shanghaiRegistry,shanghaiRegistry"/>
-
-```
-
-#### Dubbo 对异构注册中心集群的支持
-
-虽然我们会做多注册中心集群部署,但通常情况下,我们部署的都是相同的注册中心产品,如都是 Zookeeper、Nacos;而对于注册中心迁移的场景,则要求 Dubbo 能提供对更多的注册中心产品的支持,或者最重要的要有很好的扩展能力。Dubbo 官方目前支持的注册中心实现有:
-
-
-
-这里需要特别提到的一点是,当前 Dubbo 的服务注册/发现模型是以接口为粒度的,而从 2.7.5 版本开始,Dubbo 新引入了应用粒度的服务注册/发现模型。这一方面有助于优化 Dubbo 当前服务发现机制、提升服务容量,另一方面对于联通以 SpringCloud 为代表的微服务体系也非常重要(关于这点在下一章中有进一步提及)。更多关于《应用粒度服务发现:服务自省》的介绍,我们将在接下来的文章或文档中予以补充,请持续关注。
-
-#### 多订阅带来的流量调度问题
-
-在引入多注册中心集群后,Dubbo 在流量选址时的多了一层注册中心集群间的负载均衡:
-
-
-
-在 Cluster Invoker 这一级,我们支持的选址策略有(2.7.5+ 版本,具体使用请参见文档):
-
-* 指定优先级
-
- ```xml
- <!-- 来自 preferred=“true” 注册中心的地址将被优先选择,只有该中心无可用地址时才 Fallback 到其他注册中心 -->
- <dubbo:registry address="zookeeper://${zookeeper.address1}" preferred="true" />
- ```
-
-* 同 zone 优先
-
- ```xml
- <!-- 选址时会和流量中的 zone key 做匹配,流量会优先派发到相同 zone 的地址 -->
- <dubbo:registry address="zookeeper://${zookeeper.address1}" zone="beijing" />
- ```
-
-* 权重轮询
-
- ```xml
- <!-- 来自北京和上海集群的地址,将以 10:1 的比例来分配流量 -->
- <dubbo:registry id="beijing" address="zookeeper://${zookeeper.address1}" weight=”100“ />
- <dubbo:registry id="shanghai" address="zookeeper://${zookeeper.address2}" weight=”10“ />
- ```
-
-* 默认,stick to 任意可用
-
-#### 多注册中心适用的场景
-
-* 同区域流量优先调度
-
- 出于容灾或者服务伸缩性需求,服务/应用往往需要部署在多个独立的机房/区域,在每个区域有独立注册中心集群的场景下,实现同区域的流量优先调度就能很好的解决延迟和可用性问题。
-
-* 注册中心迁移
-
- 公司的服务一直以来可能是存储在某一个注册中心,如 Zookeeper,但到了某个时间节点,因为各种各样的原因,当我们要迁移到另外的注册中心时,多注册中心模型能够保证平滑的迁移。
-
-* 异构系统互通
-
- 不同微服务体系开发的服务,都封闭在各自的服务发现体系中,而通过统一的多注册中心模型,可以实现不同体系的服务互相发现。
-
-## 借助 Dubbo 联通异构的微服务体系
-
-上文我们提到了在组织内存在异构微服务体系的各种合理可能性,现在我们来具体看一下异构微服务体系的实际场景,以及使用 Dubbo 实现互联互通的解决方法。首先我们先通过一张图来看一下,联通异构的微服务体系具体是一个什么样的场景。
-
-
-
-如上图所示,我们有部分微服务可以是基于 SpringCloud、gRPC、K8S 或者是自建体系构建的,他们各自之间默认是相互隔离无法联通的。当我们再构建一套基于 Dubbo 的微服务体系时,则利用 Dubbo 的多协议、多服务发现模型,我们就可以做到和各个微服务体系间的两两之间的互联互通。进一步的,如图中橙色箭头所示,依赖 Dubbo 体系作为桥接层,我们还可以实现两个异构微服务体系间的打通。
-
-对于以下几个示例场景,由于在地址发现层面目前没有统一的标准,我们暂且假设地址发现层面不同的体系建是没有障碍的,我们将重点关注迁移的基本流程以及通信协议环节。(关于地址发现部分,我们将在后续《服务自省:基于应用粒度的服务发现》之后再深入探讨)
-
-### Dubbo 体系内的协议迁移(共存)
-
-绝大多数开发者对 Dubbo 有这么一个固有认知:使用 Dubbo 开发微服务系统,则就要用 Dubbo 协议来作为服务间的通信协议才是最优方案。实际上,我们完全没有必要只束缚在 Dubbo RPC 协议上。Dubbo 作为微服务开发框架和 Dubbo 作为 RPC 协议这是两个概念,其实是完全可以分开来看待的,比如我们用 Dubbo 框架开发的业务系统,选用 rest、gRPC 通信是完全没有问题的(参加 Dubbo 支持的协议列表),具体用什么协议根据业务特点和技术规划才是最适合的。
-
-
-
-当前在云原生、Mesh 的大背景下, HTTP1/2、gRPC 协议开始受到越来越多的关注,一方面原因自然是因为它们在标准化方面做的更好,得到的更多的网络设备和基础设施的支持,具备更好的通用性和穿透性。对于很多有云原生迁移意愿的企业来说,往此类协议迁移无疑将对之后的架构升级有更多的帮助。
-
-下图演示了在 Dubbo 体系内,从 Dubbo 协议向 gRPC 协议迁移的一个中间状态。
-
-
-
-* 最左边的代表尚未迁移的老应用,这类应用在迁移过程中仍然要消费和提供 Dubbo 协议的服务。
-* 中间的代表处于迁移中的应用,他们中间可能有些是服务提供者,既要为左边的老系统提供提供 Dubbo 协议服务;又要为右边的新系统提供 gRPC 服务;因此他们都是双协议暴露服务。
-* 最右边则代表是新开发的或者已经迁移完成的应用,这个体系内已能完全用 gRPC 协议通信。
-* 最终度过中间态后,我们期望所有的应用都达到最左边应用的状态,实现完全的 gRPC 协议通信。
-
-### Spring Cloud 体系迁移到 Dubbo 体系(共存)
-
-如前文所述,由于 SpringCloud 和 Dubbo 间服务发现模型的问题,要两个体系间的地址互通需要 Dubbo 侧作相应的适配,关于这部分内容将在接下来的 2.7.5 版本《服务自省》部分发布,在此我们暂且认为已经打通。
-
-
-
-Dubbo 体系内的部分应用作为透明的联通两个体系的关键节点,部分服务提供者应用要双协议发布、部分消费者应用要做到选定协议消费。由于老的 Spring Cloud 体系不允许做任何改动,因此联通两套体系的关键是 REST 协议,对 Dubbo 侧的应用来说:
-
-* 部分应用可能要以 REST 协议消费 SpringCloud 的服务;
-* 部分应用可能要暴露 REST 协议共 SpringCloud 消费;
-* Dubbo 自有体系内则通过自己选定的协议通信,这里就比较灵活了,可以是 Dubbo、REST、gRPC 等其中的任一种。而如果选定 REST 协议则对于与 SpringCloud 体系的联通就变得更加自然了,因为两端的协议都是统一的。
-
-对于消费 Spring Cloud 服务的应用,要配置服务 :
-
-```xml
-<dubbo:reference interface ="xxx.SpringService" protocol="rest"/>
-```
-
-对于提供服务给 Spring Cloud 侧消费的应用,则指定服务暴露为 rest 协议,或者双协议暴露(因如果这个服务还要被新体系内的应用调用到):
-
-```xml
-<dubbo:service interface="xxx.NewService" protocol="rest,dubbo"/>
-```
-
-作为 Dubbo 的维护者,虽然我们这里有明显的偏向性,讲的是从如何从 SpringCloud 体系迁移到 Dubbo 体系。但是反过来考虑,如果你已经或者即将选型 Dubbo 来开发微服务,则未来从 Dubbo 迁移到 SpringCloud 也是同样的思路,Dubbo 的多协议、多注册模型为双向迁移都提供了同样的灵活性。
-
-### 自建体系迁移到 Dubbo 体系(共存)
-
-这个场景和上一节中讲到的的 SpringCloud 迁移有些类似,最大的区别在于 rest 协议是 Dubbo 官方默认提供支持的,而对于已有的微服务体系内的私有通信协议,则需要先要自己去扩展 Dubbo Protocol 来提供协议层面的支持,关于 Protocol 如何扩展请参见以下官方文档:
-
-http://dubbo.apache.org/zh-cn/docs/dev/impls/protocol.html
-
-## 总结与展望
-
-要实现异构微服务体系间的共存或迁移,关键点在打通异构体系间的`协议`与`服务发现`,得益于 Dubbo 自身对多协议、多注册模型的支持,我们可以很容易的使 Dubbo 成为桥接异构微服务体系的中间层。熟悉 Dubbo 多协议实现细节的同学,可能会担心在服务数量较多的场景下,多协议注册会导致地址数量翻倍从而影响地址推送性能;另外在文中《借助 Dubbo 联通异构的微服务体系》一节,关于如何实现异构体系间的透明服务发现部分我们没有做详细的说明。关于涉及服务发现的这部分,我们将在接下来的文章中做具体阐述,看看 Dubbo 2.7.5 版本引入新的服务发现机制是如何解决这个问题的,请持续关注后续文章及 Dubbo 官方文档。
\ No newline at end of file
diff --git a/en-us/blog/download.md b/en-us/blog/download.md
index 6a86b8a..37f6813 100644
--- a/en-us/blog/download.md
+++ b/en-us/blog/download.md
@@ -1,21 +1,20 @@
---
-title: 下载中心
+title: Downloads
keywords: Dubbo, Downloads, Version
-description: 本文将向你介绍如何点击了解各版本详情和升级注意事项。
+description: This article will introduce you how to understand the details of each version and upgrade matters needing attention.
---
-# 下载中心
-## 验证
+# Downloads
-可以按照这里的[步骤](https://www.apache.org/info/verification), 利用[KEYS](https://www.apache.org/dist/incubator/dubbo/KEYS)文件来验证下载。
+## Verification
-## Apache Dubbo
+you can follow these [procedures](https://www.apache.org/info/verification) and the [KEYS](https://www.apache.org/dist/dubbo/KEYS) file to verify the download files
-请点击了解各[版本详情和升级注意事项](http://dubbo.apache.org/zh-cn/docs/user/versions/index.html)
+## Apache Dubbo
-> GitHub: https://github.com/apache/incubator-dubbo \
-> 发布说明:https://github.com/apache/incubator-dubbo/releases
+> GitHub: https://github.com/apache/dubbo \
+> Release Notes: https://github.com/apache/dubbo/releases
### 2.7.7 (2020-05-18)
@@ -62,6 +61,7 @@ description: 本文将向你介绍如何点击了解各版本详情和升级注
[asc](https://archive.apache.org/dist/incubator/dubbo/2.7.1/apache-dubbo-incubating-2.7.1-bin.zip.asc) |
[sha512](https://archive.apache.org/dist/incubator/dubbo/2.7.1/apache-dubbo-incubating-2.7.1-bin.zip.sha512)
+
### 2.7.0 (2019-01-29)
* [source](https://archive.apache.org/dist/incubator/dubbo/2.7.0/apache-dubbo-incubating-2.7.0-source-release.zip) |
@@ -128,7 +128,7 @@ description: 本文将向你介绍如何点击了解各版本详情和升级注
## Dubbo Spring Boot Starter
> GitHub: https://github.com/apache/incubator-dubbo-spring-boot-project \
-> 发布说明:https://github.com/apache/incubator-dubbo-spring-boot-project/releases
+> Release Notes: https://github.com/apache/incubator-dubbo-spring-boot-project/releases
### 2.7.1 (2019-04-09)
@@ -169,7 +169,7 @@ description: 本文将向你介绍如何点击了解各版本详情和升级注
## Dubbo Admin
> GitHub: https://github.com/apache/incubator-dubbo-admin \
-> 发布说明:https://github.com/apache/incubator-dubbo-admin/releases
+> Release Notes: https://github.com/apache/incubator-dubbo-admin/releases
### 0.1 (2019-02-15)
diff --git a/en-us/blog/dubbo-101.md b/en-us/blog/dubbo-101.md
index c2ae952..41f42b7 100644
--- a/en-us/blog/dubbo-101.md
+++ b/en-us/blog/dubbo-101.md
@@ -1,46 +1,46 @@
---
-title: 第一个 Dubbo 应用
+title: Your First Dubbo Demo
keywords: Dubbo, RPC, RMI
-description: 现代的分布式服务框架的基本概念与 RMI 是类似的,同样是使用 Java 的 Interface 作为服务契约,通过注册中心来完成服务的注册和发现,远程通讯的细节也是通过代理类来屏蔽。
+description: Modern distributed frameworks is similiar to RMI in terms of concepts. They both use Java interface as a service contract, archive service registry and discovery by a registry center, and Shield communication details by a proxy.
---
-# 第一个 Dubbo 应用
+# Your First Dubbo Demo
-## Java RMI 简介
+## Java RMI Introduction
-Java RMI (Remote Method Invocation)- 远程方法调用,能够让客户端像使用本地调用一样调用服务端 Java 虚拟机中的对象方法。RMI 是面向对象语言领域对 RPC (Remote Procedure Call)的完善,用户无需依靠 IDL 的帮助来完成分布式调用,而是通过依赖接口这种更简单自然的方式。
+Java RMI (Remote Method Invocation) is a mechanism that allows users to access or invocate an object and a method running on another JVM (Java Virtual Machine). RMI is an implementation of RPC (Remote Procedure Call) in java with support of OOP (Object Oriented Paradigms). Instead of bothering IDL (Interface Define Language), users can build distributed applications by depending on interfaces in an easy and natural way.
-### Java RMI 工作原理
+### Java RMI Work Flow
-一个典型的 RMI 调用如下图所示:
+Here is how a typical RMI invocation usually works:
-1. 服务端向 RMI 注册服务绑定自己的地址,
-2. 客户端通过 RMI 注册服务获取目标地址,
-3. 客户端调用本地的 Stub 对象上的方法,和调用本地对象上的方法一致,
-4. 本地存根对象将调用信息打包,通过网络发送到服务端,
-5. 服务端的 Skeleton 对象收到网络请求之后,将调用信息解包,
-6. 然后找到真正的服务对象发起调用,并将返回结果打包通过网络发送回客户端。
+1. The server registers service from RMI and binds its address.
+2. The client registers service from RMI and obtains target address.
+3. The client invokes methods of local stub object in the same way of invoking other local objects.
+4. Local stub object zips invoking information and send it to the server via network.
+5. The Skeleton object of server receives the network request and unzips the information.
+6. Server runs invocation on the target object based on the information and return the zipped results back to client via network.
-
-(来源:https://www.cs.rutgers.edu/~pxk/417/notes/images/rpc-rmi_flow.png)
+
-### Java RMI 基本概念
+(source:https://www.cs.rutgers.edu/~pxk/417/notes/images/rpc-rmi_flow.png)
-Java RMI 是 Java 领域创建分布式应用的技术基石。后续的 EJB 技术,以及现代的分布式服务框架,其中的基本理念依旧是 Java RMI 的延续。在 RMI 调用中,有以下几个核心的概念:
+### Java RMI Concepts
-1. 通过**接口**进行远程调用
+Java RMI is a technique foundation stone of creating distributed applications in Java. The following EJB techniques and current framework of distributed services still inherit the fundamental concepts of Java RMI. In RMI invocation, there are some core concepts:
-2. 通过客户端的 **Stub 对象**和服务端的 **Skeleton 对象**的帮助将远程调用伪装成本地调用
-3. 通过 **RMI 注册服务**完成服务的注册和发现
+1. The invocation is run remotely on **interface**.
+2. Disguise remote invocation as local invocation by **Stub object** on client and **Skeleton object** on server.
+3. The service is registered and looked up by **RMI** registry service.
-对于第一点,客户端需要依赖接口,而服务端需要提供该接口的实现。
+For 1. users are dependent on interfaces which should be implemented by server.
-对于第二点,在 J2SE 1.5 版本之前需要通过 rmic 预先编译好客户端的 Stub 对象和服务端的 Skeleton 对象。在之后的版本中,不再需要事先生成 Stub 和 Skeleton 对象。
+For 2. In J2SE 1.5 version and before, it needs to pre-compile Stub on client and Skeleton on server by rmic. In the later versions there is no need to do so.
-下面通过示例代码简单的展示 RMI 中的服务注册和发现
+The following is a code example of registry and look-up in RMI.
-#### 服务端的服务注册
+#### Server service registry
```java
Hello obj = new HelloImpl(); // #1
@@ -49,14 +49,18 @@ Registry registry = LocateRegistry.createRegistry(1099); // #3
registry.rebind("Hello", stub); // #4
```
-说明:
+Notes:
+
+1. Initiate service object instance.
+
+2. Create stub object to communicate with the server by UnicastRemoteObject.exportObject.
-1. 初始化服务对象实例,
-2. 通过 *UnicastRemoteObject.exportObject* 生成可以与服务端通讯的 Stub 对象,
-3. 创建一个本地的 RMI 注册服务,监听端口为 1099。该注册服务运行在服务端,也可以单独启动一个注册服务的进程,
-4. 将 Stub 对象绑定到注册服务上,这样,客户端可以通过 *Hello* 这个名字查找到该远程对象。
+3. Create a local RMI registry service on port 1099 which is run on server. It can also be registered as an independent process.
-#### 客户端的服务发现
+4. Bind stub object into registry so the client can find the remote object by looking up Hello.
+
+
+#### Client service look-up
```java
Registry registry = LocateRegistry.getRegistry(); // #1
@@ -64,46 +68,46 @@ Hello stub = (Hello) registry.lookup("Hello"); // #2
String response = stub.sayHello(); // #3
```
-说明:
+Notes:
-1. 获取注册服务实例,在本例中,由于没有传入任何参数,假定要获取的注册服务实例部署在本机,并监听在 1099 端口上,
-2. 从注册服务中查找服务名为 *Hello* 的远程对象,
-3. 通过获取的 Stub 对象发起一次 RMI 调用并获得结果。
+1. Acquire registry service instances. In this case, there is no input parameters so it is assumed that the acquired instance is located on port 1099.
+2. Look up the remote object named Hello in registry service.
+3. Run a RMI invocation via acquired Stub object and get results.
+Understand the work flow and basic concepts of RMI is helpful to handle current framework of distributed service. It is recommended to refer to RMI official documents for further information[^1].
-理解 RMI 的工作原理和基本概念,对掌握现代分布式服务框架很有帮助,建议进一步的阅读 RMI 官方教材 [^1]。
+## Basic Concepts of Dubbo
-## Dubbo 基本概念
+The basic concepts of current framework of distributed service is similar to the one of RMI. They both use Java interface as service contract, register and look up by registry center and use agency to block the details of remote communications. Specifically, Dubbo has following four types of roles to play when running:
-现代的分布式服务框架的基本概念与 RMI 是类似的,同样是使用 Java 的 Interface 作为服务契约,通过注册中心来完成服务的注册和发现,远程通讯的细节也是通过代理类来屏蔽。具体来说,Dubbo 在工作时有以下四个角色参与:
+1. Serve the provider – Expose service at assigned ports at initialization and register the service address and ports at registry center
+2. Serve the consumer – Subscribe the service of interests at registry center at initialization to acquire the list of addresses provided by the service provider.
+3. Registry center – Register and look up service. Store the address provided by the service provider and send it to the consumer.
+4. Monitor center – Collect and monitor running status of providers and consumers, e.g., times of invocations, delay of invocations, etc.
+5. Running container – Initialize and load the provider and manage the lifecycle of running.
-1. 服务提供者 - 启动时在指定端口上暴露服务,并将服务地址和端口注册到注册中心上
-2. 服务消费者 - 启动时向注册中心订阅自己感兴趣的服务,以便获得服务提供方的地址列表
-3. 注册中心 - 负责服务的注册和发现,负责保存服务提供方上报的地址信息,并向服务消费方推送
-4. 监控中心 - 负责收集服务提供方和消费方的运行状态,比如服务调用次数、延迟等,用于监控
-5. 运行容器 - 负责服务提供方的初始化、加载以及运行的生命周期管理

-**部署阶段**
+**Deploy stage**
-* 服务提供者在指定端口暴露服务,并向注册中心注册服务信息。
-* 服务消费者向注册中心发起服务地址列表的订阅。
+* Service providers expose service at assigned ports and register information of service at registry center.
+* Service consumers subscribe the list of service addresses from registry center.
-**运行阶段**
+**Run stage**
-* 注册中心向服务消费者推送地址列表信息。
-* 服务消费者收到地址列表后,从其中选取一个向目标服务发起调用。
-* 调用过程服务消费者和服务提供者的运行状态上报给监控中心。
+* Registry center sends the address to service consumers.
+* After receiving the list of addresses, service consumers select one of them and invoke an object service.
+* During invocation, the running status of service providers and consumers is reported to the monitor center.
-## 基于 API 的 Dubbo 应用
+## Dubbo Applications Based on API
-Dubbo 的应用一般都是通过 Spring 来组装的。为了快速获得一个可以工作的 Dubbo 应用,这里的示例摒弃了复杂的配置,而改用面向 Dubbo API 的方式来构建服务提供者和消费者,另外,注册中心和监控中心在本示例中也不需要安装和配置。
+The applications of Dubbo are usually assembled by Spring. To obtain an available Dubbo application quickly, the example shown here abandons complex configurations but to create service provider and consumer in Dubbo API oriented way. Additionally, the registry center and monitor center do not need installation or configuration in this example.
-在生产环境,Dubbo 的服务需要一个分布式的服务注册中心与之配合,比如,ZooKeeper。为了方便开发,Dubbo 提供了直连[^2]以及组播[^3]两种方式,从而避免额外搭建注册中心的工作。在本例中,将使用组播的方式来完成服务的注册和发现。
+In production environment, the service of Dubbo usually requires cooperation with a distributed service registry center, such as ZooKeeper. For convenience, Dubbo offers two ways to avoid extra work of building registry center, namely direct connection [2] and assembled podcast [3] respectively. In this example, the latter way is applied to register and look up service.
-### 定义服务契约
+### Define Service Contract
```java
public interface GreetingsService {
@@ -111,11 +115,11 @@ public interface GreetingsService {
}
```
-**说明**:
+**Notes**:
-1. 定义了一个简单的服务契约 *GreetingsService*,其中只有一个方法 *sayHi* 可供调用,入参是 *String* 类型,返回值也是 *String* 类型。
+1. The codes define a simple service contract where there is only one function, sayHi, can be invoked. The type of input parameter and return value are both String.
-### 提供契约的实现
+### Provide Contract Implementation
```java
public class GreetingsServiceImpl implements GreetingsService { // #1
@@ -126,12 +130,12 @@ public class GreetingsServiceImpl implements GreetingsService { // #1
}
```
-**说明**:
+**Notes**:
-1. 服务提供者需要实现服务契约 *GreetingsService* 接口。
-2. 该实现简单的返回一个欢迎信息,如果入参是 *dubbo*,则返回 *hi, dubbo*。
+1. Service providers need to implement the interface of service contract, GreetingsService.
+2. This function simply returns a welcome message. For example, if the input value is *dubbo*,it will return *hi, dubbo*.
-### 实现 Dubbo 服务提供方
+### Implement Dubbo Service Provider
```java
public class Application {
@@ -147,17 +151,18 @@ public class Application {
}
```
-**说明**:
+**Notes**:
-1. 创建一个 *ServiceConfig* 的实例,泛型参数信息是服务接口类型,即 *GreetingsService*。
-2. 生成一个 *ApplicationConfig* 的实例,并将其装配进 *ServiceConfig*。
-3. 生成一个 *RegistryConfig* 实例,并将其装配进 *ServiceConfig*,这里使用的是组播方式,参数是 `multicast://224.5.6.7:1234`。合法的组播地址范围为:*224.0.0.0 - 239.255.255.255*
-4. 将服务契约 *GreetingsService* 装配进 *ServiceConfig*。
-5. 将服务提供者提供的实现 *GreetingsServiceImpl* 的实例装配进 *ServiceConfig*。
-6. *ServiceConfig* 已经具备足够的信息,开始对外暴露服务,默认监听端口是 *20880*。
-7. 为了防止服务端退出,按任意键或者 *ctrl-c* 退出。
+1. Create an instance *ServiceConfig* with service interface type as generics parameters, which is *GreetingsService* in this example.
+2. Generate an instance of *ApplicationConfig* and assemble it into *ServiceConfig*.
+3. Generate an instance *RegistryConfig* and assemble it into *ServiceConfig*. Since the assembled way is applied here, the parameter should be `multicast://224.5.6.7:1234`. The valid range of assembled address is *224.0.0.0 - 239.255.255.255*
+4. Assemble the service contract *GreetingsService* into *ServiceConfig*.
+5. Assemble the instance with implementation of *GreetingsServicelmpl* provided by service providers into *ServiceConfig*.
+6. *ServiceConfig* starts to expose itself at default ports *20880*. after being equipped with enough information.
+7. Press any key or *ctrl-C* to exit to avoid server halt.
-### 实现 Dubbo 服务调用方
+
+### Implement Dubbo Service Consumer
```java
public class Application {
@@ -173,26 +178,27 @@ public class Application {
}
```
-**说明**:
+**Notes**:
+
+1. Create an instance of *ReferenceConfig* with service interface type as generics parameters, which is *GreetingsService* in this example.
+2. Create an instance of *ApplicationConfig*, and assemble it into *ReferenceConfig*.
+3. Generate an instance *RegistryConfig*, and assemble it into *ReferenceConfig*. Note that the address information here should be the same as the one of the service provider.
+4. Assemble the service contract *GreetingsService* into *ReferenceConfig*.
+5. Obtain the agency of *GreetingsService* from *ReferenceConfig*.
+6. Invoke a remote call through *GreetingsSerive*’s agency and pass in `dubbo` as input parameter.
+7. Return and print results `hi, dubbo`.
-1. 创建一个 *ReferenceConfig* 的实例,同样,泛型参数信息是服务接口类型,即 *GreetingService*。
-2. 生成一个 *ApplicationConfig* 的实例,并将其装配进 *ReferenceConfig*。
-3. 生成一个 *RegistryConfig* 实例,并将其装配进 *ReferenceConfig*,注意这里的组播地址信息需要与服务提供方的相同。
-4. 将服务契约 *GreetingsService* 装配进 *ReferenceConfig*。
-5. 从 *ReferenceConfig* 中获取到 *GreetingService* 的代理。
-6. 通过 *GreetingService* 的代理发起远程调用,传入的参数为 *dubbo*。
-7. 打印返回结果 *hi, dubbo*。
-### 运行
+### Run
-完整的示例在 https://github.com/apache/dubbo-samples/tree/master/java/dubbo-samples-api 上提供。在完整的示例中,由于配置了 *exec-maven-plugin*,可以很方便的在命令行下通过 maven 的方式执行。当然,您也可以在 IDE 里直接执行,但是需要注意的是,由于使用了组播的方式来发现服务,运行时需要指定 *-Djava.net.preferIPv4Stack=true*。
+The complete example can be found at https://github.com/apache/dubbo-samples/tree/master/java/dubbo-samples-api. In the complete version, it is convenient to execute by maven in command line with the configuration of *exec-maven-plugin*. Of course, it can also be executed directly in IDE. However, there is one noteworthy thing that because of using assembled way to look up service, it needs to assign *-Djava.net.preferIPv4Stack=true* when running.
-#### 构建示例
+#### Build Example
-通过以下的命令来同步示例代码并完成构建:
+Synchronize the example codes and build by the following command lines:
-1. 同步代码:git clone https://github.com/apache/dubbo-samples.git
-2. 构建:mvn clean package
+1. Synchronize the example codes: git clone https://github.com/apache/dubbo-samples.git
+2. Build:mvn clean package
```bash
$ git clone https://github.com/apache/dubbo-samples.git
@@ -215,72 +221,72 @@ INFO] Scanning for projects...
[INFO] ------------------------------------------------------------------------
```
-当看到 *BUILD SUCCESS* 的时候表明构建完成,下面就可以开始进入运行阶段了。
+The build is finished when it shows `BUILD SUCCESS`. Then comes the running stage.
-#### 运行服务端
+#### Run the server
-通过运行以下的 maven 命令来启动服务提供者:
+Run the service provider by the following maven command lines:
```bash
-$ mvn -Djava.net.preferIPv4Stack=true -Dexec.mainClass=com.alibaba.dubbo.samples.server.Application exec:java
+$ mvn -Djava.net.preferIPv4Stack=true -Dexec.mainClass=org.apache.dubbo.samples.provider.Application exec:java
[INFO] Scanning for projects...
[INFO]
[INFO] ------------------------------------------------------------------------
[INFO] Building dubbo-samples-api 1.0-SNAPSHOT
[INFO] ------------------------------------------------------------------------
-[INFO]
+[INFO]
[INFO] --- exec-maven-plugin:1.6.0:java (default-cli) @ dubbo-samples-api ---
-log4j:WARN No appenders could be found for logger (com.alibaba.dubbo.common.logger.LoggerFactory).
+log4j:WARN No appenders could be found for logger (org.apache.dubbo.common.logger.LoggerFactory).
log4j:WARN Please initialize the log4j system properly.
log4j:WARN See http://logging.apache.org/log4j/1.2/faq.html#noconfig for more info.
first-dubbo-provider is running.
```
-当 *first-dubbo-provider is running.* 出现时,代表服务提供者已经启动就绪,等待客户端的调用。
+When *first-dubbo-provider is running* appears, the service provider is ready to be called by the client.
-#### 运行客户端
+#### Run the client
-通过运行以下的 maven 命令来调用服务:
+Run the service consumer by the following maven command lines:
```bash
-$ mvn -Djava.net.preferIPv4Stack=true -Dexec.mainClass=com.alibaba.dubbo.samples.client.Application exec:java
+$ mvn -Djava.net.preferIPv4Stack=true -Dexec.mainClass=org.apache.dubbo.samples.consumer.Application exec:java
[INFO] Scanning for projects...
[INFO]
[INFO] ------------------------------------------------------------------------
[INFO] Building dubbo-samples-api 1.0-SNAPSHOT
[INFO] ------------------------------------------------------------------------
-[INFO]
+[INFO]
[INFO] --- exec-maven-plugin:1.6.0:java (default-cli) @ dubbo-samples-api ---
-log4j:WARN No appenders could be found for logger (com.alibaba.dubbo.common.logger.LoggerFactory).
+log4j:WARN No appenders could be found for logger (org.apache.dubbo.common.logger.LoggerFactory).
log4j:WARN Please initialize the log4j system properly.
log4j:WARN See http://logging.apache.org/log4j/1.2/faq.html#noconfig for more info.
hi, dubbo
```
-可以看到, *hi, dubbo* 是从服务提供者返回的执行结果。
+`hi, dubbo` is the execution results from service provider.
-## 快速生成 Dubbo 应用
+## Quick Creation of A Dubbo Application
-Dubbo 还提供了一个公共服务快速搭建基于 Spring Boot 的 Dubbo 应用。访问 http://start.dubbo.io 并按照下图所示来生成示例工程:
+Dubbo also provides a public platform that can create a Dubbo application quickly based on Spring Boot. Visit http://start.dubbo.io and follow the figure below to create an example project:

-**说明**:
+**Notes**:
-1. 在 *Group* 中提供 maven groupId,默认值是 *com.example*。
-2. 在 *Artifact* 中提供 maven artifactId,默认值是 *demo*。
-3. 在 *DubboServiceName* 中提供服务名,默认值是 *com.example.HelloService*。
-4. 在 *DubboServiceVersion* 中提供服务的版本,默认值是 *1.0.0*。
-5. 在 *Client/Server* 中选取本次构建的工程是服务提供者 (Server) 还是服务消费者 (Client),默认值是 *server*。
-6. 使用 *embeddedZookeeper* 作为服务注册发现,默认为勾选。
-7. 是否激活 qos 端口,默认为不勾选,如果勾选可以通过 *22222* 端口访问。
-8. 点击 *Generate Project* 即可下载生成好的工程。
+1. Provide maven groupId in *Group* with default value `com.example`.
+2. Provide maven artifactId in *Artifact* with default value `demo`.
+3. Provide the name of service in *DubboServiceName* with default value `com.example.HelloService`.
+4. Provide the version of service in *DubboServiceVersion* with default value `1.0.0`.
+5. Choose server or client in *Client/Server* with default value `server`.
+6. *embeddedZookeeper* is selected by default as service registry look up.
+7. qos ports activation is not selected by default but if it is, it can be accessed by port *22222*.
+8. Click *Generate Project* to download the generated project.
-在本例中展示的是服务提供者,同样的,通过在生成界面选取 *client* 来生成对应的服务消费者。
+This example shows how to generate a server. Similarly, it can generate a *client* by selecting client on the generation interface.
-### 运行
+### Run
-用 IDE 打开生成好的工程,可以发现应用是一个典型的 Spring Boot 应用。程序的入口如下所示:
+Open the generated project with an IDE and to see the application is a typical Spring Boot application with the following program entry:
```java
@SpringBootApplication
@@ -292,25 +298,26 @@ public class DemoApplication {
}
```
-**说明**:
+**Notes**:
-1. 在 *2181* 端口上启动嵌入式 *ZooKeeper*。
-2. 启动 *Spring Boot* 上下文。
+1. Launch embedded *ZooKeeper* on port *2181*.
+2. Launch the context of *Spring Boot*.
-可以直接在 IDE 中运行,输出结果如下:
+
+Run it directly in IDE and here are the results:
```bash
-2018-05-28 16:59:38.072 INFO 59943 --- [ main] a.b.d.c.e.WelcomeLogoApplicationListener :
+2018-05-28 16:59:38.072 INFO 59943 --- [ main] a.b.d.c.e.WelcomeLogoApplicationListener :
████████▄ ███ █▄ ▀█████████▄ ▀█████████▄ ▄██████▄
- ███ ▀███ ███ ███ ███ ███ ███ ███ ███ ███
- ███ ███ ███ ███ ███ ███ ███ ███ ███ ███
- ███ ███ ███ ███ ▄███▄▄▄██▀ ▄███▄▄▄██▀ ███ ███
- ███ ███ ███ ███ ▀▀███▀▀▀██▄ ▀▀███▀▀▀██▄ ███ ███
- ███ ███ ███ ███ ███ ██▄ ███ ██▄ ███ ███
- ███ ▄███ ███ ███ ███ ███ ███ ███ ███ ███
+ ███ ▀███ ███ ███ ███ ███ ███ ███ ███ ███
+ ███ ███ ███ ███ ███ ███ ███ ███ ███ ███
+ ███ ███ ███ ███ ▄███▄▄▄██▀ ▄███▄▄▄██▀ ███ ███
+ ███ ███ ███ ███ ▀▀███▀▀▀██▄ ▀▀███▀▀▀██▄ ███ ███
+ ███ ███ ███ ███ ███ ██▄ ███ ██▄ ███ ███
+ ███ ▄███ ███ ███ ███ ███ ███ ███ ███ ███
████████▀ ████████▀ ▄█████████▀ ▄█████████▀ ▀██████▀
-
+
:: Dubbo Spring Boot (v0.1.0) : https://github.com/dubbo/dubbo-spring-boot-project
:: Dubbo (v2.0.1) : https://github.com/alibaba/dubbo
@@ -323,13 +330,13 @@ public class DemoApplication {
2018-05-28 16:59:39.624 INFO 59943 --- [ main] com.example.demo.DemoApplication : Started DemoApplication in 1.746 seconds (JVM running for 2.963)
```
-**说明**:
+**Notes**:
-1. 输出中打印的以 *dubbo.* 开头的配置信息,定义在 *main/resources/application.properties* 中。
+1. In the printouts, the configuration starting with `dubbo.` Is defined in *main/resources/application.properties*.
-### 通过 Telnet 管理服务
+### Manage service by Telnet
-生成工程的时候如果选择了激活 *qos* 的话,就可以通过 *telnet* 或者 *nc* 来管理服务、查看服务状态。
+If *qos* is activated during generation, the service can be watched and managed by *telnet* or *nc*.
```bash
$ telnet localhost 22222
@@ -337,14 +344,14 @@ Trying 127.0.0.1...
Connected to localhost.
Escape character is '^]'.
████████▄ ███ █▄ ▀█████████▄ ▀█████████▄ ▄██████▄
- ███ ▀███ ███ ███ ███ ███ ███ ███ ███ ███
- ███ ███ ███ ███ ███ ███ ███ ███ ███ ███
- ███ ███ ███ ███ ▄███▄▄▄██▀ ▄███▄▄▄██▀ ███ ███
- ███ ███ ███ ███ ▀▀███▀▀▀██▄ ▀▀███▀▀▀██▄ ███ ███
- ███ ███ ███ ███ ███ ██▄ ███ ██▄ ███ ███
- ███ ▄███ ███ ███ ███ ███ ███ ███ ███ ███
+ ███ ▀███ ███ ███ ███ ███ ███ ███ ███ ███
+ ███ ███ ███ ███ ███ ███ ███ ███ ███ ███
+ ███ ███ ███ ███ ▄███▄▄▄██▀ ▄███▄▄▄██▀ ███ ███
+ ███ ███ ███ ███ ▀▀███▀▀▀██▄ ▀▀███▀▀▀██▄ ███ ███
+ ███ ███ ███ ███ ███ ██▄ ███ ██▄ ███ ███
+ ███ ▄███ ███ ███ ███ ███ ███ ███ ███ ███
████████▀ ████████▀ ▄█████████▀ ▄█████████▀ ▀██████▀
-
+
dubbo>
dubbo>ls
@@ -360,22 +367,24 @@ As Consumer side:
+---------------------+---+
```
-目前 *qos* 支持以下几个命令,更详细的信息请查阅官方文档[^4]:
+Currently, *qos* supports following command lines. For more information please refer to the official document. [^4]:
+
+* *ls*:List the information of client and server.
+* *online*:Bring the service online.
+* *offline*:Bring the service offline.
+* *help*:View online help.
-* *ls*:列出消费者、提供者信息
-* *online*:上线服务
-* *offline*:下线服务
-* *help*:联机帮助
+## Summary
-## 总结
+In this tutorial, we start with RMI and introduce the basic concepts in Java distributed invocations. Based on interface programming, it disguises remote calls as local by agency and run the service registry and looking up by registry center.
-在本文中,从 RMI 开始,介绍了 Java 领域分布式调用的基本概念,也就是基于接口编程、通过代理将远程调用伪装成本地、通过注册中心完成服务的注册和发现。
+Then for simplicity, we introduce how to develop a complete Dubbo demo in an easy way of assembled registry and direct Dubbo API oriented programming. Additionally, we look into the usage of *ServiceConfig* and *RefenceConfig*, which is of great help for further using Spring XML configuration and the programming pattern of Spring Boot.
-然后为了简单起见,使用简单的组播注册方式和直接面向 Dubbo API 编程的方式介绍了如何开发一个 Dubbo 的完整应用。深入的了解 *ServiceConfig* 和 *ReferenceConfig* 的用法,对于进一步的使用 Spring XML 配置、乃至 Spring Boot 的编程方式有这很大的帮助。
+Eventually, we give an outline of how to create a Dubbo application quickly based on Spring Boot using the public resources, start.dubbo.io, provided by the Dubbo development team and operate and maintain the Dubbo service by *qos*.
-最后,简单的介绍了如何通过 Dubbo 团队提供的公共服务 start.dubbo.io 快速搭建基于 Spring Boot 的 Dubbo 应用,并通过 *qos* 来做 Dubbo 服务的简单运维。
+---
-[^1]: [Getting Started Using JavaTM RMI](https://docs.oracle.com/javase/6/docs/technotes/guides/rmi/hello/hello-world.html)
-[^2]: [直连提供者](http://dubbo.apache.org/zh-cn/docs/user/demos/explicit-target.html)
-[^3]: [Multicast 注册中心](http://dubbo.apache.org/zh-cn/docs/user/references/registry/multicast.html)
-[^4]: [在线运维命令](http://dubbo.apache.org/zh-cn/docs/user/references/qos.html)
\ No newline at end of file
+1. [Getting Started Using JavaTM RMI](https://docs.oracle.com/javase/6/docs/technotes/guides/rmi/hello/hello-world.html)
+2. [Explicit target](http://dubbo.apache.org/en-us/docs/user/demos/explicit-target.html)
+3. [Multicast Registry](http://dubbo.apache.org/en-us/docs/user/references/registry/multicast.html)
+4. [Online QOS command](http://dubbo.apache.org/en-us/docs/user/references/qos.html)
diff --git a/en-us/blog/dubbo-27-features.md b/en-us/blog/dubbo-27-features.md
deleted file mode 100644
index bea0993..0000000
--- a/en-us/blog/dubbo-27-features.md
+++ /dev/null
@@ -1,230 +0,0 @@
----
-title: Dubbo2.7 三大新特性详解
-keywords: Dubbo2.7
-description: 异步化改造,三大中心改造,服务治理增强
----
-
-#
-
-## 1 背景介绍
-
-自 2017 年 7 月阿里重启 Dubbo 开源,到目前为止 github star 数,contributor 数都有了非常大的提升。2018 年 2 月 9 日阿里决定将 Dubbo 项目贡献给 Apache,经过一周的投票,顺利成为了 Apache 的孵化项目,也就是大家现在看到的 **Incubator Dubbo**。预计在 2019 年 4 月,Dubbo 可以达成毕业,成为 Apache 的顶级项目。
-
-## 2 分支介绍
-
-
-
-Dubbo 目前有如图所示的 5 个分支,其中 2.7.1-release 只是一个临时分支,忽略不计,对其他 4 个分支进行介绍。
-
-- 2.5.x 近期已经通过投票,Dubbo 社区即将停止对其的维护。
-- 2.6.x 为长期支持的版本,也是 Dubbo 贡献给 Apache 之前的版本,其包名前缀为:com.alibaba,JDK 版本对应 1.6。
-- 3.x-dev 是前瞻性的版本,对 Dubbo 进行一些高级特性的补充,如支持 rx 特性。
-- master 为长期支持的版本,版本号为 2.7.x,也是 Dubbo 贡献给 Apache 的开发版本,其包名前缀为:org.apache,JDK 版本对应 1.8。
-
-> 如果想要研究 Dubbo 的源码,建议直接浏览 master 分支。
-
-## 3 Dubbo 2.7 新特性
-
-Dubbo 2.7.x 作为 Apache 的孵化版本,除了代码优化之外,还新增了许多重磅的新特性,本文将会介绍其中最典型的三个新特性:
-
-- 异步化改造
-- 三大中心改造
-- 服务治理增强
-
-## 4 异步化改造
-
-### 4.1 几种调用方式
-
-
-
-在远程方法调用中,大致可以分为这 4 种调用方式。oneway 指的是客户端发送消息后,不需要接受响应。对于那些不关心服务端响应的请求,比较适合使用 oneway 通信。
-
-> 注意,void hello() 方法在远程方法调用中,不属于 oneway 调用,虽然 void 方法表达了不关心返回值的语义,但在 RPC 层面,仍然需要做通信层的响应。
-
-sync 是最常用的通信方式,也是默认的通信方法。
-
-future 和 callback 都属于异步调用的范畴,他们的区别是:在接收响应时,future.get() 会导致线程的阻塞;callback 通常会设置一个回调线程,当接收到响应时,自动执行,不会对当前线程造成阻塞。
-
-### 4.2 Dubbo 2.6 异步化
-
-异步化的优势在于客户端不需要启动多线程即可完成并行调用多个远程服务,相对多线程开销较小。介绍 2.7 中的异步化改造之前,先回顾一下如何在 2.6 中使用 Dubbo 异步化的能力。
-
-1. 将同步接口声明成 `async=true`
- ```xml
- <dubbo:reference id="asyncService" interface="org.apache.dubbo.demo.api.AsyncService" async="true"/>
- ```
- ```java
- public interface AsyncService {
- String sayHello(String name);
- }
- ```
-2. 通过上下文类获取 future
- ```java
- AsyncService.sayHello("Han Meimei");
- Future<String> fooFuture = RpcContext.getContext().getFuture();
- fooFuture.get();
- ```
-
-可以看出,这样的使用方式,不太符合异步编程的习惯,竟然需要从一个上下文类中获取到 Future。如果同时进行多个异步调用,使用不当很容易造成上下文污染。而且,Future 并不支持 callback 的调用方式。这些弊端在 Dubbo 2.7 中得到了改进。
-
-### 4.3 Dubbo 2.7 异步化
-
-1. 无需配置中特殊声明,显式声明异步接口即可
- ```java
- public interface AsyncService {
- String sayHello(String name);
- default CompletableFuture<String> sayHiAsync(String name) {
- return CompletableFuture.completedFuture(sayHello(name));
- }
- }
- ```
-2. 使用 callback 方式处理返回值
- ```java
- CompletableFuture<String> future = asyncService.sayHiAsync("Han MeiMei");
- future.whenComplete((retValue, exception) -> {
- if (exception == null) {
- System.out.println(retValue);
- } else {
- exception.printStackTrace();
- }
- });
- ```
-
-Dubbo 2.7 中使用了 JDK1.8 提供的 `CompletableFuture` 原生接口对自身的异步化做了改进。`CompletableFuture` 可以支持 future 和 callback 两种调用方式,用户可以根据自己的喜好和场景选择使用,非常灵活。
-
-### 4.4 异步化设计 FAQ
-
-Q:如果 RPC 接口只定义了同步接口,有办法使用异步调用吗?
-
-A:2.6 中的异步调用唯一的优势在于,不需要在接口层面做改造,又可以进行异步调用,这种方式仍然在 2.7 中保留;使用 Dubbo 官方提供的 compiler hacker,编译期自动重写同步方法,请[在此](https://github.com/dubbo/dubbo-async-processor#compiler-hacker-processer)讨论和跟进具体进展。
-
----
-
-Q:关于异步接口的设计问题,为何不提供编译插件,根据原接口,自动编译出一个 XxxAsync 接口?
-
-A:Dubbo 2.7 采用过这种设计,但接口的膨胀会导致服务类的增量发布,而且接口名的变化会影响服务治理的一些相关逻辑,改为方法添加 Async 后缀相对影响范围较小。
-
----
-
-Q:Dubbo 分为了客户端异步和服务端异步,刚刚你介绍的是客户端异步,为什么不提服务端异步呢?
-
-A:Dubbo 2.7 新增了服务端异步的支持,但实际上,Dubbo 的业务线程池模型,本身就可以理解为异步调用,个人认为服务端异步的特性较为鸡肋。
-
-## 5 三大中心改造
-
-三大中心指的:注册中心,元数据中心,配置中心。
-
-在 2.7 之前的版本,Dubbo 只配备了注册中心,主流使用的注册中心为 zookeeper。新增加了元数据中心和配置中心,自然是为了解决对应的痛点,下面我们来详细阐释三大中心改造的原因。
-
-### 5.1 元数据改造
-
-元数据是什么?元数据定义为描述数据的数据,在服务治理中,例如服务接口名,重试次数,版本号等等都可以理解为元数据。在 2.7 之前,元数据一股脑丢在了注册中心之中,这造成了一系列的问题:
-
-**推送量大 -> 存储数据量大 -> 网络传输量大 -> 延迟严重**
-
-生产者端注册 30+ 参数,有接近一半是不需要作为注册中心进行传递;消费者端注册 25+ 参数,只有个别需要传递给注册中心。有了以上的理论分析,Dubbo 2.7 进行了大刀阔斧的改动,只将真正属于服务治理的数据发布到注册中心之中,大大降低了注册中心的负荷。
-
-同时,将全量的元数据发布到另外的组件中:元数据中心。元数据中心目前支持 redis(推荐),zookeeper。这也为 Dubbo 2.7 全新的 Dubbo Admin 做了准备,关于新版的 Dubbo Admin,我将会后续准备一篇独立的文章进行介绍。
-
-示例:使用 zookeeper 作为元数据中心
-
-```xml
-<dubbo:metadata-report address="zookeeper://127.0.0.1:2181"/>
-```
-
-### 5.2 Dubbo 2.6 元数据
-
-```shell
-dubbo://30.5.120.185:20880/com.alibaba.dubbo.demo.DemoService?
-anyhost=true&
-application=demo-provider&
-interface=com.alibaba.dubbo.demo.DemoService&
-methods=sayHello&
-bean.name=com.alibaba.dubbo.demo.DemoService&
-dubbo=2.0.2&
-executes=4500&
-generic=false&
-owner=kirito&
-pid=84228&
-retries=7&
-side=provider&
-timestamp=1552965771067
-```
-
-从本地的 zookeeper 中取出一条服务数据,通过解码之后,可以看出,的确有很多参数是不必要。
-
-### 5.3 Dubbo 2.7 元数据
-
-在 2.7 中,如果不进行额外的配置,zookeeper 中的数据格式仍然会和 Dubbo 2.6 保持一致,这主要是为了保证兼容性,让 Dubbo 2.6 的客户端可以调用 Dubbo 2.7 的服务端。如果整体迁移到 2.7,则可以为注册中心开启简化配置的参数:
-
-```xml
-<dubbo:registry address=“zookeeper://127.0.0.1:2181” simplified="true"/>
-```
-
-Dubbo 将会只上传那些必要的服务治理数据,一个简化过后的数据如下所示:
-
-```shell
-dubbo://30.5.120.185:20880/org.apache.dubbo.demo.api.DemoService?
-application=demo-provider&
-dubbo=2.0.2&
-release=2.7.0&
-timestamp=1552975501873
-```
-
-对于那些非必要的服务信息,仍然全量存储在元数据中心之中:
-
-
-
-> 元数据中心的数据可以被用于服务测试,服务 MOCK 等功能。目前注册中心配置中 simplified 的默认值为 false,因为考虑到了迁移的兼容问题,在后续迭代中,默认值将会改为 true。
-
-### 5.4 配置中心支持
-
-衡量配置中心的必要性往往从三个角度出发:
-
-1. 分布式配置统一管理
-
-2. 动态变更推送
-
-3. 安全性
-
-Spring Cloud Config, Apollo, Nacos 等分布式配置中心组件都对上述功能有不同程度的支持。在 2.7 之前的版本中,在 zookeeper 中设置了部分节点:configurators,routers,用于管理部分配置和路由信息,它们可以理解为 Dubbo 配置中心的雏形。在 2.7 中,Dubbo 正式支持了配置中心,目前支持的几种注册中心 Zookeeper,Apollo,Nacos(2.7.1-release 支持)。
-
-在 Dubbo 中,配置中心主要承担了两个作用
-
-- 外部化配置。启动配置的集中式存储
-
-- 服务治理。服务治理规则的存储与通知
-
-示例:使用 Zookeeper 作为配置中心
-
-```xml
-<dubbo:config-center address="zookeeper://127.0.0.1:2181"/>
-```
-
-引入配置中心后,需要注意配置项的覆盖问题,优先级如图所示
-
-
-
-## 6 服务治理增强
-
-我更倾向于将 Dubbo 当做一个服务治理框架,而不仅仅是一个 RPC 框架。在 2.7 中,Dubbo 对其服务治理能力进行了增强,增加了标签路由的能力,并抽象出了应用路由和服务路由的概念。在最后一个特性介绍中,着重对标签路由 TagRouter 进行探讨。
-
-> 在服务治理中,路由层和负载均衡层的对比。区别 1,Router:m 选 n,LoadBalance:n 选 1;区别 2,路由往往是叠加使用的,负载均衡只能配置一种。
-
-在很长的一段时间内,Dubbo 社区经常有人提的一个问题是:Dubbo 如何实现流量隔离和灰度发布,直到 2.7 提供了标签路由,用户可以使用这个功能,来实现上述的需求。
-
-
-
-标签路由提供了这样一个能力,当调用链路为 A -> B -> C -> D 时,用户给请求打标,最典型的打标方式可以借助 attachment(他可以在分布式调用中传递下去),调用会优先请求那些匹配的服务端,如 A -> B,C -> D,由于集群中未部署 C 节点,则会降级到普通节点。
-
-打标方式会受到集成系统差异的影响,从而导致很大的差异,所以 Dubbo 只提供了 `RpcContext.getContext().setAttachment()` 这样的基础接口,用户可以使用 SPI 扩展,或者 server filter 的扩展,对测试流量进行打标,引导进入隔离环境/灰度环境。
-
-新版的 Dubbo Admin 提供了标签路由的配置项:
-
-
-
-Dubbo 用户可以在自己系统的基础上对标签路由进行二次扩展,或者借鉴标签路由的设计,实现自己系统的流量隔离,灰度发布。
-
-## 7 总结
-
-本文介绍了 Dubbo 2.7 比较重要的三大新特性:异步化改造,三大中心改造,服务治理增强。Dubbo 2.7 还包含了很多功能优化、特性升级,可以在项目源码的 [CHANGES.md](https://github.com/apache/dubbo/blob/master/CHANGES.md) 中浏览全部的改动点。最后提供一份 Dubbo 2.7 的升级文档:[2.7迁移文档](http://dubbo.apache.org/zh-cn/docs/user/versions/version-270.html),欢迎体验。
diff --git a/en-us/blog/dubbo-admin.md b/en-us/blog/dubbo-admin.md
deleted file mode 100644
index ed8613e..0000000
--- a/en-us/blog/dubbo-admin.md
+++ /dev/null
@@ -1,71 +0,0 @@
-# 新版Dubbo Admin介绍
-
-```
-Demo地址:http://47.91.207.147/#/service
-github: https://github.com/apache/dubbo-ops
-```
-Dubbo Admin之前的版本过于老旧,也长期疏于维护,因此在去年年中的时候,对该项目进行了一次重构,项目结构上的变化如下:
-* 将后端框架从webx替换成spring boot
-* 前端采用Vue和Vuetify.js作为开发框架
-* 移除velocity模板
-* 集成swagger,提供api管理功能
-
-当前版本的Dubbo Admin包含了之前版本中的绝大部分功能,包括服务治理,服务查询等,同时支持了Dubbo2.7中服务治理的新特性。
-
-
-## 配置规范
-由于在Dubbo2.7中,配置中心和注册中心做了分离,并且增加了元数据中心,因此Dubbo Admin的配置方式也做了更新,`application.properties`中的配置如下:
-```properties
-admin.registry.address=zookeeper://127.0.0.1:2181
-admin.config-center=zookeeper://127.0.0.1:2181
-admin.metadata-report.address=zookeeper://127.0.0.1:2181
-```
-也可以和Dubbo2.7一样,在配置中心指定元数据和注册中心的地址,以zookeeper为例,配置的路径和内容如下:
-```properties
-# /dubbo/config/dubbo/dubbo.properties
-dubbo.registry.address=zookeeper://127.0.0.1:2181
-dubbo.metadata-report.address=zookeeper://127.0.0.1:2181
-```
-配置中心里的地址会覆盖掉本地`application.properties`的配置
-
-## 功能介绍
-功能上,主要延续了之前版本的功能,包括服务查询和服务治理,2.7版本在服务治理的功能上有了很大的改进,这些改进也大部分都会以Dubbo Admin作为入口来体现。
-
-### 标签路由
-标签路由是Dubbo2.7引入的新功能,配置以应用作为维度,给不同的服务器打上不同名字的标签,配置如下图所示:
-
-调用的时候,客户端可以通过`setAttachment`的方式,来设置不同的标签名称,比如本例中,`setAttachment(tag1)`,客户端的选址范围就在如图所示的三台机器中,可以通过这种方式来实现流量隔离,灰度发布等功能。
-
-### 应用级别的服务治理
-在Dubbo2.6及更早版本中,所有的服务治理规则都只针对服务粒度,如果要把某条规则作用到应用粒度上,需要为应用下的所有服务配合相同的规则,变更,删除的时候也需要对应的操作,这样的操作很不友好,因此Dubbo2.7版本中增加了应用粒度的服务治理操作,对于条件路由(包括黑白名单),动态配置(包括权重,负载均衡)都可以做应用级别的配置:
-
-上图是条件路由的配置,可以按照应用名,服务名两个维度来填写,也可以按照这两个维度来查询。
-
-
-
-条件路由,标签路由和动态配置都采用了`yaml`格式的文本编写,其他的规则配置还是采用了表单的形式。
-
-#### 关于兼容性
-Dubbo2.6到Dubbo2.7,服务治理发生了比较大的变化,Dubbo Admin兼容两个版本的用法:
-* 对于服务级别的配置,会按照Dubbo2.6(URL)和Dubbo2.7(配置文件)两种格式进行写入,保证Dubbo2.6的客户端能够正确读取,解析规则
-* 对于应用级别的配置,包括标签路由,只会按照Dubbo2.7的格式进行写入,因为Dubbo2.6无此功能,不需要做向前兼容。
-* Dubbo Admin只会按照Dubbo2.7的格式进行配置读取,因此,所有在Dubbo Admin上做的配置都可以被读到,但是之前遗留的,Dubbo2.6格式的URL无法被读取。
-* 对于同一个应用或者服务,每种规则只能够配置一条,否则新的会覆盖旧的。
-
-### 配置管理
-配置管理也是配合Dubbo2.7新增的功能,在Dubbo2.7中,增加了全局和应用维度的配置,
-* 全局配置:
-
-全局配置里可以指定注册中心,元数据中心的地址,服务端和客户端的超时时间等,这些配置在全局内生效。除了配置写入,也可以用来查看。如果使用zookeeper作为注册中心和元数据中心,还可以看到配置文件所在位置的目录结构。
-* 应用, 服务配置
-
-应用级别的配置可以为应用或者应用内的服务指定配置,在服务维度上,需要区分提供者和消费者。`dubbo.reference.{serviceName}`表示作为该服务消费者的配置,`dubbo.provider.{servcieName}`表示作为该服务提供者的配置。优先级服务 > 应用 > 全局。其中注册中心和元数据中心的地址,只能在全局配置中指定,这也是Dubbo2.7中推荐的使用方式。
-
-### 元数据和服务测试
-元数据是Dubbo2.7中新引入的元素,主要的使用场景就在Dubbo Admin中,主要体现在两个地方:
-* 服务详情展示:
-
-跟之前版本相比,Dubbo2.7中增加了对服务方法完整签名的记录,因此服务详情中也增加了方法信息的详情,可以看到方法名,方法参数列表以及返回值信息。
-* 服务测试:
-
-更重要的,元数据为服务测试提供了数据基础,可以在页面上调用真实的服务提供者,方便测试,也不需要为了调用服务去搭建一套Dubbo环境以及编写消费端代码。
diff --git a/en-us/blog/dubbo-annotation-driven.md b/en-us/blog/dubbo-annotation-driven.md
deleted file mode 100644
index 79e9fd6..0000000
--- a/en-us/blog/dubbo-annotation-driven.md
+++ /dev/null
@@ -1,809 +0,0 @@
-# Dubbo 注解驱动(Annotation-Driven)
-
-
-
-
-## 注解驱动(Annotation-Driven)
-
-
-
-
-
-### `@DubboComponentScan`
-
-
-
-
-
-#### 起始版本: `2.5.7`
-
-
-
-
-
-
-
-#### `<dubbo:annotation> `历史遗留问题
-
-
-
-
-
-##### 1. 注解支持不充分
-
-
-
-在 Dubbo `2.5.7`之前的版本 ,Dubbo 提供了两个核心注解 `@Service` 以及 `@Reference`,分别用于Dubbo 服务提供和 Dubbo 服务引用。
-
-
-
-其中,`@Service` 作为 XML 元素 `<dubbo:service>`的替代注解,与 Spring Framework `@org.springframework.stereotype.Service` 类似,用于服务提供方 Dubbo 服务暴露。与之相对应的`@Reference`,则是替代`<dubbo:reference` 元素,类似于 Spring 中的 `@Autowired`。
-
-
-
- `2.5.7` 之前的Dubbo,与早期的 Spring Framework 2.5 存在类似的不足,即注解支持不够充分。注解需要和 XML 配置文件配合使用,如下所示:
-
-```xml
-<?xml version="1.0" encoding="UTF-8"?>
-<beans xmlns:xsi="http://www.w3.org/2001/XMLSchema-instance"
- xmlns:dubbo="http://code.alibabatech.com/schema/dubbo"
- xmlns="http://www.springframework.org/schema/beans"
- xsi:schemaLocation="http://www.springframework.org/schema/beans http://www.springframework.org/schema/beans/spring-beans-2.5.xsd
- http://code.alibabatech.com/schema/dubbo http://code.alibabatech.com/schema/dubbo/dubbo.xsd">
-
- <dubbo:application name="annotation-provider"/>
- <dubbo:registry address="127.0.0.1:4548"/>
- <dubbo:annotation package="com.alibaba.dubbo.config.spring.annotation.provider"/>
-
-</beans>
-```
-
-
-
-
-
-##### 2. `@Service` Bean 不支持 Spring AOP
-
-
-
-同时,使用 `<dubbo:annotation> ` 方式扫描后的Dubbo `@Service` ,在 Spring 代理方面存在问题,如 GitHub 上的 issue https://github.com/alibaba/dubbo/issues/794:
-
-> 关于dubbo @Service注解生成ServiceBean时, interface获取成spring 的代理对象的bug
->
-> >在项目里, 我使用了
-> >
-> >```java
-> >@Service
-> >@Transactional
-> >@com.alibaba.dubbo.config.annotation.Service
-> >public class SUserJpushServiceImp
-> >```
-> >
-> >的形式, 来暴露服务。但是在发布服务的时候, interface class 是通过
-> >``
-> >serviceConfig.setInterface(bean.getClass().getInterfaces()[0]);
-> >``
-> >的形式获取, 刚好, 我的service都使用了@Transactional注解, 对象被代理了。所以获取到的interface是Spring的代理接口...
-
-
-
-不少热心的小伙伴不仅发现这个历史遗留问题,而且提出了一些修复方案。同时,为了更好地适配 Spring 生命周期以及将 Dubbo 完全向注解驱动编程模型过渡,因此,引入了全新 Dubbo 组件扫描注解 - `@DubboComponentScan`。
-
-
-
-> 注: `<dubbo:annotation> ` Spring AOP 问题将在 `2.5.9` 中修复:https://github.com/alibaba/dubbo/issues/1125
-
-
-
-
-
-##### 3. @Reference 不支持字段继承性
-
-
-
-假设有一个 Spring Bean `AnnotationAction` 直接通过字段`annotationService` 标记 `@Reference` 引用 `AnnotationService` :
-
-```java
-package com.alibaba.dubbo.examples.annotation.action;
-
-import com.alibaba.dubbo.config.annotation.Reference;
-import com.alibaba.dubbo.examples.annotation.api.AnnotationService;
-import org.springframework.stereotype.Component;
-
-
-@Component("annotationAction")
-public class AnnotationAction {
-
- @Reference
- private AnnotationService annotationService;
-
- public String doSayHello(String name) {
- return annotationService.sayHello(name);
- }
-
-}
-```
-
-
-
-当`AnnotationAction` 被 XML 元素 `<dubbo:annotation>` 扫描后:
-
-```xml
-<dubbo:annotation package="com.alibaba.dubbo.examples.annotation.action"/>
-```
-
-
-
-字段 `annotationService` 能够引用到 `AnnotationService`,执行 `doSayHello` 方法能够正常返回。
-
-
-
-如果将字段`annotationService` 抽取到`AnnotationAction` 的父类`BaseAction` 后,`AnnotationService` 无法再被引用,改造如下所示:
-
-`AnnotationAction.java`
-
-```java
-@Component("annotationAction")
-public class AnnotationAction extends BaseAction {
-
- public String doSayHello(String name) {
- return getAnnotationService().sayHello(name);
- }
-
-}
-```
-
-
-
-`BaseAction.java`
-
-```java
-public abstract class BaseAction {
-
- @Reference
- private AnnotationService annotationService;
-
- protected AnnotationService getAnnotationService() {
- return annotationService;
- }
-}
-```
-
-
-
-改造后,再次执行 `doSayHello` 方法,`NullPointerException` 将会被抛出。说明`<dubbo:annotation>` 并不支持`@Reference` 字段继承性。
-
-
-
-了解了历史问题,集合整体愿景,下面介绍`@DubboComponentScan` 的设计原则。
-
-
-
-
-
-
-
-#### 设计原则
-
-
-
-
-
-Spring Framework 3.1 引入了新 Annotation - `@ComponentScan` , 完全替代了 XML 元素 ` <context:component-scan>` 。同样, `@DubboComponentScan` 作为 Dubbo `2.5.7` 新增的 Annotation,也是XML 元素 `<dubbo:annotation>` 的替代方案。
-
-
-
-在命名上(类名以及属性方法),为了简化使用和关联记忆,Dubbo 组件扫描 Annotation `@DubboComponentScan`,借鉴了 Spring Boot 1.3 引入的 `@ServletComponentScan`。定义如下:
-
-```java
-public @interface DubboComponentScan {
-
- /**
- * Alias for the {@link #basePackages()} attribute. Allows for more concise annotation
- * declarations e.g.: {@code @DubboComponentScan("org.my.pkg")} instead of
- * {@code @DubboComponentScan(basePackages="org.my.pkg")}.
- *
- * @return the base packages to scan
- */
- String[] value() default {};
-
- /**
- * Base packages to scan for annotated @Service classes. {@link #value()} is an
- * alias for (and mutually exclusive with) this attribute.
- * <p>
- * Use {@link #basePackageClasses()} for a type-safe alternative to String-based
- * package names.
- *
- * @return the base packages to scan
- */
- String[] basePackages() default {};
-
- /**
- * Type-safe alternative to {@link #basePackages()} for specifying the packages to
- * scan for annotated @Service classes. The package of each class specified will be
- * scanned.
- *
- * @return classes from the base packages to scan
- */
- Class<?>[] basePackageClasses() default {};
-
-}
-```
-
-
-
-> 注意:`basePackages()` 和 `value()` 均能支持占位符(placeholder)指定的包名
-
-
-
-在职责上,`@DubboComponentScan` 相对于 Spring Boot `@ServletComponentScan` 更为繁重,原因在于处理 Dubbo `@Service` 类暴露 Dubbo 服务外,还有帮助 Spring Bean `@Reference`字段或者方法注入 Dubbo 服务代理。
-
-
-
- 在场景上,Spring Framework `@ComponentScan` 组件扫描逻辑更为复杂。而在 `@DubboComponentScan` 只需关注 `@Service` 和 `@Reference` 处理。
-
-
-
-在功能上, `@DubboComponentScan` 不但需要提供完整 Spring AOP 支持的能力,而且还得具备`@Reference ` 字段可继承性的能力。
-
-
-
-了解基本设计原则后,下面通过完整的示例,简介`@DubboComponentScan` 使用方法以及注意事项。
-
-
-
-
-
-
-
-#### 使用方法
-
-
-
-后续通过服务提供方(`@Serivce`)以及服务消费方(`@Reference`)两部分来介绍`@DubboComponentScan` 使用方法。
-
-
-
-假设,服务提供方和服务消费分均依赖服务接口`DemoService`:
-
-```java
-package com.alibaba.dubbo.demo;
-
-public interface DemoService {
-
- String sayHello(String name);
-
-}
-```
-
-
-
-
-
-##### 服务提供方(`@Serivce`)
-
-
-
-###### 实现 `DemoService`
-
-
-
-服务提供方实现`DemoService` - `AnnotationDemoService` ,同时标注 Dubbo `@Service` :
-
-```java
-package com.alibaba.dubbo.demo.provider;
-
-import com.alibaba.dubbo.config.annotation.Service;
-import com.alibaba.dubbo.demo.DemoService;
-
-/**
- * Annotation {@link DemoService} 实现
- *
- * @author <a href="mailto:mercyblitz@gmail.com">Mercy</a>
- */
-@Service
-public class AnnotationDemoService implements DemoService {
-
- @Override
- public String sayHello(String name) {
- return "Hello , " + name;
- }
-
-}
-```
-
-
-
-
-
-###### 服务提供方 Annotation 配置
-
-
-
-将 `AnnotationDemoService` 暴露成Dubbo 服务,需要依赖 Spring Bean:`ApplicationConfig`、`ProtocolConfig` 以及 `RegistryConfig` 。这三个 Spring Bean 过去可通过 XML 文件方式组装 Spring Bean:
-
-```xml
-<beans xmlns:xsi="http://www.w3.org/2001/XMLSchema-instance"
- xmlns:dubbo="http://code.alibabatech.com/schema/dubbo"
- xmlns="http://www.springframework.org/schema/beans"
- xsi:schemaLocation="http://www.springframework.org/schema/beans http://www.springframework.org/schema/beans/spring-beans-2.5.xsd
- http://code.alibabatech.com/schema/dubbo http://code.alibabatech.com/schema/dubbo/dubbo.xsd
- ">
-
- <!-- 当前应用信息配置 -->
- <dubbo:application name="dubbo-annotation-provider"/>
-
- <!-- 连接注册中心配置 -->
- <dubbo:registry id="my-registry" address="N/A"/>
-
- <dubbo:protocol name="dubbo" port="12345"/>
-
-</beans>
-```
-
-
-
-以上装配方式不予推荐,推荐使用 Annotation 配置,因此可以换成 Spring `@Configuration` Bean 的形式:
-
-```java
-package com.alibaba.dubbo.demo.config;
-
-import com.alibaba.dubbo.config.ApplicationConfig;
-import com.alibaba.dubbo.config.ProtocolConfig;
-import com.alibaba.dubbo.config.RegistryConfig;
-import com.alibaba.dubbo.config.spring.context.annotation.DubboComponentScan;
-import org.springframework.context.annotation.Bean;
-import org.springframework.context.annotation.Configuration;
-
-/**
- * 服务提供方配置
- *
- * @author <a href="mailto:mercyblitz@gmail.com">Mercy</a>
- */
-@Configuration
-@DubboComponentScan("com.alibaba.dubbo.demo.provider") // 扫描 Dubbo 组件
-public class ProviderConfiguration {
-
- /**
- * 当前应用配置
- */
- @Bean("dubbo-annotation-provider")
- public ApplicationConfig applicationConfig() {
- ApplicationConfig applicationConfig = new ApplicationConfig();
- applicationConfig.setName("dubbo-annotation-provider");
- return applicationConfig;
- }
-
- /**
- * 当前连接注册中心配置
- */
- @Bean("my-registry")
- public RegistryConfig registryConfig() {
- RegistryConfig registryConfig = new RegistryConfig();
- registryConfig.setAddress("N/A");
- return registryConfig;
- }
-
- /**
- * 当前连接注册中心配置
- */
- @Bean("dubbo")
- public ProtocolConfig protocolConfig() {
- ProtocolConfig protocolConfig = new ProtocolConfig();
- protocolConfig.setName("dubbo");
- protocolConfig.setPort(12345);
- return protocolConfig;
- }
-}
-```
-
-
-
-
-
-###### 服务提供方引导类
-
-
-
-```java
-package com.alibaba.dubbo.demo.bootstrap;
-
-import com.alibaba.dubbo.demo.DemoService;
-import com.alibaba.dubbo.demo.config.ProviderConfiguration;
-import org.springframework.context.annotation.AnnotationConfigApplicationContext;
-
-/**
- * 服务提供方引导类
- *
- * @author <a href="mailto:mercyblitz@gmail.com">Mercy</a>
- */
-public class ProviderBootstrap {
-
- public static void main(String[] args) {
- // 创建 Annotation 配置上下文
- AnnotationConfigApplicationContext context = new AnnotationConfigApplicationContext();
- // 注册配置 Bean
- context.register(ProviderConfiguration.class);
- // 启动上下文
- context.refresh();
- // 获取 DemoService Bean
- DemoService demoService = context.getBean(DemoService.class);
- // 执行 sayHello 方法
- String message = demoService.sayHello("World");
- // 控制台输出信息
- System.out.println(message);
- }
-
-}
-```
-
-
-
-`ProviderBootstrap` 启动并执行后,控制输出与预期一致:
-
-```
-Hello , World
-```
-
-
-
-以上直接结果说明 `@DubboComponentScan("com.alibaba.dubbo.demo.provider")` 扫描后,标注 Dubbo `@Service` 的 `AnnotationDemoService` 被注册成 Spring Bean,可从 Spring ApplicationContext 自由获取。
-
-
-
-
-
-##### 服务消费方(`@Reference`)
-
-
-
-###### 服务 `DemoService`
-
-
-
-```java
-package com.alibaba.dubbo.demo.consumer;
-
-import com.alibaba.dubbo.config.annotation.Reference;
-import com.alibaba.dubbo.demo.DemoService;
-
-/**
- * Annotation 驱动 {@link DemoService} 消费方
- *
- * @author <a href="mailto:mercyblitz@gmail.com">Mercy</a>
- */
-public class AnnotationDemoServiceConsumer {
-
- @Reference(url = "dubbo://127.0.0.1:12345")
- private DemoService demoService;
-
- public String doSayHell(String name) {
- return demoService.sayHello(name);
- }
-}
-```
-
-
-
-
-
-###### 服务消费方 Annotation 配置
-
-
-
-与服务提供方配置类似,服务消费方也许 Dubbo 相关配置 Bean - `ConsumerConfiguration`
-
-```java
-package com.alibaba.dubbo.demo.config;
-
-import com.alibaba.dubbo.config.ApplicationConfig;
-import com.alibaba.dubbo.config.RegistryConfig;
-import com.alibaba.dubbo.config.spring.context.annotation.DubboComponentScan;
-import com.alibaba.dubbo.demo.consumer.AnnotationDemoServiceConsumer;
-import org.springframework.context.annotation.Bean;
-import org.springframework.context.annotation.Configuration;
-
-/**
- * 服务消费方配置
- *
- * @author <a href="mailto:mercyblitz@gmail.com">Mercy</a>
- */
-@Configuration
-@DubboComponentScan
-public class ConsumerConfiguration {
-
- /**
- * 当前应用配置
- */
- @Bean
- public ApplicationConfig applicationConfig() {
- ApplicationConfig applicationConfig = new ApplicationConfig();
- applicationConfig.setName("dubbo-annotation-consumer");
- return applicationConfig;
- }
-
- /**
- * 当前连接注册中心配置
- */
- @Bean
- public RegistryConfig registryConfig() {
- RegistryConfig registryConfig = new RegistryConfig();
- registryConfig.setAddress("N/A");
- return registryConfig;
- }
-
- /**
- * 注册 AnnotationDemoServiceConsumer,@DubboComponentScan 将处理其中 @Reference 字段。
- * 如果 AnnotationDemoServiceConsumer 非 Spring Bean 的话,
- * 即使 @DubboComponentScan 指定 package 也不会进行处理,与 Spring @Autowired 同理
- */
- @Bean
- public AnnotationDemoServiceConsumer annotationDemoServiceConsumer() {
- return new AnnotationDemoServiceConsumer();
- }
-
-}
-```
-
-
-
-###### 服务消费方引导类
-
-
-
-服务消费方需要先引导服务提供方,下面的实例将会启动两个 Spring 应用上下文,首先引导服务提供方 Spring 应用上下文,同时,需要复用前面Annotation 配置 `ProviderConfiguration`:
-
-```java
- /**
- * 启动服务提供方上下文
- */
- private static void startProviderContext() {
- // 创建 Annotation 配置上下文
- AnnotationConfigApplicationContext providerContext = new AnnotationConfigApplicationContext();
- // 注册配置 Bean
- providerContext.register(ProviderConfiguration.class);
- // 启动服务提供方上下文
- providerContext.refresh();
- }
-```
-
-
-
-然后引导服务消费方Spring 应用上下文:
-
-```java
- /**
- * 启动并且返回服务消费方上下文
- *
- * @return AnnotationConfigApplicationContext
- */
- private static ApplicationContext startConsumerContext() {
- // 创建服务消费方 Annotation 配置上下文
- AnnotationConfigApplicationContext consumerContext = new AnnotationConfigApplicationContext();
- // 注册服务消费方配置 Bean
- consumerContext.register(ConsumerConfiguration.class);
- // 启动服务消费方上下文
- consumerContext.refresh();
- // 返回服务消费方 Annotation 配置上下文
- return consumerContext;
- }
-```
-
-
-
-完整的引导类实现:
-
-```java
-package com.alibaba.dubbo.demo.bootstrap;
-
-import com.alibaba.dubbo.demo.config.ConsumerConfiguration;
-import com.alibaba.dubbo.demo.config.ProviderConfiguration;
-import com.alibaba.dubbo.demo.consumer.AnnotationDemoServiceConsumer;
-import org.springframework.context.ApplicationContext;
-import org.springframework.context.annotation.AnnotationConfigApplicationContext;
-
-/**
- * 服务消费端引导类
- *
- * @author <a href="mailto:mercyblitz@gmail.com">Mercy</a>
- */
-public class ConsumerBootstrap {
-
- public static void main(String[] args) {
- // 启动服务提供方上下文
- startProviderContext();
- // 启动并且返回服务消费方上下文
- ApplicationContext consumerContext = startConsumerContext();
- // 获取 AnnotationDemoServiceConsumer Bean
- AnnotationDemoServiceConsumer consumer = consumerContext.getBean(AnnotationDemoServiceConsumer.class);
- // 执行 doSayHello 方法
- String message = consumer.doSayHello("World");
- // 输出执行结果
- System.out.println(message);
- }
-
- /**
- * 启动并且返回服务消费方上下文
- *
- * @return AnnotationConfigApplicationContext
- */
- private static ApplicationContext startConsumerContext() {
- // 创建服务消费方 Annotation 配置上下文
- AnnotationConfigApplicationContext consumerContext = new AnnotationConfigApplicationContext();
- // 注册服务消费方配置 Bean
- consumerContext.register(ConsumerConfiguration.class);
- // 启动服务消费方上下文
- consumerContext.refresh();
- // 返回服务消费方 Annotation 配置上下文
- return consumerContext;
- }
-
- /**
- * 启动服务提供方上下文
- */
- private static void startProviderContext() {
- // 创建 Annotation 配置上下文
- AnnotationConfigApplicationContext providerContext = new AnnotationConfigApplicationContext();
- // 注册配置 Bean
- providerContext.register(ProviderConfiguration.class);
- // 启动服务提供方上下文
- providerContext.refresh();
- }
-
-}
-```
-
-
-
-运行`ConsumerBootstrap`结果,仍然符合期望,`AnnotationDemoServiceConsumer` 输出:
-
-```
-Hello , World
-```
-
-
-
-
-
-
-
-#### Spring AOP 支持
-
-
-
-前面提到 `<dubbo:annotation> ` 注册 Dubbo `@Service` 组件后,在 Spring AOP 支持方面存在问题。事务作为 Spring AOP 的功能扩展,自然也会在 `<dubbo:annotation> `中不支持。
-
-
-
-`@DubboComponentScan` 针对以上问题,实现了对 Spring AOP 是完全兼容。将上述服务提供方 Annotation 配置做出一定的调整,标注`@EnableTransactionManagement` 以及自定义实现`PlatformTransactionManager` :
-
-```java
-@Configuration
-@DubboComponentScan("com.alibaba.dubbo.demo.provider") // 扫描 Dubbo 组件
-@EnableTransactionManagement // 激活事务管理
-public class ProviderConfiguration {
- // 省略其他配置 Bean 定义
-
- /**
- * 自定义事务管理器
- */
- @Bean
- @Primary
- public PlatformTransactionManager transactionManager() {
- return new PlatformTransactionManager() {
-
- @Override
- public TransactionStatus getTransaction(TransactionDefinition definition) throws TransactionException {
- System.out.println("get transaction ...");
- return new SimpleTransactionStatus();
- }
-
- @Override
- public void commit(TransactionStatus status) throws TransactionException {
- System.out.println("commit transaction ...");
- }
-
- @Override
- public void rollback(TransactionStatus status) throws TransactionException {
- System.out.println("rollback transaction ...");
- }
- };
- }
-}
-```
-
-
-
-同时调整 `AnnotationDemoService` - 增加`@Transactional` 注解:
-
-```java
-@Service
-@Transactional
-public class AnnotationDemoService implements DemoService {
- // 省略实现,保持不变
-}
-```
-
-
-
-再次运行`ConsumerBootstrap` , 观察控制台输出内容:
-
-```
-get transaction ...
-commit transaction ...
-Hello , World
-```
-
-
-
-输入内容中多处了两行,说明自定义 `PlatformTransactionManager` `getTransaction(TransactionDefinition)` 以及 `commit(TransactionStatus) ` 方法被执行,进而说明 `AnnotationDemoService` 的`sayHello(String)` 方法执行时,事务也伴随执行。
-
-
-
-
-
-#### 注意事项
-
-
-
-`ConsumerConfiguration` 上的 `@DubboComponentScan` 并没有指定 `basePackages` 扫描,这种情况会将`ConsumerConfiguration` 当做 `basePackageClasses` ,即扫描`ConsumerConfiguration` 所属的 package `com.alibaba.dubbo.demo.config` 以及子 package。由于当前示例中,不存在标注 Dubbo `@Service`的类,因此在运行时日志(如果开启的话)会输出警告信息:
-
-```
-WARN : [DUBBO] No Spring Bean annotating Dubbo's @Service was found in Spring BeanFactory, dubbo version: 2.0.0, current host: 127.0.0.1
-```
-
-
-
-以上信息大可不必担忧,因为 `@DubboComponentScan` 除了扫描 Dubbo `@Service` 组件以外,还将处理 `@Reference`字段注入。然而读者特别关注`@Reference`字段注入的规则。
-
-
-
-以上实现为例,`AnnotationDemoServiceConsumer` 必须申明为 Spring `@Bean` 或者 `@Component`(或者其派生注解),否则 `@DubboComponentScan` 不会主动将标注 `@Reference`字段所在的声明类提成为 Spring Bean,换句话说,如果 `@Reference`字段所在的声明类不是 Spring Bean 的话, `@DubboComponentScan` 不会处理`@Reference`注入,其原理与 Spring `@Autowired` 一致。
-
-
-
-以上使用不当可能会导致相关问题,如 GitHub 上曾有小伙伴提问:https://github.com/alibaba/dubbo/issues/825
-
-> **li362692680** 提问:
->
-> > @DubboComponentScan注解在消费端扫描包时扫描的是 @Service注解??不是@Reference注解??
-> > 启动时报
-> > DubboComponentScanRegistrar-85]-[main]-[INFO] 0 annotated @Service Components { [] }
->
-> 笔者(**mercyblitz**)回复:
->
-> > `@Reference` 类似于 `@Autowired` 一样,首先其申明的类必须被 Spring 上下文当做一个Bean,因此,Dubbo 并没有直接将 `@Reference` 字段所在的类提升成 Bean。
-> >
-> > 综上所述,这并不是一个问题,而是用法不当!
-
-
-
-
-
-#### 已知问题
-
-
-
-最新发布的 Dubbo `2.5.8` 中,`@DubboComponentScan` 在以下特殊场景下存在 Spring `@Service` 不兼容情况:
-
-> 假设有两个服务实现类 `A` 和 `B`,同时存放在`com.acme` 包下:
->
-> * `A` 标注 Dubbo `@Service`
-> * `B` 标注 Dubbo `@Service` 和 Spring `@Service`
->
-> 当 Spring `@ComponentScan` 先扫描`com.acme` 包时,`B` 被当做 Spring Bean 的候选类。随后,`@DubboComponentScan` 也扫描相同的包。当应用启动时,`A` 和 `B` 虽然都是 Spring Bean,可仅 `A` 能够暴露 Dubbo 服务,`B` 则丢失。
-
-
-
-问题版本:`2.5.7`、`2.5.8`
-
-问题详情:https://github.com/alibaba/dubbo/issues/1120
-
-修复版本:`2.5.9`(下个版本)
-
-
-
-
-
-
-
diff --git a/en-us/blog/dubbo-annotation.md b/en-us/blog/dubbo-annotation.md
index a13c61e..1a1fc27 100644
--- a/en-us/blog/dubbo-annotation.md
+++ b/en-us/blog/dubbo-annotation.md
@@ -1,23 +1,23 @@
---
-title: 在 Dubbo 中使用注解
+title: Use Annotations In Dubbo
keywords: Dubbo, Annotation, Spring
-description: 介绍了如何使用注解方式而非 XML 方式来开发 Dubbo 应用,可以学习到如何使用 @EnableDubbo、@Service、@Reference 的用法。
+description: This article will introduce you how to use annotations instead of XML to develop Dubbo applications, such as `@EnableDubbo`, `@Service` and `@Reference`.
---
-# 在 Dubbo 中使用注解
+# Use Annotations In Dubbo
-随着微服务架构的广泛地推广和实施。在 Java 生态系统中,以 Spring Boot 和 Spring Cloud 为代表的微服务框架,引入了全新的编程模型,包括:
+With the widely promotion and implementation of Microservices Architecture, the Microservices Architecture represented by Spring Boot and Spring Cloud, in Java ecosystem, introduced some brand new programming model, like:
+ - Annotation-Driven
+ - External Configuration
+ - Auto-Configure
-* 注解驱动(Annotation-Driven)
-* 外部化配置(External Configuration)
-* 以及自动装配(Auto-Configure)
+New programming model have some advantages, for example, it does not require `XML` configuration, it can simplify deployment process, beyond that,it can promote development efficiency. In order to implement the microservice architecture better,Dubbo has provided more perfect support for the above three scenarios since version 2.5.8. This article focuses on introduce annotations rather than discuss the traditional XML configuration approach. There are two kinds of automatic assembly, exte [...]
-新的编程模型无需 XML 配置、简化部署、提升开发效率。为了更好地实践微服务架构,Dubbo 从 `2.5.8` 版本开始, 分别针对了上述的三个场景,提供了更完善的支持。本文不讨论传统的 XML 配置方式,而是侧重介绍注解这种方式。外部配置、自动装配两种自动装配会在另外的文章中专门介绍。
-## 注解介绍
-### @EnableDubbo
+## Introduce Annotations
-`@EnableDubbo` 注解是 `@EnableDubboConfig` 和 `@DubboComponentScan`两者组合的便捷表达方式。与注解驱动相关的是 `@DubboComponentScan`。
+### @EnableDubbo
+The annotations of `@EnableDubbo` is a combination of both `@EnableDubboConfig` and `@DubboComponentScan`.Related to the annotation driver is `@DubboComponentScan`.
```java
package org.apache.dubbo.config.spring.context.annotation;
@@ -50,15 +50,11 @@ public @interface EnableDubbo {
}
```
-通过 `@EnableDubbo` 可以在指定的包名下(通过 `scanBasePackages`),或者指定的类中(通过 `scanBasePackageClasses`)扫描 Dubbo 的服务提供者(以 `@Service` 标注)以及 Dubbo 的服务消费者(以 `Reference` 标注)。
-
-扫描到 Dubbo 的服务提供方和消费者之后,对其做相应的组装并初始化,并最终完成服务暴露或者引用的工作。
-
-当然,如果不使用外部化配置(External Configuration)的话,也可以直接使用 `@DubboComponentScan`。
+The `@bableDubbo` can be used to scan Dubbo's service provider (marked by `@Service`) and Dubbo's service consumer (marked by `Reference`) under the specified package name (via `scanBasePackages`) or in the specified class (via `scanBasePackageClasses`). After Dubbo's service providers and consumers have been scanned, they have been assembled corresponding and been initialized, and finally the service is exposed or referenced, if you do not use `External Configuration`, you can use `@Du [...]
### @Service
-`@Service` 用来配置 Dubbo 的服务提供方,比如:
+`@service` is used to configure Dubbo's Service provider,for example:
```java
@Service
@@ -69,7 +65,7 @@ public class AnnotatedGreetingService implements GreetingService {
}
```
-通过 `@Service` 上提供的属性,可以进一步的定制化 Dubbo 的服务提供方:
+Via `@Service`'s properties, you can customize Dubbo's Service provider:
```java
package org.apache.dubbo.config.annotation;
@@ -95,29 +91,28 @@ public @interface Service {
}
```
-其中比较重要的有:
-
-1. @Service 只能定义在一个类上,表示一个服务的具体实现
-1. interfaceClass:指定服务提供方实现的 interface 的类
-1. interfaceName:指定服务提供方实现的 interface 的类名
-1. version:指定服务的版本号
-1. group:指定服务的分组
-1. export:是否暴露服务
-1. registry:是否向注册中心注册服务
-1. application:应用配置
-1. module:模块配置
-1. provider:服务提供方配置
-1. protocol:协议配置
-1. monitor:监控中心配置
-2. registry:注册中心配置
-
-另外,需要注意的是,application、module、provider、protocol、monitor、registry(从 8 到 13)需要提供的是对应的 spring bean 的名字,而这些 bean 的组装要么通过传统的 XML 配置方式完成,要么通过现代的 Java Config 来完成。在本文中,将会展示 Java Config 的使用方式。
+Which is more important:
+1. **@Service**: Can only be defined on a class, represent a service
+2. **interfaceClass**: specified `interface`'s class implemented by the service provider
+3. **interfaceName**: specified `interface`'s class name implemented by the service provider
+4. **version**: specified the version number of the service
+5. **group**:specified the group of services
+6. **export**:whether to expose service
+7. **registry**:Whether to register service to the registry
+8. **application**:application configuration
+9. **module**:module configuration
+10. **provider**:service provider configuration
+11. **protocol**:protocol configuration
+12. **monitor**:monitoring center configuration
+13. **registr**:registry configuration
+
+In addition, it should be noted that, `application`, `module`, `provider`, `protocol`, `monitor`, `registry` (from 8 to 13) need to provide the name of the corresponding `spring bean`,These bean assembly completed either through traditional XML configuration,or by the modern Java Config. This article will show you how to use `Java Config`.
### @Reference
-`@Reference` 用来配置 Dubbo 的服务消费方,比如:
+`@Reference` is used to configure Dubbo's Service consumer,for example:
-```java
+```Java
@Component
public class GreetingServiceConsumer {
@Reference
@@ -129,9 +124,9 @@ public class GreetingServiceConsumer {
}
```
-通过 `@Reference` 上提供的属性,可以进一步的定制化 Dubbo 的服务消费方:
+Via `@Reference`'s properties, you can customize Dubbo's Service consumer:
-```java
+```Java
package org.apache.dubbo.config.annotation;
@Documented
@@ -153,42 +148,41 @@ public @interface Reference {
}
```
-其中比较重要的有:
-
-1. @Reference 可以定义在类中的一个字段上,也可以定义在一个方法上,甚至可以用来修饰另一个 annotation,表示一个服务的引用。通常 @Reference 定义在一个字段上
-2. interfaceClass:指定服务的 interface 的类
-3. interfaceName:指定服务的 interface 的类名
-4. version:指定服务的版本号
-5. group:指定服务的分组
-6. url:通过指定服务提供方的 URL 地址直接绕过注册中心发起调用
-7. application:应用配置
-8. module:模块配置
-9. consumer:服务消费方配置
-10. protocol:协议配置
-11. monitor:监控中心配置
-12. registry:注册中心配置
+Which is more important:
-另外,需要注意的是,application、module、consumer、protocol、monitor、registry(从 7 到 12)需要提供的是对应的 spring bean 的名字,而这些 bean 的组装要么通过传统的 XML 配置方式完成,要么通过现代的 Java Config 来完成。在本文中,将会展示 Java Config 的使用方式。
+1. **@Reference**:you can define it on a field in a class, you can define it on a method, you can even modify another annotation, it represent a reference to a service.Normally `@Reference` is defined in one field
+2. **interfaceClass** : specified `interface`'s class implemented by the service provider
+3. **interfaceName**: specified `interface`'s class name implemented by the service provider
+4. **version**: specified the version number of the service
+5. **group**:pecified the group of services
+6. **url**: invoking the registry directly by specifying the URL of the service provider
+7. **application**:application configuration
+8. **module**:module configuration
+9. **consumer**:service consumer configuration
+10. **protocol**:protocol configuration
+11. **monitor**:monitoring center configuration
+12. **registr**:registry configuration
-## 示例实战
+In addition, it should be noted that, `application`, `module`, `consumer`, `protocol`, `monitor`, `registry` (from 7 to 12) need to provide the name of the corresponding `spring bean`,These bean assembly completed either through traditional XML configuration,or by the modern Java Config. This article will show you how to use `Java Config`.
-了解了 `@EnableDubbo`, `@Service`,`@Reference` 的作用,下面以一个实际的例子来展示如何使用 annotation 来开发 Dubbo 应用。以下的代码可以在 https://github.com/dubbo/dubbo-samples/tree/master/dubbo-samples-annotation 中找到。
+## Example practice
-### 1. 接口定义
+After learn what `@EnableDubbo`, `@Service`, `@Reference` is, there is a practical example showing how to use the annotation to develop a Dubbo application.The following code can be found at https://github.com/dubbo/dubbo-samples/tree/master/dubbo-samples-annotation
-定义一个简单的 `GreetingService` 接口,里面只有一个简单的方法 `sayHello` 向调用者问好。
+### 1.Interface Definition
-```java
+Define a simple `GreetingService` interface with only a simple method `sayHello` to the caller.
+```Java
public interface GreetingService {
String sayHello(String name);
}
```
-### 2. 服务端:服务实现
+### 2.Server:Service Implementation
-实现 `GreetingService` 接口,并通过 `@Service` 来标注其为 Dubbo 的一个服务。
+Implement the `GreetingService` interface, and mark it as a service for Dubbo via @Service.
-```java
+```Java
@Service
public class AnnotatedGreetingService implements GreetingService {
public String sayHello(String name) {
@@ -197,11 +191,11 @@ public class AnnotatedGreetingService implements GreetingService {
}
```
-### 3. 服务端:组装服务提供方
+### 3.Server:Assembly Service Provider
-通过 Spring 中 Java Config 的技术(`@Configuration`)和 annotation 扫描(`@EnableDubbo`)来发现、组装、并向外提供 Dubbo 的服务。
+You can discover, assemble, and provide Dubbo's services through the Java config technology (@Configuration) and annotation scan (@EnableDubbo) in Spring.
-```java
+```Java
@Configuration
@EnableDubbo(scanBasePackages = "com.alibaba.dubbo.samples.impl")
static class ProviderConfiguration {
@@ -238,22 +232,19 @@ static class ProviderConfiguration {
}
```
-说明:
-
-* 通过 `@EnableDubbo` 指定在 `com.alibaba.dubbo.samples.impl` 下扫描所有标注有 `@Service` 的类
-* 通过 `@Configuration` 将 ProviderConfiguration 中所有的 `@Bean` 通过 Java Config 的方式组装出来并注入给 Dubbo 服务,也就是标注有 `@Service` 的类。这其中就包括了:
-
- 1. ProviderConfig:服务提供方配置
- 2. ApplicationConfig:应用配置
- 3. RegistryConfig:注册中心配置
- 4. ProtocolConfig:协议配置
-
-
-### 4. 服务端:启动服务
-
-在 `main` 方法中通过启动一个 Spring Context 来对外提供 Dubbo 服务。
-
-```java
+Description:
+ - Scan all classes marked with `@Service` under `com.alibaba.dubbo.samples.impl` with `@EnableDubbo`
+ - Via @Configuration, all @Beans in the ProviderConfiguration are assembled using the way of `Java Config` and then injected into the Dubbo service, which means the class marked with `@Service`.Which included:
+i. **ProviderConfig**:Service provider configuration
+ii. **ApplicationConfig**:Application configuration
+iii.**RegistryConfig**:registry configuration
+iv. **ProtocolConfig**:Protocol configuration
+
+ ### 4.Server:Start Service
+
+In the `main` method to provide external `Dubbo` service by starting a `Spring Context`.
+
+```Java
public class ProviderBootstrap {
public static void main(String[] args) throws Exception {
new EmbeddedZooKeeper(2181, false).start(); // #1
@@ -264,28 +255,24 @@ public class ProviderBootstrap {
}
```
-说明:
-
-1. 启动一个嵌入式的 zookeeper 在 2181 端口上提供注册中心的服务
-2. 初始化一个 `AnnotationConfigApplicationContext` 的示例,并将 `ProviderConfiguration` 传入以完成 Dubbo 服务的自动发现和装配
-3. 启动 Spring Context,开始提供对外的 Dubbo 服务
-4. 因为是服务端,需要通过阻塞主线程来防止进程退出
-
-
-
-启动服务端的 `main` 方法,将会看到下面的输出,代表服务端启动成功,并在注册中心(ZookeeperRegistry)上注册了 `GreetingService` 这个服务:
+Description:
+1. Start an embedded `zookeeper` and provide service registry on port `2181`
+2. Initialize an example of an AnnotationConfigApplicationContext and pass the `ProviderConfiguration` into the example to complete the automatic discovery and assembly of the `Dubbo` service.
+3. Start the `Spring Context` and start providing external `Dubbo` services.
+4. Because it is a server, you need to prevent the process exit by blocking the main thread.
+Start the `main` method of the server, you will see the following output, on behalf of the server startup success, and registered the `GreetingService` service in the `ZookeeperRegistry`:
```sh
[01/08/18 02:12:51:051 CST] main INFO transport.AbstractServer: [DUBBO] Start NettyServer bind /0.0.0.0:20880, export /192.168.99.1:20880, dubbo version: 2.6.2, current host: 192.168.99.1
[01/08/18 02:12:51:051 CST] main INFO zookeeper.ZookeeperRegistry: [DUBBO] Register: dubbo://192.168.99.1:20880/com.alibaba.dubbo.samples.api.GreetingService?anyhost=true&application=dubbo-annotation-provider&default.timeout=1000&dubbo=2.6.2&generic=false&interface=com.alibaba.dubbo.samples.api
```
-### 5. 客户端:引用服务
+### 5.Server:Reference Service
-通过 `@Reference` 来标记 `GreetingService` 接口的成员变量 greetingService 是一个 Dubbo 服务的引用,也就是说,可以简单的通过该接口向远端的服务提供方发起调用,而客户端并没有实现 `GreetingService` 接口。
+Marking the member variable of the `GreetingService` via `@Reference` .The `greetingService` is a reference to the `Dubbo` service, which means that it can simply provide through the interface to the remote party to initiate service calls, and the client does not implement `GreetingService` interface.
-```java
+```Java
@Component("annotatedConsumer")
public class GreetingServiceConsumer {
@Reference
@@ -297,11 +284,11 @@ public class GreetingServiceConsumer {
}
```
-### 6. 客户端:组装服务消费者
+### 6.Server:Assembly Service consumer
-与 **3. 服务端:组装服务提供方** 类似,通过 Spring 中 Java Config 的技术(`@Configuration`)和 annotation 扫描(`@EnableDubbo`)来发现、组装 Dubbo 服务的消费者。
+Just like **3. Server:Assembly Service Provider** You can discover, assemble, and provide Dubbo's service consumer through the Java config technology (@Configuration) and annotation scan (@EnableDubbo) in Spring.
-```java
+```Java
@Configuration
@EnableDubbo(scanBasePackages = "com.alibaba.dubbo.samples.action")
@ComponentScan(value = {"com.alibaba.dubbo.samples.action"})
@@ -331,19 +318,18 @@ static class ConsumerConfiguration {
}
```
-说明:
+Description:
+ - Scan all classes marked with `@Service` under `com.alibaba.dubbo.samples.impl` with `@Reference`
+ - Via @Configuration, all @Beans in the ProviderConfiguration are assembled using the way of `Java Config` and then injected into the Dubbo service, which means the class marked with `@Reference`.Which included:
+i. `ApplicationConfig`: Application configuration
+ii. `ConsumerConfig`:Service consumer configuration
+iii.`RegistryConfig`:Registry configuration.Note:The configuration here needs to be consistent with the configuration information of the EmbeddedZooKeeper when started by the service provider.
-- 通过 `@EnableDubbo` 指定在 `com.alibaba.dubbo.samples.impl` 下扫描所有标注有 `@Reference 的类
-- 通过 `@Configuration` 将 ConsumerConfiguration 中所有的 `@Bean` 通过 Java Config 的方式组装出来并注入给 Dubbo 服务消费者,也就是标注有 `@Reference 的类。这其中就包括了:
- 1. ApplicationConfig:应用配置
- 2. ConsumerConfig:服务消费者配置
- 3. RegistryConfig:注册中心配置,注意:这里的配置需要与服务提供方启动的 EmbeddedZooKeeper 的配置信息保持一致
+### 7.Server: Initiate Remote Calls
-### 7. 客户端:发起远程调用
+In the `main` method, you can start a `Spring Context` to find the service consumer of the assembled `Dubbo` from it, and initiate a remote call.
-在 `main` 方法中通过启动一个 Spring Context,从其中查找到组装好的 Dubbo 的服务消费者,并发起一次远程调用。
-
-```java
+```Java
public class ConsumerBootstrap {
public static void main(String[] args) {
AnnotationConfigApplicationContext context = new AnnotationConfigApplicationContext(ConsumerConfiguration.class); // #1
@@ -355,21 +341,13 @@ public class ConsumerBootstrap {
}
```
-说明:
-
-1. 初始化一个 `AnnotationConfigApplicationContext` 的示例,并将 `ConsumerConfiguration` 传入以完成 Dubbo 服务消费者的自动发现和装配
-
-2. 启动 Spring Context
-
-3. 从 Context 中查找出类型为 `GreetingServiceConsumer` 的 Bean
-
-4. 调用 `doSayHello` 方法,最终通过 Dubbo 的服务引用(由 `@Reference` 标注)发起一次远程调用
-
-5. 打印调用结果
-
-
-
-启动客户端的 `main` 方法,将会看到下面的输出,其中返回结果为 result: hello, annotation:
+Description:
+ - Initialize an example of an AnnotationConfigApplicationContext and pass the `ProviderConfiguration` into the example to complete the automatic discovery and assembly of the `Dubbo` service consumer.
+ - start `Spring Context`.
+ - Find `bean` which type is `GreetingServiceConsumer` from `Context`.
+ - Call the `doSayHello` method and finally initiate a remote call via Dubbo's service reference (marked by @Reference)
+ - Print call result
+Start the Server's `main` method, you will see the following output, which returns the `result`: hello, annotation:
```sh
[01/08/18 02:38:40:040 CST] main INFO config.AbstractConfig: [DUBBO] Refer dubbo service com.alibaba.dubbo.samples.api.GreetingService from url zookeeper://localhost:2181/com.alibaba.dubbo.registry.RegistryService?anyhost=true&application=dubbo-annotation-consumer&check=false&default.timeout=3000&dubbo=2.6.2&generic=false&interface=com.alibaba.dubbo.samples.api.GreetingService&methods=sayHello&pid=33001®ister.ip=192.168.99.1&remote.timestamp=1533105502086&side=consumer×tamp=153 [...]
@@ -377,10 +355,8 @@ public class ConsumerBootstrap {
result: hello, annotation
```
+## Conclusion
+By studying this article, the reader can master the basic concepts of `Dubbo`'s exclusive `annotations` , `@EnableDubbo`, `@Service`, `@Reference`, and master it's basic usage through a simple `Dubbo` application.
-## 总结
-
-通过本文的学习,读者可以掌握 Dubbo 专属的 annotation `@EnableDubbo`、`@Service`、`@Reference` 的基本概念,并通过一个简单 Dubbo 应用的实战开发掌握其基本的用法。
-
-Spring 除了传统的 XML 配置之外,还提供了注解驱动、外部化配置、以及自动装配等更现代的配置方式。本文专注在介绍通过注解方式来开发 Dubbo 应用,可以看到,与 XML 配置相比,注解方式编程更加简洁明快。在今后的博文中,会进一步的介绍在 Dubbo 中使用外部化配置、以及自动装配的方法。
\ No newline at end of file
+In addition to traditional `XML` configuration, `Spring` offers more modern configurations such as annotation drivers, externalization, and auto-assembly.This article focuses on the development of `Dubbo` applications through annotations. You can be seen that annotation mode programming is more concise and simple than XML configuration. In future, we will introduce the use of externalization configuration and automatic assembly in `Dubbo` further.
diff --git a/en-us/blog/dubbo-basic-usage-dubbo-consumer-configuration.md b/en-us/blog/dubbo-basic-usage-dubbo-consumer-configuration.md
index 3f47a6c..4a31905 100644
--- a/en-us/blog/dubbo-basic-usage-dubbo-consumer-configuration.md
+++ b/en-us/blog/dubbo-basic-usage-dubbo-consumer-configuration.md
@@ -1,93 +1,93 @@
-# Dubbo基本用法-Dubbo Consumer配置
+# DubboBasic Usage - Dubbo Consumer Configuration
-## Dubbo Consumer配置
+## Dubbo Consumer Configuration
-### Consumer配置详解
+### Consumer Configuration Detailed
-配置Dubbo Consumer有3种方式:XML配置,API调用方式配置,注解方式配置。
+There are 3 ways to configure the Dubbo Consumer: XML configuration, API call mode configuration, and annotation mode configuration.
-#### XML配置
+#### XML Configuration
-###### 最简单的配置的样例:
+###### Example of the simplest configuration:
```
<?xml version="1.0" encoding="UTF-8"?>
<beans xmlns="http://www.springframework.org/schema/beans"
- xmlns:xsi="http://www.w3.org/2001/XMLSchema-instance"
- xmlns:dubbo="http://dubbo.apache.org/schema/dubbo"
- xsi:schemaLocation="http://www.springframework.org/schema/beans http://www.springframework.org/schema/beans/spring-beans-4.3.xsd http://dubbo.apache.org/schema/dubbo http://dubbo.apache.org/schema/dubbo/dubbo.xsd">
- <dubbo:application name="hello-world-app" />
- <dubbo:registry address="multicast://224.5.6.7:1234" />
- <dubbo:protocol name="dubbo" port="20880" />
- <dubbo:reference id="demoServiceRemote" interface="com.alibaba.dubbo.demo.DemoService" />
+ Xmlns:xsi="http://www.w3.org/2001/XMLSchema-instance"
+ Xmlns:dubbo="http://dubbo.apache.org/schema/dubbo"
+ Xsi:schemaLocation="http://www.springframework.org/schema/beans http://www.springframework.org/schema/beans/spring-beans-4.3.xsd http://dubbo.apache.org/schema /dubbo http://dubbo.apache.org/schema/dubbo/dubbo.xsd">
+ <dubbo:application name="hello-world-app" />
+ <dubbo:registry address="multicast://224.5.6.7:1234" />
+ <dubbo:protocol name="dubbo" port="20880" />
+ <dubbo:reference id="demoServiceRemote" interface="com.alibaba.dubbo.demo.DemoService" />
</beans>
```
-> 支持的配置标签及对应的配置项详解,参考provider中的用法。
+> For the supported configuration tags and corresponding configuration items, refer to the usage in the provider.
-> 接下来重点讲解下<dubbo:reference/>的配置。
+> Next, focus on the configuration of <dubbo:reference/>.
-* <dubbo:reference/>支持的主要属性列表:
+* <dubbo:reference/> List of main attributes supported:
-| 属性名 | 说明 |
+| Property Name | Description |
| -------- | ----- |
-| id | 服务引用id,作为java bean id,需要唯一 |
-| interface | 接口名,用于查找服务 |
-| version | 版本号,与服务提供者的版本一致 |
-| timeout | 服务方法调用超时时间(毫秒) |
-| retries | 远程服务调用重试次数,不包括第一次调用,不需要重试请设为0 |
-| connections | 对每个提供者的最大连接数,rmi、http、hessian等短连接协议表示限制连接数,dubbo等长连接协表示建立的长连接个数 |
-| loadbalance | 负载均衡策略,可选值:random,roundrobin,leastactive,分别表示:随机,轮询,最少活跃调用 |
-| async | 是否异步执行,不可靠异步,只是忽略返回值,不阻塞执行线程 |
-| generic | 泛化调用,可以绕过 |
-| check | 启动时检查提供者是否存在,true报错,false忽略 |
-| actives | 每服务消费者每服务每方法最大并发调用数 |
+| id | service reference id, as java bean id, requires unique |
+Interface | interface name for finding services |
+| version | version number, consistent with the service provider's version |
+| timeout | service method call timeout (ms) |
+| retries | The number of retry attempts by the remote service, excluding the first call, no need to retry, please set to 0 |
+Connections | For each provider's maximum number of connections, rmi, http, hessian, etc. The short connection protocol indicates the number of restricted connections, and the dubbo equal-length connection association indicates the number of long connections established |
+Loadbalance | Load balancing policy, optional values: random, roundrobin, leastactive, respectively: random, polling, least active call |
+| async | Whether to execute asynchronously, unreliable asynchronous, just ignore return value, do not block execution thread |
+| generic | generalized call, can bypass |
+| check | Check if the provider exists at startup, true error, false ignore |
+Actives | Maximum concurrent calls per method per service consumer |
-其他配置属性请参考xsd:http://dubbo.apache.org/schema/dubbo/dubbo.xsd
+For other configuration properties, please refer to xsd: http://dubbo.apache.org/schema/dubbo/dubbo.xsd
-* <dubbo:method/>作为<dubbo:reference/>的子元素,它可以针对方法进行配置。比较常用的属性有:
+* <dubbo:method/> As a child of <dubbo:reference/>, it can be configured for methods. The more commonly used attributes are:
-| 属性名 | 说明 |
+| Property Name | Description |
| -------- | ----- |
-| executes | 服务执行的请求上限 |
-| retries | 超时重试次数 |
-| timeout | 调用超时时间 |
-| loadbalance | 负载均衡策略,可选值:random,roundrobin,leastactive,分别表示:随机,轮询,最少活跃调用 |
-| async | 是否异步执行,不可靠异步,只是忽略返回值,不阻塞执行线程 |
-| actives | 每服务消费者最大并发调用限制 |
+| executes | request ceiling for service execution |
+| retries | Timeout retries |
+| timeout | call timeout |
+Loadbalance | Load balancing policy, optional values: random, roundrobin, leastactive, respectively: random, polling, least active call |
+| async | Whether to execute asynchronously, unreliable asynchronous, just ignore return value, do not block execution thread |
+Actives | Maximum concurrent call limit per service consumer |
-其他属性,可以参考上面的xsd。
+For other properties, you can refer to xsd above.
-###### 配置的覆盖关系
+###### Configured coverage relationship
-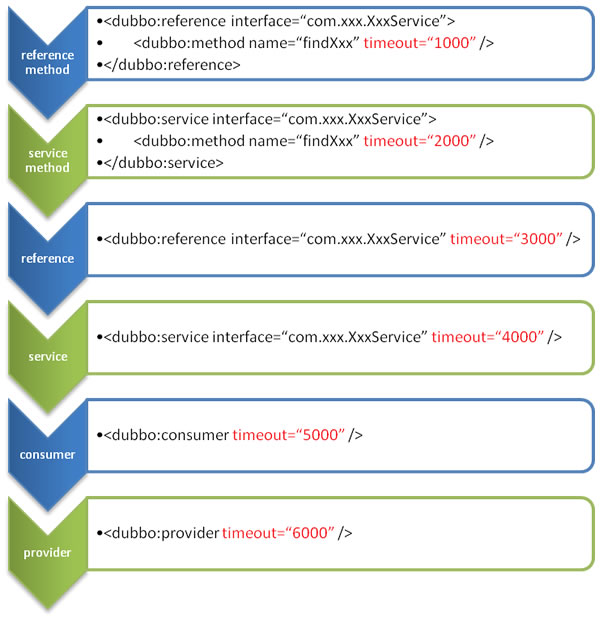
+
-<center>配置的覆盖关系图</center>
+Coverage diagram for <center> configuration</center>
-其中包含了consumer端和provider的配置,注意区分。
+It contains the configuration of the consumer side and the provider, pay attention to the distinction.
#### annotation
-###### Reference注解远程服务
+###### Reference Annotation Remote Service
```
-public class AnnotationConsumeService {
+Public class AnnotationConsumeService {
- @com.alibaba.dubbo.config.annotation.Reference
- public AnnotateService annotateService;
+ @com.alibaba.dubbo.config.annotation.Reference
+ Public AnnotateService annotateService;
// ...
@@ -97,99 +97,97 @@ public class AnnotationConsumeService {
-这种方式的配置和前面用xml配置的方式是一样的效果。
+The configuration in this way is the same as the previous configuration in xml.
-> 指定dubbo扫描路径的方式,可以参考前一章节中provider的实现。
+> To specify the way dubbo scans the path, refer to the implementation of the provider in the previous section.
-#### api直接触发
+#### api direct trigger
```
-import com.alibaba.dubbo.rpc.config.ApplicationConfig;
-import com.alibaba.dubbo.rpc.config.RegistryConfig;
-import com.alibaba.dubbo.rpc.config.ConsumerConfig;
-import com.alibaba.dubbo.rpc.config.ReferenceConfig;
-import com.xxx.XxxService;
-// 当前应用配置
+Import com.alibaba.dubbo.rpc.config.ApplicationConfig;
+Import com.alibaba.dubbo.rpc.config.RegistryConfig;
+Import com.alibaba.dubbo.rpc.config.ConsumerConfig;
+Import com.alibaba.dubbo.rpc.config.ReferenceConfig;
+Import com.xxx.XxxService;
+// current application configuration
ApplicationConfig application = new ApplicationConfig();
application.setName("yyy");
-// 连接注册中心配置
+// Connect to the registry configuration
RegistryConfig registry = new RegistryConfig();
registry.setAddress("10.20.130.230:9090");
registry.setUsername("aaa");
registry.setPassword("bbb");
-// 注意:ReferenceConfig为重对象,内部封装了与注册中心的连接,以及与服务提供方的连接
-// 引用远程服务
-ReferenceConfig<XxxService> reference = new ReferenceConfig<XxxService>(); // 此实例很重,封装了与注册中心的连接以及与提供者的连接,请自行缓存,否则可能造成内存和连接泄漏
+// Note: ReferenceConfig is a heavy object that internally encapsulates the connection to the registry and the connection to the service provider.
+// reference remote service
+ReferenceConfig<XxxService> reference = new ReferenceConfig<XxxService>(); // This instance is heavy, encapsulates the connection to the registry and the connection to the provider, please cache it yourself, otherwise it may cause memory and connection leaks.
reference.setApplication(application);
-reference.setRegistry(registry); // 多个注册中心可以用setRegistries()
+reference.setRegistry(registry); // Multiple registries can use setRegistries()
reference.setInterface(XxxService.class);
reference.setVersion("1.0.0");
-// 和本地bean一样使用xxxService
-XxxService xxxService = reference.get();
+// Use xxxService like local beans
+XxxService xxxService = reference.get();
```
-###### method特殊设置
+###### methodSpecial settings
```
-// 方法级配置
+// Method level configuration
List<MethodConfig> methods = new ArrayList<MethodConfig>();
MethodConfig method = new MethodConfig();
method.setName("createXxx");
method.setTimeout(10000);
method.setRetries(0);
-methods.add(method);
-// 引用远程服务
-ReferenceConfig<XxxService> reference = new ReferenceConfig<XxxService>(); // 此实例很重,封装了与注册中心的连接以及与提供者的连接,请自行缓存,否则可能造成内存和连接泄漏
+Methods.add(method);
+// reference remote service
+ReferenceConfig<XxxService> reference = new ReferenceConfig<XxxService>(); // This instance is heavy, encapsulates the connection to the registry and the connection to the provider, please cache it yourself, otherwise it may cause memory and connection leaks.
...
-reference.setMethods(methods); // 设置方法级配置
+reference.setMethods(methods); // Set method level configuration
```
-### Consumer 调用远程服务
-上面章节更多从配置角度出发,接下来通过一个完整的例子,来讲解下dubbo consumer的完整使用。
+### Consumer Calling Remote Service
+The above chapters are more from a configuration point of view, and then through a complete example, explain the complete use of dubbo consumer.
-这个例子中只有一个服务UserReadService,有一个方法 getUserById。 需要将通过Dubbo调用远程的服务。具体的步骤如下:
+There is only one service UserReadService in this example, there is a method getUserById. Need to call a remote service through Dubbo. The specific steps are as follows:
-1.创建一个工程
-如果本来已经有工程,可以忽略。创建一个spring boot工程,可以通过 https://start.spring.io/ 创建。
-服务的提供方,已经在provider章节中进行了定义。
-2.调用服务
+1. Create a project
+If there is already a project, you can ignore it. Create a spring boot project that can be created at https://start.spring.io/.
+The provider of the service has been defined in the provider section.
+2. Call the service
```
@RestController
-public class UserTestController{
- @Autowired
- private UserReadService userReadService;
+Public class UserTestController{
+ @Autowired
+ Private UserReadService userReadService;
@RequestMapping("/user/getById")
- public String getUserById(Long id){
+ Public String getUserById(Long id){
// just test
- return userReadService.getUserById(id).toString();
+ Return userReadService.getUserById(id).toString();
}
}
```
-3.Dubbo配置
+3.Dubbo configuration
```
<?xml version="1.0" encoding="UTF-8"?>
<beans xmlns="http://www.springframework.org/schema/beans"
- xmlns:xsi="http://www.w3.org/2001/XMLSchema-instance"
- xmlns:dubbo="http://dubbo.apache.org/schema/dubbo"
- xsi:schemaLocation="http://www.springframework.org/schema/beans http://www.springframework.org/schema/beans/spring-beans-4.3.xsd http://dubbo.apache.org/schema/dubbo http://dubbo.apache.org/schema/dubbo/dubbo.xsd">
- <dubbo:application name="hello-world-app" />
- <dubbo:registry address="multicast://224.5.6.7:1234" />
- <dubbo:protocol name="dubbo" port="20880" />
- <dubbo:reference id="userReadService" interface="com.package.UserReadService"check="false" />
+ Xmlns:xsi="http://www.w3.org/2001/XMLSchema-instance"
+ Xmlns:dubbo="http://dubbo.apache.org/schema/dubbo"
+ Xsi:schemaLocation="http://www.springframework.org/schema/beans http://www.springframework.org/schema/beans/spring-beans-4.3.xsd http://dubbo.apache.org/schema /dubbo http://dubbo.apache.org/schema/dubbo/dubbo.xsd">
+ <dubbo:application name="hello-world-app" />
+ <dubbo:registry address="multicast://224.5.6.7:1234" />
+ <dubbo:protocol name="dubbo" port="20880" />
+ <dubbo:reference id="userReadService" interface="com.package.UserReadService"check="false" />
</beans>
```
-Dubbo配置的其他方式可以参考上一章节的相关配置,或者使用集成dubbo spring boot starter方式。
-
-
+Other ways of configuring Dubbo can refer to the relevant configuration in the previous section, or use the integrated dubbo spring boot starter mode.
\ No newline at end of file
diff --git a/en-us/blog/dubbo-basic-usage-dubbo-provider-configuration.md b/en-us/blog/dubbo-basic-usage-dubbo-provider-configuration.md
index e4349f5..f674e08 100644
--- a/en-us/blog/dubbo-basic-usage-dubbo-provider-configuration.md
+++ b/en-us/blog/dubbo-basic-usage-dubbo-provider-configuration.md
@@ -1,26 +1,25 @@
---
-title: Dubbo基础用法之Provider配置
+title: Dubbo Basic Usage -- Dubbo Provider Configuration
keywords: Dubbo, Provider, Configuration
-description: 主要讲述如何配置dubbo,按照配置方式上可以分为:XML配置,properties方式配置,注解方式配置,API调用方式配置。
+description: This article will introduce you how to config Dubbo, by XML, property files, annotations or Java code.
---
-# Dubbo基本用法之Provider配置
-
+Dubbo Basic Usage -- Dubbo Provider Configuration
+---
-## Dubbo基本用法
+# Dubbo Basic Usage
-本章节主要讲述如何配置dubbo,按照配置方式上分,可以分为:XML配置,properties方式配置,注解方式配置,API调用方式配置。
-按照功能角度进行划分,可以分为Dubbo Provider和Dubbo Consumer。接下来章节中,分别对dubbo provider和Dubbo consumer进行讲解。
+This chapter mainly talking about how to configure dubbo. According to the configuration mode, it can be divided into the following mode: XML Configuration, Properties Configuration, Annotation Configuration, API Invocation Mode Configuration. And according to the function, we can divide them into Dubbo Provider and Dubbo Consumer. In the following sections, we would explain Dubbo Provider and Dubbo Consumer respectively.
-### Dubbo Provider配置
+## Dubbo Provider Configuration
-#### Provider 配置详解
+### Provider Configuration in Detail
-配置Dubbo Provider有4种方式:XML配置,properties方式配置,API调用方式配置,注解方式配置。
+The configuration mode of Dubbo Provider has 4 different ways: XML Configuration, Properties Configuration, API Invocation Mode Configuration and Annotation Configuration.
-##### XML配置
+#### XML Configuration
-###### 最简单的配置的样例:
+###### The simplest configuration example:
```
<?xml version="1.0" encoding="UTF-8"?>
<beans xmlns="http://www.springframework.org/schema/beans"
@@ -34,7 +33,7 @@ description: 主要讲述如何配置dubbo,按照配置方式上可以分为
<dubbo:reference id="demoServiceRemote" interface="com.alibaba.dubbo.demo.DemoService" />
</beans>
```
-上面样例中,注意下dubbo schema的写法:
+In the example above,note the way to write dubbo schema:
```
<beans xmlns:xsi="http://www.w3.org/2001/XMLSchema-instance"
xmlns:dubbo="http://code.alibabatech.com/schema/dubbo"
@@ -43,117 +42,119 @@ description: 主要讲述如何配置dubbo,按照配置方式上可以分为
http://code.alibabatech.com/schema/dubbo http://code.alibabatech.com/schema/dubbo/dubbo.xsd">
```
-###### 支持的配置标签
+###### Supported Configuration Tags
-| 标签 | 用途 | 解释 |
+| Tags | Application | Describe |
| -------- | ----- | :---- |
-| <dubbo:service/> | 服务配置 | 用于暴露一个服务,定义服务的元信息,一个服务可以用多个协议暴露,一个服务也可以注册到多个注册中心 |
-| <dubbo:reference/> | 引用配置 | 用于创建一个远程服务代理,一个引用可以指向多个注册中心 |
-| <dubbo:protocol/> | 协议配置 | 用于配置提供服务的协议信息,协议由提供方指定,消费方被动接受 |
-| <dubbo:application/> | 应用配置 | 用于配置当前应用信息,不管该应用是提供者还是消费者 |
-| <dubbo:module/> | 模块配置 | 用于配置当前模块信息,可选 |
-| <dubbo:registry/> | 注册中心配置 | 用于配置连接注册中心相关信息 |
-| <dubbo:monitor/> | 监控中心配置 | 用于配置连接监控中心相关信息,可选 |
-| <dubbo:provider/> | 提供方配置 | 当 ProtocolConfig 和 ServiceConfig 某属性没有配置时,采用此缺省值,可选 |
-| <dubbo:consumer/> | 消费方配置 | 当 ReferenceConfig 某属性没有配置时,采用此缺省值,可选 |
-| <dubbo:method/> | 方法配置 | 用于 ServiceConfig 和 ReferenceConfig 指定方法级的配置信息 |
-| <dubbo:argument/> | 参数配置 | 用于指定方法参数配置 |
+| <dubbo:service/> | Service Configuration | Expose a service, define the meta information of the service. One service can use multiple protocols to expose and can be registered to multiple registry centers |
+| <dubbo:reference/> | Reference Configuration | Create a remote service agent, one reference can point to multiple registry centers |
+| <dubbo:protocol/> | Protocol Configuration | Configure protocol information for providing services, protocol is specified by the provider and accepted passively by the consumer |
+| <dubbo:application/> | Application Configuration | Configure current application information, regardless of whether the application is provider or consumer |
+| <dubbo:module/> | Module Configuration | Configure current module information. Optional |
+| <dubbo:registry/> | Registry Center Configuration | Configure information related to connect registry centers |
+| <dubbo:monitor/> | Monitoring Center Configuration | Configure information related to connect monitor centers. Optional |
+| <dubbo:provider/> | Provider Configuration | When some properties ProtocolConfig or ServiceConfig are not configured, use this default value. Optional |
+| <dubbo:consumer/> | Consumer Configuration | When some properties of ReferenceConfig are not configured, use this default value. Optional |
+| <dubbo:method/> | Method Configuration | Configure specific method level information of ServiceConfig and ReferenceConfig |
+| <dubbo:argument/> | Parameter Configuration | Configure parameters of specific method |

- <center>配置之间关系图</center>
+ <center>Configuration Diagram</center>
-###### 配置项详解
+###### Configuration item in detail
* <dubbo:application name="hello-world-app" />
-用于指定应用名,这里需要保证应用名唯一,这个应用名在后续的console admin中可以在列表中显示,方便管理。
+Apply to specific application name, note that you need to make sure that the application name is unique. The application name can be displayed in the following console admin for easy management.
* <dubbo:registry address="multicast://224.5.6.7:1234" />
-注册中心配置,和服务发现的具体机制有关系。可以是zookeeper地址,也可以eureka地址。上面这个是广播地址,在本地服务调用的测试过程中非常方便。
+Configure registry center, related to the specific mechanism of service discovery. It can be zookeeper address or eureka address. The address above is the broadcast address, which is very convenient in the test process of the local service invocation.
* <dubbo:protocol name="dubbo" port="20880" />
-这里是传输的协议和默认端口,一般不需要更改。
+Here is the transport protocol and the default port, generally no changes are required.
-> 接下来重点讲解下<dubbo:service/>的配置。
+> Next, we will focus on the configuration of <dubbo:service/>
-* <dubbo:service/>支持的主要属性列表:
+* <dubbo:service/>mainly supports the following properties:
-| 属性名 | 说明 |
+| Properties Name | Description |
| -------- | ----- |
-| version | 版本号 |
-| scope | 服务可见性, 值为:local 或者 remote,默认为remote |
-| actives | 最大的激活的请求数 |
-| async | 方法调用是否异步,默认为false |
-| cache | 服务缓存,可选值:lru/threadlocal/jcache |
-| callbacks | callback实例的限制 |
-| generic | 泛化调用,可以绕过 |
-| class | Service的实现的类名 |
-| connections | 这个服务里的连接数 |
-| delay | 发布服务延迟的毫秒数 |
-| executes | 服务执行的请求上限 |
-| retries | 超时重试次数 |
-| timeout | 调用超时时间 |
-
-其他配置属性请参考xsd:http://dubbo.apache.org/schema/dubbo/dubbo.xsd
-
-* <dubbo:method/>作为<dubbo:service/>的子元素,它可以针对方法进行配置。比较常用的属性有:
-
-| 属性名 | 说明 |
+| version | Version number |
+| scope | Service visibility, value can be local or remote,remote by default |
+| actives | Maximum number of activated requests |
+| async | Whether the method called asynchronously,false by default |
+| cache | Service cache,optional value:lru/threadlocal/jcache |
+| callbacks | Limitation of callback instance |
+| generic | Generalized calls which can be bypassed |
+| class | The implementation of the service's class name |
+| connections | The number of connections in the service |
+| delay | The number of milliseconds delay for publicating the service |
+| executes | Upper bound of service execution requests |
+| retries | Timeout retry times |
+| timeout | Invocation timeout time |
+
+For other configuration properties, please refer to xsd:http://dubbo.apache.org/schema/dubbo/dubbo.xsd
+
+* <dubbo:method/> as the sub-element of <dubbo:service/> can be configured corresponding to method. Properties that are commonly used are:
+
+| Properties Name | Description |
| -------- | ----- |
-| executes | 服务执行的请求上限 |
-| retries | 超时重试次数 |
-| timeout | 调用超时时间 |
+| executes | Upper bound of service execution requests |
+| retries | Timeout retry times |
+| timeout | Invocation timeout time |
-其他属性,可以参考上面的xsd。
+For other properties,you can refer to xsd above。
-###### 配置的覆盖关系
+###### Configuration Override Relationship

-<center>配置的覆盖关系图</center>
+<center>Configuration Coverage Relationship Diagram</center>
-这里的覆盖关系包含了Provider和Consumer两端的配置,如果对consumer有疑问,可以参考后一章节的consumer章节之后再来理解。
+The Override relationship here includes the configuration of both provider end and consumer end. If you have any questions about consumer, you can refer to the next chapter, consumer chapter, to understand.
-#### dubbo.properties方式配置
+#### dubbo.properties Configuration
-> 如果公共配置很简单,没有多注册中心,多协议等情况,或者想多个 Spring 容器想共享配置,可以使用 dubbo.properties 作为缺省配置。
+> If the public configuration is very simple, no multiple registry centers, no multiple protocols, etc., or if you want multiple Spring containers to share the configuration, you can use dubbo.properties as the default configurations.
-Dubbo 将自动加载 classpath 根目录下的 dubbo.properties,可以通过JVM启动参数 -Ddubbo.properties.file=xxx.properties 改变缺省配置位置。
+Dubbo would load dubbo.properties under the classpath root directory automaticaly,you can change the default configuration location by JVM startup parameter -Ddubbo.properties.file=xxx.properties.
-###### dubbo.properties配置样例
+###### dubbo.properties Configuration example
```
-# 应用名
+# application name
dubbo.application.name=dubbodemo-provider
-# 注册中心地址
+# registry center address
dubbo.registry.address=zookeeper://localhost:2181
-# 广播的注册中心样例
+# Example of broadcasting registry center
#dubbo.registry.address=multicast://224.5.6.7:1234
-# 调用协议地址
+# address for calling protocol
dubbo.protocol.name=dubbo
dubbo.protocol.port=28080
```
-###### 映射规则
-将 XML 配置的标签名,加属性名,用点分隔,多个属性拆成多行
-* 比如:dubbo.application.name=foo等价于<dubbo:application name="foo" />
-* 比如:dubbo.registry.address=10.20.153.10:9090等价于<dubbo:registry address="10.20.153.10:9090" />
-如果 XML 有多行同名标签配置,可用 id 号区分,如果没有 id 号将对所有同名标签生效
-* 比如:dubbo.protocol.rmi.port=1234等价于<dubbo:protocol id="rmi" name="rmi" port="1234" />
-* 比如:dubbo.registry.china.address=10.20.153.10:9090等价于<dubbo:registry id="china" address="10.20.153.10:9090" />
-###### 覆盖策略
-
+###### Mapping Rule
+Split the tag name and properties in XML configuration with dots, and multiple properties should be split into multiple lines
+* For example: dubbo.application.name=foo equivalents to <dubbo:application name="foo" />
+* For example: dubbo.registry.address=10.20.153.10:9090 equivalents to <dubbo:registry address="10.20.153.10:9090" />
+
+If there are multiple configurations having the same tag name, they can be distinguished by id, and if there is no id, the configurations will be applied to all tags with the same name.
+* For example: dubbo.protocol.rmi.port=1234 equivalents to <dubbo:protocol id="rmi" name="rmi" port="1234" />
+* For example: dubbo.registry.china.address=10.20.153.10:9090 equivalents to <dubbo:registry id="china" address="10.20.153.10:9090" />
+
+###### Coverage Strategy
+
-* JVM 启动 -D 参数优先,这样可以使用户在部署和启动时进行参数重写,比如在启动时需改变协议的端口。
-* XML 次之,如果在 XML 中有配置,则 dubbo.properties 中的相应配置项无效。
-* Properties 最后,相当于缺省值,只有 XML 没有配置时,dubbo.properties 的相应配置项才会生效,通常用于共享公共配置,比如应用名。
+* When JVM starts, -D parameter has priority, so that users can rewrite the parameters when deploy and start, for example, the protocol port should be changed when start.
+* Then comes to XML, the configurations in dubbo.properties are invalid, if they are configured in XML.
+* Properties are the last, which can be considered as default value. Only when there is no configuration in XML, the corresponding configuarations in dubbo.properties will become effective, which usually applies to shared public configuration, like application name.
-> 注意:
-1. 如果 classpath 根目录下存在多个 dubbo.properties,比如多个 jar 包中有 dubbo.properties,Dubbo 会任意加载,并打印 Error 日志,后续可能改为抛异常。 ↩
-2. 协议的 id 没配时,缺省使用协议名作为 id
+> Note:
+1. If there are multiple dubbo.properties in the classpath root directory, for example, if dubbo.properties exist in multiple JAR files, Dubbo will load anyone arbitrarily and print the Error logs, which may change to throwing exceptions later.↩
+2. When the protocol's id is not configured, protocol name will be used as id as default.
-##### 注解配置
+#### Annotation
-###### Service注解暴露服务
+###### Service Annotation Exposure Service
```
import com.alibaba.dubbo.config.annotation.Service;
@@ -162,8 +163,7 @@ public class AnnotateServiceImpl implements AnnotateService {
// ...
}
```
-###### javaconfig形式配置公共模块
-
+###### Javaconfig Configuration Public Module
```
@Configuration
public class DubboConfiguration {
@@ -185,9 +185,9 @@ public class DubboConfiguration {
}
```
-这种方式的配置和前面用xml配置的方式是一样的效果。
+The result of configuration using this method is the same as that of using xml.
-###### 指定dubbo扫描路径
+###### Specify the Dubbo Scan Path
```
@SpringBootApplication
@DubboComponentScan(basePackages = "com.alibaba.dubbo.test.service.impl")
@@ -195,13 +195,12 @@ public class ProviderTestApp {
// ...
}
```
-或者使用spring bean xml配置方式:
+or use the spring bean xml configuration:
```
<dubbo:annotation package="com.chanshuyi.service.impl" />
```
-##### 代码配置
-
+#### API Trigger Directly
```
import com.alibaba.dubbo.rpc.config.ApplicationConfig;
import com.alibaba.dubbo.rpc.config.RegistryConfig;
@@ -210,60 +209,61 @@ import com.alibaba.dubbo.rpc.config.ServiceConfig;
import com.xxx.XxxService;
import com.xxx.XxxServiceImpl;
-// 服务实现
+// Service implementation
XxxService xxxService = new XxxServiceImpl();
-// 当前应用配置
+// current application configuration
ApplicationConfig application = new ApplicationConfig();
application.setName("xxx");
-// 连接注册中心配置
+// connect to registry center configuration
RegistryConfig registry = new RegistryConfig();
registry.setAddress("10.20.130.230:9090");
registry.setUsername("aaa");
registry.setPassword("bbb");
-// 服务提供者协议配置
+// service provider's protocol configuration
ProtocolConfig protocol = new ProtocolConfig();
protocol.setName("dubbo");
protocol.setPort(12345);
protocol.setThreads(200);
-// 注意:ServiceConfig为重对象,内部封装了与注册中心的连接,以及开启服务端口
+// Note: ServiceConfig is a heavy object, which encapsulated the connection with registry center internally, and open the service port
-// 服务提供者暴露服务配置
-ServiceConfig<XxxService> service = new ServiceConfig<XxxService>(); // 此实例很重,封装了与注册中心的连接,请自行缓存,否则可能造成内存和连接泄漏
+// Service provider exposes service configuration
+ServiceConfig<XxxService> service = new ServiceConfig<XxxService>(); // This instance is very heavy, which encapsulated the connection with registry center, please cache it by yourself, it might cause memory and connection leakage otherwise.
service.setApplication(application);
-service.setRegistry(registry); // 多个注册中心可以用setRegistries()
-service.setProtocol(protocol); // 多个协议可以用setProtocols()
+service.setRegistry(registry); // multiple registry centers can use setRegistries()
+service.setProtocol(protocol); // multiple protocols can use setProtocols()
service.setInterface(XxxService.class);
service.setRef(xxxService);
service.setVersion("1.0.0");
-// 暴露及注册服务
+// exposure and register service
service.export();
```
-一般在spring应用中,不推荐使用这种方式。 具体的含义这里不做解释,可以通过github查看源码。
-
-### Provider 接口和实现
+Generally, this method is not recommended in spring applications. The reason can be checked by reading the source code on github, which would not be explained here.
-上面章节更多从配置角度出发,接下来通过一个完整的例子,来讲解下dubbo provider的完整使用。
+### Provider Interface and Implement
+The above chapters are described mainly from a configuration perspective, and lets explain the complete use of Dubbo provider by going through a complete example.
-这个例子中只有一个服务UserReadService,有一个方法 getUserById。 需要将这个服务通过Dubbo暴露给远程的服务。具体的步骤如下:
+There is only one service UserReadService, and one method getUserById in this example.
+This service need to be exposed to a remote service by Dubbo. Detail steps are shown below:
-1.创建工程
-如果本来已经有工程,可以忽略。创建一个spring boot工程,可以通过 https://start.spring.io/ 创建。
-2.定义接口
-定义接口:UserReadService
+1. Create Project
+Skip this step if there is already a project. Create a Spring Boot project, which can be created through https://start.spring.io/.
+2. Define Interface
+Define interface: UserReadService
```
public interface UserReadService{
-public User getUserById(Long userId);
+ public User getUserById(Long userId);
}
```
-这个接口一般来说会放到独立的jar包里,作为client包。 其他应用要消费这个服务的时候,一般来说需要应用引用这个client包。(除了泛化调用)
-3.实现接口
-实现UserReadService, 当前实现部署在Provider的应用中。
+Generally, this interface should be placed in an independent JAR file as a client package.
+Generally, the other services need to refer this client package if they want to consume this service(except for generalized call).
+3. Implement Interface
+Implement UserReadService, and deploy current implementation in the Provider's application.
```
public UserReadServiceImpl implements UserReadService{
public User getUserById(Long userId){
@@ -271,7 +271,7 @@ public UserReadServiceImpl implements UserReadService{
}
}
```
-4.Dubbo配置
+4. Dubbo Configuration
```
<?xml version="1.0" encoding="UTF-8"?>
<beans xmlns="http://www.springframework.org/schema/beans"
@@ -285,4 +285,4 @@ public UserReadServiceImpl implements UserReadService{
<dubbo:service interface="com.package.UserReadService" ref="userReadService" />
</beans>
```
-Dubbo配置的其他方式可以参考上一章节的相关配置,或者使用集成dubbo spring boot starter方式。
+For the other modes of Dubbo configuration, please refer to the related configurations in the previous chapter, or use the integrated Dubbo Spring Boot starter method.
diff --git a/en-us/blog/dubbo-cluster-error-handling.md b/en-us/blog/dubbo-cluster-error-handling.md
deleted file mode 100644
index 3a23c8c..0000000
--- a/en-us/blog/dubbo-cluster-error-handling.md
+++ /dev/null
@@ -1,270 +0,0 @@
----
-title: Dubbo集群容错
-keywords: Dubbo, RPC, cluster, Error-handling
-description: 在分布式系统中,集群某个某些节点出现问题是大概率事件,因此在设计分布式RPC框架的过程中,必须要把失败作为设计的一等公民来对待。一次调用失败之后,应该如何选择对失败的选择策略,这是一个见仁见智的问题,每种策略可能都有自己独特的应用场景。因此,作为框架来说,应当针对不同场景提供多种策略,供用户进行选择。本文介绍了Dubbo框架提供的多种错误处理策略,并通过实例说明如何进行配置。
----
-
-
-### Design For failure
-
-在分布式系统中,集群某个某些节点出现问题是大概率事件,因此在设计分布式RPC框架的过程中,必须要把失败作为设计的一等公民来对待。一次调用失败之后,应该如何选择对失败的选择策略,这是一个见仁见智的问题,每种策略可能都有自己独特的应用场景。因此,作为框架来说,应当针对不同场景提供多种策略,供用户进行选择。
-
-在Dubbo设计中,通过Cluster这个接口的抽象,把一组可供调用的Provider信息组合成为一个统一的`Invoker`供调用方进行调用。经过路由规则过滤,负载均衡选址后,选中一个具体地址进行调用,如果调用失败,则会按照集群配置的容错策略进行容错处理。
-
-Dubbo默认内置了若干容错策略,如果不能满足用户需求,则可以通过自定义容错策略进行配置。
-
-### 内置容错策略
-
-Dubbo主要内置了如下几种策略:
-
-* Failover(失败自动切换)
-* Failsafe(失败安全)
-* Failfast(快速失败)
-* Failback(失败自动恢复)
-* Forking(并行调用)
-* Broadcast(广播调用)
-
-这些名称比较相似,概念也比较容易混淆,下面逐一进行解释。
-
-#### Failover(失败自动切换)
-
-`Failover`是高可用系统中的一个常用概念,服务器通常拥有主备两套机器配置,如果主服务器出现故障,则自动切换到备服务器中,从而保证了整体的高可用性。
-
-Dubbo也借鉴了这个思想,并且把它作为Dubbo`默认的容错策略`。当调用出现失败的时候,根据配置的重试次数,会自动从其他可用地址中重新选择一个可用的地址进行调用,直到调用成功,或者是达到重试的上限位置。
-
-Dubbo里默认配置的重试次数是2,也就是说,算上第一次调用,最多会调用3次。
-
-
-
-其配置方法,容错策略既可以在服务提供方配置,也可以服务调用方进行配置。而重试次数的配置则更为灵活,既可以在服务级别进行配置,也可以在方法级别进行配置。具体优先顺序为:
-
-```
-服务调用方方法级配置 > 服务调用方服务级配置 > 服务提供方方法级配置 > 服务提供方服务级配置
-```
-
-以XML方式为例,具体配置方法如下:
-
-服务提供方,服务级配置
-
-```xml
-<dubbo:service interface="org.apache.dubbo.demo.DemoService" ref="demoService" cluster="failover" retries="2" />
-```
-
-服务提供方,方法级配置
-
-```xml
-<dubbo:service interface="org.apache.dubbo.demo.DemoService" ref="demoService"cluster="failover">
- <dubbo:method name="sayHello" retries="2" />
- </dubbo:reference>
-```
-
-服务调用方,服务级配置
-
-```xml
-<dubbo:reference id="demoService" interface="org.apache.dubbo.demo.DemoService" cluster="failover" retries="1"/>
-```
-
-服务调用方,方法级配置:
-
-```xml
- <dubbo:reference id="demoService" interface="org.apache.dubbo.demo.DemoService" cluster="failover">
- <dubbo:method name="sayHello" retries="3" />
- </dubbo:reference>
-```
-
-Failover可以自动对失败进行重试,对调用者屏蔽了失败的细节,但是Failover策略也会带来一些副作用:
-
-* 重试会额外增加一下开销,例如增加资源的使用,在高负载系统下,额外的重试可能让系统雪上加霜。
-* 重试会增加调用的响应时间。
-* 某些情况下,重试甚至会造成资源的浪费。考虑一个调用场景,A->B->C,如果A处设置了超时100ms,再B->C的第一次调用完成时已经超过了100ms,但很不幸B->C失败,这时候会进行重试,但其实这时候重试已经没有意义,因此在A看来这次调用已经超时,A可能已经开始执行其他逻辑。
-
-#### Failsafe(失败安全)
-
-失败安全策略的核心是即使失败了也不会影响整个调用流程。通常情况下用于旁路系统或流程中,它的失败不影响核心业务的正确性。在实现上,当出现调用失败时,会忽略此错误,并记录一条日志,同时返回一个空结果,在上游看来调用是成功的。
-
-应用场景,可以用于写入审计日志等操作。
-
-具体配置方法:
-
-服务提供方,服务级配置
-
-```xml
-<dubbo:service interface="org.apache.dubbo.demo.DemoService" ref="demoService" cluster="failsafe" />
-```
-
-服务调用方,服务级配置
-
-```xml
-<dubbo:reference id="demoService" interface="org.apache.dubbo.demo.DemoService" cluster="failsafe"/>
-```
-
-其中服务调用方配置优先于服务提供方配置。
-
-#### Failfast(快速失败)
-
-某些业务场景中,某些操作可能是非幂等的,如果重复发起调用,可能会导致出现脏数据等。例如调用某个服务,其中包含一个数据库的写操作,如果写操作完成,但是在发送结果给调用方的过程中出错了,那么在调用发看来这次调用失败了,但其实数据写入已经完成。这种情况下,重试可能并不是一个好策略,这时候就需要使用到`Failfast`策略,调用失败立即报错。让调用方来决定下一步的操作并保证业务的幂等性。
-
-具体配置方法:
-
-服务提供方,服务级配置
-
-```xml
-<dubbo:service interface="org.apache.dubbo.demo.DemoService" ref="demoService" cluster="failfast" />
-```
-
-服务调用方,服务级配置
-
-```xml
-<dubbo:reference id="demoService" interface="org.apache.dubbo.demo.DemoService" cluster="failfast"/>
-```
-
-其中服务调用方配置优先于服务提供方配置。
-
-#### Failback(失败自动恢复)
-
-`Failback`通常和`Failover`两个概念联系在一起。在高可用系统中,当主机发生故障,通过`Failover`进行主备切换后,待故障恢复后,系统应该具备自动恢复原始配置的能力。
-
-Dubbo中的`Failback`策略中,如果调用失败,则此次失败相当于`Failsafe`,将返回一个空结果。而与`Failsafe`不同的是,Failback策略会将这次调用加入内存中的失败列表中,对于这个列表中的失败调用,会在另一个线程中进行异步重试,重试如果再发生失败,则会忽略,即使重试调用成功,原来的调用方也感知不到了。因此它通常适合于,对于实时性要求不高,且不需要返回值的一些异步操作。
-
-具体配置方法:
-
-服务提供方,服务级配置
-
-```xml
-<dubbo:service interface="org.apache.dubbo.demo.DemoService" ref="demoService" cluster="failsafe" />
-```
-
-服务调用方,服务级配置
-
-```xml
-<dubbo:reference id="demoService" interface="org.apache.dubbo.demo.DemoService" cluster="failsafe"/>
-```
-
-其中服务调用方配置优先于服务提供方配置。
-
-按照目前的实现,Failback策略还有一些局限,例如内存中的失败调用列表没有上限,可能导致堆积,异步重试的执行间隔无法调整,默认是5秒。
-
-#### Forking(并行调用)
-
-上述几种策略中,主要都是针对调用失败发生后如何进行弥补的角度去考虑的,而`Forking`策略则跟上述几种策略不同,是一种典型的用成本换时间的思路。即第一次调用的时候就同时发起多个调用,只要其中一个调用成功,就认为成功。在资源充足,且对于失败的容忍度较低的场景下,可以采用此策略。
-
-具体配置方法:
-
-服务提供方,服务级配置
-
-```xml
-<dubbo:service interface="org.apache.dubbo.demo.DemoService" ref="demoService" cluster="forking" />
-```
-
-服务调用方,服务级配置
-
-```xml
-<dubbo:reference id="demoService" interface="org.apache.dubbo.demo.DemoService" cluster="forking"/>
-```
-
-其中服务调用方配置优先于服务提供方配置。
-
-#### Broadcast(广播调用)
-
-在某些场景下,可能需要对服务的所有提供者进行操作,此时可以使用广播调用策略。此策略会逐个调用所有提供者,只要任意有一个提供者出错,则认为此次调用出错。通常用于通知所有提供者更新缓存或日志等本地资源信息。
-
-具体配置方法:
-
-服务提供方,服务级配置
-
-```xml
-<dubbo:service interface="org.apache.dubbo.demo.DemoService" ref="demoService" cluster="broadcast" />
-```
-
-服务调用方,服务级配置
-
-```xml
-<dubbo:reference id="demoService" interface="org.apache.dubbo.demo.DemoService" cluster="broadcast"/>
-```
-
-其中服务调用方配置优先于服务提供方配置。
-
-#### 各种策略对比
-
-下表对各种策略做一个简单对比,
-
-| 策略名称 | 优点 | 缺点 | 主要应用场景 |
-| --------- | -------------------------------- | -------------------------------------- | ---------------------------------------------------- |
-| Failover | 对调用者屏蔽调用失败的信息 | 增加RT,额外资源开销,资源浪费 | 对调用rt不敏感的场景 |
-| Failfast | 业务快速感知失败状态进行自主决策 | 产生较多报错的信息 | 非幂等性操作,需要快速感知失败的场景 |
-| Failsafe | 即使失败了也不会影响核心流程 | 对于失败的信息不敏感,需要额外的监控 | 旁路系统,失败不影响核心流程正确性的场景 |
-| Failback | 失败自动异步重试 | 重试任务可能堆积 | 对于实时性要求不高,且不需要返回值的一些异步操作 |
-| Forking | 并行发起多个调用,降低失败概率 | 消耗额外的机器资源,需要确保操作幂等性 | 资源充足,且对于失败的容忍度较低,实时性要求高的场景 |
-| Broadcast | 支持对所有的服务提供者进行操作 | 资源消耗很大 | 通知所有提供者更新缓存或日志等本地资源信息 |
-
-### 自定义容错策略
-
-如果上述内置的容错策略无法满足你的需求,还可以通过扩展的方式来实现自定义容错策略。
-
-#### 扩展接口
-
-`com.alibaba.dubbo.rpc.cluster.Cluster`
-
-#### 扩展配置
-
-```xml
-<dubbo:service cluster="xxx" />
-```
-
-#### 扩展示例
-
-下面通过一个例子来展示如何使用自定义的容错策略。
-Maven 项目结构:
-
-```
-src
- |-main
- |-java
- |-com
- |-xxx
- |-XxxCluster.java (实现Cluster接口)
- |-resources
- |-META-INF
- |-dubbo
- |-org.apache.dubbo.rpc.cluster.Cluster (纯文本文件,内容为:xxx=com.xxx.XxxCluster)
-```
-
-XxxCluster.java:
-
-```java
-package com.xxx;
-
-import org.apache.dubbo.rpc.cluster.Cluster;
-import org.apache.dubbo.rpc.cluster.support.AbstractClusterInvoker;
-import org.apache.dubbo.rpc.cluster.Directory;
-import org.apache.dubbo.rpc.cluster.LoadBalance;
-import org.apache.dubbo.rpc.Invoker;
-import org.apache.dubbo.rpc.Invocation;
-import org.apache.dubbo.rpc.Result;
-import org.apache.dubbo.rpc.RpcException;
-
-import java.util.List;
-
-public class XxxCluster implements Cluster {
-
- @Override
- public <T> Invoker<T> join(Directory<T> directory) throws RpcException {
- return new AbstractClusterInvoker<T>() {
- @Override
- protected Result doInvoke(Invocation invocation, List<Invoker<T>> invokers, LoadBalance loadbalance) throws RpcException {
- // your custimzed fault tolarence strategy goes here
- }
- };
- }
-
-}
-```
-
-`META-INF/dubbo/com.alibaba.dubbo.rpc.cluster.Cluster`文件的内容为
-
-```
-xxx=com.xxx.XxxCluster
-```
-
-
-
diff --git a/en-us/blog/dubbo-compatible.md b/en-us/blog/dubbo-compatible.md
deleted file mode 100644
index dd64448..0000000
--- a/en-us/blog/dubbo-compatible.md
+++ /dev/null
@@ -1,197 +0,0 @@
----
-title: Dubbo 2.7.x repackage后的兼容实现方案
-keywords: Dubbo, repackage, 兼容
-description: 本文简单描述了2.7.x repackage后对老版本的兼容性实现方案。
----
-
-# Dubbo 2.7.x repackage后的兼容实现方案
-
-Dubbo至加入Apache孵化器以来,一个很强的诉求就是需要rename groupId和package name,这两项工作在项目毕业前需要完成。其中rename package相对来说复杂一些,除了要修改所有类的包名为`org.apache.dubbo`外,更多的是需要考虑如何老版本的兼容性。
-
-常见的兼容性包括但不限于以下几种情况:
-
-* 用户API
- * 编程API
- * Spring注解
-* 扩展SPI
- * 扩展Filter
-
-2.7.x里就是通过增加了一个新的模块`dubbo-compatible`来解决以上兼容性问题。
-
-## 编程使用API
-
-编程使用API是最直接最原始的使用方式,其他方式诸如Spring schema、注解等方式都是基于原始API的;因此非常有必要对API编程形式进行兼容。
-
-所有编程相关API的兼容代码均在`com.alibaba.dubbo.config`包下,下面我们看看几个常见API的兼容实现。
-
-### ApplicationConfig
-
-```java
-package com.alibaba.dubbo.config;
-
-@Deprecated
-public class ApplicationConfig extends org.apache.dubbo.config.ApplicationConfig {
-
- public ApplicationConfig() {
- super();
- }
-
- public ApplicationConfig(String name) {
- super(name);
- }
-}
-```
-
-### ProtocolConfig
-
-```java
-package com.alibaba.dubbo.config;
-
-@Deprecated
-public class ProtocolConfig extends org.apache.dubbo.config.ProtocolConfig {
-
- public ProtocolConfig() {
- }
-
- public ProtocolConfig(String name) {
- super(name);
- }
-
- public ProtocolConfig(String name, int port) {
- super(name, port);
- }
-}
-```
-
-可以看到:
-
-1. 兼容类是直接通过继续repacakge后的类,达到最大程度的代码复用;
-2. 构造函数也需要保持兼容;
-
-整个兼容包中,除了上述API以外,包括一些常用的类比如`Constants`、`URL`以及绝大部分的兼容类都是通过简单的继承,让用户基于老的API实现的类能正确运行。
-
-## Spring注解
-
-Spring注解诸如`@EnableDubbo`、`@Service`以及`@Reference`,由于不能使用继承,故这些注解类是通过代码拷贝来实现的;用于处理这些注解的Spring BeanPostProcessor以及Parser等相关的类,也是通过拷贝来实现;
-
-这类兼容代码分别位于兼容包的以下几个package中:
-
-* com.alibaba.dubbo.config.annotation
-* com.alibaba.dubbo.config.spring.context.annotation
-* org.apache.dubbo.config.spring
-
-所以这里要特别强调的是,这类代码在2.7.x里存在2份,因此有修改的同时需要同步修改。
-
-## 扩展SPI
-
-Dubbo的SPI扩展机制,可以通过[Dubbo可扩展机制实战](http://dubbo.apache.org/zh-cn/blog/introduction-to-dubbo-spi.html)这篇博客详细了解。
-
-以Filter扩展为例,简单来说就是:
-
-1. MyFilter需要实现Filter接口
-2. 在META-INF/dubbo下,增加META-INF/dubbo/com.alibaba.dubbo.rpc.Filter,内容为:
-
- ```
- myFilter=com.test.MyFilter
- ```
-
-看似简单的两点,对Dubbo框架来说,需要:
-
-1. 正确加载配置文件META-INF/dubbo/com.alibaba.dubbo.rpc.Filter
-2. 正确加载MyFilter类并执行invoke方法
-
-下面分别介绍Dubbo框架怎么实现以上几点。
-
-### 正确加载META-INF/dubbo/com.alibaba.dubbo.rpc.Filter
-
-Dubbo SPI机制在查找配置文件时,是根据扩展点的类名来查找的,以Filter为例,在包名变为org.apache.dubbo后,查询的目录变成:
-
-* META-INF/dubbo/internal/org.apache.dubbo.rpc.Filter
-* META-INF/dubbo/org.apache.dubbo.rpc.Filter
-* META-INF/services/org.apache.dubbo.rpc.Filter
-
-但是用户之前按老的包实现的Filter,其配置是放在类似`META-INF/dubbo/com.alibaba.dubbo.rpc.Filter`的,如果框架不做特殊处理,是不会加载老配置的。
-
-因此在`ExtensionLoader`这个类里,做了特殊的处理:
-
-```java
- // synchronized in getExtensionClasses
- private Map<String, Class<?>> loadExtensionClasses() {
- final SPI defaultAnnotation = type.getAnnotation(SPI.class);
- if (defaultAnnotation != null) {
- String value = defaultAnnotation.value();
- if ((value = value.trim()).length() > 0) {
- String[] names = NAME_SEPARATOR.split(value);
- if (names.length > 1) {
- throw new IllegalStateException("more than 1 default extension name on extension " + type.getName()
- + ": " + Arrays.toString(names));
- }
- if (names.length == 1) cachedDefaultName = names[0];
- }
- }
-
- Map<String, Class<?>> extensionClasses = new HashMap<String, Class<?>>();
- loadDirectory(extensionClasses, DUBBO_INTERNAL_DIRECTORY, type.getName());
- loadDirectory(extensionClasses, DUBBO_INTERNAL_DIRECTORY, type.getName().replace("org.apache", "com.alibaba"));
- loadDirectory(extensionClasses, DUBBO_DIRECTORY, type.getName());
- loadDirectory(extensionClasses, DUBBO_DIRECTORY, type.getName().replace("org.apache", "com.alibaba"));
- loadDirectory(extensionClasses, SERVICES_DIRECTORY, type.getName());
- loadDirectory(extensionClasses, SERVICES_DIRECTORY, type.getName().replace("org.apache", "com.alibaba"));
- return extensionClasses;
- }
-```
-
-可以看到,除了加载新配置外,老配置文件也会进行扫描。
-
-### 正确加载MyFilter类
-
-`com.alibaba.dubbo.rpc.Filter`接口除了要继承自`org.apache.dubbo.rpc.Filter`以外,其唯一的方法invoke也需要做特殊处理。我们看看它的方法签名:
-
-`Result invoke(Invoker<?> invoker, Invocation invocation) throws RpcException;`
-
-这里参数、返回值、异常都会被实现类`MyFilter`用到,因此这些类也需要有兼容类;而参数、返回值不同,对于接口来说是不同的方法,因此:
-
-* 需要在com.alibaba.dubbo.rpc.Filter里,定义老的invoke方法,MyFilter会覆盖这个方法;
-* org.apache.dubbo.rpc.Filter里的invoke方法,需要找一个地方来实现桥接,框架调用Filter链执行到新的invoke方法时,新的参数如何转换成老参数,老返回值如何转换成新的返回值;
-
-这里就用到了JDK8的新特性:接口default方法。
-
-```java
-@Deprecated
-public interface Filter extends org.apache.dubbo.rpc.Filter {
-
- Result invoke(Invoker<?> invoker, Invocation invocation) throws RpcException;
-
- default org.apache.dubbo.rpc.Result invoke(org.apache.dubbo.rpc.Invoker<?> invoker,
- org.apache.dubbo.rpc.Invocation invocation)
- throws org.apache.dubbo.rpc.RpcException {
- Result.CompatibleResult result = (Result.CompatibleResult) invoke(new Invoker.CompatibleInvoker<>(invoker),
- new Invocation.CompatibleInvocation(invocation));
- return result.getDelegate();
- }
-}
-```
-
-可以看到,default方法里,对参数进行了包装,然后调用老的invoke方法,并将返回值进行解包后返回给Dubbo框架。这里Result.CompatibleResult、Invocation.CompatibleInvocation以及Invoker.CompatibleInvoker都用到了代理模式。
-
-感兴趣的同学可以详细看一下以下几个类:
-
-* com.alibaba.dubbo.rpc.Invocation
-* com.alibaba.dubbo.rpc.Invoker
-* com.alibaba.dubbo.rpc.Result
-
-## 后续todo list
-
-目前兼容包仅仅是对常见的API及SPI做了支持,列表如下:
-
-* com.alibaba.dubbo.rpc.Filter / Invocation / Invoker / Result / RpcContext / RpcException
-* com.alibaba.dubbo.config.*Config
-* com.alibaba.dubbo.config.annotation.Reference / Service
-* com.alibaba.dubbo.config.spring.context.annotation.EnableDubbo
-* com.alibaba.dubbo.common.Constants / URL
-* com.alibaba.dubbo.common.extension.ExtensionFactory
-* com.alibaba.dubbo.common.serialize.Serialization / ObjectInput / ObjectOutput
-* com.alibaba.dubbo.cache.CacheFactory / Cache
-* com.alibaba.dubbo.rpc.service.EchoService / GenericService
-
-大家如果在试用的过程中发现有任何问题请及时提出;同时如果对其他扩展点有兼容需求,也请大家提出来,也非常欢迎大家自己解决并贡献出来。
\ No newline at end of file
diff --git a/en-us/blog/dubbo-consistent-hash-implementation.md b/en-us/blog/dubbo-consistent-hash-implementation.md
deleted file mode 100644
index 247e36c..0000000
--- a/en-us/blog/dubbo-consistent-hash-implementation.md
+++ /dev/null
@@ -1,284 +0,0 @@
----
-title: Dubbo一致性Hash负载均衡实现剖析
-keywords: Dubbo, Consistent Hash,一致性Hash,一致性哈希
-description: 本文以一般的一致性Hash实现作为引子,详细剖析了Dubbo一致性Hash负载均衡算法的实现
----
-
-需要强调的是,Dubbo的Hash映射模型与大部分网上资料描述的**环形队列Hash映射模型**是存在一些区别的。于我而言,环形队列Hash映射模型,不足以让我对一致性Hash有足够彻底的了解。直到看懂了Dubbo的一致性Hash的实现,才觉得豁然开朗。
-
-
-
-### 一、环形队列Hash映射模型
-
-这种方案,其基础还是基于取模运算。对2^32取模,那么,Hash值的区间为[0, 2^32-1]。接下来要做的,就包括两部分:
-
-#### **a、映射服务**
-
-将服务地址(ip+端口)按照一定规则构造出特定的识别码(如md5码),再用识别码对2^32取模,确定服务在Hash值区间对应的位置。假设有Node1、Node2、Node3三个服务,其映射关系如下:
-
-
-
-
-
-#### **b、映射请求、定位服务**
-
-在发起请求时,我们往往会带上参数,而这些参数,就可以被我们用来确定具体调用哪一个服务。假设有请求R1、R2、R3,对它们的参数也经过计算特定识别码、取余的一系列运算之后,有如下映射关系:
-
-
-
-从图中,我们可以看到,R1请求映射在0-Node1中间,R2请求映射在Node1-Node2中间,R3请求映射在Node2-Node3中间。我们取**服务Hash值大于请求Hash值**的**第一个服务**作为实际的调用服务。也就是说,R1请求将调用Node1服务,R2请求将调用Node2服务,R3请求将调用Node3服务。
-
-
-
-#### **c、新增服务节点**
-
-假设新增服务Node4,映射在Node3之前,恰巧破坏了原来的一个映射关系:
-
-
-
-这样,请求R3将会实际调用服务Node4,但请求R1、R2不受影响。
-
-
-
-#### **d、删除服务节点**
-
-假设服务Node2宕机,那么R2请求将会映射到Node3:
-
-
-
-原本的R1、R3请求不受影响。
-
-
-
-> 可以看出,当新增、删除服务时,受影响的请求是有限的。不至于像简单取模映射一般,服务发生变化时,需要调整全局的映射关系。
-
-
-
-#### **e、平衡性与虚拟节点**
-
-在我们上面的假设中,我们假设Node1、Node2、Node3三个服务在经过Hash映射后所分布的位置恰巧把环切成了均等的三分,请求的分布也基本是平衡的。但是实际上计算服务Hash值的时候,是很难这么巧的。也许一不小心就映射成了这个样子:
-
-
-
-这样,就会导致大部分请求都会被映射到Node1上。因此,引出了虚拟节点。
-
-所谓虚拟节点,就是除了对服务本身地址进行Hash映射外,还通过在它地址上做些处理(比如Dubbo中,在ip+port的字符串后加上计数符1、2、3......,分别代表虚拟节点1、2、3),以达到同一服务映射多个节点的目的。通过引入虚拟节点,我们可以把上图中映射给Node1的请求进一步拆分:
-
-
-
-如上图所示,若有请求落在Node3-Node1'区间,该请求应该是调用Node1'服务,但是因为Node1'是Node1的虚拟节点,所以实际调用的是Node1服务。通过引入虚拟节点,请求的分布就会比较平衡了。
-
-
-
-### **二、Dubbo一致性Hash的使用与负载均衡策略的引入阶段**
-
-#### **a、如何使用一致性Hash作为Dubbo的负载均衡策略?**
-
-dubbo:service、dubbo:reference、dubbo:provider、dubbo:consumer、dubbo:method这几个配置项都可以配置Dubbo的负载均衡策略,其中一致性Hash的属性值是:**consistenthash**。
-
-以dubbo:reference为例:
-
-**XML配置:**
-
-> <dubbo:reference loadbalance="consistenthash" /\>
-
-
-
-**Properties配置:**
-
-> dubbo.reference.loadbalance=consistenthash
-
-
-
-**注解:**
-
-> @Reference(loadbalance = "consistenthash")
-
-
-
-#### **b、Dubbo负载均衡策略的引入阶段**
-
-Dubbo实现的是客户端负载均衡。关于服务接口代理类的实现,这里不做详细描述,可以参考官网:
-
-> 服务引入:http://dubbo.apache.org/zh-cn/docs/source_code_guide/refer-service.html。
-
-在接口代理类生成、并且装配好后,服务的调用基本是这样一个流程:proxy -> MockClusterInvoker -> 集群策略(如:FailoverClusterInvoker) -> 初始化负载均衡策略 -> 根据选定的负载均衡策略确定Invoker。
-
-**负载均衡策略的初始化**是在AbstractClusterInvoker中的initLoadBalance方法中初始化的:
-
-```java
-protected LoadBalance initLoadBalance(List<Invoker<T>> invokers, Invocation invocation) {
- if (CollectionUtils.isNotEmpty(invokers)) {
- return ExtensionLoader.getExtensionLoader(LoadBalance.class).getExtension(invokers.get(0).getUrl()
- .getMethodParameter(RpcUtils.getMethodName(invocation), LOADBALANCE_KEY, DEFAULT_LOADBALANCE));
- } else {
- return ExtensionLoader.getExtensionLoader(LoadBalance.class).getExtension(DEFAULT_LOADBALANCE);
- }
-}
-```
-
-这部分代码逻辑分为两部分:
-
-1、获取调用方法所配置的LOADBALANCE_KEY属性的值,LOADBALANCE_KEY这个常量的实际值为:loadbalance,即为我们的所配置的属性;
-
-2、利用SPI机制来初始化并加载该值所代表的负载均衡策略。
-
-
-
-所有的负载均衡策略都会继承LoadBalance接口。在各种集群策略中,最终都会调用AbstractClusterInvoker的select方法,而AbstractClusterInvoker会在doSelect中,**调用LoadBalance的select方法,这里即开始了负载均衡策略的执行。**
-
-
-
-### 三、Dubbo一致性Hash负载均衡的实现
-
-需要说明的一点是,我所说的**负载均衡策略的执行**,即是在所有的Provider中选出一个,作为当前Consumer的远程调用对象。在代码中,Provider被封装成了Invoker实体,所以直接说来,负载均衡策略的执行就是在Invoker列表中选出一个Invoker。
-
-所以,对比普通一致性Hash的实现,Dubbo的一致性Hash算法也可以分为两步:
-
-**1、映射Provider至Hash值区间中(实际中映射的是Invoker);**
-
-**2、映射请求,然后找到大于请求Hash值的第一个Invoker。**
-
-
-
-#### **a、映射Invoker**
-
-Dubbo中所有的负载均衡实现类都继承了AbstractLoadBalance,调用LoadBalance的select方法时,实际上调用的是AbstractLoadBalance的实现:
-
-```java
-@Override
-public <T> Invoker<T> select(List<Invoker<T>> invokers, URL url, Invocation invocation) {
- if (CollectionUtils.isEmpty(invokers)) {
- return null;
- }
- if (invokers.size() == 1) {
- return invokers.get(0);
- }
- // doSelect这里进入具体负载均衡算法的执行逻辑
- return doSelect(invokers, url, invocation);
-}
-```
-
-可以看到这里调用了doSelect,Dubbo一致性Hash的具体实现类名字是**ConsistentHashLoadBalance**,让我们来看看它的doSelect方法干了啥:
-
-```java
-@Override
-protected <T> Invoker<T> doSelect(List<Invoker<T>> invokers, URL url, Invocation invocation) {
- String methodName = RpcUtils.getMethodName(invocation);
- // key格式:接口名.方法名
- String key = invokers.get(0).getUrl().getServiceKey() + "." + methodName;
- // identityHashCode 用来识别invokers是否发生过变更
- int identityHashCode = System.identityHashCode(invokers);
- ConsistentHashSelector<T> selector = (ConsistentHashSelector<T>) selectors.get(key);
- if (selector == null || selector.identityHashCode != identityHashCode) {
- // 若不存在"接口.方法名"对应的选择器,或是Invoker列表已经发生了变更,则初始化一个选择器
- selectors.put(key, new ConsistentHashSelector<T>(invokers, methodName, identityHashCode));
- selector = (ConsistentHashSelector<T>) selectors.get(key);
- }
- return selector.select(invocation);
-}
-```
-
-这里有个很重要的概念:**选择器——selector**。这是Dubbo一致性Hash实现中,承载着整个映射关系的数据结构。它里面主要有这么几个参数:
-
-```java
-/**
- * 存储Hash值与节点映射关系的TreeMap
- */
-private final TreeMap<Long, Invoker<T>> virtualInvokers;
-
-/**
- * 节点数目
- */
-private final int replicaNumber;
-
-/**
- * 用来识别Invoker列表是否发生变更的Hash码
- */
-private final int identityHashCode;
-
-/**
- * 请求中用来作Hash映射的参数的索引
- */
-private final int[] argumentIndex;
-```
-
-在新建ConsistentHashSelector对象的时候,就会遍历所有Invoker对象,然后计算出其地址(ip+port)对应的md5码,并按照配置的节点数目replicaNumber的值来初始化服务节点和所有虚拟节点:
-
-```java
-ConsistentHashSelector(List<Invoker<T>> invokers, String methodName, int identityHashCode) {
- this.virtualInvokers = new TreeMap<Long, Invoker<T>>();
- this.identityHashCode = identityHashCode;
- URL url = invokers.get(0).getUrl();
- // 获取配置的节点数目
- this.replicaNumber = url.getMethodParameter(methodName, HASH_NODES, 160);
- // 获取配置的用作Hash映射的参数的索引
- String[] index = COMMA_SPLIT_PATTERN.split(url.getMethodParameter(methodName, HASH_ARGUMENTS, "0"));
- argumentIndex = new int[index.length];
- for (int i = 0; i < index.length; i++) {
- argumentIndex[i] = Integer.parseInt(index[i]);
- }
- // 遍历所有Invoker对象
- for (Invoker<T> invoker : invokers) {
- // 获取Provider的ip+port
- String address = invoker.getUrl().getAddress();
- for (int i = 0; i < replicaNumber / 4; i++) {
- byte[] digest = md5(address + i);
- for (int h = 0; h < 4; h++) {
- long m = hash(digest, h);
- virtualInvokers.put(m, invoker);
- }
- }
- }
-}
-```
-
-这里值得注意的是:以replicaNumber取默认值160为例,假设当前遍历到的Invoker地址为127.0.0.1:20880,它会依次获得“127.0.0.1:208800”、“127.0.0.1:208801”、......、“127.0.0.1:2088040”的md5摘要,在每次获得摘要之后,还会对该摘要进行四次数位级别的散列。大致可以猜到其目的应该是为了加强散列效果。(希望有人能告诉我相关的理论依据。)
-
-代码中**virtualInvokers.put(m, invoker)**即是存储当前计算出的Hash值与Invoker的映射关系。
-
-这段代码简单说来,就是为每个Invoker都创建replicaNumber个节点,Hash值与Invoker的映射关系即象征着一个节点,这个关系存储在TreeMap中。
-
-
-
-#### **b、映射请求**
-
-让我们重新回到ConsistentHashLoadBalance的**doSelect**方法,若没有找到selector则会新建selector,找到selector后便会调用selector的select方法:
-
-```java
-public Invoker<T> select(Invocation invocation) {
- // 根据invocation的【参数值】来确定key,默认使用第一个参数来做hash计算
- String key = toKey(invocation.getArguments());
- // 获取【参数值】的md5编码
- byte[] digest = md5(key);
- return selectForKey(hash(digest, 0));
-}
-
-// 根据参数索引获取参数,并将所有参数拼接成字符串
-private String toKey(Object[] args) {
- StringBuilder buf = new StringBuilder();
- for (int i : argumentIndex) {
- if (i >= 0 && i < args.length) {
- buf.append(args[i]);
- }
- }
- return buf.toString();
-}
-
-// 根据参数字符串的md5编码找出Invoker
-private Invoker<T> selectForKey(long hash) {
- Map.Entry<Long, Invoker<T>> entry = virtualInvokers.ceilingEntry(hash);
- if (entry == null) {
- entry = virtualInvokers.firstEntry();
- }
- return entry.getValue();
-}
-```
-
-argumentIndex是在初始化Selector的时候一起赋值的,代表着需要用哪几个请求参数作Hash映射获取Invoker。比如:有方法methodA(Integer a, Integer b, Integer c),如果argumentIndex的值为{0,2},那么即用a和c拼接的字符串来计算Hash值。
-
-我们已经知道virtualInvokers是一个TreeMap,TreeMap的底层实现是红黑树。对于TreeMap的方法ceilingEntry(hash),它的作用是用来**获取比传入值大的第一个元素**。可以看到,这一点与一般的一致性Hash算法的处理逻辑完全是相同的。
-
-但这里的回环逻辑有点不同。对于取模运算来讲,大于最大值后,会自动回环从0开始,而这里的逻辑是:当没有比传入ceilingEntry()方法中的值大的元素的时候,virtualInvokers.ceilingEntry(hash)必然会得到null,于是,就用virtualInvokers.firstEntry()来获取整个TreeMap的第一个元素。
-
-从selectForKey中获取到Invoker后,负载均衡策略也就算是执行完毕了。后续获取远程调用客户端等调用流程不再赘述。
\ No newline at end of file
diff --git a/en-us/blog/dubbo-context-information.md b/en-us/blog/dubbo-context-information.md
deleted file mode 100644
index d35d826..0000000
--- a/en-us/blog/dubbo-context-information.md
+++ /dev/null
@@ -1,60 +0,0 @@
----
-title: Dubbo 上下文信息
-keywords: Dubbo,RPC Context, Attachment
-description: 介绍Dubbo上下文信息的作用、应用场景、使用方式以及注意事项
----
-
-# Dubbo 上下文信息
-
-## 简介
-上下文信息是一次 RPC 调用过程中附带的环境信息,如方法名、参数类型、真实参数、本端/对端地址等。这些数据仅属于一次调用,作用于 Consumer 到 Provider 调用的整个流程。
-
-提供上下文信息是 RPC 框架很重要的一个功能,使用上下文不仅可以为单次调用指定不同配置,还能在此基础上提供强大的上层功能,如分布式链路追踪。其实现原理就是在上下文中维护一个`span_id`,Consumer 和 Provider 通过传递`span_id`来连接一次RPC调用,分别上报日志后可以在追踪系统中串联并展示完整的调用流程。这样可以更方便地发现异常,定位问题。
-
-
-## 使用说明
-Dubbo中代表上下文的类是`org.apache.dubbo.rpc.RpcContext`,可通过下述代码来获取上下文信息。
-```
-RpcContext.getContext()
-```
-## 使用场景
-### 获取调用信息
-| 方法名 | 用途 | 作用范围 | 说明 |
-| :--------------------- | ---------------------------- | -------- | ------------------------------------------------------------ |
-| getRequest | 获取 RPC 请求对象 | Consumer | 获取底层 RPC 请求对象,例如 HttpServletRequest,其他情况为 null |
-| getResponse | 获取 RPC 请求响应 | Consumer | 获取底层 RPC 响应对象,例如HttpServletResponse,其他情况为 null |
-| isProviderSide | 当前是否属于 Provider 上下文 | Both | 服务被调用时为 true,调用其他服务时为false |
-| isConsumerSide | 当前是否属于 Consumer 上下文 | Both | 服务被调用时为 false,调用其他服务时为 true |
-| getUrls | 获取当前能调用的 Url 列表 | Both | Consumer 端会根据不同的 Failover 策略实时变化 |
-| getRemotePort | 获取远端端口 | Both | Consumer 端为最后一次调用的 Provider 端口,Provider 为当前请求的 Consumer 端口 |
-| getRemoteHost | 获取远端主机地址 | Both | |
-| getRemoteHostName | 获取远端主机名 | Both | |
-| getRemoteAddressString | 获取远端地址 | Both | |
-| getRemoteAddress | 获取远端地址 | Both | |
-| getLocalPort | 获取本端端口 | Both | |
-| getLocalHost | 获取本端主机地址 | Both | |
-| getLocalHostName | 获取本端主机名 | Both | |
-| getLocalAddressString | 获取本端地址 | Both | |
-| getLocalAddress | 获取本端地址 | Both | |
-
-
-
-### 传递用户参数
-
-#### 本端传递
-
-调用`get`和`set`方法即可完成参数传递。主要用于本端 Filter 之间的数据共享。
-
-#### 对端传递
-
-调用`setAttachment`和`getAttachment`即可完成对端数据传递,这些数据会经过 RPC 传递到对端。例如 Consumer 向 Provider 传递`span_id`。
-
-- Dubbo已经支持从 Provider 端向 Consumer 端传递参数,读写方式和 Consumer 端调用时的方式一样。
-
-### 异步调用
-
-在异步调用时,可通过`getCompletableFuture`或`getFuture`获取相关的 Future,异步调用相关文档请参阅:[异步调用](http://Dubbo.apache.org/zh-cn/docs/user/demos/async-call.html)
-
-## 注意事项
-
-Dubbo 内部使用 ThreadLocal 的方式存储每次调用的上下文信息,当接收到请求或发起请求时,当前线程会更新 RpcContext。例如,服务 A 调用服务 B,服务 B 调用服务 C,在 B 调 C 之前,RpcContext 记录的是 A 调 B 的信息,在 B 调 C 之后,RpcContext 记录的是 B 调 C 的信息。
diff --git a/en-us/blog/dubbo-contribute-to-opensource.md b/en-us/blog/dubbo-contribute-to-opensource.md
deleted file mode 100644
index e02995a..0000000
--- a/en-us/blog/dubbo-contribute-to-opensource.md
+++ /dev/null
@@ -1,196 +0,0 @@
----
-title: 以Dubbo为例,聊聊如何向开源项目做贡献
-keywords: Dubbo, opensource
-description: 本文将会以 dubbo 项目为例向你阐释,给开源项目做贡献并不是一件难事
----
-
-# 以Dubbo为例,聊聊如何向开源项目做贡献
-
-
-Github 上有众多优秀的开源项目,大多数 IT 从业者将其当做了予取予求的工具库,遇到什么需求,先去 Github 搜一把,但有没有想过有一天自己也可以给开源事业做一些贡献呢?本文将会以 dubbo 项目为例,向你阐释,给开源项目做贡献并不是一件难事。
-
-## 1 为何要给开源贡献力量
-
-为开源项目做贡献得到的收益是多方面的,为了让你有足够的信心加入到开源项目中,我在文章最开始列举出它的诸多好处。
-
-### 1.1 巩固技能
-
-无论你是提交代码,撰写文档,提交 Issue,组织活动,当你切身参与到一个开源项目中,相关的技能都会得到历练,并且在开源项目中找到自己的位置。一方面,日常工作中我们中的大多数人接触到的是业务场景,并没有太多机会接触到基础架构组件,开源项目为我们提供了一个平台,在这里,你可以尽情挑选自己熟悉的项目为它添砖加瓦(以 Dubbo 为例,并不是所有 IT 公司都有能力自研服务治理框架);另一方面,你所提交的代码,会有管理员协助审核,他们会给出专业的建议,更好的代码规范以及更优的编程思路最终都会变成你的经验。
-
-### 1.2 结交朋友
-
-开源社区为你提供了一个平台,在这里,你可以认识很多纯粹的技术爱好者,开源贡献者是最符合 geek 定义的那群人,你所接触到的往往是某个领域最厉害的那批人。
-
-### 1.3 建立口碑
-
-这是一个很好的展示个人实力的地方,俗话说:talk is cheap,show me the code. 作为技术人员,没有什么比一个漂亮的 Github 主页更有说服力的了。如果你能够为开源项目做出可观的贡献,你也将收获到业界的知名度,此时开源项目的成就和你是密不可分的。
-
-### 1.4 传承开源精神
-
-只有源源不断的贡献者给开源项目添砖加瓦,才可以为 Github 一类的开源社区形成良好的开源风气。否则,只有输出没有输入,开源会失去活力。
-
-### 1.5 养成习惯
-
-相信我,一旦养成了每天提交代码的习惯,就像你不想中断打卡一样,你绝不想中断 commit。不止有英语打卡,健身打卡,还有开源打卡!
-
-
-
-## 2 贡献代码时的一些疑难杂症
-
-如果你是一名开源界的新手,可能会对贡献的流程心生畏惧。比如:我该怎么修改代码并提交?我的代码要是存在bug怎么办?我的代码别人会不会很 low?我该如何寻找合适的开源项目?开源社区那么多的工具和词汇都是什么意思?
-
-文章的第二部分将从一个**小白**的角度,介绍一下开源中的一些常见问题。
-
-### 2.1 git 常规操作
-
-一般而言,我们选择使用 git 来作为版本管理的工具,你不一定要非常熟练的使用它,在我看来掌握 clone,add,commit,pull,push 即可,遇到复杂的场景,你还有谷歌。
-
-**fork 与 clone**
-
-
-
-如果你只是想下载源码,查看他的源码实现,使用 Clone or download 按钮即可。
-
-如果你想要给开源项目做改动,并且最终请求合并,让开源项目存在你贡献的代码,就应该使用 fork。
-
-fork 将会复制一份当前主分支的代码进入到你的仓库中,之后你所有的修改,应当基于自己的仓库进行,在功能开发/bug 修复之后,可以使用你的仓库向源仓库提交 pull request。只有源仓库的管理员才有权利合并你的请求。
-
-一些可能对你有帮助的高级指令。
-
-```shell
-# 设置源仓库
-git remote add upstream https://github.com/apache/dubbo.git
-# 拉取源仓库的更新
-git fetch upstream
-# 将自己仓库的主分支合并源仓库的更新
-git checkout master
-git merge upstream/master
-```
-
-**pull request**
-
-
-
-pull request 经常被缩写为 PR,指的是一次向源仓库请求合并的行为,如上是我 fork 了 dubbo 的仓库之后才存在的操作按钮。
-
-**源仓库视角的 pull request**
-
-
-
-管理者会对 pull request 涉及的改动进行 review,以确保你的代码是符合规范的,逻辑有没有偏差,以及符合框架的功能需求。
-
-### 2.2 Travis CI
-
-一些自动化的 CI 流程被植入在每一次 pull request 的构建之中,用于给开源仓库去校验提交者的代码是否符合既定的规范,如:是否有编译问题,单元测试是否通过,覆盖率是否达标,代码风格是否合规等等。
-
-
-
-一般情况下,必须通过 CI,你的 pull request 才会被管理 review。
-
-### 2.3 Mailing list
-
-每个开源项目都会有自己的贡献规范,可以参考首页的 Contributing,来获取具体的信息。dubbo 作为一个孵化中的 apache 项目,遵守了 apache 的传统,在 [Contributing](https://github.com/apache/dubbo/blob/master/CONTRIBUTING.md) 中描述道:当你有新特性想要贡献给 Dubbo 时,官方推荐使用 Mailing list 的方式描述一遍你想要做的改动。
-
-Mailing list 简单来说,就是一个邮件通知机制,所有的 Dubbo 开发者都会订阅该邮箱:dev@dubbo.apache.org。有任何新特性的改动,或者什么建议想要通知其他开发者,都可以通过向该邮箱发送邮件来达到这个目的,相同地,你也会收到其转发的其他开发者的邮件。
-
-或者你是一个 Dubbo 的使用者,你想要得知开发者的改造方向,也可以订阅,这个[指南](https://github.com/apache/dubbo/wiki/Mailing-list-subscription-guide)可以帮助你订阅 Dubbo 的 Mailing list。
-
-> 作为一个 modern developer,你可能觉得 mailing list 的交流方式存在滞后性,这样的沟通方式不是特别的高效,但它作为 apache 项目的推荐交流方式存在其特殊的原因,在此不多赘述。总之遵循一个原则:bug fix或者讨论,可以在 github issue 中进行,影响较大的特性和讨论则推荐在 mailing list 中展开。
-
-## 3 其他贡献形式
-
-不仅仅只有贡献代码,修复 bug 等行为才算作为开源做贡献,以下这些行为也属于主要形式:
-
-### 3.1 撰写文档
-
- [Dubbo文档](http://dubbo.apache.org/zh-cn/)是其开源组成成分的重要一环,其内容源文件位于:[https://github.com/apache/dubbo-website](https://github.com/apache/dubbo-website)。同样也是一个 Git 仓库,任何你想要对 dubbo 知识点的补充,都可以在这儿提交 pull request,只需要一些 markdown 的语法知识,和一些可有可无的 npm 语法即可。如果你觉得贡献代码对于现在的自己仍然有点难度,不妨从贡献文档开始接触开源。
-
-### 3.2 ISSUE
-
-无论是 Github 中的 Issue 还是 mailing list 中的讨论,无论是提出问题,汇报 bug,还是回答问题(bugfix 则不仅仅需要 Issue 了),协助管理者 review pull request,都是贡献的一种形式,勿以善小而不为。
-
-### 3.3 其他行为
-
-任何你能够想到的,可以帮助开源项目变得更好的的行为,都属于开源贡献。例如,给每个 Issue 打上合适的 tag,关闭重复的 Issue,链接相关联的 Issue,线下组织沙龙,回答 Stack Overflow 上相关的问题,以及文档中一个错别字的修改等等。
-
-## 4 开源最佳实践
-
-### 4.1 有效沟通
-
-无论你处于什么样的目的:仅仅是一次性的贡献,亦或是永久性的加入社区,都的和他人进行沟通和交往,这是你要在开源圈发展必须修炼的技能。
-
-在你开启一个isse或PR之前,或者是在聊天室问问题之前,请牢记下面所列出的几点建议,会让你的工作更加的高效。
-
-**给出上下文** 以便于让其他人能够快速的理解。比方说你运行程序时遇到一个错误,要解释你是如何做的,并描述如何才能再现错误现象。又比方说你是提交一个新的想法,要解释你为什么这么想,对于项目有用处吗(不仅仅是只有你!)
-
-> 😇 *“当我做 Y 的时候 X 不能工作”*
->
-> 😢 *“X 出问题! 请修复它。”*
-
-**在进一步行动前,做好准备工作。** 不知道没关系,但是要展现你尝试过、努力过。在寻求帮助之前,请确认阅读了项目的 README、文档、问题(开放的和关闭的)、邮件列表,并搜索了网络。当你表现出很强烈的求知欲的时候,人们是非常欣赏这点的,会很乐意的帮助你。
-
-> 😇 *“我不确定 X 是如何实现的,我查阅了相关的帮助文档,然而毫无所获。”*
->
-> 😢 *“我该怎么做 X ?”*
-
-**保持请求内容短小而直接。** 正如发送一份邮件,每一次的贡献,无论是多么的简单,都是需要他人去查阅的。很多项目都是请求的人多,提供帮助的人少。相信我,保持简洁,你能得到他人帮助的机会会大大的增加。
-
-> 😇 *“我很乐意写 API 教程。”*
->
-> 😢 *” 有一天我驾驶汽车行驶在高速公路上,在某个加油站加油的时候,突发奇想,我们应该这么做,不过在我进一步解释之前,我先和大家展示一下。。。”*
-
-**让所有的沟通都是在公开场合下进行。** 哪怕是很不起眼的小事,也不要去给维护者发私信,除非是你要分享一些敏感信息(诸如安全问题或严重的过失)。你若能够保持谈话是公开的,很多人可以你们交换的意见中学习和受益。
-
-> 😇 *(评论) “@维护者 你好!我们该如何处理这个PR?”*
->
-> 😢 *(邮件) “你好,非常抱歉给发信,但是我实在很希望你能看一下我提交的PR。”*
-
-**大胆的提问(但是要谨慎!)。** 每个人参与社区,开始的时候都是新手,哪怕是非常有经验的贡献者也一样,在刚进入一个新的项目的时候,也是新手。出于同样的原因,甚至长期维护人员并不总是熟悉一个项目的每一部分。给他们同样的耐心,你也会得到同样的回报。
-
-> 😇 *“感谢查看了这个错误,我按照您的建议做了,这是输出结果。”*
->
-> 😢 *“你为什么不修复我的问题?这难道不是你的项目吗?”*
-
-**尊重社区的决定。** 你的想法可能会和社区的优先级、愿景等有差异,他们可能对于你的想法提供了反馈和最后的决定的理由,这时你应该去积极的讨论,并寻求妥协的办法,维护者必须慎重的考虑你的想法。但是如果你实在是不能同意社区的做法,你可以坚持自己!保持自己的分支,或者另起炉灶。
-
-> 😇 *“你不能支持我的用例,我蛮失望,但是你的解释仅仅是对一小部分用户起作用,我理解是为什么。感谢你的耐心倾听。”*
->
-> 😢 *“你为什么不支持我的用例?这是不可接受的!”*
-
-**以上几点,要铭记在心。** 开源是由来自世界各地的人们共同协作实现的。面临的问题是跨语言、跨文化、不同的地理为止、不同的时区,另外,撰写文字的沟通更是难上加难,无法传达语气和情绪。请让这些会话都充满善意吧!在以下情形中请保持礼貌:推动一个想法、请求更多的上下文、进一步澄清你的立场。既然你在互联网找到了自己的所需,那么请尝试让它变得更好!
-
-### 4.2 创建 issue
-
-你应该在遇到下列情况下,去创建一个 issue:
-
-- 报告你自己无法解决的错误
-- 讨论一个高级主题或想法
-- 期望实现某新的特性,或者其它项目的想法
-
-在 issue 的沟通中几点实用的技巧:
-
-- **如果你刚好看到一个开放的issue,恰是你打算解决的,** 添加评论,告诉他人你将对此展开工作,并及时响应。这样的话,可以避免他人重复劳动。
-- **如果说某个issue已经开放很久了,** 这可能是已经有人正在解决中,又或者是早已经解决过了,所以也请添加评论,在打算开始工作之前,最好是确认一下。
-- **如果你创建了一个issue,但是没多久自己解决了,** 也要添加评论,让其他人知道,然后关闭该issue。记录本身就是对社区的贡献。
-
-### 4.3 创建 pull request
-
-在下面的情形时,请你务必使用 PR:
-
-- 提交补丁 (例如,纠正拼写错误、损坏的链接、或者是其它较明显的错误)
-- 开始一项别人请求的任务,或者是过去在issue中早就讨论过的
-
-一个 PR 并不代表着工作已经完成。它通常是尽早的开启一个PR,是为了其他人可以观看或者给作者反馈意见。只需要在子标题标记为“WIP”(正在进行中)。作者可以在后面添加很多评论。
-
-如果说项目是托管在 GitHub上的,以下是我们总结出的提交RP的建议:
-
-- **Fork 代码仓库** 并克隆到本地,在本地的仓库配置“上游”为远端仓库。这样你可以在提交你的PR时保持和“上游”同步,会减少很多解决冲突的时间。(更多关于同步的说明,请参考[这里](https://help.github.com/articles/syncing-a-fork/).)
-- **创建一个分支** 用于自己编辑。
-- **参考任何相关的issue** 或者在你的RP中支持文档(比如. “Closes #37.”)
-- **包含之前和之后的快照** 如果你的改动是包含了不同的 HTML/CSS。在你的PR中拖拉相应的图片。
-- **测试你的改动!** 若测试用例存在的话,跑一遍,以覆盖你的更改,若没有的话,则创建相应的用例。无论测试是否存在,一定要确保你的改动不会破坏掉现有的项目。
-- **和项目现有的风格保持一致** 尽你最大的努力,这也就是意味着在使用缩进、分号、以及注释很可能和你自己的风格大相径庭,但是为了节省维护者的精力,以及未来他人更好的理解和维护,还请你容忍一下。
-
-## 5 成为一个开源贡献者
-
-如果你有志于参与开源事业,可以尝试从自己最熟悉的项目开始,开源并不是属于高级开发者的专属词汇,它就是由你我这样的人在需求,修复,构建中演进下去的。Let's try it !
diff --git a/en-us/blog/dubbo-copywriting-style.md b/en-us/blog/dubbo-copywriting-style.md
deleted file mode 100644
index 53ee3a1..0000000
--- a/en-us/blog/dubbo-copywriting-style.md
+++ /dev/null
@@ -1,272 +0,0 @@
----
-title: Dubbo 博客文档中文排版指南
-keywords: Dubbo, Copywriting
-description: 统一中文文案、排版的相关用法,降低团队成员之间的沟通成本,增强网站气质。
----
-
-# Dubbo 博客文档中文排版指南
-
-[TOC]
-
-## 空格
-
-「有研究显示,打字的时候不喜欢在中文和英文之间加空格的人,感情路都走得很辛苦,有七成的比例会在 34 岁的时候跟自己不爱的人结婚,而其余三成的人最后只能把遗产留给自己的猫。毕竟爱情跟书写都需要适时地留白。与大家共勉之。」—— [vinta/paranoid-auto-spacing](https://github.com/vinta/pangu.js)
-
-### 中英文之间需要增加空格
-
-正确:
-
-> 在 LeanCloud 上,数据存储是围绕 `AVObject` 进行的。
-
-错误:
-
-> 在LeanCloud上,数据存储是围绕`AVObject`进行的。
-
-> 在 LeanCloud上,数据存储是围绕`AVObject` 进行的。
-
-完整的正确用法:
-
-> 在 LeanCloud 上,数据存储是围绕 `AVObject` 进行的。每个 `AVObject` 都包含了与 JSON 兼容的 key-value 对应的数据。数据是 schema-free 的,你不需要在每个 `AVObject` 上提前指定存在哪些键,只要直接设定对应的 key-value 即可。
-
-例外:「豆瓣FM」等产品名词,按照官方所定义的格式书写。
-
-### 中文与数字之间需要增加空格
-
-正确:
-
-> 今天出去买菜花了 5000 元。
-
-错误:
-
-> 今天出去买菜花了 5000元。
-
-> 今天出去买菜花了5000元。
-
-### 数字与单位之间需要增加空格
-
-正确:
-
-> 我家的光纤入户宽带有 10 Gbps,SSD 一共有 20 TB。
-
-错误:
-
-> 我家的光纤入户宽带有 10Gbps,SSD 一共有 10TB。
-
-例外:度/百分比与数字之间不需要增加空格:
-
-正确:
-
-> 今天是 233° 的高温。
-
-> 新 MacBook Pro 有 15% 的 CPU 性能提升。
-
-错误:
-
-> 今天是 233 ° 的高温。
-
-> 新 MacBook Pro 有 15 % 的 CPU 性能提升。
-
-### 全角标点与其他字符之间不加空格
-
-正确:
-
-> 刚刚买了一部 iPhone,好开心!
-
-错误:
-
-> 刚刚买了一部 iPhone ,好开心!
-
-### `-ms-text-autospace` to the rescue?
-
-Microsoft 有个 [`-ms-text-autospace`](http://msdn.microsoft.com/en-us/library/ie/ms531164(v=vs.85).aspx) 的 CSS 属性可以实现自动为中英文之间增加空白。不过目前并未普及,另外在其他应用场景,例如 OS X、iOS 的用户界面目前并不存在这个特性,所以请继续保持随手加空格的习惯。
-
-## 标点符号
-
-### 不重复使用标点符号
-
-正确:
-
-> 德国队竟然战胜了巴西队!
-
-> 她竟然对你说「喵」?!
-
-错误:
-
-> 德国队竟然战胜了巴西队!!
-
-> 德国队竟然战胜了巴西队!!!!!!!!
-
-> 她竟然对你说「喵」??!!
-
-> 她竟然对你说「喵」?!?!??!!
-
-## 全角和半角
-
-不明白什么是全角(全形)与半角(半形)符号?请查看维基百科词条『[全角和半角](http://zh.wikipedia.org/wiki/%E5%85%A8%E5%BD%A2%E5%92%8C%E5%8D%8A%E5%BD%A2)』。
-
-### 使用全角中文标点
-
-正确:
-
-> 嗨!你知道嘛?今天前台的小妹跟我说「喵」了哎!
-
-> 核磁共振成像(NMRI)是什么原理都不知道?JFGI!
-
-错误:
-
-> 嗨! 你知道嘛? 今天前台的小妹跟我说 “喵” 了哎!
-
-> 嗨!你知道嘛?今天前台的小妹跟我说”喵”了哎!
-
-> 核磁共振成像 (NMRI) 是什么原理都不知道? JFGI!
-
-> 核磁共振成像(NMRI)是什么原理都不知道?JFGI!
-
-### 数字使用半角字符
-
-正确:
-
-> 这件蛋糕只卖 1000 元。
-
-错误:
-
-> 这件蛋糕只卖 1000 元。
-
-例外:在设计稿、宣传海报中如出现极少量数字的情形时,为方便文字对齐,是可以使用全角数字的。
-
-### 遇到完整的英文整句、特殊名词,其內容使用半角标点
-
-正确:
-
-> 乔布斯那句话是怎么说的?「Stay hungry, stay foolish.」
-
-> 推荐你阅读《Hackers & Painters: Big Ideas from the Computer Age》,非常的有趣。
-
-错误:
-
-> 乔布斯那句话是怎么说的?「Stay hungry,stay foolish。」
-
-> 推荐你阅读《Hackers&Painters:Big Ideas from the Computer Age》,非常的有趣。
-
-## 名词
-
-### 专有名词使用正确的大小写
-
-大小写相关用法原属于英文书写范畴,不属于本 wiki 讨论內容,在这里只对部分易错用法进行简述。
-
-正确:
-
-> 使用 GitHub 登录
-
-> 我们的客户有 GitHub、Foursquare、Microsoft Corporation、Google、Facebook, Inc.。
-
-错误:
-
-> 使用 github 登录
-
-> 使用 GITHUB 登录
-
-> 使用 Github 登录
-
-> 使用 gitHub 登录
-
-> 使用 gイんĤЦ8 登录
-
-> 我们的客户有 github、foursquare、microsoft corporation、google、facebook, inc.。
-
-> 我们的客户有 GITHUB、FOURSQUARE、MICROSOFT CORPORATION、GOOGLE、FACEBOOK, INC.。
-
-> 我们的客户有 Github、FourSquare、MicroSoft Corporation、Google、FaceBook, Inc.。
-
-> 我们的客户有 gitHub、fourSquare、microSoft Corporation、google、faceBook, Inc.。
-
-> 我们的客户有 gイんĤЦ8、キouЯƧquムгє、๓เςг๏ร๏Ŧt ς๏гק๏гคtเ๏ภn、900913、ƒ4ᄃëв๏๏к, IПᄃ.。
-
-注意:当网页中需要配合整体视觉风格而出现全部大写/小写的情形,HTML 中请使用标准的大小写规范进行书写;并通过 `text-transform: uppercase;`/`text-transform: lowercase;` 对表现形式进行定义。
-
-### 不要使用不地道的缩写
-
-正确:
-
-> 我们需要一位熟悉 JavaScript、HTML5,至少理解一种框架(如 Backbone.js、AngularJS、React 等)的前端开发者。
-
-错误:
-
-> 我们需要一位熟悉 Js、h5,至少理解一种框架(如 backbone、angular、RJS 等)的 FED。
-
-## 争议
-
-以下用法略带有个人色彩,即:无论是否遵循下述规则,从语法的角度来讲都是**正确**的。
-
-### 链接之间增加空格
-
-用法:
-
-> 请 [提交一个 issue](https://www.cnkirito.moe/chinese-copywriting-guidelines/#) 并分配给相关同事。
-
-> 访问我们网站的最新动态,请 [点击这里](https://www.cnkirito.moe/chinese-copywriting-guidelines/#) 进行订阅!
-
-对比用法:
-
-> 请[提交一个 issue](https://www.cnkirito.moe/chinese-copywriting-guidelines/#) 并分配给相关同事。
-
-> 访问我们网站的最新动态,请[点击这里](https://www.cnkirito.moe/chinese-copywriting-guidelines/#)进行订阅!
-
-### 简体中文使用直角引号
-
-用法:
-
-> 「老师,『有条不紊』的『紊』是什么意思?」
-
-对比用法:
-
-> “老师,‘有条不紊’的‘紊’是什么意思?”
-
-## 工具
-
-| 仓库 | 语言 |
-| ------------------------------------------------------------ | --------------- |
-| [vinta/paranoid-auto-spacing](https://github.com/vinta/paranoid-auto-spacing) | JavaScript |
-| [huei90/pangu.node](https://github.com/huei90/pangu.node) | Node.js |
-| [huacnlee/auto-correct](https://github.com/huacnlee/auto-correct) | Ruby |
-| [sparanoid/space-lover](https://github.com/sparanoid/space-lover) | PHP (WordPress) |
-| [nauxliu/auto-correct](https://github.com/NauxLiu/auto-correct) | PHP |
-| [ricoa/copywriting-correct](https://github.com/ricoa/copywriting-correct) | PHP |
-| [hotoo/pangu.vim](https://github.com/hotoo/pangu.vim) | Vim |
-| [sparanoid/grunt-auto-spacing](https://github.com/sparanoid/grunt-auto-spacing) | Node.js (Grunt) |
-| [hjiang/scripts/add-space-between-latin-and-cjk](https://github.com/hjiang/scripts/blob/master/add-space-between-latin-and-cjk) | Python |
-
-## 谁在这样做?
-
-| 网站 | 文案 | UGC |
-| ------------------------------------------------- | ---- | ------------ |
-| [Apple 中国](http://www.apple.com/cn/) | Yes | N/A |
-| [Apple 香港](http://www.apple.com/hk/) | Yes | N/A |
-| [Apple 台湾](http://www.apple.com/tw/) | Yes | N/A |
-| [Microsoft 中国](http://www.microsoft.com/zh-cn/) | Yes | N/A |
-| [Microsoft 香港](http://www.microsoft.com/zh-hk/) | Yes | N/A |
-| [Microsoft 台湾](http://www.microsoft.com/zh-tw/) | Yes | N/A |
-| [LeanCloud](https://leancloud.cn/) | Yes | N/A |
-| [知乎](https://www.zhihu.com/) | Yes | 部分用户达成 |
-| [V2EX](https://www.v2ex.com/) | Yes | Yes |
-| [SegmentFault](https://segmentfault.com/) | Yes | 部分用户达成 |
-| [Apple4us](http://apple4us.com/) | Yes | N/A |
-| [豌豆荚](https://www.wandoujia.com/) | Yes | N/A |
-| [Ruby China](https://ruby-china.org/) | Yes | 标题达成 |
-| [PHPHub](https://phphub.org/) | Yes | 标题达成 |
-| [少数派](http://sspai.com/) | Yes | N/A |
-
-
-## 参考文献
-
-- [Guidelines for Using Capital Letters](http://grammar.about.com/od/punctuationandmechanics/a/Guidelines-For-Using-Capital-Letters.htm)
-- [Letter case - Wikipedia](http://en.wikipedia.org/wiki/Letter_case)
-- [Punctuation - Oxford Dictionaries](http://www.oxforddictionaries.com/words/punctuation)
-- [Punctuation - The Purdue OWL](https://owl.english.purdue.edu/owl/section/1/6/)
-- [How to Use English Punctuation Corrently - wikiHow](http://www.wikihow.com/Use-English-Punctuation-Correctly)
-- [格式 - openSUSE](https://zh.opensuse.org/index.php?title=Help:%E6%A0%BC%E5%BC%8F)
-- [全角和半角 - 维基百科](http://zh.wikipedia.org/wiki/%E5%85%A8%E5%BD%A2%E5%92%8C%E5%8D%8A%E5%BD%A2)
-- [引号 - 维基百科](http://zh.wikipedia.org/wiki/%E5%BC%95%E8%99%9F)
-- [疑问惊叹号 - 维基百科](http://zh.wikipedia.org/wiki/%E7%96%91%E5%95%8F%E9%A9%9A%E5%98%86%E8%99%9F)
-
-> 统一中文文案、排版的相关用法,降低团队成员之间的沟通成本,增强网站气质。原文出处:https://github.com/mzlogin/chinese-copywriting-guidelines
\ No newline at end of file
diff --git a/en-us/blog/dubbo-echo-test.md b/en-us/blog/dubbo-echo-test.md
deleted file mode 100644
index be80503..0000000
--- a/en-us/blog/dubbo-echo-test.md
+++ /dev/null
@@ -1,93 +0,0 @@
-# 回声测试
-回声测试用于检测服务是否可用。客户端通过 EchoService 来使用回声测试。EchoService 申明如下:
-
-```Java
-public interface EchoService {
-
- /**
- * echo test.
- *
- * @param message message.
- * @return message.
- */
- Object $echo(Object message);
-
-}
-```
-用户通过 $echo 方法发起的请求,会按照正常请求的流程执行,能够测试整个调用是否通畅,监控系统可以使用回声测试来检测服务可用性。
-
-## 使用范例
-
-所有服务引用自动实现 EchoService 接口,用户只需将服务引用强制转型为 EchoService,即可使用。配置和代码范例如下所示。
-Spring 配置:
-
-```
-<dubbo:reference id="demoService" interface="org.apache.dubbo.samples.echo.DemoService" />
-```
-代码:
-
-```Java
-// 远程服务引用
-DemoService demoService= ctx.getBean("demoService");
-// 强制转型为EchoService
-EchoService echoService = (EchoService) demoService;
-// 回声测试可用性
-String status = echoService.$echo("OK");
-assert(status.equals("OK"));
-```
-## 实现原理
-
-我们在配置服务引用时,并没有配置 EchoService 这个接口,为什么可以直接把服务引用转型为 EchoService 呢?
-用户拿到的服务引用其实是一个 Proxy,Dubbo 在生成 Proxy 的时候,已经默认将 EchoService 这个接口加入到 Proxy 的接口列表中,所以用户拿到的 Proxy 都已经实现了 EchoService。生成代理相关代码如下:
-
-```Java
- public <T> T getProxy(Invoker<T> invoker, boolean generic) throws RpcException {
- Class<?>[] interfaces = null;
- String config = invoker.getUrl().getParameter(Constants.INTERFACES);
- if (config != null && config.length() > 0) {
- String[] types = Constants.COMMA_SPLIT_PATTERN.split(config);
- if (types != null && types.length > 0) {
- interfaces = new Class<?>[types.length + 2];
- interfaces[0] = invoker.getInterface();
- interfaces[1] = EchoService.class;
- for (int i = 0; i < types.length; i++) {
- // TODO can we load successfully for a different classloader?.
- interfaces[i + 2] = ReflectUtils.forName(types[i]);
- }
- }
- }
- if (interfaces == null) {
- interfaces = new Class<?>[]{invoker.getInterface(), EchoService.class};
- }
-
- if (!GenericService.class.isAssignableFrom(invoker.getInterface()) && generic) {
- int len = interfaces.length;
- Class<?>[] temp = interfaces;
- interfaces = new Class<?>[len + 1];
- System.arraycopy(temp, 0, interfaces, 0, len);
- interfaces[len] = com.alibaba.dubbo.rpc.service.GenericService.class;
- }
-
- return getProxy(invoker, interfaces);
- }
-```
-通过这种方式,任何服务引用都可以被转型成 EchoService 来使用。
-上面解释了客户端的实现,另外一边,用户在服务端也并没有实现 EchoService,那么客户端 EchoService 发出的调用在服务端是如何处理的呢?框架使用 Filter 机制来处理 EchoService 请求。Filter 实现代码如下:
-
-```Java
-@Activate(group = Constants.PROVIDER, order = -110000)
-public class EchoFilter implements Filter {
-
- @Override
- public Result invoke(Invoker<?> invoker, Invocation inv) throws RpcException {
- if (inv.getMethodName().equals(Constants.$ECHO) && inv.getArguments() != null && inv.getArguments().length == 1) {
- return new RpcResult(inv.getArguments()[0]);
- }
- return invoker.invoke(inv);
- }
-
-}
-```
-请求经过 EchoFilter.invoke 方法时,如果判定为 $echo 调用,则直接返回请求参数,否则继续执行 Filter 链。EchoFilter 默认加入到每一个服务提供者的 Filter 链里 EchoFilter.invoke 方法时,如果判定为 $echo 调用,则直接返回请求参数,否则继续执行 Filter 链。EchoFilter 默认加入到每一个服务提供者的 Filter 链里。这样每一个服务提供者自动具备了响应 EchoService 的能力。
-
-通过上述分析,我们了解了框架是如何通过动态代理和 Filter 机制,使得用户可以透明地使用 EchoService 功能。
diff --git a/en-us/blog/dubbo-externalized-configuration.md b/en-us/blog/dubbo-externalized-configuration.md
deleted file mode 100644
index ebe3c3c..0000000
--- a/en-us/blog/dubbo-externalized-configuration.md
+++ /dev/null
@@ -1,690 +0,0 @@
-# Dubbo 外部化配置(Externalized Configuration)
-
-
-
-
-## 外部化配置(External Configuration)
-
-
-
-在[Dubbo 注解驱动](Dubbo-Annotation-Driven.md)例子中,无论是服务提供方,还是服务消费方,均需要转配相关配置Bean:
-
-```java
- @Bean
- public ApplicationConfig applicationConfig() {
- ApplicationConfig applicationConfig = new ApplicationConfig();
- applicationConfig.setName("dubbo-annotation-consumer");
- return applicationConfig;
- }
-```
-
-
-
-虽然实现类似于`ProviderConfiguration` 和 `ConsumerConfiguration` 这样的 Spring `@Configuration` Bean 成本并不高,不过通过 Java Code 的方式定义配置 Bean,或多或少是一种 Hard Code(硬编码)的行为,缺少弹性。
-
-
-
-尽管在 Spring 应用中,可以通过 `@Value` 或者 `Environment` 的方式获取外部配置,其代码简洁性以及类型转换灵活性存在明显的不足。因此,Spring Boot 提出了外部化配置(External Configuration)的感念,即通过程序以外的配置源,动态地绑定指定类型。
-
-
-
-随着 Spring Boot / Spring Cloud 应用的流行,开发人员逐渐地接受并且使用 Spring Boot 外部化配置(External Configuration),即通过 `application.properties` 或者 `bootstrap.properties` 装配配置 Bean。
-
-
-
-下列表格记录了 Dubbo 内置配置类:
-
-| 配置类 | 标签 | 用途 | 解释 |
-| ------------------- | ---------------------- | ------ | ---------------------------------------- |
-| `ProtocolConfig` | `<dubbo:protocol/>` | 协议配置 | 用于配置提供服务的协议信息,协议由提供方指定,消费方被动接受 |
-| `ApplicationConfig` | `<dubbo:application/>` | 应用配置 | 用于配置当前应用信息,不管该应用是提供者还是消费者 |
-| `ModuleConfig` | `<dubbo:module/>` | 模块配置 | 用于配置当前模块信息,可选 |
-| `RegistryConfig` | `<dubbo:registry/>` | 注册中心配置 | 用于配置连接注册中心相关信息 |
-| `MonitorConfig` | `<dubbo:monitor/>` | 监控中心配置 | 用于配置连接监控中心相关信息,可选 |
-| `ProviderConfig` | `<dubbo:provider/>` | 提供方配置 | 当 ProtocolConfig 和 ServiceConfig 某属性没有配置时,采用此缺省值,可选 |
-| `ConsumerConfig` | `<dubbo:consumer/>` | 消费方配置 | 当 ReferenceConfig 某属性没有配置时,采用此缺省值,可选 |
-| `MethodConfig` | `<dubbo:method/>` | 方法配置 | 用于 ServiceConfig 和 ReferenceConfig 指定方法级的配置信息 |
-| `ArgumentConfig` | `<dubbo:argument/>` | 参数配置 | 用于指定方法参数配置 |
-
-
-
-通过申明对应的 Spring 扩展标签,在 Spring 应用上下文中将自动生成相应的配置 Bean。
-
-
-
-在 Dubbo 官方用户手册的[“属性配置”](/docs/3.0/zh-cn/docs/user/configuration/configuration-load-process.md)章节中,`dubbo.properties` 配置属性能够映射到 `ApplicationConfig` 、`ProtocolConfig` 以及 `RegistryConfig` 的字段。从某种意义上来说,`dubbo.properties` 也是 Dubbo 的外部化配置。
-
-
-
-其中,引用“映射规则”的内容:
-
->## 映射规则
->
->将 XML 配置的标签名,加属性名,用点分隔,多个属性拆成多行
->
->* 比如:`dubbo.application.name=foo`等价于`<dubbo:application name="foo" />`
->* 比如:`dubbo.registry.address=10.20.153.10:9090`等价于`<dubbo:registryaddress="10.20.153.10:9090" />`
->
->如果 XML 有多行同名标签配置,可用 id 号区分,如果没有 id 号将对所有同名标签生效
->
->* 比如:`dubbo.protocol.rmi.port=1234`等价于`<dubbo:protocol id="rmi" name="rmi" port="1099" />`
->* 比如:`dubbo.registry.china.address=10.20.153.10:9090`等价于`<dubbo:registry id="china"address="10.20.153.10:9090" />`
->
->下面是 dubbo.properties 的一个典型配置:
->
->```
->dubbo.application.name=foo
->dubbo.application.owner=bar
->dubbo.registry.address=10.20.153.10:9090
->```
-
-
-
-根据“映射规则”,Dubbo 即支持单配置 Bean 映射,也支持多 Bean 映射。综合以上需求,既要兼容 Dubbo 已有的一个或多个 Bean 字段映射绑定,也支持外部化配置。
-
-> 特别提醒:外部化配置(External Configuration)并非 Spring Boot 特有,即使在 Spring Framework 场景下亦能支持。也就是说 Dubbo 外部化配置即可在 Spring Framework 中工作,也能在 Spring Boot 中运行。
-
-
-
-Dubbo 外部化配置(External Configuration) 支持起始版本为:`2.5.8`
-
-
-
-
-
-### `@EnableDubboConfig`
-
-
-
-#### 起始版本:`2.5.8`
-
-
-
-#### 使用说明
-
-
-
-##### `@EnableDubboConfig` 定义
-
-```java
-public @interface EnableDubboConfig {
-
- /**
- * It indicates whether binding to multiple Spring Beans.
- *
- * @return the default value is <code>false</code>
- * @revised 2.5.9
- */
- boolean multiple() default false;
-
-}
-```
-
-
-
-* `multiple` : 表示是否支持多Dubbo 配置 Bean 绑定。默认值为 `false` ,即单 Dubbo 配置 Bean 绑定
-
-
-
-##### 单 Dubbo 配置 Bean 绑定
-
-
-
-为了更好地向下兼容,`@EnableDubboConfig` 提供外部化配置属性与 Dubbo 配置类之间的绑定,其中映射关系如下:
-
-| 配置类 | 外部化配置属性前缀 | 用途 |
-| ------------------- | ------------------- | ------ |
-| `ProtocolConfig` | `dubbo.protocol` | 协议配置 |
-| `ApplicationConfig` | `dubbo.application` | 应用配置 |
-| `ModuleConfig` | `dubbo.module` | 模块配置 |
-| `RegistryConfig` | `dubbo.registry` | 注册中心配置 |
-| `MonitorConfig` | `dubbo.monitor` | 监控中心配置 |
-| `ProviderConfig` | `dubbo.provider` | 提供方配置 |
-| `ConsumerConfig` | `dubbo.consumer` | 消费方配置 |
-
-
-
-当标注 `@EnableDubboConfig` 的类被扫描注册后,同时 Spring(Spring Boot)应用配置(`PropertySources`)中存在`dubbo.application.*` 时,`ApplicationConfig` Bean 将被注册到在 Spring 上下文。否则,不会被注册。如果出现`dubbo.registry.*`的配置,那么,`RegistryConfig` Bean 将会创建,以此类推。即按需装配 Dubbo 配置 Bean。
-
-
-
-如果需要指定配置 Bean的 id,可通过`**.id` 属性设置,以`dubbo.application` 为例:
-
-```properties
-## application
-dubbo.application.id = applicationBean
-dubbo.application.name = dubbo-demo-application
-```
-
-
-
-以上配置等同于以下 Java Config Bean:
-
-```java
- @Bean("applicationBean")
- public ApplicationConfig applicationBean() {
- ApplicationConfig applicationConfig = new ApplicationConfig();
- applicationConfig.setName("dubbo-demo-application");
- return applicationConfig;
- }
-```
-
-
-
-大致上配置属性与配置类绑定模式 - `dubbo.application.* ` 映射到 `ApplicationConfig` 中的字段。
-
-> 注:当配置属性名称无法在配置类中找到字段时,将会忽略绑定
-
-
-
-
-
-##### 多 Dubbo 配置 Bean 绑定
-
-
-
-Dubbo `@Service` 和 `@Reference` 允许 Dubbo 应用关联`ApplicationConfig` Bean 或者指定多个`RegistryConfig` Bean 等能力。换句话说,Dubbo 应用上下文中可能存在多个`ApplicationConfig` 等 Bean定义。
-
-
-
-为了适应以上需要,因此从Dubbo `2.5.9` 开始,`@EnableDubboConfig` 支持多 Dubbo 配置 Bean 绑定,同时按照业界规约标准,与单 Dubbo 配置 Bean 绑定约定不同,配置属性前缀均为英文复数形式:
-
-> 详情请参考 :https://github.com/alibaba/dubbo/issues/1141
-
-
-
-* `dubbo.applications`
-* `dubbo.modules`
-* `dubbo.registries`
-* `dubbo.protocols`
-* `dubbo.monitors`
-* `dubbo.providers`
-* `dubbo.consumers`
-
-
-
-以`dubbo.applications` 为例,基本的模式如下:
-
-```properties
-dubbo.applications.${bean-name}.property-name = ${property-value}
-```
-
-
-
-请读者注意,在单 Dubbo 配置 Bean 绑定时,可以通过指定`id` 属性的方式,定义`ApplicationConfig` Bean 的ID,即`dubbo.application.id`。
-
-而在多 Dubbo 配置 Bean 绑定时,Bean ID 则由`dubbo.applications.`与属性字段名称(`.property-name`)之间的字符来表达。
-
-
-
-如下配置:
-
-```properties
-# multiple Bean definition
-dubbo.applications.applicationBean.name = dubbo-demo-application
-dubbo.applications.applicationBean2.name = dubbo-demo-application2
-dubbo.applications.applicationBean3.name = dubbo-demo-application3
-```
-
-
-
-该配置内容中,绑定了三个`ApplicationConfig` Bean,分别是`applicationBean`、`applicationBean2`以及`applicationBean3`
-
-
-
-#### 示例说明
-
-
-
-`@EnableDubboConfig` 的使用方法很简答, 再次强调一点,当规约的外部配置存在时,相应的 Dubbo 配置类 才会提升为 Spring Bean。简言之,按需装配。
-
-
-
-
-
-##### 单 Dubbo 配置 Bean 绑定
-
-
-
-###### 外部化配置文件
-
-
-
-将以下内容的外部化配置文件物理路径为:`classpath:/META-INF/config.properties`:
-
-```properties
-# 单 Dubbo 配置 Bean 绑定
-## application
-dubbo.application.id = applicationBean
-dubbo.application.name = dubbo-demo-application
-
-## module
-dubbo.module.id = moduleBean
-dubbo.module.name = dubbo-demo-module
-
-## registry
-dubbo.registry.address = zookeeper://192.168.99.100:32770
-
-## protocol
-dubbo.protocol.name = dubbo
-dubbo.protocol.port = 20880
-
-## monitor
-dubbo.monitor.address = zookeeper://127.0.0.1:32770
-
-## provider
-dubbo.provider.host = 127.0.0.1
-
-## consumer
-dubbo.consumer.client = netty
-```
-
-
-
-###### `@EnableDubboConfig` 配置 Bean
-
-
-
-```java
-/**
- * Dubbo 配置 Bean
- *
- * @author <a href="mailto:mercyblitz@gmail.com">Mercy</a>
- */
-@EnableDubboConfig
-@PropertySource("META-INF/config.properties")
-@Configuration
-public class DubboConfiguration {
-
-}
-```
-
-
-
-###### 实现引导类
-
-
-
-```java
-/**
- * Dubbo 配置引导类
- *
- * @author <a href="mailto:mercyblitz@gmail.com">Mercy</a>
- */
-public class DubboConfigurationBootstrap {
-
- public static void main(String[] args) {
- // 创建配置上下文
- AnnotationConfigApplicationContext context = new AnnotationConfigApplicationContext();
- // 注册当前配置 Bean
- context.register(DubboConfiguration.class);
- context.refresh();
- // application
- ApplicationConfig applicationConfig = context.getBean("applicationBean", ApplicationConfig.class);
- System.out.printf("applicationBean.name = %s \n", applicationConfig.getName());
-
- // module
- ModuleConfig moduleConfig = context.getBean("moduleBean", ModuleConfig.class);
- System.out.printf("moduleBean.name = %s \n", moduleConfig.getName());
-
- // registry
- RegistryConfig registryConfig = context.getBean(RegistryConfig.class);
- System.out.printf("registryConfig.name = %s \n", registryConfig.getAddress());
-
- // protocol
- ProtocolConfig protocolConfig = context.getBean(ProtocolConfig.class);
- System.out.printf("protocolConfig.name = %s \n", protocolConfig.getName());
- System.out.printf("protocolConfig.port = %s \n", protocolConfig.getPort());
-
- // monitor
- MonitorConfig monitorConfig = context.getBean(MonitorConfig.class);
- System.out.printf("monitorConfig.name = %s \n", monitorConfig.getAddress());
-
- // provider
- ProviderConfig providerConfig = context.getBean(ProviderConfig.class);
- System.out.printf("providerConfig.name = %s \n", providerConfig.getHost());
-
- // consumer
- ConsumerConfig consumerConfig = context.getBean(ConsumerConfig.class);
- System.out.printf("consumerConfig.name = %s \n", consumerConfig.getClient());
- }
-}
-```
-
-
-
-###### 执行结果
-
-
-
-```
-applicationBean.name = dubbo-demo-application
-moduleBean.name = dubbo-demo-module
-registryConfig.name = zookeeper://192.168.99.100:32770
-protocolConfig.name = dubbo
-protocolConfig.port = 20880
-monitorConfig.name = zookeeper://127.0.0.1:32770
-providerConfig.name = 127.0.0.1
-consumerConfig.name = netty
-```
-
-
-
-不难发现,`@EnableDubboConfig` 配置 Bean 配合外部化文件 `classpath:/META-INF/config.properties`,与执行输出内容相同。
-
-
-
-
-
-##### 多 Dubbo 配置 Bean 绑定
-
-
-
-###### 外部化配置文件
-
-
-
-将以下内容的外部化配置文件物理路径为:`classpath:/META-INF/multiple-config.properties`:
-
-```properties
-# 多 Dubbo 配置 Bean 绑定
-## dubbo.applications
-dubbo.applications.applicationBean.name = dubbo-demo-application
-dubbo.applications.applicationBean2.name = dubbo-demo-application2
-dubbo.applications.applicationBean3.name = dubbo-demo-application3
-```
-
-
-
-###### `@EnableDubboConfig` 配置 Bean(多)
-
-
-
-```java
-@EnableDubboConfig(multiple = true)
-@PropertySource("META-INF/multiple-config.properties")
-private static class DubboMultipleConfiguration {
-
-}
-```
-
-
-
-###### 实现引导类
-
-
-
-```java
-/**
- * Dubbo 配置引导类
- *
- * @author <a href="mailto:mercyblitz@gmail.com">Mercy</a>
- */
-public class DubboConfigurationBootstrap {
- public static void main(String[] args) {
- // 创建配置上下文
- AnnotationConfigApplicationContext context = new AnnotationConfigApplicationContext();
- // 注册当前配置 Bean
- context.register(DubboMultipleConfiguration.class);
- context.refresh();
-
- // 获取 ApplicationConfig Bean:"applicationBean"、"applicationBean2" 和 "applicationBean3"
- ApplicationConfig applicationBean = context.getBean("applicationBean", ApplicationConfig.class);
- ApplicationConfig applicationBean2 = context.getBean("applicationBean2", ApplicationConfig.class);
- ApplicationConfig applicationBean3 = context.getBean("applicationBean3", ApplicationConfig.class);
-
- System.out.printf("applicationBean.name = %s \n", applicationBean.getName());
- System.out.printf("applicationBean2.name = %s \n", applicationBean2.getName());
- System.out.printf("applicationBean3.name = %s \n", applicationBean3.getName());
- }
-}
-```
-
-
-
-###### 执行结果
-
-
-
-```
-applicationBean.name = dubbo-demo-application
-applicationBean2.name = dubbo-demo-application2
-applicationBean3.name = dubbo-demo-application3
-```
-
-
-
-`@EnableDubboConfig(multiple = true)` 执行后,运行结果说明`ApplicationConfig` Bean 以及 ID 的定义方式。
-
-
-
-
-
-### `@EnableDubboConfigBinding` & `@EnableDubboConfigBindings`
-
-
-
-`@EnableDubboConfig`适合绝大多数外部化配置场景,然而无论是单 Bean 绑定,还是多 Bean 绑定,其**外部化配置属性前缀**是固化的,如`dubbo.application` 以及 `dubbo.applications` 。
-
-
-
-当应用需要自定义**外部化配置属性前缀**,`@EnableDubboConfigBinding`能提供更大的弹性,支持单个外部化配置属性前缀(`prefix`) 与 Dubbo 配置 Bean 类型(`AbstractConfig` 子类)绑定,如果需要多次绑定时,可使用`@EnableDubboConfigBindings`。
-
-> 尽管 Dubbo 推荐使用 Java 8 ,然而实际的情况,运行时的 JDK 的版本可能从 6到8 均有。因此,`@EnableDubboConfigBinding` 没有实现`java.lang.annotation.Repeatable`,即允许实现类不支持重复标注`@EnableDubboConfigBinding`。
-
-
-
-`@EnableDubboConfigBinding` 在支持外部化配置属性与 Dubbo 配置类绑定时,与 Dubbo 过去的映射行为不同,被绑定的 Dubbo 配置类将会提升为 Spring Bean,无需提前装配 Dubbo 配置类。同时,支持多 Dubbo 配置Bean 装配。其 Bean 的绑定规则与`@EnableDubboConfig`一致。
-
-
-
-#### 起始版本: `2.5.8`
-
-
-
-#### 使用说明
-
-
-
-##### `@EnableDubboConfigBinding` 定义
-
-
-
-```java
-public @interface EnableDubboConfigBinding {
-
- /**
- * The name prefix of the properties that are valid to bind to {@link AbstractConfig Dubbo Config}.
- *
- * @return the name prefix of the properties to bind
- */
- String prefix();
-
- /**
- * @return The binding type of {@link AbstractConfig Dubbo Config}.
- * @see AbstractConfig
- * @see ApplicationConfig
- * @see ModuleConfig
- * @see RegistryConfig
- */
- Class<? extends AbstractConfig> type();
-
- /**
- * It indicates whether {@link #prefix()} binding to multiple Spring Beans.
- *
- * @return the default value is <code>false</code>
- */
- boolean multiple() default false;
-
-}
-```
-
-
-
-* `prefix()` : 指定待绑定 Dubbo 配置类的外部化配置属性的前缀,比如`dubbo.application` 为 `ApplicationConfig` 的外部化配置属性的前缀。`prefix()` 支持占位符(Placeholder), 并且其关联前缀值是否以"." 作为结尾字符是可选的,即`prefix() = "dubbo.application"` 与 `prefix() = "dubbo.application."` 效果相同
-* `type()` : 指定 Dubbo 配置类,所有 `AbstractConfig` 的实现子类即可,如`ApplicationConfig` 、`RegistryConfig` 以及 `ProtocolConfig` 等
-* `multiple()` : 表明是否需要将`prefix()` 作为多个 `type()` 类型的 Spring Bean 外部化配置属性。默认值为`false`,即默认支持单个类型的 Spring 配置 Bean
-
-
-
-
-假设标注 `@EnableDubboConfigBinding` 的实现类被 Spring 应用上下文扫描并且注册后,其中`prefix()` = `dubbo.app` 、 `type()` = `ApplicationConfig.class` ,且外部配置内容为:
-
-```properties
-dubbo.app.id = applicationBean
-dubbo.app.name = dubbo-demo-application
-```
-
-
-
-Spring 应用上下文启动后,一个 ID 为 "applicationBean" 的 `ApplicationConfig` Bean 被初始化,其 `name` 字段被设置为 "dubbo-demo-application"。
-
-
-
-##### `EnableDubboConfigBindings` 定义
-
-
-
-```java
-public @interface EnableDubboConfigBindings {
-
- /**
- * The value of {@link EnableDubboConfigBindings}
- *
- * @return non-null
- */
- EnableDubboConfigBinding[] value();
-
-}
-```
-
-
-
-* `value` : 指定多个`EnableDubboConfigBinding`,用于实现外部化配置属性前缀(`prefix`) 与 Dubbo 配置 Bean 类型(`AbstractConfig` 子类)绑定。
-
-
-
-#### 示例说明
-
-
-
-##### 外部化配置文件
-
-
-
-将以下内容的外部化配置文件物理路径为:`classpath:/META-INF/bindings.properties`
-
-```properties
-# classpath:/META-INF/bindings.properties
-## 占位符值 : ApplicationConfig 外部配置属性前缀
-applications.prefix = dubbo.apps.
-
-## 多 ApplicationConfig Bean 绑定
-dubbo.apps.applicationBean.name = dubbo-demo-application
-dubbo.apps.applicationBean2.name = dubbo-demo-application2
-dubbo.apps.applicationBean3.name = dubbo-demo-application3
-
-## 单 ModuleConfig Bean 绑定
-dubbo.module.id = moduleBean
-dubbo.module.name = dubbo-demo-module
-
-## 单 RegistryConfig Bean 绑定
-dubbo.registry.address = zookeeper://192.168.99.100:32770
-```
-
-
-
-
-
-##### `EnableDubboConfigBindings` 配置 Bean
-
-
-
-`DubboConfiguration` 作为 Dubbo 配置 Bean,除通过 `@EnableDubboConfigBinding` 绑定之外,还需要 `@PropertySource` 指定外部化配置文件(`classpath:/META-INF/bindings.properties`):
-
-```java
-/**
- * Dubbo 配置 Bean
- *
- * @author <a href="mailto:mercyblitz@gmail.com">Mercy</a>
- */
-@EnableDubboConfigBindings({
- @EnableDubboConfigBinding(prefix = "${applications.prefix}",
- type = ApplicationConfig.class, multiple = true), // 多 ApplicationConfig Bean 绑定
- @EnableDubboConfigBinding(prefix = "dubbo.module", // 不带 "." 后缀
- type = ModuleConfig.class), // 单 ModuleConfig Bean 绑定
- @EnableDubboConfigBinding(prefix = "dubbo.registry.", // 带 "." 后缀
- type = RegistryConfig.class) // 单 RegistryConfig Bean 绑定
-})
-@PropertySource("META-INF/bindings.properties")
-@Configuration
-public class DubboConfiguration {
-
-}
-```
-
-
-
-
-
-##### 实现引导类
-
-
-
-通过之前的使用说明,当 `EnableDubboConfigBinding` 将外部配置化文件`classpath:/META-INF/dubbo.properties` 绑定到 `ApplicationConfig`后,其中 Spring Bean "applicationBean" 的 name 字段被设置成 "dubbo-demo-application"。同时, `EnableDubboConfigBinding` 所标注的 `DubboConfiguration` 需要被 Sring 应用上下文注册:
-
-```java
-/**
- * Dubbo 配置引导类
- *
- * @author <a href="mailto:mercyblitz@gmail.com">Mercy</a>
- */
-public class DubboConfigurationBootstrap {
-
- public static void main(String[] args) {
- // 创建配置上下文
- AnnotationConfigApplicationContext context = new AnnotationConfigApplicationContext();
- // 注册当前配置 Bean
- context.register(DubboConfiguration.class);
- context.refresh();
- // 获取 ApplicationConfig Bean:"applicationBean"、"applicationBean2" 和 "applicationBean3"
- ApplicationConfig applicationBean = context.getBean("applicationBean", ApplicationConfig.class);
- ApplicationConfig applicationBean2 = context.getBean("applicationBean2", ApplicationConfig.class);
- ApplicationConfig applicationBean3 = context.getBean("applicationBean3", ApplicationConfig.class);
-
- System.out.printf("applicationBean.name = %s \n", applicationBean.getName());
- System.out.printf("applicationBean2.name = %s \n", applicationBean2.getName());
- System.out.printf("applicationBean3.name = %s \n", applicationBean3.getName());
-
- // 获取 ModuleConfig Bean:"moduleBean"
- ModuleConfig moduleBean = context.getBean("moduleBean", ModuleConfig.class);
-
- System.out.printf("moduleBean.name = %s \n", moduleBean.getName());
-
- // 获取 RegistryConfig Bean
- RegistryConfig registry = context.getBean(RegistryConfig.class);
-
- System.out.printf("registry.address = %s \n", registry.getAddress());
- }
-}
-```
-
-
-
-##### 运行结果
-
-
-
-`DubboConfigurationBootstrap` 运行后控制台输出:
-
-```
-applicationBean.name = dubbo-demo-application
-applicationBean2.name = dubbo-demo-application2
-applicationBean3.name = dubbo-demo-application3
-moduleBean.name = dubbo-demo-module
-registry.address = zookeeper://192.168.99.100:32770
-```
-
-
-
-输出的内容与`classpath:/META-INF/bindings.properties` 绑定的内容一致,符合期望。
diff --git a/en-us/blog/dubbo-fescar.md b/en-us/blog/dubbo-fescar.md
index b61afc4..75736f8 100644
--- a/en-us/blog/dubbo-fescar.md
+++ b/en-us/blog/dubbo-fescar.md
@@ -1,21 +1,21 @@
---
-title: 如何使用Fescar保证Dubbo微服务间的一致性
-keywords: Dubbo,Fescar,一致性
-description: 本文主要介绍如何使用Fescar保证Dubbo微服务间的一致性
+title: How to use Fescar to ensure consistency between Dubbo Microservices
+keywords: Dubbo,Fescar,Consistency
+description: This article will introduce you how to use Fescar to ensure consistency between Dubbo Microservices.
---
-# 如何使用Fescar保证Dubbo微服务间的一致性
+# How to use Fescar to ensure consistency between Dubbo Microservices
-## 案例
+## Use case
-用户采购商品业务,整个业务包含3个微服务:
+A business logic for user purchasing commodities. The whole business logic is powered by 3 microservices:
-- 库存服务: 扣减给定商品的库存数量。
-- 订单服务: 根据采购请求生成订单。
-- 账户服务: 用户账户金额扣减。
+- Storage service: deduct storage count on given commodity.
+- Order service: create order according to purchase request.
+- Account service: debit the balance of user's account.
-### 业务结构图
+### Architecture

@@ -56,7 +56,7 @@ public interface AccountService {
}
```
-### 主要的业务逻辑:
+### Main business logic
```java
public class BusinessServiceImpl implements BusinessService {
@@ -116,11 +116,11 @@ public class OrderServiceImpl implements OrderService {
}
```
-## Fescar 分布式事务解决方案
+## Distributed Transaction Solution with Fescar

-此处仅仅需要一行注解 `@GlobalTransactional` 写在业务发起方的方法上:
+We just need an annotation `@GlobalTransactional` on business method:
```java
@@ -130,15 +130,15 @@ public class OrderServiceImpl implements OrderService {
}
```
-## Dubbo 与 Fescar 结合的例子
+## Example powered by Dubbo + Fescar
-### Step 1: 安装数据库
+### Step 1: Setup database
-- 要求: MySQL (InnoDB 存储引擎)。
+- Requirement: MySQL with InnoDB engine.
-**提示:** 事实上例子中3个微服务需要3个独立的数据库,但为了方便我们使用同一物理库并配置3个逻辑连接串。
+**Note:** In fact, there should be 3 database for the 3 services in the example use case. However, we can just create one database and configure 3 data sources for simple.
-更改以下xml文件中的数据库url、username和password
+Modify Spring XML with the database URL/username/password you just created.
dubbo-account-service.xml
dubbo-order-service.xml
@@ -149,12 +149,12 @@ dubbo-storage-service.xml
<property name="username" value="xxx" />
<property name="password" value="xxx" />
```
-### Step 2: 为 Fescar 创建 undo_log 表
+### Step 2: Create undo_log table for Fescar
-`UNDO_LOG` 此表用于 Fescar 的AT模式。
+`UNDO_LOG` table is required by Fescar AT mode.
```sql
--- 注意当 Fescar 版本升级至 0.3.0+ 将由之前的普通索引变更为唯一索引。
+-- Note that when Fescar version is upgraded to 0.3.0+, it is changed from the previous normal index to the unique index.
CREATE TABLE `undo_log` (
`id` bigint(20) NOT NULL AUTO_INCREMENT,
`branch_id` bigint(20) NOT NULL,
@@ -169,7 +169,7 @@ CREATE TABLE `undo_log` (
) ENGINE=InnoDB AUTO_INCREMENT=1 DEFAULT CHARSET=utf8;
```
-### Step 3: 创建相关业务表
+### Step 3: Create tables for example business
```sql
@@ -202,10 +202,10 @@ CREATE TABLE `account_tbl` (
PRIMARY KEY (`id`)
) ENGINE=InnoDB DEFAULT CHARSET=utf8;
```
-### Step 4: 启动 Fescar-Server 服务
+### Step 4: Start Fescar-Server
-- 下载Server [package](https://github.com/alibaba/fescar/releases), 并解压。
-- 运行bin目录下的启动脚本。
+- Download server [package](https://github.com/alibaba/fescar/releases), unzip it.
+- Start Fescar-Server
```shell
sh fescar-server.sh $LISTEN_PORT $PATH_FOR_PERSISTENT_DATA
@@ -215,13 +215,13 @@ e.g.
sh fescar-server.sh 8091 /home/admin/fescar/data/
```
-### Step 5: 运行例子
+### Step 5: Run example
-- 启动账户服务 ([DubboAccountServiceStarter](https://github.com/fescar-group/fescar-samples/blob/master/dubbo/src/main/java/com/alibaba/fescar/samples/dubbo/starter/DubboAccountServiceStarter.java))。
-- 启动库存服务 ([DubboStorageServiceStarter](https://github.com/fescar-group/fescar-samples/blob/master/dubbo/src/main/java/com/alibaba/fescar/samples/dubbo/starter/DubboStorageServiceStarter.java))。
-- 启动订单服务 ([DubboOrderServiceStarter](https://github.com/fescar-group/fescar-samples/blob/master/dubbo/src/main/java/com/alibaba/fescar/samples/dubbo/starter/DubboOrderServiceStarter.java))。
-- 运行BusinessService入口 ([DubboBusinessTester](https://github.com/fescar-group/fescar-samples/blob/master/dubbo/src/main/java/com/alibaba/fescar/samples/dubbo/starter/DubboBusinessTester.java))。
+- Start AccountService ([DubboAccountServiceStarter](https://github.com/fescar-group/fescar-samples/blob/master/dubbo/src/main/java/com/alibaba/fescar/samples/dubbo/starter/DubboAccountServiceStarter.java)).
+- Start StorageService ([DubboStorageServiceStarter](https://github.com/fescar-group/fescar-samples/blob/master/dubbo/src/main/java/com/alibaba/fescar/samples/dubbo/starter/DubboStorageServiceStarter.java)).
+- Start OrderService ([DubboOrderServiceStarter](https://github.com/fescar-group/fescar-samples/blob/master/dubbo/src/main/java/com/alibaba/fescar/samples/dubbo/starter/DubboOrderServiceStarter.java)).
+- Run BusinessService for test ([DubboBusinessTester](https://github.com/fescar-group/fescar-samples/blob/master/dubbo/src/main/java/com/alibaba/fescar/samples/dubbo/starter/DubboBusinessTester.java)).
-### 相关项目
+### Related projects
* fescar: https://github.com/alibaba/fescar/
* fescar-samples : https://github.com/fescar-group/fescar-samples
diff --git a/en-us/blog/dubbo-generic-invoke.md b/en-us/blog/dubbo-generic-invoke.md
index 81e6273..4377ba1 100644
--- a/en-us/blog/dubbo-generic-invoke.md
+++ b/en-us/blog/dubbo-generic-invoke.md
@@ -1,29 +1,31 @@
---
-title: Dubbo的泛化调用
+title: Generic invoke of Dubbo
keywords: Dubbo, Generic invoke
-description: 本文介绍了 Dubbo 泛化调用的使用场景及相关示例
+description: This article introduces you when and how to use generic invoke of Dubbo.
---
-# Dubbo的泛化调用
+# Generic invoke of Dubbo
-以下几种场景可以考虑使用泛化调用:
+The generic invoke could be considered to be used in the following cases:
-- 服务测试平台
-- API 服务网关
+- Service test platform
+- API service gateway
-泛化调用主要用于消费端没有 API 接口的情况;不需要引入接口 jar 包,而是直接通过 GenericService 接口来发起服务调用,参数及返回值中的所有 POJO 均用 `Map` 表示。泛化调用对于服务端无需关注,按正常服务进行暴露即可。
+The generic invoke is mainly used when the consumer does not have an API interface;
+instead of depending the interface jar package, the service call is initiated directly through the GenericService interface, and all POJOs in the parameters and return values are represented by a `Map`.
+Generic invoke does not require attention on the server and can be exposed as normal services.
-下面来看看消费端如何使用泛化调用进行服务调用。
+Next, let's take a look at how the consumer uses generic invoke for service call.
-## 通过 Spring XML 配置进行泛化调用
+## Generic invoke through Spring XML configuration
-在 Spring 配置申明 `generic="true"`,如:
+Declare `generic="true"` in Spring configuration, such as
```xml
-<dubbo:reference id="userService" interface="com.alibaba.dubbo.samples.generic.api.IUserService" generic="true"/>
+"userService" interface="com.alibaba.dubbo.samples.generic.api.IUserService" generic="true"/>
```
-需要使用的地方,通过强制类型转化为 GenericService 进行调用:
+Where you need to use it, you can call it by forcing a type cast to GenericService.
```java
GenericService userService = (GenericService) context.getBean("userService");
@@ -32,18 +34,22 @@ String name = (String) userService.$invoke("delete", new String[]{int.class.getN
System.out.println(name);
```
-其中:
+Among them,
-1. GenericService 这个接口只有一个方法,名为 `$invoke`,它接受三个参数,分别为方法名、方法参数类型数组和参数值数组;
-2. 对于方法参数类型数组
- 1. 如果是基本类型,如 int 或 long,可以使用 `int.class.getName()`获取其类型;
- 2. 如果是基本类型数组,如 int[],则可以使用 `int[].class.getName()`;
- 3. 如果是 POJO,则直接使用全类名,如 `com.alibaba.dubbo.samples.generic.api.Params`。
+1. The interface GenericService has only one method, named $invoke, which takes three arguments, a method name, an array of method parameter types, and an array of parameter values.
-## 通过 API 编程进行泛化调用
+2. For arrays of method parameter types
-```
-ApplicationConfig application = new ApplicationConfig();
+ i. If it is a basic type, such as int or long, use `int.class.getName()` to get its type;
+
+ ii. If it is a basic type array, such as int[], use `int[].class.getName()`;
+
+ iii. If it is a POJO, use the full class name directly, such as `com.alibaba.dubbo.samples.generic.api.Params`.
+
+## Generic invoke through API programming
+
+```java
+ApplicationConfig application = new ApplicationConfig()ApplicationConfig application = new ApplicationConfig();
application.setName("api-generic-consumer");
RegistryConfig registry = new RegistryConfig();
@@ -52,27 +58,27 @@ registry.setAddress("zookeeper://127.0.0.1:2181");
application.setRegistry(registry);
ReferenceConfig<GenericService> reference = new ReferenceConfig<GenericService>();
-// 弱类型接口名
+// weak type interface name
reference.setInterface("com.alibaba.dubbo.samples.generic.api.IUserService");
-// 声明为泛化接口
+// declared as a generalized interface
reference.setGeneric(true);
reference.setApplication(application);
-// 用com.alibaba.dubbo.rpc.service.GenericService可以替代所有接口引用
+// replace all interface references with com.alibaba.dubbo.rpc.service.GenericService
GenericService genericService = reference.get();
String name = (String) genericService.$invoke("delete", new String[]{int.class.getName()}, new Object[]{1});
System.out.println(name);
```
-通过 API 的方式,不需要像 XML 的方式需要提前将服务配置好,可以动态构建 ReferenceConfig;相对 XML 来说,API 的方式更常见。
+Through the API, you don't need to configure the service in advance like XML. You can dynamically construct ReferenceConfig; the API is more common than XML.
-## 参数或返回值是 POJO 的场景
+## The case where parameters or return values are POJOs
-比如方法签名是 `User get(Params params);`其中 User 有 id 和 name 两个属性,Params 有 query 一个属性。
+For example, the method signature is `User get(Params params)`, where `User` has two attributes, id and name, and `Params` has one attribute, query.
-以下是消费端的调用代码:
+The following is the code of the consumer:
```java
String[] parameterTypes = new String[]{"com.alibaba.dubbo.samples.generic.api.Params"};
@@ -83,19 +89,20 @@ Object user = userService.$invoke("get", parameterTypes, new Object[]{param});
System.out.println("sample one result: " + user);
```
-上述代码的输出结果为:
+The output of the above code is:
-```shell
+```
sample one result: {name=charles, id=1, class=com.alibaba.dubbo.samples.generic.api.User}
```
-这里,Dubbo 框架会自动将 POJO 的返回值转换成 Map。可以看到,返回值 `user` 是一个 HashMap,里面分别存放了 name、id、class 三个 k/v。
+Here, the Dubbo framework will automatically convert the return value from POJO to Map.
+It can be seen that the return value `user` is a HashMap, which stores three k/vs, name, id, and class.
-#### 泛接口实现
+## Generic interface implementation
-泛接口实现方式主要用于服务端没有 API 接口的情况,参数及返回值中的所有 POJO 均用 Map 表示,通常用于框架集成,如实现一个通用的远程服务 Mock 框架,可通过实现 GenericService 接口处理所有服务请求。
+The implementation of the generic interface is mainly used when the server does not have an API interface. All POJOs in the parameters and return values are represented by Map, which is usually used for framework integration. For example, to implement a generic remote service Mock framework, all service requests can be handled by implementing the interface GenericService.
-### 服务端实现 GenericService
+### Implementation GenericService on the server
```java
public class GenericServiceImpl implements GenericService {
@@ -112,7 +119,7 @@ public class GenericServiceImpl implements GenericService {
}
```
-### 服务端暴露服务
+### Server exposed service
```java
ApplicationConfig application = new ApplicationConfig();
@@ -138,9 +145,9 @@ service2.setRef(genericService);
service2.export();
```
-同样,也可以使用 XML 配置的方式暴露服务;此时服务端是没有依赖 HiService 和 HelloService 这两个接口的。
+Similarly, you can expose the service using XML configuration; in this case, the server does not depend on the two interfaces HiService and HelloService.
-### 消费端进行服务调用
+### Service invoke on the consumer
```java
ApplicationConfig application = new ApplicationConfig();
@@ -152,7 +159,7 @@ registry.setAddress("zookeeper://127.0.0.1:2181");
application.setRegistry(registry);
ReferenceConfig<GenericService> reference = new ReferenceConfig<GenericService>();
-// 弱类型接口名
+// weak type interface name
reference.setInterface(HiService.class);
reference.setApplication(application);
@@ -160,7 +167,7 @@ HiService hiService = (HiService) reference.get();
System.out.println(hiService.hi("dubbo"));
ReferenceConfig<GenericService> reference2 = new ReferenceConfig<GenericService>();
-// 弱类型接口名
+// weak type interface name
reference2.setInterface(HelloService.class);
reference2.setApplication(application);
@@ -168,11 +175,12 @@ HelloService helloService = (HelloService) reference2.get();
System.out.println(helloService.hello("community"));
```
-同样,消费端也可以使用 XML 配置的方式引用服务,然后进行调用。这里可以看到调用方式为普通的服务调用,并非泛化调用。当然使用泛化调用也是可以的。
+Similarly, the consumer can also reference the service using an XML configuration and then make the call. Here you can see that the calling method is a normal service call, not a generic call. Of course, it is also possible to use generic calls.
+
+So far, a simple service Mock platform has been successfully launched!
-到这里为止,一个简易的服务 Mock 平台就成功上线了!
-## 其他
+## Others
-* 本文介绍的泛化调用和泛接口实现,都是在原生的 `Dubbo` 协议之上的。在 2.6.2 版本之前,其他协议如 http/hessian 等是不支持泛化调用的,2.6.3 版本将会对这两个协议的泛化调用做支持。
-* 本文中提到的相关示例代码可以在 dubbo-samples中找到:https://github.com/apache/dubbo-samples/tree/master/java/dubbo-samples-generic
\ No newline at end of file
+- The generic invoke and generic interface implementations introduced in this article are all based on the native Dubbo protocol. Prior to version 2.6.2, other protocols such as http/hessian don't support generic invoke. Version 2.6.3 will support the generic invoke of these two protocols.
+- The relevant sample codes mentioned in this article can be found in dubbo-samples: https://github.com/apache/dubbo-samples/tree/master/java/dubbo-samples-generic
diff --git a/en-us/blog/dubbo-gracefully-shutdown.md b/en-us/blog/dubbo-gracefully-shutdown.md
deleted file mode 100644
index 1858931..0000000
--- a/en-us/blog/dubbo-gracefully-shutdown.md
+++ /dev/null
@@ -1,114 +0,0 @@
----
-title: Dubbo 优雅停机
-keywords: Dubbo, Gracefully Shutdown, Safely Shutdown
-description: 介绍Dubbo优雅停机的原理和使用方式
----
-
-# Dubbo 优雅停机
-
-## 背景
-
-对于任何一个线上应用,如何在服务更新部署过程中保证客户端无感知是开发者必须要解决的问题,即从应用停止到重启恢复服务这个阶段不能影响正常的业务请求。理想条件下,在没有请求的时候再进行更新是最安全可靠的,然而互联网应用必须要保证可用性,因此在技术层面上优化应用更新流程来保证服务在更新时无损是必要的。
-
-传统的解决方式是通过将应用更新流程划分为手工摘流量、停应用、更新重启三个步骤,由人工操作实现客户端无对更新感知。这种方式简单而有效,但是限制较多:不仅需要使用借助网关的支持来摘流量,还需要在停应用前人工判断来保证在途请求已经处理完毕。这种需要人工介入的方式运维复杂度较高,只能适用规模较小的应用,无法在大规模系统上使用。
-
-因此,如果在容器/框架级别提供某种自动化机制,来自动进行摘流量并确保处理完以到达的请求,不仅能保证业务不受更新影响,还可以极大地提升更新应用时的运维效率。
-
-这个机制也就是优雅停机,目前Tomcat/Undertow/Dubbo等容器/框架都有提供相关实现。下面给出正式一些的定义:优雅停机是指在停止应用时,执行的一系列保证应用正常关闭的操作。这些操作往往包括等待已有请求执行完成、关闭线程、关闭连接和释放资源等,优雅停机可以避免非正常关闭程序可能造成数据异常或丢失,应用异常等问题。优雅停机本质上是JVM即将关闭前执行的一些额外的处理代码。
-
-## 适用场景
-
-- JVM主动关闭(`System.exit(int)`;
-- JVM由于资源问题退出(`OOM`);
-- 应用程序接受到`SIGTERM`或`SIGINT`信号。
-
-## 配置方式
-### 服务的优雅停机
-在Dubbo中,优雅停机是默认开启的,停机等待时间为10000毫秒。可以通过配置`dubbo.service.shutdown.wait`来修改等待时间。
-
-例如将等待时间设置为20秒可通过增加以下配置实现:
-
-```shell
-dubbo.service.shutdown.wait=20000
-```
-
-### 容器的优雅停机
-当使用`org.apache.dubbo.container.Main`这种容器方式来使用 Dubbo 时,也可以通过配置`dubbo.shutdown.hook`为`true`来开启优雅停机。
-
-### 通过QOS优雅上下线
-
-基于`ShutdownHook`方式的优雅停机无法确保所有关闭流程一定执行完,所以 Dubbo 推出了多段关闭的方式来保证服务完全无损。
-
-多段关闭即将停止应用分为多个步骤,通过运维自动化脚本或手工操作的方式来保证脚本每一阶段都能执行完毕。
-
-在关闭应用前,首先通过 QOS 的`offline`指令下线所有服务,然后等待一定时间确保已经到达请求全部处理完毕,由于服务已经在注册中心下线,当前应用不会有新的请求。这时再执行真正的关闭(`SIGTERM` 或` SIGINT`)流程,就能保证服务无损。
-
-QOS可通过 telnet 或 HTTP 方式使用,具体方式请见[Dubbo-QOS命令使用说明](http://dubbo.apache.org/zh-cn/docs/user/references/qos.html)。
-
-## 流程
-
-Provider在接收到停机指令后
-
-- 从注册中心上注销所有服务;
-- 从配置中心取消监听动态配置;
-- 向所有连接的客户端发送只读事件,停止接收新请求;
-- 等待一段时间以处理已到达的请求,然后关闭请求处理线程池;
-- 断开所有客户端连接。
-
-Consumer在接收到停机指令后
-
-- 拒绝新到请求,直接返回调用异常;
-- 等待当前已发送请求执行完毕,如果响应超时则强制关闭连接。
-
-当使用容器方式运行 Dubbo 时,在容器准备退出前,可进行一系列的资源释放和清理工。
-
-例如使用 SpringContainer时,Dubbo 的ShutdownHook线程会执行`ApplicationContext`的`stop`和`close`方法,保证 Bean的生命周期完整。
-
-## 实现原理
-
-1. 在加载类`org.apache.dubbo.config.AbstractConfig`时,通过`org.apache.dubbo.config.DubboShutdownHook`向JVM注册 ShutdownHook。
-
- ```java
- /**
- * Register the ShutdownHook
- */
- public void register() {
- if (!registered.get() && registered.compareAndSet(false, true)) {
- Runtime.getRuntime().addShutdownHook(getDubboShutdownHook());
- }
- }
- ```
-
-2. 每个ShutdownHook都是一个单独的线程,由JVM在退出时触发执行`org.apache.dubbo.config.DubboShutdownHook`。
-
- ```java
- /**
- * Destroy all the resources, including registries and protocols.
- */
- public void doDestroy() {
- if (!destroyed.compareAndSet(false, true)) {
- return;
- }
- // destroy all the registries
- AbstractRegistryFactory.destroyAll();
- // destroy all the protocols
- destroyProtocols();
- }
- ```
-
-3. 首先关闭所有注册中心,这一步包括:
- - 从注册中心注销所有已经发布的服务;
- - 取消订阅当前应用所有依赖的服务;
- - 断开与注册中心的连接。
-4. 执行所有`Protocol`的`destroy()`,主要包括:
- - 销毁所有`Invoker`和`Exporter`;
- - 关闭Server,向所有已连接Client发送当前Server只读事件;
- - 关闭独享/共享Client,断开连接,取消超时和重试任务;
- - 释放所有相关资源。
-5. 执行完毕,关闭JVM。
-
-## 注意事项
-
-- 使用`SIGKILL`关闭应用不会执行优雅停机;
-- 优雅停机不保证会等待所有已发送/到达请求结束;
-- 配置的优雅停机等待时间`timeout`不是所有步骤等待时间的总和,而是每一个`destroy`执行的最大时间。例如配置等待时间为5秒,则关闭Server、关闭Client等步骤会分别等待5秒。
diff --git a/en-us/blog/dubbo-heartbeat-design.md b/en-us/blog/dubbo-heartbeat-design.md
deleted file mode 100644
index 7b8df84..0000000
--- a/en-us/blog/dubbo-heartbeat-design.md
+++ /dev/null
@@ -1,386 +0,0 @@
----
-title: Dubbo 现有心跳方案总结以及改进建议
-keywords: Dubbo, 心跳
-description: 一种心跳,两种设计
----
-
-# Dubbo 现有心跳方案总结以及改进建议
-
-### 1 前言
-
-设计一个好的心跳机制并不是一件容易的事,就我所熟知的几个 RPC 框架,它们的心跳机制可以说大相径庭,这篇文章我将探讨一下**如何设计一个优雅的心跳机制,主要从 Dubbo 的现有方案以及一个改进方案来做分析**。
-
-### 2 预备知识
-
-因为后续我们将从源码层面来进行介绍,所以一些服务治理框架的细节还需要提前交代一下,方便大家理解。
-
-#### 2.1 客户端如何得知请求失败了?
-
-高性能的 RPC 框架几乎都会选择使用 Netty 来作为通信层的组件,非阻塞式通信的高效不需要我做过多的介绍。但也由于非阻塞的特性,导致其发送数据和接收数据是一个异步的过程,所以当存在服务端异常、网络问题时,客户端是接收不到响应的,那么我们如何判断一次 RPC 调用是失败的呢?
-
-误区一:Dubbo 调用不是默认同步的吗?
-
-Dubbo 在通信层是异步的,呈现给使用者同步的错觉是因为内部做了阻塞等待,实现了异步转同步。
-
-误区二: `Channel.writeAndFlush` 会返回一个 `channelFuture`,我只需要判断 `channelFuture.isSuccess` 就可以判断请求是否成功了。
-
-注意,writeAndFlush 成功并不代表对端接受到了请求,返回值为 true 只能保证写入网络缓冲区成功,并不代表发送成功。
-
-避开上述两个误区,我们再来回到本小节的标题:客户端如何得知请求失败?**正确的逻辑应当是以客户端接收到失败响应为判断依据**。等等,前面不还在说在失败的场景中,服务端是不会返回响应的吗?没错,既然服务端不会返回,那就只能客户端自己造了。
-
-一个常见的设计是:客户端发起一个 RPC 请求,会设置一个超时时间 `client_timeout`,发起调用的同时,客户端会开启一个延迟 `client_timeout` 的定时器
-
-- 接收到正常响应时,移除该定时器。
-- 定时器倒计时完毕,还没有被移除,则认为请求超时,构造一个失败的响应传递给客户端。
-
-Dubbo 中的超时判定逻辑:
-
-```java
-public static DefaultFuture newFuture(Channel channel, Request request, int timeout) {
- final DefaultFuture future = new DefaultFuture(channel, request, timeout);
- // timeout check
- timeoutCheck(future);
- return future;
-}
-private static void timeoutCheck(DefaultFuture future) {
- TimeoutCheckTask task = new TimeoutCheckTask(future);
- TIME_OUT_TIMER.newTimeout(task, future.getTimeout(), TimeUnit.MILLISECONDS);
-}
-private static class TimeoutCheckTask implements TimerTask {
- private DefaultFuture future;
- TimeoutCheckTask(DefaultFuture future) {
- this.future = future;
- }
- @Override
- public void run(Timeout timeout) {
- if (future == null || future.isDone()) {
- return;
- }
- // create exception response.
- Response timeoutResponse = new Response(future.getId());
- // set timeout status.
- timeoutResponse.setStatus(future.isSent() ? Response.SERVER_TIMEOUT : Response.CLIENT_TIMEOUT);
- timeoutResponse.setErrorMessage(future.getTimeoutMessage(true));
- // handle response.
- DefaultFuture.received(future.getChannel(), timeoutResponse);
- }
-}
-
-```
-
-主要逻辑涉及的类:`DubboInvoker`,`HeaderExchangeChannel`,`DefaultFuture` ,通过上述代码,我们可以得知一个细节,无论是何种调用,都会经过这个定时器的检测,**超时即调用失败,一次 RPC 调用的失败,必须以客户端收到失败响应为准**。
-
-#### 2.2 心跳检测需要容错
-
-网络通信永远要考虑到最坏的情况,一次心跳失败,不能认定为连接不通,多次心跳失败,才能采取相应的措施。
-
-#### 2.3 心跳检测不需要忙检测
-
-忙检测的对立面是空闲检测,我们做心跳的初衷,是为了保证连接的可用性,以保证及时采取断连,重连等措施。如果一条通道上有频繁的 RPC 调用正在进行,我们不应该为通道增加负担去发送心跳包。**心跳扮演的角色应当是晴天收伞,雨天送伞。**
-
-### 3 Dubbo 现有方案
-
-> 本文的源码对应 Dubbo 2.7.x 版本,在 apache 孵化的该版本中,心跳机制得到了增强。
-
-介绍完了一些基础的概念,我们再来看看 Dubbo 是如何设计应用层心跳的。Dubbo 的心跳是双向心跳,客户端会给服务端发送心跳,反之,服务端也会向客户端发送心跳。
-
-#### 3.1 连接建立时创建定时器
-
-```java
-public class HeaderExchangeClient implements ExchangeClient {
- private int heartbeat;
- private int heartbeatTimeout;
- private HashedWheelTimer heartbeatTimer;
- public HeaderExchangeClient(Client client, boolean needHeartbeat) {
- this.client = client;
- this.channel = new HeaderExchangeChannel(client);
- this.heartbeat = client.getUrl().getParameter(Constants.HEARTBEAT_KEY, dubbo != null && dubbo.startsWith("1.0.") ? Constants.DEFAULT_HEARTBEAT : 0);
- this.heartbeatTimeout = client.getUrl().getParameter(Constants.HEARTBEAT_TIMEOUT_KEY, heartbeat * 3);
- if (needHeartbeat) { <1>
- long tickDuration = calculateLeastDuration(heartbeat);
- heartbeatTimer = new HashedWheelTimer(new NamedThreadFactory("dubbo-client-heartbeat", true), tickDuration,
- TimeUnit.MILLISECONDS, Constants.TICKS_PER_WHEEL); <2>
- startHeartbeatTimer();
- }
- }
- }
-```
-
-<1> **默认开启心跳检测的定时器**
-
-<2> **创建了一个 `HashedWheelTimer ` 开启心跳检测**,这是 Netty 所提供的一个经典的时间轮定时器实现,至于它和 jdk 的实现有何不同,不了解的同学也可以关注下,我就不拓展了。
-
-不仅 `HeaderExchangeClient` 客户端开起了定时器,`HeaderExchangeServer` 服务端同样开起了定时器,由于服务端的逻辑和客户端几乎一致,所以后续我并不会重复粘贴服务端的代码。
-
-> Dubbo 在早期版本版本中使用的是 schedule 方案,在 2.7.x 中替换成了 HashedWheelTimer。
-
-#### 3.2 开启两个定时任务
-
-```java
-private void startHeartbeatTimer() {
- long heartbeatTick = calculateLeastDuration(heartbeat);
- long heartbeatTimeoutTick = calculateLeastDuration(heartbeatTimeout);
- HeartbeatTimerTask heartBeatTimerTask = new HeartbeatTimerTask(cp, heartbeatTick, heartbeat); <1>
- ReconnectTimerTask reconnectTimerTask = new ReconnectTimerTask(cp, heartbeatTimeoutTick, heartbeatTimeout); <2>
-
- heartbeatTimer.newTimeout(heartBeatTimerTask, heartbeatTick, TimeUnit.MILLISECONDS);
- heartbeatTimer.newTimeout(reconnectTimerTask, heartbeatTimeoutTick, TimeUnit.MILLISECONDS);
-}
-```
-
-Dubbo 在 `startHeartbeatTimer` 方法中主要开启了两个定时器: `HeartbeatTimerTask`,`ReconnectTimerTask`
-
-<1> `HeartbeatTimerTask` 主要用于定时发送心跳请求
-
-<2> `ReconnectTimerTask` 主要用于心跳失败之后处理重连,断连的逻辑
-
-至于方法中的其他代码,其实也是本文的重要分析内容,先容我卖个关子,后面再来看追溯。
-
-#### 3.3 定时任务一:发送心跳请求
-
-详细解析下心跳检测定时任务的逻辑 `HeartbeatTimerTask#doTask`:
-
-```java
-protected void doTask(Channel channel) {
- Long lastRead = lastRead(channel);
- Long lastWrite = lastWrite(channel);
- if ((lastRead != null && now() - lastRead > heartbeat)
- || (lastWrite != null && now() - lastWrite > heartbeat)) {
- Request req = new Request();
- req.setVersion(Version.getProtocolVersion());
- req.setTwoWay(true);
- req.setEvent(Request.HEARTBEAT_EVENT);
- channel.send(req);
- }
- }
-}
-```
-
-前面已经介绍过,**Dubbo 采取的是双向心跳设计**,即服务端会向客户端发送心跳,客户端也会向服务端发送心跳,接收的一方更新 lastRead 字段,发送的一方更新 lastWrite 字段,超过心跳间隙的时间,便发送心跳请求给对端。这里的 lastRead/lastWrite 同样会被同一个通道上的普通调用更新,通过更新这两个字段,实现了只在连接空闲时才会真正发送空闲报文的机制,符合我们一开始科普的做法。
-
-> 注意:不仅仅心跳请求会更新 lastRead 和 lastWrite,普通请求也会。这对应了我们预备知识中的空闲检测机制。
-
-#### 3.4 定时任务二:处理重连和断连
-
-继续研究下重连和断连定时器都实现了什么 `ReconnectTimerTask#doTask`。
-
-```java
-protected void doTask(Channel channel) {
- Long lastRead = lastRead(channel);
- Long now = now();
- if (lastRead != null && now - lastRead > heartbeatTimeout) {
- if (channel instanceof Client) {
- ((Client) channel).reconnect();
- } else {
- channel.close();
- }
- }
-}
-```
-
-第二个定时器则负责根据客户端、服务端类型来对连接做不同的处理,当超过设置的心跳总时间之后,客户端选择的是重新连接,服务端则是选择直接断开连接。这样的考虑是合理的,客户端调用是强依赖可用连接的,而服务端可以等待客户端重新建立连接。
-
-> 细心的朋友会发现,这个类被命名为 ReconnectTimerTask 是不太准确的,因为它处理的是重连和断连两个逻辑。
-
-#### 3.5 定时不精确的问题
-
-在 Dubbo 的 issue 中曾经有人反馈过定时不精确的问题,我们来看看是怎么一回事。
-
-Dubbo 中默认的心跳周期是 60s,设想如下的时序:
-
-- 第 0 秒,心跳检测发现连接活跃
-- 第 1 秒,连接实际断开
-- 第 60 秒,心跳检测发现连接不活跃
-
-由于**时间窗口的问题,死链不能够被及时检测出来,最坏情况为一个心跳周期**。
-
-为了解决上述问题,我们再倒回去看一下上面的 `startHeartbeatTimer()` 方法
-
-```java
-long heartbeatTick = calculateLeastDuration(heartbeat);
-long heartbeatTimeoutTick = calculateLeastDuration(heartbeatTimeout);
-```
-
-其中 `calculateLeastDuration` 根据心跳时间和超时时间分别计算出了一个 tick 时间,实际上就是将两个变量除以了 3,使得他们的值缩小,并传入了 `HashedWheelTimer` 的第二个参数之中
-
-```java
-heartbeatTimer.newTimeout(heartBeatTimerTask, heartbeatTick, TimeUnit.MILLISECONDS);
-heartbeatTimer.newTimeout(reconnectTimerTask, heartbeatTimeoutTick, TimeUnit.MILLISECONDS);
-```
-
-tick 的含义便是定时任务执行的频率。这样,通过减少检测间隔时间,增大了及时发现死链的概率,原先的最坏情况是 60s,如今变成了 20s。这个频率依旧可以加快,但需要考虑资源消耗的问题。
-
-> 定时不准确的问题出现在 Dubbo 的两个定时任务之中,所以都做了 tick 操作。事实上,所有的定时检测的逻辑都存在类似的问题。
-
-#### 3.6 Dubbo 心跳总结
-
-Dubbo 对于建立的每一个连接,同时在客户端和服务端开启了 2 个定时器,一个用于定时发送心跳,一个用于定时重连、断连,执行的频率均为各自检测周期的 1/3。定时发送心跳的任务负责在连接空闲时,向对端发送心跳包。定时重连、断连的任务负责检测 lastRead 是否在超时周期内仍未被更新,如果判定为超时,客户端处理的逻辑是重连,服务端则采取断连的措施。
-
-先不急着判断这个方案好不好,再来看看改进方案是怎么设计的。
-
-### 4 Dubbo 改进方案
-
-实际上我们可以更优雅地实现心跳机制,本小节开始,我将介绍一个新的心跳机制。
-
-#### 4.1 IdleStateHandler 介绍
-
-Netty 对空闲连接的检测提供了天然的支持,使用 `IdleStateHandler` 可以很方便的实现空闲检测逻辑。
-
-```java
-public IdleStateHandler(
- long readerIdleTime, long writerIdleTime, long allIdleTime,
- TimeUnit unit) {}
-```
-
-- readerIdleTime:读超时时间
-- writerIdleTime:写超时时间
-- allIdleTime:所有类型的超时时间
-
-`IdleStateHandler` 这个类会根据设置的超时参数,循环检测 channelRead 和 write 方法多久没有被调用。当在 pipeline 中加入 `IdleSateHandler` 之后,可以在此 pipeline 的任意 Handler 的 `userEventTriggered` 方法之中检测 `IdleStateEvent` 事件,
-
-```java
-@Override
-public void userEventTriggered(ChannelHandlerContext ctx, Object evt) throws Exception {
- if (evt instanceof IdleStateEvent) {
- //do something
- }
- ctx.fireUserEventTriggered(evt);
-}
-```
-
-为什么需要介绍 `IdleStateHandler` 呢?其实提到它的空闲检测 + 定时的时候,大家应该能够想到了,这不天然是给心跳机制服务的吗?很多服务治理框架都选择了借助 `IdleStateHandler` 来实现心跳。
-
-> IdleStateHandler 内部使用了 eventLoop.schedule(task) 的方式来实现定时任务,使用 eventLoop 线程的好处是还同时保证了**线程安全**,这里是一个小细节。
-
-#### 4.2 客户端和服务端配置
-
-首先是将 `IdleStateHandler` 加入 pipeline 中。
-
-**客户端:**
-
-```java
-bootstrap.handler(new ChannelInitializer<NioSocketChannel>() {
- @Override
- protected void initChannel(NioSocketChannel ch) throws Exception {
- ch.pipeline().addLast("clientIdleHandler", new IdleStateHandler(60, 0, 0));
- }
-});
-```
-
-**服务端:**
-
-```java
-serverBootstrap.childHandler(new ChannelInitializer<NioSocketChannel>() {
- @Override
- protected void initChannel(NioSocketChannel ch) throws Exception {
- ch.pipeline().addLast("serverIdleHandler",new IdleStateHandler(0, 0, 200));
- }
-}
-```
-
-客户端配置了 read 超时为 60s,服务端配置了 write/read 超时为 200s,先在此埋下两个伏笔:
-
-1. 为什么客户端和服务端配置的超时时间不一致?
-2. 为什么客户端检测的是读超时,而服务端检测的是读写超时?
-
-#### 4.3 空闲超时逻辑 — 客户端
-
-对于空闲超时的处理逻辑,客户端和服务端是不同的。首先来看客户端
-
-```java
-@Override
-public void userEventTriggered(ChannelHandlerContext ctx, Object evt) throws Exception {
- if (evt instanceof IdleStateEvent) {
- // send heartbeat
- sendHeartBeat();
- } else {
- super.userEventTriggered(ctx, evt);
- }
-}
-```
-
-检测到空闲超时之后,采取的行为是向服务端发送心跳包,具体是如何发送,以及处理响应的呢?伪代码如下
-
-```java
-public void sendHeartBeat() {
- Invocation invocation = new Invocation();
- invocation.setInvocationType(InvocationType.HEART_BEAT);
- channel.writeAndFlush(invocation).addListener(new CallbackFuture() {
- @Override
- public void callback(Future future) {
- RPCResult result = future.get();
- //超时 或者 写失败
- if (result.isError()) {
- channel.addFailedHeartBeatTimes();
- if (channel.getFailedHeartBeatTimes() >= channel.getMaxHeartBeatFailedTimes()) {
- channel.reconnect();
- }
- } else {
- channel.clearHeartBeatFailedTimes();
- }
- }
- });
-}
-```
-
-行为并不复杂,构造一个心跳包发送到服务端,接受响应结果
-
-- 响应成功,清空请求失败标记
-- 响应失败,心跳失败标记+1,如果超过配置的失败次数,则重新连接
-
-> 不仅仅是心跳,普通请求返回成功响应时也会清空标记
-
-#### 4.4 空闲超时逻辑 — 服务端
-
-```java
-@Override
-public void userEventTriggered(ChannelHandlerContext ctx, Object evt) throws Exception {
- if (evt instanceof IdleStateEvent) {
- channel.close();
- } else {
- super.userEventTriggered(ctx, evt);
- }
-}
-```
-
-服务端处理空闲连接的方式非常简单粗暴,直接关闭连接。
-
-#### 4.5 改进方案心跳总结
-
-1. 为什么客户端和服务端配置的超时时间不一致?
-
- 因为客户端有重试逻辑,不断发送心跳失败 n 次之后,才认为是连接断开;而服务端是直接断开,留给服务端时间得长一点。60 * 3 < 200 还说明了一个问题,双方都拥有断开连接的能力,但连接的创建是由客户端主动发起的,那么客户端也更有权利去主动断开连接。
-
-2. 为什么客户端检测的是读超时,而服务端检测的是读写超时?
-
- 这其实是一个心跳的共识了,仔细思考一下,定时逻辑是由客户端发起的,所以整个链路中不通的情况只有可能是:服务端接收,服务端发送,客户端接收。也就是说,只有客户端的 pong,服务端的 ping,pong 的检测是有意义的。
-
-> 主动追求别人的是你,主动说分手的也是你。
-
-利用 `IdleStateHandler` 实现心跳机制可以说是十分优雅的,借助 Netty 提供的空闲检测机制,利用客户端维护单向心跳,在收到 3 次心跳失败响应之后,客户端断开连接,交由异步线程重连,本质还是表现为客户端重连。服务端在连接空闲较长时间后,主动断开连接,以避免无谓的资源浪费。
-
-### 5 心跳设计方案对比
-
-| | Dubbo 现有方案 | Dubbo 改进方案 |
-| :------------------: | :----------------------------------------------------------: | :--------------------------------------------------: |
-| **主体设计** | 开启两个定时器 | 借助 IdleStateHandler,底层使用 schedule |
-| **心跳方向** | 双向 | 单向(客户端 -> 服务端) |
-| **心跳失败判定方式** | 心跳成功更新标记,借助定时器定时扫描标记,如果超过心跳超时周期未更新标记,认为心跳失败。 | 通过判断心跳响应是否失败,超过失败次数,认为心跳失败 |
-| **扩展性** | Dubbo 存在 mina,grizzy 等其他通信层实现,自定义定时器很容易适配多种扩展 | 多通信层各自实现心跳,不做心跳的抽象 |
-| **设计性** | 编码复杂度高,代码量大,方案复杂,不易维护 | 编码量小,可维护性强 |
-
-私下请教过**美团点评的长连接负责人:俞超(闪电侠)**,美点使用的心跳方案和 Dubbo 改进方案几乎一致,可以说该方案是标准实现了。
-
-### 6 Dubbo 实际改动点建议
-
-鉴于 Dubbo 存在一些其他通信层的实现,所以可以保留现有的定时发送心跳的逻辑。
-
-- **建议改动点一:**
-
-双向心跳的设计是不必要的,兼容现有的逻辑,可以让客户端在连接空闲时发送单向心跳,服务端定时检测连接可用性。定时时间尽量保证:客户端超时时间 * 3 ≈ 服务端超时时间
-
-- **建议改动点二:**
-
-去除处理重连和断连的定时任务,Dubbo 可以判断心跳请求是否响应失败,可以借鉴改进方案的设计,在连接级别维护一个心跳失败次数的标记,任意响应成功,清除标记;连续心跳失败 n 次,客户端发起重连。这样可以减少一个不必要的定时器,任何轮询的方式,都是不优雅的。
-
-最后再聊聊可扩展性这个话题。其实我是建议把定时器交给更加底层的 Netty 去做,也就是完全使用 `IdleStateHandler` ,其他通信层组件各自实现自己的空闲检测逻辑,但是 Dubbo 中 mina,grizzy 的兼容问题囿住了我的拳脚,但试问一下,如今的 2019 年,又有多少人在使用 mina 和 grizzy?因为一些不太可能用的特性,而限制了主流用法的优化,这肯定不是什么好事。抽象,功能,可扩展性并不是越多越好,开源产品的人力资源是有限的,框架使用者的理解能力也是有限的,能解决大多数人问题的设计,才是好的设计。哎,谁让我不会 mina,grizzy,还懒得去学呢[摊手]。
diff --git a/en-us/blog/dubbo-integrate-with-hystrix.md b/en-us/blog/dubbo-integrate-with-hystrix.md
deleted file mode 100644
index c117c38..0000000
--- a/en-us/blog/dubbo-integrate-with-hystrix.md
+++ /dev/null
@@ -1,207 +0,0 @@
----
-title: Spring应用快速集成Dubbo + Hystrix
-keywords: Dubbo, Spring, Hystrix
-description: 本文介绍在spring应用里,怎么把Dubbo和Hystrix结合起来使用。
----
-
-# Spring应用快速集成Dubbo + Hystrix
-
-## 背景
-
-Hystrix 旨在通过控制那些访问远程系统、服务和第三方库的节点,从而对延迟和故障提供更强大的容错能力。Hystrix具备拥有回退机制和断路器功能的线程和信号隔离,请求缓存和请求打包,以及监控和配置等功能。
-
-Dubbo是Alibaba开源的,目前国内最流行的java rpc框架。
-
-本文介绍在spring应用里,怎么把Dubbo和Hystrix结合起来使用。
-
-- <https://github.com/Netflix/Hystrix>
-- <https://github.com/apache/dubbo>
-
-## Spring Boot应用
-
-Demo地址: <https://github.com/dubbo/dubbo-samples/tree/master/dubbo-samples-spring-boot-hystrix>
-
-### 生成dubbo集成spring boot的应用
-
-对于不熟悉dubbo 集成spring boot应用的同学,可以在这里直接生成dubbo + spring boot的工程: <http://start.dubbo.io/>
-
-### 配置spring-cloud-starter-netflix-hystrix
-
-spring boot官方提供了对hystrix的集成,直接在pom.xml里加入依赖:
-
-```
- <dependency>
- <groupId>org.springframework.cloud</groupId>
- <artifactId>spring-cloud-starter-netflix-hystrix</artifactId>
- <version>1.4.4.RELEASE</version>
- </dependency>
-```
-
-然后在Application类上增加`@EnableHystrix`来启用hystrix starter:
-
-```
-@SpringBootApplication
-@EnableHystrix
-public class ProviderApplication {
-```
-
-### 配置Provider端
-
-在Dubbo的Provider上增加`@HystrixCommand`配置,这样子调用就会经过Hystrix代理。
-
-```
-@Service(version = "1.0.0")
-public class HelloServiceImpl implements HelloService {
- @HystrixCommand(commandProperties = {
- @HystrixProperty(name = "circuitBreaker.requestVolumeThreshold", value = "10"),
- @HystrixProperty(name = "execution.isolation.thread.timeoutInMilliseconds", value = "2000") })
- @Override
- public String sayHello(String name) {
- // System.out.println("async provider received: " + name);
- // return "annotation: hello, " + name;
- throw new RuntimeException("Exception to show hystrix enabled.");
- }
-}
-```
-
-### 配置Consumer端
-
-对于Consumer端,则可以增加一层method调用,并在method上配置`@HystrixCommand`。当调用出错时,会走到`fallbackMethod = "reliable"`的调用里。
-
-```
- @Reference(version = "1.0.0")
- private HelloService demoService;
-
- @HystrixCommand(fallbackMethod = "reliable")
- public String doSayHello(String name) {
- return demoService.sayHello(name);
- }
- public String reliable(String name) {
- return "hystrix fallback value";
- }
-```
-
-通过上面的配置,很简单地就完成了Spring Boot里Dubbo + Hystrix的集成。
-
-## 传统Spring Annotation应用
-
-Demo地址: <https://github.com/dubbo/dubbo-samples/tree/master/dubbo-samples-spring-hystrix>
-
-传统spring annotation应用的配置其实也很简单,和spring boot应用不同的是:
-
-1. 显式配置Spring AOP支持:`@EnableAspectJAutoProxy`
-2. 显式通过`@Configuration`配置`HystrixCommandAspect` Bean。
-
-```
- @Configuration
- @EnableDubbo(scanBasePackages = "com.alibaba.dubbo.samples.annotation.action")
- @PropertySource("classpath:/spring/dubbo-consumer.properties")
- @ComponentScan(value = {"com.alibaba.dubbo.samples.annotation.action"})
- @EnableAspectJAutoProxy
- static public class ConsumerConfiguration {
-
- @Bean
- public HystrixCommandAspect hystrixCommandAspect() {
- return new HystrixCommandAspect();
- }
- }
-```
-
-## Hystrix集成Spring AOP原理
-
-在上面的例子里可以看到,Hystrix对Spring的集成是通过Spring AOP来实现的。下面简单分析下实现。
-
-```
-@Aspect
-public class HystrixCommandAspect {
- @Pointcut("@annotation(com.netflix.hystrix.contrib.javanica.annotation.HystrixCommand)")
- public void hystrixCommandAnnotationPointcut() {
- }
- @Pointcut("@annotation(com.netflix.hystrix.contrib.javanica.annotation.HystrixCollapser)")
- public void hystrixCollapserAnnotationPointcut() {
- }
-
- @Around("hystrixCommandAnnotationPointcut() || hystrixCollapserAnnotationPointcut()")
- public Object methodsAnnotatedWithHystrixCommand(final ProceedingJoinPoint joinPoint) throws Throwable {
- Method method = getMethodFromTarget(joinPoint);
- Validate.notNull(method, "failed to get method from joinPoint: %s", joinPoint);
- if (method.isAnnotationPresent(HystrixCommand.class) && method.isAnnotationPresent(HystrixCollapser.class)) {
- throw new IllegalStateException("method cannot be annotated with HystrixCommand and HystrixCollapser " +
- "annotations at the same time");
- }
- MetaHolderFactory metaHolderFactory = META_HOLDER_FACTORY_MAP.get(HystrixPointcutType.of(method));
- MetaHolder metaHolder = metaHolderFactory.create(joinPoint);
- HystrixInvokable invokable = HystrixCommandFactory.getInstance().create(metaHolder);
- ExecutionType executionType = metaHolder.isCollapserAnnotationPresent() ?
- metaHolder.getCollapserExecutionType() : metaHolder.getExecutionType();
-
- Object result;
- try {
- if (!metaHolder.isObservable()) {
- result = CommandExecutor.execute(invokable, executionType, metaHolder);
- } else {
- result = executeObservable(invokable, executionType, metaHolder);
- }
- } catch (HystrixBadRequestException e) {
- throw e.getCause() != null ? e.getCause() : e;
- } catch (HystrixRuntimeException e) {
- throw hystrixRuntimeExceptionToThrowable(metaHolder, e);
- }
- return result;
- }
-```
-
-1. `HystrixCommandAspect`里定义了两个注解的AspectJ Pointcut:`@HystrixCommand`, `@HystrixCollapser`。所有带这两个注解的spring bean都会经过AOP处理
-2. 在`@Around` AOP处理函数里,可以看到Hystrix会创建出`HystrixInvokable`,再通过`CommandExecutor`来执行
-
-## spring-cloud-starter-netflix-hystrix的代码分析
-
-1. `@EnableHystrix` 引入了`@EnableCircuitBreaker`,`@EnableCircuitBreaker`引入了`EnableCircuitBreakerImportSelector`
-
- ```
- @EnableCircuitBreaker
- public @interface EnableHystrix {
- }
-
- @Import(EnableCircuitBreakerImportSelector.class)
- public @interface EnableCircuitBreaker {
- }
- ```
-
-2. `EnableCircuitBreakerImportSelector`继承了`SpringFactoryImportSelector<EnableCircuitBreaker>`,使spring加载`META-INF/spring.factories`里的`EnableCircuitBreaker`声明的配置
-
- 在`META-INF/spring.factories`里可以找到下面的配置,也就是引入了`HystrixCircuitBreakerConfiguration`。
-
- ```
- org.springframework.cloud.client.circuitbreaker.EnableCircuitBreaker=\
- org.springframework.cloud.netflix.hystrix.HystrixCircuitBreakerConfiguration
- ```
-
-3. 在`HystrixCircuitBreakerConfiguration`里可以发现创建了`HystrixCommandAspect`
-
- ```
- @Configuration
- public class HystrixCircuitBreakerConfiguration {
-
- @Bean
- public HystrixCommandAspect hystrixCommandAspect() {
- return new HystrixCommandAspect();
- }
- ```
-
-可见`spring-cloud-starter-netflix-hystrix`实际上也是创建了`HystrixCommandAspect`来集成Hystrix。
-
-另外`spring-cloud-starter-netflix-hystrix`里还有metrics, health, dashboard等集成。
-
-## 总结
-
-- 对于dubbo provider的`@Service`是一个spring bean,直接在上面配置`@HystrixCommand`即可
-- 对于dubbo consumer的`@Reference`,可以通过加一层简单的spring method包装,配置`@HystrixCommand`即可
-- Hystrix本身提供`HystrixCommandAspect`来集成Spring AOP,配置了`@HystrixCommand`和`@HystrixCollapser`的spring method都会被Hystrix处理
-
-## 链接
-
-- <https://github.com/Netflix/Hystrix>
-- <https://github.com/apache/dubbo>
-- <http://start.dubbo.io/>
-- <https://cloud.spring.io/spring-cloud-netflix/single/spring-cloud-netflix.html#_circuit_breaker_hystrix_clients>
diff --git a/en-us/blog/dubbo-invoke.md b/en-us/blog/dubbo-invoke.md
index 7155feb..56422dd 100644
--- a/en-us/blog/dubbo-invoke.md
+++ b/en-us/blog/dubbo-invoke.md
@@ -1,40 +1,40 @@
---
-title: Dubbo 关于同步/异步调用的几种方式
+title: Dubbo: Several ways about synchronous/asynchronous invoke
keywords: Dubbo, Invoke, Async
-description: 本文介绍了Dubbo基于异步通讯机制实现的几种同步和异步调用方式。
+description: This article introduces you how to use Dubbo synchronously or asynchronously.
---
-# Dubbo 关于同步/异步调用的几种方式
+# Dubbo: Several ways about synchronous/asynchronous invoke
-我们知道,Dubbo 缺省协议采用单一长连接,底层实现是 Netty 的 NIO 异步通讯机制;基于这种机制,Dubbo 实现了以下几种调用方式:
+As we all know,Dubbo adopts a single large join protocol by default and takes the NIO asynchronous communication mechanism of Netty as the low-level implementation. Based on this mechanism, Dubbo implements several invocation modes as follows:
-* 同步调用
-* 异步调用
-* 参数回调
-* 事件通知
+* synchronous invoke
+* asynchronous invoke
+* parameters callback
+* event notification
-## 同步调用
+### Synchronous invoke
-同步调用是一种阻塞式的调用方式,即 Consumer 端代码一直阻塞等待,直到 Provider 端返回为止;
+Synchronous invoke is a kind of blocking invocation mode, that is the Consumer keeps blocking and waiting, until the Provider returns.
-通常,一个典型的同步调用过程如下:
+Generally, a typical synchronous invocation process is as follows:
-1. Consumer 业务线程调用远程接口,向 Provider 发送请求,同时当前线程处于`阻塞`状态;
-2. Provider 接到 Consumer 的请求后,开始处理请求,将结果返回给 Consumer;
-3. Consumer 收到结果后,当前线程继续往后执行。
+1. Consumer service thread invokes the remote API and sends requests to the Provider. Meanwhile, the current service thread stays in blocking state;
+2. Provider process relative request after receiving it from Consumer. Then returns the results to Consumer;
+3. After Consumer receiving results, the current thread continues to execute.
-这里有 2 个问题:
+Here are two problems:
-1. Consumer 业务线程是怎么进入`阻塞`状态的?
-2. Consumer 收到结果后,如何唤醒业务线程往后执行的?
+1. How does Consumer service thread turn into `blocking` state?
+2. How does the service thread be awaked to execute after Consumer receiving results?
-其实,Dubbo 的底层 IO 操作都是异步的。Consumer 端发起调用后,得到一个 Future 对象。对于同步调用,业务线程通过`Future#get(timeout)`,阻塞等待 Provider 端将结果返回;`timeout`则是 Consumer 端定义的超时时间。当结果返回后,会设置到此 Future,并唤醒阻塞的业务线程;当超时时间到结果还未返回时,业务线程将会异常返回。
+In fact, the low-level I/O operations of Dubbo are all asynchronous. The Consumer gets a Future object after invoking the Provider. For synchronous invoke, the service thread takes advantage of `Future#get(timeout)` to block and wait for Provider returning results, with the 'timeout' indicating the timeout defined by Consumer. When the result returns, the Future will be set and the blocked service thread will be awaked. The service thread will return an exception if there is no result af [...]
-## 异步调用
+### Asynchronous invoke
-基于 Dubbo 底层的异步 NIO 实现异步调用,对于 Provider 响应时间较长的场景是必须的,它能有效利用 Consumer 端的资源,相对于 Consumer 端使用多线程来说开销较小。
+For scenarios that Provider has a long response time, it's necessary to implement asynchronous invoke based on Dubbo's underlying asynchronous NIO. It could utilize the resource of Consumer effectively, and costs less than using multi-thread for Consumer.
-异步调用,对于 Provider 端不需要做特别的配置。下面的例子中,Provider 端接口定义如下:
+Asynchronous invoke does not need specific configuration for Provider. In the example,the API of Provider is defined as follow:
```java
public interface AsyncService {
@@ -42,7 +42,7 @@ public interface AsyncService {
}
```
-### Consumer 配置
+##### Consumer configuration
```xml
<dubbo:reference id="asyncService" interface="com.alibaba.dubbo.samples.async.api.AsyncService">
@@ -50,50 +50,50 @@ public interface AsyncService {
</dubbo:reference>
```
-需要异步调用的方法,均需要使用 `<dubbo:method/>`标签进行描述。
+Notice that if we need an asynchronous revoke method, we must use `<dubbo:method/>` label to describe it.
-### Consumer 端发起调用
+##### Consumer triggers invocation
```java
AsyncService service = ...;
-String result = service.goodbye("samples");// 这里的返回值为空,请不要使用
+String result = service.goodbye("samples");// returns NULL and DO NOT use!
Future<String> future = RpcContext.getContext().getFuture();
-... // 业务线程可以开始做其他事情
-result = future.get(); // 阻塞需要获取异步结果时,也可以使用 get(timeout, unit) 设置超时时间
+... // other service thread logic
+result = future.get(); // could use get(timeout, unit) to configure timeout, when it needs to get the asynchronous result
```
-Dubbo Consumer 端发起调用后,同时通过`RpcContext.getContext().getFuture()`获取跟返回结果关联的`Future`对象,然后就可以开始处理其他任务;当需要这次异步调用的结果时,可以在任意时刻通过`future.get(timeout)`来获取。
+After Dubbo Consumer triggers invocation, it uses `RpcContext.getContext().getFuture()` to get the relative `Future` object, and then it could start executing other tasks. Anytime when we need results, `future.get(timeout)` is supposed to be called.
-一些特殊场景下,为了尽快调用返回,可以设置是否等待消息发出:
+Under several special conditions, it could be set whether to wait for sending the request, to accelerate the return of invocation:
-* `sent="true"` 等待消息发出,消息发送失败将抛出异常;
-* `sent="false"` 不等待消息发出,将消息放入 IO 队列,即刻返回。
+* `sent="true"` Waiting for sending the request, and return an exception if it fails;
+* `sent="false"` Do not wait for the request, and returns immediately after putting the request to the I/O queue.
-默认为`false`。配置方式如下:
+We set it to `false` by default. And detailed configuration is as follows:
```xml
<dubbo:method name="goodbye" async="true" sent="true" />
```
-如果你只是想异步,完全忽略返回值,可以配置 `return="false"`,以减少 Future 对象的创建和管理成本:
+If you only want to be asynchronous, then omit the result thoroughly, `return="false"` could be set to reduce the creation and management cost of Future:
```xml
<dubbo:method name="goodbye" async="true" return="false"/>
```
-此时,`RpcContext.getContext().getFuture()`将返回`null`。
+At this time,`RpcContext.getContext().getFuture()` will return `null`。
-整个异步调用的时序图如下:
+The complete sequence diagram of asynchronous invoke is as follow:
-
+
-此示例代码位于:https://github.com/dubbo/dubbo-samples/tree/master/dubbo-samples-async
+The sample locates at:https://github.com/dubbo/dubbo-samples/tree/master/dubbo-samples-async
-## 参数回调
+### Parameters callback
-参数回调有点类似于本地 Callback 机制,但 Callback 并不是 Dubbo 内部的类或接口,而是由 Provider 端自定义的;Dubbo 将基于长连接生成反向代理,从而实现从 Provider 端调用 Consumer 端的逻辑。
+The parameter Callback is somewhat similar to the local Callback mechanism, but Callback is not an inner class or interface of Dubbo. Instead, it is defined by the Provider. Dubbo will generate a reverse proxy based on the long connection, so as to implement the logic of calling the Consumer from the Provider.
-### Provider 端定义 Service 和 Callback
+##### Service and Callback definition of Provider
```java
public interface CallbackService {
@@ -105,7 +105,7 @@ public interface CallbackListener {
}
```
-#### Provider 端 Service 实现
+##### Service implementation of Provider
```java
public class CallbackServiceImpl implements CallbackService {
@@ -146,7 +146,7 @@ public class CallbackServiceImpl implements CallbackService {
}
```
-#### Provider 端暴露服务
+##### Service exposure of Provider
```xml
<bean id="callbackService" class="com.alibaba.dubbo.samples.callback.impl.CallbackServiceImpl"/>
@@ -159,9 +159,9 @@ public class CallbackServiceImpl implements CallbackService {
</dubbo:service>
```
-这里,Provider 需要在方法中声明哪个参数是 Callback 参数。
+Here,Provider needs to declare which parameter is the Callback parameter in the method.
-#### Consumer 端实现 Callback 接口
+##### Callback interface implementation of Consumer
```java
CallbackService callbackService = ...;
@@ -172,17 +172,17 @@ callbackService.addListener("foo.bar", new CallbackListener() {
});
```
-Callback 接口的实现类在 Consumer 端,当方法发生调用时,Consumer 端会自动 export 一个 Callback 服务。而 Provider 端在处理调用时,判断如果参数是 Callback,则生成了一个 proxy,因此服务实现类里在调用 Callback 方法的时候,会被传递到 Consumer 端执行 Callback 实现类的代码。
+The implementation class of the Callback interface is on the Consumer, which automatically exports a Callback service when the method is called. Thus during Provider processing the call, if the parameter is determined as Callback, it will generate a proxy. Therefore, when the service implementation class calling the Callback method, it will be passed to the Consumer to execute the code.
-上述示例代码位于:https://github.com/dubbo/dubbo-samples/tree/master/dubbo-samples-callback
+The sample code above is located at:https://github.com/dubbo/dubbo-samples/tree/master/dubbo-samples-callback
-这种调用方式有点像消息的发布和订阅,但又有区别。比如当 Consumer 端 完成了Callback 服务的 export 后,如果后续重启了,这时 Provider 端就会调不通;同时 Provider 端如何清理掉这个 proxy 也是一个问题。
+This invocation mode is somewhat like message publishing and subscribing, but there is a little difference. For example, when the Consumer completes the export of Callback service, if it restarts later, then the Provider will fail to adjust. Meanwhile it is also a problem for the Provider to clean up the proxy.
-## 事件通知
+### Event notification
-事件通知允许 Consumer 端在调用之前、调用之后或出现异常时,触发 `oninvoke`、`onreturn`、`onthrow` 三个事件。
+Event notification allows the Consumer triggering three events,particularly `oninvoke`, `onreturn`, `onthrow` before calling, after calling or occurring exceptions.
-可以通过在配置 Consumer 时,指定事件需要通知的方法,如:
+You can specify which events need to be notified during configuring Consumer, such as:
```xml
<bean id="demoCallback" class="com.alibaba.dubbo.samples.notify.impl.NotifyImpl" />
@@ -192,13 +192,13 @@ Callback 接口的实现类在 Consumer 端,当方法发生调用时,Consume
</dubbo:reference>
```
-其中,NotifyImpl 的代码如下:
+Among them,the code of NotifyImpl is as follow:
```java
public class NotifyImpl implements Notify{
public Map<Integer, String> ret = new HashMap<Integer, String>();
-
+
public void onreturn(String name, int id) {
ret.put(id, name);
System.out.println("onreturn: " + name);
@@ -210,12 +210,12 @@ public class NotifyImpl implements Notify{
}
```
-这里要强调一点,自定义 Notify 接口中的三个方法的参数规则如下:
+Here we address that the parameter rules of three methods in the custom Notify interface are as follows:
-* `oninvoke` 方法参数与调用方法的参数相同;
-* `onreturn`方法第一个参数为调用方法的返回值,其余为调用方法的参数;
-* `onthrow`方法第一个参数为调用异常,其余为调用方法的参数。
+* `oninvoke` method's parameters are the same as the calling method parameters;
+* `onreturn` method's first parameter is the returned value of calling method,and the others are the same as the calling method;
+* `onthrow` method's first parameter is an invoked exception,and the others are the same as the calling method.
-上述配置中,`sayHello`方法为同步调用,因此事件通知方法的执行也是同步执行。可以配置 `async=true`让方法调用为异步,这时事件通知的方法也是异步执行的。特别强调一下,`oninvoke`方法不管是否异步调用,都是同步执行的。
+In the above configuration, `sayHello` method is an asynchronous invocation, so the execution of event notification method is also synchronous. You can configure the `async = true` to make method invocation asynchronous, at this moment, event notification method is executed asynchronously. Especially emphasize that `oninvoke` method is executed synchronously, whether is an asynchronous call or not.
-事件通知的示例代码请参考:https://github.com/dubbo/dubbo-samples/tree/master/dubbo-samples-notify
\ No newline at end of file
+Please refer to the sample code for event notification:https://github.com/dubbo/dubbo-samples/tree/master/dubbo-samples-notify
\ No newline at end of file
diff --git a/en-us/blog/dubbo-k8s.md b/en-us/blog/dubbo-k8s.md
index be14eb5..32fb5dc 100644
--- a/en-us/blog/dubbo-k8s.md
+++ b/en-us/blog/dubbo-k8s.md
@@ -1,101 +1,142 @@
---
-title: Dubbo与Kubernetes集成
+title: Integrate Dubbo with Kubernetes
keywords: Dubbo, Kubernetes, K8S
-description: 本文主要尝试将Dubbo服务注册到Kubernetes,同时无缝融入Kubernetes的多租户安全体系。
+description: This article will try to register Dubbo service to Kubernetes and integrate with Kubernetes's multi-tenancy security system.
---
-# Dubbo与Kubernetes集成
+# General goal
-## 大体目标
+Dubbo's provider don't care about service registration.Open its Dubbo service port,the declaration and publishment of the service will be executed by Kubernetes.
+Dubbo's consumer directly discovers the corresponding service endpoints of Kubernetes during service discovery procedure, thereby reusing Dubbo's existing microservice channel capabilities.The benefit is that there is no need to rely on any third-party soft-loaded registry and it can be seamlessly integrated into the multi-tenant security system of Kubernetes. Reference demo : [https://github.com/dubbo/dubbo-ubernetes](https://github.com/dubbo/dubbo-Kubernetes)
-Dubbo的provider不再关心服务注册的事宜,只需要把其Dubbo服务端口打开,由Kubernetes来进行服务的声明和发布;Dubbo的consumer在服务发现时直接发现kubernetes的对应服务endpoints,从而复用Dubbo已有的微服务通道能力。好处是无需依赖三方的软负载注册中心;同时无缝融入Kubernetes的多租户安全体系。Demo的代码参照: https://github.com/dubbo/dubbo-kubernetes
+# Introduction
-## 闲谈
+Kubernates is a hierarchical system with rich secondary development function based on the expansibility.
-Kubernates是建立在扩展性的具备二次开发的功能层次丰富的体系化系统
+* First of all, Kubernates's core function is to manage the container cluster. Kubernates manages the storage and calculation of containerized cluster, based on the container runtime (CRI), network interface (CNI) and storage service interface (CSI/FV).
+* Secondly,Kubernates has application-oriented deployment and routing capabilities,including statefulness/statelessness,batch processing and service-oriented applications,especially the application management based on microservices architecture which includes service discovery,service definition and unified configuration on the basis of configmap.
+* Finally, on top of the abstract model of the basic resource (mainly the resources of abstract infrastructure, IaaS) and the application layer is the governance layer, which includes elastic expansion, namespaces/tenants and so on. Naturally, it is a matter of course to set up service about unified log center and omnidirectional monitoring on the Kubernetes based upon the foundational capabilities of atomic inner core.
+
+We will explain the above description with a diagram of Kubernetes Architecture. In 2018, Kubernetes took a qualitative step toward the standard PaaS basement.Someone hold opinions that the reason is the ability for secondary development on the basis of the expansion and someone think the key is declarative programming and strong community operations relying on Google and Redhat. However,I think the essential reason is Layered architecture and the abstract domain modeling in the problem [...]
-- 首先其最核心的功能是管理容器集群,能管理容器化的集群(包括存储,计算),当然这个是建立在对容器运行时(CRI),网络接口(CNI),存储服务接口(CSI/FV)的基础上;
-- 其次是面向应用(包括无状态/有状态,批处理/服务型应用)的部署和路由能力,特别是基于微服务架构的应用管理,具备了其服务定义和服务发现,以及基于configmap的统一配置能力;
-- 在基础资源(主要是抽象底层IaaS的资源)和应用层的抽象模型之上是治理层,包含弹性扩容,命名空间/租户,等。当然,基于其原子内核的基础能力,在Kubernetes的核心之上搭建统一的日志中心和全方位监控等服务是水到渠成的,CNCF更是有其认定推荐。
-来张Kubernetes Architecture的一张图解释下上述描述。在2018年Kubernetes往事实的paas底座的标配迈出质的一步,有人说原因在于基于扩展的二次开发能力,有人说在于其声明式编程和背靠Google和Redhat的强大社区运作,我觉得回归本质是在于下图中的**Layered架构和其问题域的领域建模抽象**。

-以微服务架构视角,Kubernetes在一定意义上是微服务框架(这时较叫微服务平台或toolkit集更合适),支持微服务的服务发现/注册的基本能力。借用如下图做一个简单描述。
-
+From a micro-service architecture perspective, Kubernetes is a micro-service framework (more appropriate than a micro-service platform or toolkit set at this time) in a sense, supporting the basic capabilities of microservices for service discovery/registration. Use the following table to make a brief description.
+
+| The design of microservice | The function of Kubernetes |
+| :--- | :--- |
+| Point 1:API gateway | Ingress |
+| Point 2:Statelessness, distinguish between stateful and stateless applications | Stateless corresponds to Deployment,and stateful corresponds to StatefulSet |
+| Point 3:Horizontal expansion of the database | Headless service points to PaaS service or StatefulSet deployment |
+| Point 4:Cache | Headless service points to PaaS service or StatefulSet deployment |
+| Point 5:Service splitting and service discovery | Service |
+| Point 6:Service orchestration and flexibility | Replicas of deployment |
+| Point 7:Unified configuration center | ConfigMap |
+| Point 8:Unified log center | DaemonSet deploys log agent |
+| Point 9:Circut break, current limiting and downgrade | Service Mesh |
+| Point 10:Comprehensive monitoring | Cadsivor, DaemonSet deploys and monitors Agent |
+
+By the way, the microservices field involves many issues, which can be explained as follows. When building microservices, we will delve into Distributed System, a discipline has a 40-year research background and is rooted in the adaptive system theory. It's a bit complicated, but the concepts it covers are more or less heard for us, and it solves problems that we're familiar with:
+
+* Deployment
+* Delivery
+* APIs
+* Versioning
+* Contracts
+* Scaling / Autoscaling
+* Service Discovery
+* Load Balancing
+* Routing / Adaptive Routing
+* Health Checking
+* Configuration
+* Circuit Breaking
+* Bulk-heads
+* TTL / Deadlining
+* Latency Tracing
+* Service Causal Tracing
+* Distributed logging
+* Metrics Exposure, Collection
+
+For Kubernetes, only a few of problems are solved. Problems such as Dynamic Routing, Stability Control (Circuit Breaking, Bulk-heads, etc.) , Distributed Service Tracking, etc. are all the blank. These problems are exactly what Service Mesh needs to solve, and these also plays an important role in CNCF's Tail Map. Of course, as Dubbo is a basically complete microservices infrastructure (Dubbo is based on the Sidecar which is a common solution for solving cross-language claims in Service [...]
+
+> <span data-type="color" style="color:rgb(119, 119, 119)"><span data-type="background" style="background-color:rgb(255, 255, 255)">A service mesh is a dedicated infrastructure layer for handling service-to-service communication. It's responsible for the reliable delivery of requests through the complex topology of services that comprise a modern, cloud native application.</span></span>
+
+We will know the existing solution, Dubbo integrates the Clould Native Equipment - Kubernetes's basic abilities to solve the microservices's core problems, can be regarded as a Service Mesh solution in a narrow sense, but it can only be used in the Java field. You can understand the above words as a joke, haha.
+
+# T<span data-type="color" style="color:rgb(51, 51, 51)"><span data-type="background" style="background-color:rgb(255, 255, 255)">hought</span></span>/Plan
+
+Kubernetes is a natural address registration center for microservices, similar to zookeeper, VIPserver and Configserver used internally by Alibaba. Specifically, the Pod in Kubernetes is a running instance of the application. The scheduled deployment/start/stop of the Pod will call the API-Server service to maintain its state to ETCD. The service in Kubernetes is coresponded to the concept of the microservices defined as follows.
-话题再展开一下,微服务领域涉及众多问题,大概可以用下图说明。
+> A Kubernetes Service is an abstraction layer which defines a logical set of Pods and enables external traffic exposure, load balancing and service discovery for those Pods.
-
+In conclusion, the Kubernetes service has the following characteristics:
-Kubernetes解决得只是少部分,而像动态路由,稳定性控制(断路器,隔水舱等),分布式服务追踪等是个空白,这也就是servicemesh要解决的,是在CNCF的Trail Map占有重要一席;当然Dubbo是基本具备完备的微服务,也就是使得其集成到k8s体系下具有相当的意义。Dubbo在serviemesh中基于sidecar的方案是解决跨语言诉求的通用servicemesh方案,需要新开一个话题来展开说;而引用serviemsh的原始定义:
+* Each Service has a unique name and corresponding IP. IP is automatically assigned by Kubernetes and the name is defined by the developer.
+* Service IP has several manifestations: ClusterIP, NodePort, LoadBalance and Ingress. ClusterIP is mainly used for intra-cluster communication; NodePort, Ingress and LoadBalance, which are used to expose services to access portals outside the cluster.
-> A service mesh is a dedicated infrastructure layer for handling service-to-service communication. It’s responsible for the reliable delivery of requests through the complex topology of services that comprise a modern, cloud native application.
+At first sight, the service of Kubernetes has its own IP, while under the original fixed mindset: Dubbo/HSF service is aggregated by the IP of the entire service cluster, that means, Kubernetes and Dubbo/HSF look like something different in natural, but when carefully thinking, the difference becomes insignificant. Because the only IP under Kubernetes is just a Virtural IP--VIP, behind the vip are multiple endpoints, which is the factual processing node.
-> 首先服务网格是一个云原生环境下基础设施层,功能在于处理服务间通信,职责是负责实现请求的可靠传递,被使得被监控跟踪,被治理,最终使得微服务架构被赋予高可控的稳定性和快速的问题定位排查能力。
+Here we only discuss the situation that the Dubbo service in the cluster is accessed in the same Kubernetes cluster, As for the provider outside Kubernetes to access the provider in Kubernetes, since it involves the problem of network address space, and it usually requires GateWay/loadbalance for mapping conversion, which there not detail discussion for this case. Besides, there are two options available for Kubernetes:
-可以得出现有Dubbo集成云原生基础设施Kubernetes的基础能力而并解决微服务相关核心问题也算是一种狭义上的servicemesh方案,只是是Java领域的罢了;当玩笑理解也行,哈哈。
+1. DNS: The default Kubernetes service is based on the DNS plugin (The latest version of the recommendation is coreDNS), one proposal on Dubbo is about this. since HSF/Dubbo has always highlighted its soft-load address discovery capability, it ignores Static's strategy insteadily, my understanding is that as a service discovery mechanism, the static resolution mechanism is one of the simplest and most needed to support mechanism, you can also refer to Envoy's point of views. While at th [...]
-## 思路/方案
+ 
-Kubernetes是天然可作为微服务的地址注册中心,类似于Zookeeper, 阿里巴巴内部用到的VIPserver,Configserver。 具体来说,Kubernetes中的Pod是对于应用的运行实例,Pod的被调度部署/启停都会调用API-Server的服务来保持其状态到ETCD;Kubernetes中的service是对应微服务的概念,定义如下
+2. API:DNS relies on the DNS plugin, which will generate additional operation, so consider directly obtaining the endpoint through the client of Kubernetes. In fact, by accessing the API server interface of Kubernetes, you can directly obtain the list of endpoints behind a certain servie, and can also monitor the changes in its address list. Thereby implementing the soft load discovery strategy recommended by Dubbo/HSF. Refer to the code for details:
-> A Kubernetes Service is an abstraction layer which defines a logical set of Pods and enables external traffic exposure, load balancing and service discovery for those Pods.
+The above two thoughts need to consider the following two points:
-概括来说Kubernetes service具有如下特点
+1. Kubernetes and Dubbo are consistent with the mapping name of service. Dubbo's service is determined by serviename, group, version to determine its uniqueness, and servicename generally has a longer package name for its service interface. Need to map the servie name of Kubernetes and the service name of dubbo. Either add a property like SOFA to define it. This is a big change, but it is most reasonable. Or it is a fixed rule to reference the deployed environment variables, which can be [...]
+2. Port problem:The default Pod and Pod network interoperability is solved, need to be validated.
-- 每个Service都有一个唯一的名字,及对应IP。IP是kubernetes自动分配的,名字是开发者自己定义的。
-- Service的IP有几种表现形式,分别是ClusterIP,NodePort,LoadBalance,Ingress。 ClusterIP主要用于集群内通信;NodePort,Ingress,LoadBalance用于暴露服务给集群外的访问入口。
+## Demo Verification
-乍一看,Kubernetes的service都是唯一的IP,在原有的Dubbo/HSF固定思维下:Dubbo/HSF的service是由整个服务集群的IP聚合而成,貌似是有本质区别的,细想下来差别不大,因为Kubernetes下的唯一IP只是一个VIP,背后挂在了多个endpoint,那才是事实上的处理节点。此处只讨论集群内的Dubbo服务在同一个kubernetes集群内访问;至于kubernetes外的consumer访问kubernetes内的provider,涉及到网络地址空间的问题,一般需要GateWay/loadbalance来做映射转换,不展开讨论。针对Kubernetes内有两种方案可选: :
+The following is a demo deployment through Kubernetes service in Alibaba Cloud's Container Registry and EDAS. Visit Alibaba Cloud -》Container Registry.
-1. DNS: 默认Kubernetes的service是靠DNS插件(最新版推荐是coreDNS), Dubbo上有个proposal是关于这个的。我的理解是static resolution的机制是最简单最需要支持的一种service discovery机制,具体也可以参考Envoy在此的观点,由于HSF/Dubbo一直突出其软负载的地址发现能力,反而忽略Static的策略。同时蚂蚁的SOFA一直是支持此种策略,那一个SOFA工程的工程片段做一个解释。这样做有两个好处,1)当软负载中心crash不可用造成无法获取地址列表时,有一定的机制Failover到此策略来处理一定的请求。 2)在LDC/单元化下,蚂蚁的负载中心集群是机房/区域内收敛部署的,首先保证软负载中心的LDC化了进而稳定可控,当单元需要请求中心时,此VIP的地址发现就排上用场了。
+1. Create repo and bind the github codebase. As shown below.
-
+
-2. API:DNS是依靠DNS插件进行的,相当于额外的运维开销,所以考虑直接通过kubernetes的client来获取endpoint。事实上,通过访问Kubernetes的API server接口是可以直接获取某个servie背后的endpoint列表,同时可以监听其地址列表的变化。从而实现Dubbo/HSF所推荐的软负载发现策略。具体可以参考代码:
-以上两种思路都需要考虑以下两点:
-1. Kubernetes和Dubbo对于service的名字是映射一致的。Dubbo的服务是由serviename,group,version三个来确定其唯一性,而且servicename一般其服务接口的包名称,比较长。需要映射Kubernetes的servie名与dubbo的服务名。要么是像SOFA那样增加一个属性来进行定义,这是个大的改动,但最合理;要么是通过固定规则来引用部署的环境变量,可用于快速验证。
-2. 端口问题:默认Pod与Pod的网络互通算是解决了,需要验证。
-## Demo验证
+2. Click Manage enter the repository details page. Click Build in images service panel, construct the demo into image and publish it to the specified repository. As shown below.
-下面通过阿里云的容器镜像服务和EDAS中的Kubernetes服务来做一次Demo部署。访问阿里云 -> 容器镜像服务。
+ 
+
+
+
+3. Switch to Enterprise Distributed Application Services (EDAS) products panel, visit Resource Management -> Clusters. Create Kubernetes cluster and bind ECS. As shown below.
+
+ 
-1. 创建镜像仓库并绑定github代码库。如下图
-
-2. 点击管理 **进行创建好的仓库**,通过镜像服务下的构建功能,把demo构建成image,并发布到指定仓库。如下图。
+4. Application Management -> Create application, type Kubernetes application and specify the image in the container registry . As shown below.
-
+ 
-3. 切换到企业级分布式应用服务(EDAS)产品,在资源管理 -> 集群 下创建Kubernetes集群并绑定ECS,如下图.
-
-4. 应用管理 -》创建应用,**类型为kubernetes应用** 并且指定在容器镜像服务中的镜像。如下图。
+ 
-
-
-5. 创建完成后,进行应用部署。如下图
+5. After creation , then deploy applications. As shown below.
-
+ 
-- 补充应用名不能有大写字母,全部小写,否则有部署失败的问题。
+- The supplementary application name cannot have uppercase letters, all lowercase, otherwise there is a problem of deployment failure.
-- 在创建应用时,选中镜像后,下一步的按钮无法点击,需要点击选择来继续。
+- When creating an app, after selecting the image, the next button cannot be clicked and you need to click Choose to continue.
-- EDAS有两套独立的Kubernetes服务,一套是基于阿里云的容器服务,一套是Lark自己搞的。本人体验的是后者。
+- EDAS has two independent Kubernetes services, one based on Alibaba Cloud's container service, and one set by Lark. I experience the latter.
-- Docker与IDE集成的开发联调,需要考虑集成IDEA的相关插件。
+- The development joint of Docker and IDE integration, you need to consider the relevant plug-ins for integrating IDEA.
-- 部署时总是出错,感觉Kubernetes服务上哪里有问题。需要进一步排查。
+- There is always an error in deployment, maybe there is a problem with the Kubernetes service. Need further investigation.
- {"kind":"Pod","namespace":"lzumwsrddf831iwarhehd14zh2-default","name":"dubbo-k8s-demo-610694273-jq238","uid":"12892e67-8bc8-11e8-b96a-00163e02c37b","apiVersion":"v1","resourceVersion":"850282769"},"reason":"FailedSync","message":"Error syncing pod","
\ No newline at end of file
+{"kind":"Pod","namespace":"lzumwsrddf831iwarhehd14zh2-default","name":"dubbo-k8s-demo-610694273-jq238","uid":"12892e67-8bc8-11e8-b96a-00163e02c37b","apiVersion":"v1","resourceVersion":"850282769"},"reason":"FailedSync","message":"Error syncing pod","
diff --git a/en-us/blog/dubbo-loadbalance.md b/en-us/blog/dubbo-loadbalance.md
index 84c8f2e..6ff42c7 100644
--- a/en-us/blog/dubbo-loadbalance.md
+++ b/en-us/blog/dubbo-loadbalance.md
@@ -1,62 +1,62 @@
---
-title: Dubbo的负载均衡
+title: Dubbo's Load Balance
keywords: Dubbo, LoadBalance
-description: 本文介绍了负载均衡的相关概念以及 Dubbo 中的负载均衡策略实现。
+description: This article introduces you what is load balance and how load balance strategy is implemented in Dubbo.
---
-# Dubbo的负载均衡
+# Dubbo's Load Balance
-## 背景
+## Background
-Dubbo是一个分布式服务框架,能避免单点故障和支持服务的横向扩容。一个服务通常会部署多个实例。如何从多个服务 Provider 组成的集群中挑选出一个进行调用,就涉及到一个负载均衡的策略。
+Dubbo is a distributed service framework that avoids single point of failure and horizontal expansion of support services. A service typically deploys multiple instances. How to select a call from a cluster of multiple service providers involves a load balancing strategy.
-## 几个概念
+## Concepts
-在讨论负载均衡之前,我想先解释一下这3个概念。
+Before discussing load balancing, I will explain these three concepts first.
-1. 负载均衡
-2. 集群容错
-3. 服务路由
+1. Load Balancing
+2. Fault-tolerant Cluster
+3. Service Route
-这3个概念容易混淆。他们都描述了怎么从多个 Provider 中选择一个来进行调用。那他们到底有什么区别呢?下面我来举一个简单的例子,把这几个概念阐述清楚吧。
+These three concepts are confusing. They all describe how to choose from multiple Providers to make calls. So what is the difference between them? Let me give a simple example and explain these concepts clearly.
-有一个Dubbo的用户服务,在北京部署了10个,在上海部署了20个。一个杭州的服务消费方发起了一次调用,然后发生了以下的事情:
+There is a Dubbo user service, 10 deployed in Beijing and 20 deployed in Shanghai. A service consumer in Hangzhou initiated a call and then the following steps executed:
-1. 根据配置的路由规则,如果杭州发起的调用,会路由到比较近的上海的20个 Provider。
-2. 根据配置的随机负载均衡策略,在20个 Provider 中随机选择了一个来调用,假设随机到了第7个 Provider。
-3. 结果调用第7个 Provider 失败了。
-4. 根据配置的Failover集群容错模式,重试其他服务器。
-5. 重试了第13个 Provider,调用成功。
+1. According to the configured routing rule, if the call is initiated by Hangzhou, it will be routed to the nearest 20 Providers in Shanghai.
+2. According to the configured random load balancing strategy, one of the 20 Providers is randomly selected to be called, assuming that the 7th Provider is randomly selected.
+3. As a result, calling the 7th Provider failed.
+4. Retried other servers according to the configured Fault-tolerant Cluster mode.
+5. The call to the 13th Provider was successful.
-上面的第1,2,4步骤就分别对应了路由,负载均衡和集群容错。 Dubbo中,先通过路由,从多个 Provider 中按照路由规则,选出一个子集。再根据负载均衡从子集中选出一个 Provider 进行本次调用。如果调用失败了,根据集群容错策略,进行重试或定时重发或快速失败等。 可以看到Dubbo中的路由,负载均衡和集群容错发生在一次RPC调用的不同阶段。最先是路由,然后是负载均衡,最后是集群容错。 本文档只讨论负载均衡,路由和集群容错在其他的文档中进行说明。
+Steps 1, 2, and 4 above correspond to routing, load balancing, and fault-tolerant cluster. In Dubbo, a subset is selected by routing from multiple Providers according to routing rules, then a Provider selected from the subset according to load balancing to make this call. If the call fails, Dubbo retry or schedule retransmission or fail-fast according to the Fault-tolerant Cluster policy. You can see the routes in Dubbo, load balancing and Fault-tolerant Cluster exectute at different sta [...]
-## Dubbo内置负载均衡策略
+## Dubbo's Internal Load Balancing Strategy
-Dubbo内置了4种负载均衡策略:
+Dubbo has four Internal Load Balancing Strategies:
-1. RandomLoadBalance:随机负载均衡。随机的选择一个。是Dubbo的**默认**负载均衡策略。
-2. RoundRobinLoadBalance:轮询负载均衡。轮询选择一个。
-3. LeastActiveLoadBalance:最少活跃调用数,相同活跃数的随机。活跃数指调用前后计数差。使慢的 Provider 收到更少请求,因为越慢的 Provider 的调用前后计数差会越大。
-4. ConsistentHashLoadBalance:一致性哈希负载均衡。相同参数的请求总是落在同一台机器上。
+1. RandomLoadBalance: Random load balancing. Choose a Provider randomly. It is Dubbo's default load balancing strategy.
+2. Round Robin Load Balancing: Polling load balancing, then chooses one Provider.
+3. LeastActiveLoadBalance: The minimum number of active calls, the random number of the same active number. The active number refers to the difference before and after the call. Make slow providers receive fewer requests, because the slower Provider before and after the difference of calls will be larger.
+4. ConsistentHashLoadBalance: Consistent hash load balancing. Requests with the same parameters always fall on the same machine.
-### 1.随机负载均衡
+### 1. Random Load Balancing
-顾名思义,随机负载均衡策略就是从多个 Provider 中随机选择一个。但是 Dubbo 中的随机负载均衡有一个权重的概念,即按照权重设置随机概率。比如说,有10个 Provider,并不是说,每个 Provider 的概率都是一样的,而是要结合这10个 Provider 的权重来分配概率。
+As the name implies, the random load balancing strategy is to select one from multiple Providers randomly. However, random load balancing in Dubbo has a weighting concept that sets the random probability according to the weight. For example, there are 10 Providers, it's not to say that the probability of each Provider is the same, but to assign the probability by combining the weights of these 10 providers.
-Dubbo中,可以对 Provider 设置权重。比如机器性能好的,可以设置大一点的权重,性能差的,可以设置小一点的权重。权重会对负载均衡产生影响。可以在Dubbo Admin中对 Provider 进行权重的设置。
+In Dubbo, you can set weights on the Provider. For example, if the performance of the machine is better, you can set a larger weight. If the performance is poorer, you can set a smaller weight. Weights have an impact on load balancing. The weight of provider can be set in Dubbo Admin.
-**基于权重的负载均衡算法**
+#### Weight-based Load Balancing Algorithm
-随机策略会先判断所有的 Invoker 的权重是不是一样的,如果都是一样的,那么处理就比较简单了。使用random.nexInt(length)就可以随机生成一个 Invoker 的序号,根据序号选择对应的 Invoker 。如果没有在Dubbo Admin中对服务 Provider 设置权重,那么所有的 Invoker 的权重就是一样的,默认是100。 如果权重不一样,那就需要结合权重来设置随机概率了。算法大概如下: 假如有4个 Invoker。
+The stochastic strategy will determine whether the weights of all the invokers are the same at first. If they are all the same, then the processing is relatively simple. Using `random.nexInt(length)`, you can randomly generate an invoker serial number, and select the corresponding invoker according to the serial number. If the service provider not set weight in Dubbo Admin, then all the invokers have the same weight, the default is 100. If the weights are different, then you need to comb [...]
-| invoker | weight |
+| Invoker | Weight |
| ------- | ------ |
| A | 10 |
| B | 20 |
| C | 20 |
| D | 30 |
-A,B,C和D总的权重是10 + 20 + 20 + 30 = 80。将80个数分布在如下的图中:
+The total weight of A, B, C and D is 10 + 20 + 20 + 30 = 80. Spread 80 numbers in the following diagram:
```
+-----------------------------------------------------------------------------------+
@@ -74,11 +74,11 @@ A,B,C和D总的权重是10 + 20 + 20 + 30 = 80。将80个数分布在如下
-----------------------------------------------------------54
```
-上面的图中一共有4块区域,长度分别是A,B,C和D的权重。使用random.nextInt(10 + 20 + 20 + 30),从80个数中随机选择一个。然后再判断该数分布在哪个区域。比如,如果随机到37,37是分布在C区域的,那么就选择 Invoker C。15是在B区域,54是在D区域。
+There are four areas in the above picture, and the lengths are the weights of A, B, C and D, respectively. Use `random.nextInt(10 + 20 + 20 + 30)` to randomly select one of the 80 numbers. Then determine which area the number is distributed in. For example, if random to 37, 37 is distributed in the C region, then select inboker C. 15 is in the B area, 54 is in the D area.
-**随机负载均衡源码**
+#### Random load balancing Source code
-下面是随机负载均衡的源码,为了方便阅读和理解,我把无关部分都去掉了。
+Below is the source code for random load balancing. For ease of reading and understanding, I removed the extraneous parts.
```
public class RandomLoadBalance extends AbstractLoadBalance {
@@ -86,11 +86,11 @@ public class RandomLoadBalance extends AbstractLoadBalance {
private final Random random = new Random();
protected <T> Invoker<T> doSelect(List<Invoker<T>> invokers, URL url, Invocation invocation) {
- int length = invokers.size(); // Invoker 总数
- int totalWeight = 0; // 所有 Invoker 的权重的和
+ int length = invokers.size(); // total invoker
+ int totalWeight = 0; // Sum of invokers' weights
- // 判断是不是所有的 Invoker 的权重都是一样的
- // 如果权重都一样,就简单了。直接用Random生成索引就可以了。
+ // Determine if all the invokers have the same weight
+ // If the weights are the same, it is simple to generate an index directly from Random.
boolean sameWeight = true;
for (int i = 0; i < length; i++) {
int weight = getWeight(invokers.get(i), invocation);
@@ -101,7 +101,7 @@ public class RandomLoadBalance extends AbstractLoadBalance {
}
if (totalWeight > 0 && !sameWeight) {
- // 如果不是所有的 Invoker 权重都相同,那么基于权重来随机选择。权重越大的,被选中的概率越大
+ // If not all of the invoker weights are the same, load balancer will randomly choose invoker based on its weight. The greater the weight, the greater the probability of being selected
int offset = random.nextInt(totalWeight);
for (int i = 0; i < length; i++) {
offset -= getWeight(invokers.get(i), invocation);
@@ -110,40 +110,40 @@ public class RandomLoadBalance extends AbstractLoadBalance {
}
}
}
- // 如果所有 Invoker 权重相同
+ // If all invokers have the same weight
return invokers.get(random.nextInt(length));
}
}
```
-### 2.轮询负载均衡
+### 2. Round Robin Load Balancing
-轮询负载均衡,就是依次的调用所有的 Provider。和随机负载均衡策略一样,轮询负载均衡策略也有权重的概念。 轮询负载均衡算法可以让RPC调用严格按照我们设置的比例来分配。不管是少量的调用还是大量的调用。但是轮询负载均衡算法也有不足的地方,存在慢的 Provider 累积请求的问题,比如:第二台机器很慢,但没挂,当请求调到第二台时就卡在那,久而久之,所有请求都卡在调到第二台上,导致整个系统变慢。
+Round Robin Load Balancing, is to call all Providers in turn. As with random load balancing strategies, Round Robin Load Balancing policies also has a weighting concept. The Round Robin Load Balancing algorithm allows RPC calls to be allocated exactly as we set. Whether it is a small or large number of calls. However, there are also some shortcomings in the Round Robin Load Balancing algorithm. There is a problem that the slow provider accumulates the request. For example, the second mac [...]
+### 3. Minimum Active Call Load Balancing
+Official explanation:
+> The active number refers to the difference between the counts before and after the call. Select the machine with the minimum number of active calls or choose a random one among machines with the same active number, so that the slower machine can receives less requests.
-### 3.最少活跃调用数负载均衡
+This explanation seems to be ambigious. We know the purpose is to ensure the slower machine receive less requests, but it is not clear how to achieve it. An example is here: each service maintains an active number counter. When A machine starts processing the request, the counter is incremented by 1. At this time, A is still processing. If the processing is completed, the counter is decremented by 1. B machine processes very quickly after receiving the request. Then the active numbers of [...]
-官方解释:
-
-> 最少活跃调用数,相同活跃数的随机,活跃数指调用前后计数差,使慢的机器收到更少。
-
-这个解释好像说的不是太明白。目的是让更慢的机器收到更少的请求,但具体怎么实现的还是不太清楚。举个例子:每个服务维护一个活跃数计数器。当A机器开始处理请求,该计数器加1,此时A还未处理完成。若处理完毕则计数器减1。而B机器接受到请求后很快处理完毕。那么A,B的活跃数分别是1,0。当又产生了一个新的请求,则选择B机器去执行(B活跃数最小),这样使慢的机器A收到少的请求。
-
-处理一个新的请求时,Consumer 会检查所有 Provider 的活跃数,如果具有最小活跃数的 Invoker 只有一个,直接返回该 Invoker:
+When processing a new request, Consumer will check the active number of all Providers. If there is only one Invoker with the minimum active number, the Invoker is returned directly.
```
if (leastCount == 1) {
- // 如果只有一个最小则直接返回
+ // if there is only one minimum value then return directly
return invokers.get(leastIndexs[0]);
}
```
-如果最小活跃数的 Invoker 有多个,且权重不相等同时总权重大于0,这时随机生成一个权重,范围在 (0,totalWeight) 间内。最后根据随机生成的权重,来选择 Invoker。
+If there are multiple Invokers with the minimum active number, plus the weights are not equal and the total weight is greater than 0, then generate a random weight ranging from 0 to totalWeight. Finally, the Invoker is selected based on the randomly generated weights.
```
if (! sameWeight && totalWeight > 0) {
- // 如果权重不相同且权重大于0则按总权重数随机
+ // if the weights are not equal and the toatl weight is greater than 0 then choose randomly according to total weight
+
int offsetWeight = random.nextInt(totalWeight);
- // 并确定随机值落在哪个片断上
+
+ // and determine which segment the random value falls on.
+
for (int i = 0; i < leastCount; i++) {
int leastIndex = leastIndexs[i];
offsetWeight -= getWeight(invokers.get(leastIndex), invocation);
@@ -153,82 +153,80 @@ if (! sameWeight && totalWeight > 0) {
}
```
-### 4.一致性Hash算法
-使用一致性 Hash 算法,让相同参数的请求总是发到同一 Provider。 当某一台 Provider 崩溃时,原本发往该 Provider 的请求,基于虚拟节点,平摊到其它 Provider,不会引起剧烈变动。 算法参见:<http://en.wikipedia.org/wiki/Consistent_hashing>。
+### 4. Consistent Hash Algorithm
-缺省只对第一个参数Hash,如果要修改,请配置:
+Use consistent hash algorithm to ensure that requests with same parameters are always sent to the same Provider. When a Provider crashes, requests originally sent to the Provider is spread evenly to other Providers based on the virtual node without causing drastic changes. The algorithm can be seen at: http://en.wikipedia.org/wiki/Consistent_hashing
+By default, only the first parameter is hashed. Configure if you would like to modify it:
```
<dubbo:parameter key="hash.arguments" value="0,1" />
```
-缺省用160份虚拟节点,如果要修改,请配置:
-
+By default, 160 virtual nodes are used. Configure if you would like to modify it:
```
<dubbo:parameter key="hash.nodes" value="320" />
```
-一致性Hash算法可以和缓存机制配合起来使用。比如有一个服务getUserInfo(String userId)。设置了Hash算法后,相同的userId的调用,都会发送到同一个 Provider。这个 Provider 上可以把用户数据在内存中进行缓存,减少访问数据库或分布式缓存的次数。如果业务上允许这部分数据有一段时间的不一致,可以考虑这种做法。减少对数据库,缓存等中间件的依赖和访问次数,同时减少了网络IO操作,提高系统性能。�
+Consistent hash algorithms can be used in conjunction with caching mechanisms. For example, there is a service getUserInfo(String userId). After the hash algorithm is set, the same userId call is sent to the same Provider. This Provider can cache user data in memory, reducing the number of accesses to the database or distributed cache. If this part of the data is allowed to be inconsistent for some time, this approach can be considered. The number of dependencies and accesses to middlewa [...]
+
+
-## 负载均衡配置
-如果不指定负载均衡,默认使用随机负载均衡。我们也可以根据自己的需要,显式指定一个负载均衡。 可以在多个地方类来配置负载均衡,比如 Provider 端,Consumer端,服务级别,方法级别等。
+## Load Balancing Configuration
-### 服务端服务级别
+If load balancing is not specified, random load balancing is used by default. Load balancing can also be explicitly specified based on our needs. Load balancing can be configured in multiple local classes, such as Provider Side, Consumer Side, Service Level, and Method Level.
+### Server Side Service Level
```
<dubbo:service interface="..." loadbalance="roundrobin" />
```
+All methods of the service use roundrobin load balancing.
-该服务的所有方法都使用roundrobin负载均衡。
-
-### 客户端服务级别
-
+### Client Side Service Level
```
<dubbo:reference interface="..." loadbalance="roundrobin" />
```
+All methods of the service use roundrobin load balancing.
-该服务的所有方法都使用roundrobin负载均衡。
-
-### 服务端方法级别
-
+### Server Side Method Level
```
<dubbo:service interface="...">
<dubbo:method name="hello" loadbalance="roundrobin"/>
</dubbo:service>
```
+Only the hello method of the service uses roundrobin load balancing.
-只有该服务的hello方法使用roundrobin负载均衡。
-
-### 客户端方法级别
-
+### Client Side Method Level
```
<dubbo:reference interface="...">
<dubbo:method name="hello" loadbalance="roundrobin"/>
</dubbo:reference>
```
+Only the hello method of the service uses roundrobin load balancing.
+
+Similar to other Dubbo configurations, multiple configurations are covered:
-只有该服务的hello方法使用roundrobin负载均衡。
+1. The method level takes precedence, the interface level is next, and the global configuration comes last.
+2. If the level is the same, the Consumer is given priority and the Provider is next
-和Dubbo其他的配置类似,多个配置是有覆盖关系的:
+Therefore, the priority of the above four configurations is:
-1. 方法级优先,接口级次之,全局配置再次之。
-2. 如果级别一样,则消费方优先,提供方次之。
+1. Client side method level configuration.
+2. Client side interface level configuration.
+3. Server side method level configuration.
+4. Server side interface level configuration.
-所以,上面4种配置的优先级是:
-1. 客户端方法级别配置。
-2. 客户端接口级别配置。
-3. 服务端方法级别配置。
-4. 服务端接口级别配置。
-## 扩展负载均衡
-Dubbo的4种负载均衡的实现,大多数情况下能满足要求。有时候,因为业务的需要,我们可能需要实现自己的负载均衡策略。本章只说明如何配置负载均衡算法。关于Dubbo扩展机制的更多内容,请前往[Dubbo可扩展机制实战](https://lark.alipay.com/aliware_articles/vtpf9h/pe9pyr)。
+## Extended Load Balancing
-1. 实现LoadBalance接口, 以下是Dubbo的LoadBalance接口:
+Four load balancing implementations of Dubbo meet the requirements in most cases. Sometimes, we may need to implement our own load balancing strategy because of the needs of the business. This chapter only explains how to configure the load balancing algorithm. For more on the Dubbo extension mechanism, go to the Dubbo extension mechanism practice.
+1. Implementing the LoadBalance interface
+
+The following is Dubbo's LoadBalance interface:
```
@SPI(RandomLoadBalance.NAME)
public interface LoadBalance {
@@ -237,12 +235,11 @@ public interface LoadBalance {
}
```
-这是SPI的接口,select方法的参数如下:
-
-- invokers: 所有的服务 Provider 列表。
-- url: 一些配置信息,比如接口名,是否check,序列化方式。
-- invocation: RPC调用的信息,包括方法名,方法参数类型,方法参数。 下面是我们自己实现的一个LoadBalance,实现很简单,选择第一个 Invoker:
+This is the interface of the SPI. The parameters of the select method are as follows:
+* invokers: A list of all service Providers.
+* url: Some configuration information, such as interface name, check or not, serialization.
+* invocation: Information called by the RPC, including the method name, method parameter type, and method parameters. Here is a LoadBalance implemented by us. The implementation is very simple - Choose the first Invoker:
```
package com.demo.dubbo;
public class DemoLoadBalance implements LoadBalance {
@@ -254,18 +251,21 @@ public class DemoLoadBalance implements LoadBalance {
}
```
-2. 添加资源文件 添加文件:`src/main/resource/META-INF/dubbo/com.alibaba.dubbo.rpc.cluster.LoadBalance`。这是一个简单的文本文件。文件内容如下:
+2. Add a resource file
+Add a file:
+``src/main/resource/META-INF/dubbo/com.alibaba.dubbo.rpc.cluster.LoadBalance``
+This is a simple text file. The file contents are as follows:
```
demo=my=com.demo.dubbo.DemoLoadBalance
```
-3. 配置使用自定义LoadBalance
+3. Configure to use custom LoadBalance
```
<dubbo:reference id="helloService" interface="com.demo.dubbo.api.IHelloService" loadbalance="demo" />
```
-在Consumer端的`dubbo:reference`中配置`<loadbalance="demo">`
+Configure ``<loadbalance="demo">`` in ``dubbo:reference`` at the Consumer side.
-经过上面的3个步骤,我们编写了一个自定义的LoadBalance,并告诉Dubbo使用它了。启动Dubbo,我们就能看到Dubbo已经使用了自定义的DemoLoadBalance。
\ No newline at end of file
+After 3 steps above, we wrote a custom LoadBalance and told Dubbo to use it. Start Dubbo and we can see that Dubbo has used a custom DemoLoadBalance.
diff --git a/en-us/blog/dubbo-local-call.md b/en-us/blog/dubbo-local-call.md
deleted file mode 100644
index b6086ca..0000000
--- a/en-us/blog/dubbo-local-call.md
+++ /dev/null
@@ -1,139 +0,0 @@
-# 本地调用
-
-### 本地调用介绍
-
-当一个应用既是一个服务的提供者,同时也是这个服务的消费者的时候,可以直接对本机提供的服务发起本地调用。从 `2.2.0` 版本开始,Dubbo 默认在本地以 *injvm* 的方式暴露服务,这样的话,在同一个进程里对这个服务的调用会优先走本地调用。
-
-
-
-与本地对象上方法调用不同的是,Dubbo 本地调用会经过 Filter 链,其中包括了 Consumer 端的 Filter 链以及 Provider 端的 Filter 链。通过这样的机制,本地消费者和其他消费者都是统一对待,统一监控,服务统一进行治理。
-
-
-
-
-
-
-
-
-
-同时,相比于远程调用来说,Dubbo 本地调用性能较优,省去了请求、响应的编解码及网络传输的过程。
-
-
-
-要使用 Dubbo 本地调用不需做特殊配置,按正常 Dubbo 服务暴露服务即可。任一服务在暴露远程服务的同时,也会同时以 *injvm* 的协议暴露本地服务。*injvm* 是一个伪协议,不会像其他协议那样对外开启端口,只用于本地调用的目的。
-
-
-
-以下面的 XML 配置为例:
-
-
-
-```xml
-<dubbo:registry address="zookeeper://127.0.0.1:2181"/>
-<dubbo:protocol name="dubbo" port="20800"/>
-
-<bean id="demoServiceTarget" class="org.apache.dubbo.samples.local.impl.DemoServiceImpl"/>
-
-<dubbo:service interface="org.apache.dubbo.samples.local.api.DemoService" ref="demoServiceTarget"/>
-<dubbo:reference id="demoService" interface="org.apache.dubbo.samples.local.api.DemoService"/>
-```
-
-
-
-这里同时配置了同一服务 *DemoService* 的提供者以及消费者。在这种情况下,该应用中的 *DemoService* 的消费方会优先使用 *injvm* 协议进行本地调用。上述的例子可以在 dubbo-samples 工程中找到源码:https://github.com/apache/dubbo-samples/blob/master/dubbo-samples-local
-
-
-
-### 细粒度控制本地调用
-
-本地调用是可以显示关闭的,通过这种方式,服务提供者可以做到对远端服务消费者和本地消费者一视同仁。具体做法是通过 *scope="remote"* 来关闭 *injvm* 协议的暴露,这样,即使是本地调用者,也需要从注册中心上获取服务地址列表,然后才能发起调用,而这个时候的调用过程,与远端的服务消费者的过程是一致的。
-
-
-
-```xml
-<bean id="target" class="org.apache.dubbo.samples.local.impl.DemoServiceImpl"/>
-<!-- 服务提供者指定 scope="remote" -->
-<dubbo:service interface="org.apache.dubbo.samples.local.api.DemoService" ref="target" scope="remote"/>
-<dubbo:reference id="demoService" interface="org.apache.dubbo.samples.local.api.DemoService"/>
-```
-
-
-
-同样的,服务消费者也支持通过 *scope* 来限定发起调用优先走本地,还是只走远程。比如,可以通过以下的方式强制消费端通过**远程调用**的方式来发起 dubbo 调用:
-
-
-
-```xml
-<!-- 服务消费者指定 scope="remote" -->
-<dubbo:reference id="demoService" interface="org.apache.dubbo.samples.local.api.DemoService" scope="remote"/>
-```
-
-
-
-如果同时服务提供方限定了 *scope="local"* 的话,
-
-
-
-```xml
-<!-- 服务提供者指定 scope="remote" -->
-<dubbo:service interface="org.apache.dubbo.samples.local.api.DemoService" ref="target" scope="remote"/>
-<!-- 服务消费者指定 scope="local" -->
-<dubbo:reference id="demoService" interface="org.apache.dubbo.samples.local.api.DemoService" scope="local"/>
-```
-
-
-
-那么该程序中的 dubbo 调用将会失败,原因是服务提供方只暴露了远程服务到注册中心上,并没有暴露 *injvm* 协议的服务,而出于同一个进程中的服务消费者查找不到 *injvm* 协议的服务,也不会去远程的注册中心上订阅服务地址。同样的,当服务提供者限定 *scope="local"* 而服务消费者限定 *scope="remote"* 也会因为相同的原因导致调用失败。出错信息如下:
-
-
-
-```sh
-[20/03/19 05:03:18:018 CST] main INFO config.AbstractConfig: [DUBBO] Using injvm service org.apache.dubbo.samples.local.api.DemoService, dubbo version: 2.7.1, current host: 169.254.146.168
-Exception in thread "main" org.springframework.beans.factory.BeanCreationException: Error creating bean with name 'demoService': FactoryBean threw exception on object creation; nested exception is java.lang.IllegalStateException: Failed to check the status of the service org.apache.dubbo.samples.local.api.DemoService. No provider available for the service org.apache.dubbo.samples.local.api.DemoService from the url injvm://127.0.0.1/org.apache.dubbo.samples.local.api.DemoService?applicati [...]
-```
-
-
-
-### 何时无法使用本地调用
-
-默认情况下,本地调用是自动开启的,不需要做额外的配置。只有当需要关闭的时候,才需要通过 *scope* 的配置来显式的关闭。
-
-
-
-但是,特别需要指出的是,在下面的几种情况下,本地调用是无法使用的:
-
-第一,泛化调用的时候无法使用本地调用。
-
-第二,消费者明确指定 URL 发起直连调用。当然,如果消费者指定的是 *injvm* 的 URL,最终的调用也是走本地调用的,比如:
-
-
-
-```xml
-<dubbo:reference id="demoService" interface="org.apache.dubbo.samples.local.api.DemoService" url="injvm://127.0.0.1/org.apache.dubbo.samples.local.api.DemoService"/>
-```
-
-
-
-### 强制打开本地调用
-
-除了通过 *scope* 来控制本地调用的行为之外,也可以通过 *injvm* 这个配置来强制打开或者禁用本地调用。
-
-
-
-```xml
-<dubbo:consumer injvm="false" .../>
-<dubbo:provider injvm="true" .../>
-```
-
-
-
-但是通过 *injvm* 来配置本地调用的方式已经被废弃。通过 *scope* 的方式来控制是官方推荐的。
-
-
-
-### 总结
-
-本文介绍了本地调用的概念以及带来的好处,并进一步的揭示了 dubbo 本地调用实际上是在当前进程中暴露了 *injvm* 的协议,而该协议并不会对外暴露端口,然后讨论了如何通过 *scope* 来细粒度的控制本地调用的行为,并强调了通过 *invjm* 来配置的方式已经被废弃,在未来版本中可能会被删除。
-
-
-
diff --git a/en-us/blog/dubbo-meet-arthas.md b/en-us/blog/dubbo-meet-arthas.md
deleted file mode 100644
index 657931a..0000000
--- a/en-us/blog/dubbo-meet-arthas.md
+++ /dev/null
@@ -1,365 +0,0 @@
----
-title: 当Dubbo遇上Arthas:排查问题的实践
-keywords: Dubbo, Arthas
-description: 使用Alibaba开源的应用诊断利器Arthas来排查Dubbo应用的问题。
----
-
-# 当Dubbo遇上Arthas:排查问题的实践
-
-
-Apache Dubbo是Alibaba开源的高性能RPC框架,在国内有非常多的用户。
-
-* Github: https://github.com/apache/dubbo
-* 文档:http://dubbo.apache.org/zh-cn/
-
-Arthas是Alibaba开源的应用诊断利器,9月份开源以来,Github Star数三个月超过6000。
-
-* Github: https://github.com/alibaba/arthas
-* 文档:https://alibaba.github.io/arthas/
-* Arthas开源交流QQ群: 916328269
-* Arthas开源交流钉钉群: 21965291
-
-当Dubbo遇上Arthas,会碰撞出什么样的火花呢?下面来分享Arthas排查Dubbo问题的一些经验。
-
-### dubbo-arthas-demo
-
-下面的排查分享基于这个`dubbo-arthas-demo`,非常简单的一个应用,浏览器请求从Spring MVC到Dubbo Client,再发送到Dubbo Server。
-
-Demo里有两个spring boot应用,可以先启动`server-demo`,再启动`client-demo`。
-
-* https://github.com/hengyunabc/dubbo-arthas-demo
-
-```
- /user/{id} -> UserService -> UserServiceImpl
- Browser Dubbo Client Dubbo Server
-```
-
-Client端:
-
-```java
-@RestController
-public class UserController {
-
- @Reference(version = "1.0.0")
- private UserService userService;
-
- @GetMapping("/user/{id}")
- public User findUserById(@PathVariable Integer id) {
- return userService.findUser(id);
- }
-```
-
-Server端:
-
-```java
-@Service(version = "1.0.0")
-public class UserServiceImpl implements UserService {
- @Override
- public User findUser(int id) {
- if (id < 1) {
- throw new IllegalArgumentException("user id < 1, id: " + id);
- }
- for (User user : users) {
- if (user.getId() == id) {
- return user;
- }
- }
- throw new RuntimeException("Can not find user, id: " + id);
- }
-```
-
-### Arthas快速开始
-
-* https://alibaba.github.io/arthas/install-detail.html
-
-```bash
-$ wget https://alibaba.github.io/arthas/arthas-boot.jar
-$ java -jar arthas-boot.jar
-```
-
-启动后,会列出所有的java进程,选择1,然后回车,就会连接上`ServerDemoApplication`
-
-```bash
-$ java -jar arthas-boot.jar
-* [1]: 43523 ServerDemoApplication
- [2]: 22342
- [3]: 44108 ClientDemoApplication
-1
-[INFO] arthas home: /Users/hengyunabc/.arthas/lib/3.0.5/arthas
-[INFO] Try to attach process 43523
-[INFO] Attach process 43523 success.
-[INFO] arthas-client connect 127.0.0.1 3658
- ,---. ,------. ,--------.,--. ,--. ,---. ,---.
- / O \ | .--. ''--. .--'| '--' | / O \ ' .-'
-| .-. || '--'.' | | | .--. || .-. |`. `-.
-| | | || |\ \ | | | | | || | | |.-' |
-`--' `--'`--' '--' `--' `--' `--'`--' `--'`-----'
-
-wiki: https://alibaba.github.io/arthas
-version: 3.0.5
-pid: 43523
-time: 2018-12-05 16:23:52
-
-$
-```
-
-
-### Dubbo线上服务抛出异常,怎么获取调用参数?
-
-* https://alibaba.github.io/arthas/watch.html
-
-当线上服务抛出异常时,最着急的是什么参数导致了抛异常?
-
-在demo里,访问 http://localhost:8080/user/0 ,`UserServiceImpl`就会抛出一个异常,因为user id不合法。
-
-在Arthas里执行 `watch com.example.UserService * -e -x 2 '{params,throwExp}'` ,然后再次访问,就可以看到watch命令把参数和异常都打印出来了。
-
-```
-$ watch com.example.UserService * -e -x 2 '{params,throwExp}'
-Press Ctrl+C to abort.
-Affect(class-cnt:1 , method-cnt:4) cost in 230 ms.
-ts=2018-12-05 16:26:44; [cost=3.905523ms] result=@ArrayList[
- @Object[][
- @Integer[0],
- ],
- java.lang.IllegalArgumentException: user id < 1, id: 0
- at com.example.UserServiceImpl.findUser(UserServiceImpl.java:24)
- at com.alibaba.dubbo.common.bytecode.Wrapper1.invokeMethod(Wrapper1.java)
- at com.alibaba.dubbo.rpc.proxy.javassist.JavassistProxyFactory$1.doInvoke(JavassistProxyFactory.java:45)
- at com.alibaba.dubbo.rpc.proxy.AbstractProxyInvoker.invoke(AbstractProxyInvoker.java:71)
- at com.alibaba.dubbo.config.invoker.DelegateProviderMetaDataInvoker.invoke(DelegateProviderMetaDataInvoker.java:48)
- at com.alibaba.dubbo.rpc.protocol.InvokerWrapper.invoke(InvokerWrapper.java:52)
- at com.alibaba.dubbo.rpc.filter.ExceptionFilter.invoke(ExceptionFilter.java:61)
-```
-
-### 怎样线上调试Dubbo服务代码?
-
-* https://alibaba.github.io/arthas/redefine.html
-
-在本地开发时,可能会用到热部署工具,直接改代码,不需要重启应用。但是在线上环境,有没有办法直接动态调试代码?比如增加日志。
-
-在Arthas里,可以通过`redefine`命令来达到线上不重启,动态更新代码的效果。
-
-比如我们修改下`UserServiceImpl`,用`System.out`打印出具体的`User`对象来:
-
-```java
- public User findUser(int id) {
- if (id < 1) {
- throw new IllegalArgumentException("user id < 1, id: " + id);
- }
- for (User user : users) {
- if (user.getId() == id) {
- System.out.println(user);
- return user;
- }
- }
- throw new RuntimeException("Can not find user, id: " + id);
- }
-```
-
-本地编绎后,把`server-demo/target/classes/com/example/UserServiceImpl.class`传到线上服务器,然后用`redefine`命令来更新代码:
-
-```
-$ redefine -p /tmp/UserServiceImpl.class
-redefine success, size: 1
-```
-
-这样子更新成功之后,访问 http://localhost:8080/user/1 ,在`ServerDemoApplication`的控制台里就可以看到打印出了user信息。
-
-### 怎样动态修改Dubbo的logger级别?
-
-* https://alibaba.github.io/arthas/ognl.html
-* https://alibaba.github.io/arthas/sc.html
-* https://commons.apache.org/proper/commons-ognl/language-guide.html
-
-在排查问题时,需要查看到更多的信息,如果可以把logger级别修改为`DEBUG`,就非常有帮助。
-
-`ognl`是apache开源的一个轻量级表达式引擎。下面通过Arthas里的`ognl`命令来动态修改logger级别。
-
-首先获取Dubbo里`TraceFilter`的一个logger对象,看下它的实现类,可以发现是log4j。
-
-```bash
-$ ognl '@com.alibaba.dubbo.rpc.protocol.dubbo.filter.TraceFilter@logger.logger'
-@Log4jLogger[
- FQCN=@String[com.alibaba.dubbo.common.logger.support.FailsafeLogger],
- logger=@Logger[org.apache.log4j.Logger@2f19bdcf],
-]
-```
-
-再用`sc`命令来查看具体从哪个jar包里加载的:
-
-```bash
-$ sc -d org.apache.log4j.Logger
- class-info org.apache.log4j.Logger
- code-source /Users/hengyunabc/.m2/repository/org/slf4j/log4j-over-slf4j/1.7.25/log4j-over-slf4j-1.7.25.jar
- name org.apache.log4j.Logger
- isInterface false
- isAnnotation false
- isEnum false
- isAnonymousClass false
- isArray false
- isLocalClass false
- isMemberClass false
- isPrimitive false
- isSynthetic false
- simple-name Logger
- modifier public
- annotation
- interfaces
- super-class +-org.apache.log4j.Category
- +-java.lang.Object
- class-loader +-sun.misc.Launcher$AppClassLoader@5c647e05
- +-sun.misc.Launcher$ExtClassLoader@59878d35
- classLoaderHash 5c647e05
-
-Affect(row-cnt:1) cost in 126 ms.
-```
-
-**可以看到log4j是通过slf4j代理的。**
-
-那么通过`org.slf4j.LoggerFactory`获取`root` logger,再修改它的level:
-
-```
-$ ognl '@org.slf4j.LoggerFactory@getLogger("root").setLevel(@ch.qos.logback.classic.Level@DEBUG)'
-null
-$ ognl '@org.slf4j.LoggerFactory@getLogger("root").getLevel().toString()'
-@String[DEBUG]
-```
-可以看到修改之后,`root` logger的level变为`DEBUG`。
-
-### 怎样减少测试小姐姐重复发请求的麻烦?
-
-* https://alibaba.github.io/arthas/tt.html
-
-在平时开发时,可能需要测试小姐姐发请求过来联调,但是我们在debug时,可能不小心直接跳过去了。这样子就尴尬了,需要测试小姐姐再发请求过来。
-
-Arthas里提供了`tt`命令,可以减少这种麻烦,可以直接重放请求。
-
-```bash
-$ tt -t com.example.UserServiceImpl findUser
-Press Ctrl+C to abort.
-Affect(class-cnt:1 , method-cnt:1) cost in 145 ms.
- INDEX TIMESTAMP COST(ms) IS-RET IS-EXP OBJECT CLASS METHOD
-----------------------------------------------------------------------------------------------------------------
- 1000 2018-12-05 17:47:52 1.56523 true false 0x3233483 UserServiceImpl findUser
- 1001 2018-12-05 17:48:03 0.286176 false true 0x3233483 UserServiceImpl findUser
- 1002 2018-12-05 17:48:11 90.324335 true false 0x3233483 UserServiceImpl findUser
-```
-
-上面的`tt -t`命令捕获到了3个请求。然后通过`tt --play`可以重放请求:
-
-```bash
-$ tt --play -i 1000
- RE-INDEX 1000
- GMT-REPLAY 2018-12-05 17:55:50
- OBJECT 0x3233483
- CLASS com.example.UserServiceImpl
- METHOD findUser
- PARAMETERS[0] @Integer[1]
- IS-RETURN true
- IS-EXCEPTION false
- RETURN-OBJ @User[
- id=@Integer[1],
- name=@String[Deanna Borer],
- ]
-Time fragment[1000] successfully replayed.
-Affect(row-cnt:1) cost in 4 ms.
-```
-
-### Dubbo运行时有哪些Filter? 耗时是多少?
-
-* https://alibaba.github.io/arthas/trace.html
-
-Dubbo运行时会加载很多的Filter,那么一个请求会经过哪些Filter处理,Filter里的耗时又是多少呢?
-
-通过Arthas的`trace`命令,可以很方便地知道Filter的信息,可以看到详细的调用栈和耗时。
-
-```bash
-$ trace com.alibaba.dubbo.rpc.Filter *
-Press Ctrl+C to abort.
-Affect(class-cnt:19 , method-cnt:59) cost in 1441 ms.
-`---ts=2018-12-05 19:07:26;thread_name=DubboServerHandler-30.5.125.152:20880-thread-10;id=3e;is_daemon=true;priority=5;TCCL=sun.misc.Launcher$AppClassLoader@5c647e05
- `---[8.435844ms] com.alibaba.dubbo.rpc.filter.EchoFilter:invoke()
- +---[0.124572ms] com.alibaba.dubbo.rpc.Invocation:getMethodName()
- +---[0.065123ms] java.lang.String:equals()
- `---[7.762928ms] com.alibaba.dubbo.rpc.Invoker:invoke()
- `---[7.494124ms] com.alibaba.dubbo.rpc.filter.ClassLoaderFilter:invoke()
- +---[min=0.00355ms,max=0.049922ms,total=0.057637ms,count=3] java.lang.Thread:currentThread()
- +---[0.0126ms] java.lang.Thread:getContextClassLoader()
- +---[0.02188ms] com.alibaba.dubbo.rpc.Invoker:getInterface()
- +---[0.004115ms] java.lang.Class:getClassLoader()
- +---[min=0.003906ms,max=0.014058ms,total=0.017964ms,count=2] java.lang.Thread:setContextClassLoader()
- `---[7.033486ms] com.alibaba.dubbo.rpc.Invoker:invoke()
- `---[6.869488ms] com.alibaba.dubbo.rpc.filter.GenericFilter:invoke()
- +---[0.01481ms] com.alibaba.dubbo.rpc.Invocation:getMethodName()
-```
-
-### Dubbo动态代理是怎样实现的?
-
-* https://alibaba.github.io/arthas/jad.html
-* com.alibaba.dubbo.common.bytecode.Wrapper
-
-通过Arthas的`jad`命令,可以看到Dubbo通过javaassist动态生成的Wrappr类的代码:
-
-```java
-$ jad com.alibaba.dubbo.common.bytecode.Wrapper1
-
-ClassLoader:
-+-sun.misc.Launcher$AppClassLoader@5c647e05
- +-sun.misc.Launcher$ExtClassLoader@59878d35
-
-Location:
-/Users/hengyunabc/.m2/repository/com/alibaba/dubbo/2.5.10/dubbo-2.5.10.jar
-
-package com.alibaba.dubbo.common.bytecode;
-
-public class Wrapper1
-extends Wrapper
-implements ClassGenerator.DC {
-
- public Object invokeMethod(Object object, String string, Class[] arrclass, Object[] arrobject) throws InvocationTargetException {
- UserServiceImpl userServiceImpl;
- try {
- userServiceImpl = (UserServiceImpl)object;
- }
- catch (Throwable throwable) {
- throw new IllegalArgumentException(throwable);
- }
- try {
- if ("findUser".equals(string) && arrclass.length == 1) {
- return userServiceImpl.findUser(((Number)arrobject[0]).intValue());
- }
- if ("listUsers".equals(string) && arrclass.length == 0) {
- return userServiceImpl.listUsers();
- }
- if ("findUserByName".equals(string) && arrclass.length == 1) {
- return userServiceImpl.findUserByName((String)arrobject[0]);
- }
- }
-```
-
-### 获取Spring context
-
-除了上面介绍的一些排查技巧,下面分享一个获取Spring Context,然后“为所欲为”的例子。
-
-在Dubbo里有一个扩展`com.alibaba.dubbo.config.spring.extension.SpringExtensionFactory`,把Spring Context保存到了里面。
-因此,我们可以通过`ognl`命令获取到。
-
-```bash
-$ ognl '#context=@com.alibaba.dubbo.config.spring.extension.SpringExtensionFactory@contexts.iterator.next, #context.getBean("userServiceImpl").findUser(1)'
-@User[
- id=@Integer[1],
- name=@String[Deanna Borer],
-]
-```
-
-* `SpringExtensionFactory@contexts.iterator.next` 获取到`SpringExtensionFactory`里保存的spring context对象
-* `#context.getBean("userServiceImpl").findUser(1)` 获取到`userServiceImpl`再执行一次调用
-
-只要充分发挥想像力,组合Arthas里的各种命令,可以发挥出神奇的效果。
-
-## 总结
-
-本篇文章来自杭州Dubbo Meetup的分享《当DUBBO遇上Arthas - 排查问题的实践》,希望对大家线上排查Dubbo问题有帮助。
-
-分享的PDF可以在 https://github.com/alibaba/arthas/issues/327 里下载。
diff --git a/en-us/blog/dubbo-meetup-beijing-may-12th-2018.md b/en-us/blog/dubbo-meetup-beijing-may-12th-2018.md
index bfc7569..cdfbbd7 100644
--- a/en-us/blog/dubbo-meetup-beijing-may-12th-2018.md
+++ b/en-us/blog/dubbo-meetup-beijing-may-12th-2018.md
@@ -1,17 +1,16 @@
---
-title: 首届Dubbo开发者沙龙在北京成功举办
+title: The first Dubbo meetup has been held in Beijing
keywords: Dubbo, Beijing, meetup
-description: 首届Dubbo开发者沙龙在北京成功举办
+description: The first Dubbo meetup has been held in Beijing.
---
-首届Dubbo开发者沙龙在北京成功举办
+The first Dubbo meetup has been held in Beijing
---
-首届Dubbo开发者沙龙在北京成功举办, 超过400位开发者参加。这是一个很好的开始!
+The first Dubbo meetup has successfully been held in Beijing, over 400+ people were present. What a great event!
-分享嘉宾及主体如下:
-
- * 罗毅: Dubbo 的现状现状与未来规划 [PDF](https://github.com/dubbo/awesome-dubbo/raw/master/slides/meetup/201805%40Beijing/dubbo-present-and-future.pdf)
- * 刘军: 第四届阿里中间件性能挑战赛 [PDF](https://github.com/dubbo/awesome-dubbo/raw/master/slides/meetup/201805%40Beijing/introduction-to-4th-aliware-performance-challenge.pdf)
- * 陈志轩: 通过 Dubbo 和 Spring-boot 快速构建微服务 [PDF](https://github.com/dubbo/awesome-dubbo/raw/master/slides/meetup/201805%40Beijing/quickly-building-microservice-with-dubbo-and-springboot.pdf)
- * 王欣: Dubbo 和微店的服务化实践历程分享 [PDF](https://github.com/dubbo/awesome-dubbo/raw/master/slides/meetup/201805%40Beijing/dubbo-and-weidian's-practice-on-microservice-architecture.pdf)
+Please enjoy the slides of the topics:
+ * Ian Luo: Dubbo's present and future (Chinese) [slides](https://github.com/dubbo/awesome-dubbo/raw/master/slides/meetup/201805%40Beijing/dubbo-present-and-future.pdf)
+ * Jun Liu: Introduction to the 4th Aliware Performance Challenge (Chinese) [slides](https://github.com/dubbo/awesome-dubbo/raw/master/slides/meetup/201805%40Beijing/introduction-to-4th-aliware-performance-challenge.pdf)
+ * Zhixuan Chen: Quickly building Microservice with Dubbo and Spring-boot (Chinese) [slides](https://github.com/dubbo/awesome-dubbo/raw/master/slides/meetup/201805%40Beijing/quickly-building-microservice-with-dubbo-and-springboot.pdf)
+ * Xin Wang: Dubbo and Weidian's Practice on Microservice Architecture (Chinese) [slides](https://github.com/dubbo/awesome-dubbo/raw/master/slides/meetup/201805%40Beijing/dubbo-and-weidian's-practice-on-microservice-architecture.pdf)
diff --git a/en-us/blog/dubbo-meetup-chengdu.md b/en-us/blog/dubbo-meetup-chengdu.md
index 99fd4f0..87d6f0f 100644
--- a/en-us/blog/dubbo-meetup-chengdu.md
+++ b/en-us/blog/dubbo-meetup-chengdu.md
@@ -1,26 +1,25 @@
---
-title: 第四届Dubbo开发者沙龙于8月26日在成都举行
-keywords: Dubbo, 成都, meetup
-description: 第四届Dubbo开发者沙龙于8月26日在成都举行。
+title: The fourth Dubbo meetup has been held in Chengdu
+keywords: Dubbo, Chengdu, meetup
+description: The fourth Dubbo meetup has been held in Chengdu.
---
-# 第四届Dubbo开发者沙龙于8月26日在成都举行
+# The fourth Dubbo meetup has been held in Chengdu

-## 用户深度沟通交流
+## The depth of the user communication
-8.26上午10:00-12:00,邀请到货车帮,云图金控,前BBD,飞鱼星四家公司开源爱好者及重度用户参与面对面交流;据参与者反馈,解答了对Dubbo的诸多疑惑,特别是如何参与贡献社区,以及捐献代码所带来的价值点。希望后面可以更加深入参与Dubbo社区及活动中。
+On August 26, 10:00 am - 12:00am, invited the arrival of the car to help, cloud gold, former BBD, flying fish star four companies open source enthusiasts and heavy users participate in face-to-face communication;According to the participants' feedback, answer to Dubbo many doubt, especially how to participate in the contribution to the community, as well as code contribution value point.Hope later can be more deeply involved in Dubbo communities and activities.
-## meetup活动信息
+## Meetup activity information
-本次活动依旧爆满,总报名人数976,现场用户350+,直播PV 13207。
+The event is still full, total enrollment of 976, 350 + site users, live PV 13207.
-## 报名信息
+## The registration information
-Aliware Open Source•成都站-Apache Dubbo开发者沙龙于8月26日(周日)在成都高新区天府五街200号菁蓉国际广场8号楼2楼会议厅举办,技术GG们的思想盛宴,干货与福利一个都不会少。
-
-报名链接:http://www.huodongxing.com/event/7453091088400
+Aliware Open Source, headquarters - Apache Dubbo developers salon on August 26 (Sunday) in chengdu high-tech zone tianfu hemicyenine rong international plaza, 200 five street on the 8th floor held the second floor conference room, technical thinking is GG feast, dry goods and welfare will not one less.</br>
+Sign up link:http://www.huodongxing.com/event/7453091088400
-<img src="../../img/blog/dubbo-chengdu-meetup-img.jpg"/>
\ No newline at end of file
+<img src="../../img/blog/dubbo-chengdu-meetup-img.jpg"/>
diff --git a/en-us/blog/dubbo-meetup-hangzhou.md b/en-us/blog/dubbo-meetup-hangzhou.md
index 32c869f..8e85346 100644
--- a/en-us/blog/dubbo-meetup-hangzhou.md
+++ b/en-us/blog/dubbo-meetup-hangzhou.md
@@ -1,19 +1,19 @@
---
-title: 第五届Dubbo开发者沙龙在杭州成功举办
-keywords: Dubbo, 杭州, meetup
-description: 第五届Dubbo开发者沙龙在杭州成功举办。
+title: The fifth Dubbo meetup has been held in Hangzhou
+keywords: Dubbo, Hangzhou, meetup
+description: The fifth Dubbo meetup has been held in Hangzhou
---
-# 第五届Dubbo开发者沙龙在杭州成功举办
+# The fifth Dubbo meetup has been held in Hangzhou
-第五届Dubbo开发者沙龙在杭州成功举办,
+The fifth Dubbo meetup has been held in Hangzhou,
-分享嘉宾
- * 李鼎: 如何参与Dubbo开源社区 [slides](https://github.com/dubbo/awesome-dubbo/blob/master/slides/meetup/201812%40hangzhou/how-to-involve-in-dubbo-community.pdf)
- * 曹胜利: Dubbo 2.7新特性介绍及演示 [slides](https://github.com/dubbo/awesome-dubbo/blob/master/slides/meetup/201812%40hangzhou/dubbo-2.7-introduction.pdf)
- * 陶杨: Dubbo在考拉的应用实践 [slides](https://github.com/dubbo/awesome-dubbo/blob/master/slides/meetup/201812%40hangzhou/dubbo-practice-in-netease-koala.pdf)
- * 小马哥: Dubbo+Nacos服务治理重新实现 [slides](https://github.com/dubbo/awesome-dubbo/blob/master/slides/meetup/201812%40hangzhou/nacos-support-in-dubbo.pdf)
- * 赵奕豪: Sentinel:分布式服务的流量防卫兵 [slides](https://github.com/dubbo/awesome-dubbo/blob/master/slides/meetup/201812%40hangzhou/sentinel-support-for-dubbo.pdf)
- * 陈志轩: 当Dubbo遇上Arthas:排查问题的实践 [slides](https://github.com/dubbo/awesome-dubbo/blob/master/slides/meetup/201812%40hangzhou/troubleshooting-dubbo-with-arthas.pdf)
+Please enjoy the slides of the topics:
+ * Ding Li: How to involve in dubbo community [slides](https://github.com/dubbo/awesome-dubbo/blob/master/slides/meetup/201812%40hangzhou/how-to-involve-in-dubbo-community.pdf)
+ * Shenli Cao: Dubbo 2.7 introduction [slides](https://github.com/dubbo/awesome-dubbo/blob/master/slides/meetup/201812%40hangzhou/dubbo-2.7-introduction.pdf)
+ * Tao Yang: Dubbo practice in netease koala [slides](https://github.com/dubbo/awesome-dubbo/blob/master/slides/meetup/201812%40hangzhou/dubbo-practice-in-netease-koala.pdf)
+ * Mercy Ma: Nacos support in Dubbo [slides](https://github.com/dubbo/awesome-dubbo/blob/master/slides/meetup/201812%40hangzhou/nacos-support-in-dubbo.pdf)
+ * Yihao Zhao: Sentinel: Sentinel support for Dubbo [slides](https://github.com/dubbo/awesome-dubbo/blob/master/slides/meetup/201812%40hangzhou/sentinel-support-for-dubbo.pdf)
+ * Zhixuan Chen: Troubleshooting Dubbo with Arthas [slides](https://github.com/dubbo/awesome-dubbo/blob/master/slides/meetup/201812%40hangzhou/troubleshooting-dubbo-with-arthas.pdf)
diff --git a/en-us/blog/dubbo-meetup-shanghai-jun-23rd-2018.md b/en-us/blog/dubbo-meetup-shanghai-jun-23rd-2018.md
index 99566f8..eab16c4 100644
--- a/en-us/blog/dubbo-meetup-shanghai-jun-23rd-2018.md
+++ b/en-us/blog/dubbo-meetup-shanghai-jun-23rd-2018.md
@@ -1,16 +1,16 @@
---
-title: 第二届Dubbo开发者沙龙在上海成功举办
-keywords: Dubbo, 上海, meetup
-description: 第二届Dubbo开发者沙龙在上海成功举办。
+title: The second Dubbo Shanghai meetup has been held successfully
+keywords: Dubbo, Shanghai, meetup
+description: The second Dubbo Shanghai meetup has been held successfully.
---
-# 第二届Dubbo开发者沙龙在上海成功举办
-
+The second Dubbo Shanghai meetup has been held successfully
+---
-第二届Dubbo开发者沙龙在上海成功举办,超过700位开发者报名,现场参与人数300+,通过阿里云天池、云栖社区、大咖说引导线上直播观看次数10000+
+The sencond Dubbo meetup has successfully been held in Shanghai, over 700 people submitted registration, and over 300 were present, more than 10,000 watched the live online.
-分享嘉宾及PPT:
- * 朱勇: Dubbo开源现状与未来规划 (中文) [slides](https://github.com/dubbo/awesome-dubbo/blob/master/slides/meetup/201806%40Shanghai/dubbo-status-and-roadmap.pdf)
- * 小马哥: Dubbo Cloud Native 之路的实践与思考 (中文) [slides](https://github.com/dubbo/awesome-dubbo/blob/master/slides/meetup/201806%40Shanghai/dubbo-cloud-native-practices-and-thoughts.pdf)
- * 郭平: Nacos - 贡献Dubbo生态,阿里巴巴注册中心和配置中心开源计划 (中文) [slides](https://github.com/dubbo/awesome-dubbo/blob/master/slides/meetup/201806%40Shanghai/nacos-open-source-initiative.pdf)
- * 潘志伟: Dubbo在互金行业的应用场景 (中文) [slides](https://github.com/dubbo/awesome-dubbo/blob/master/slides/meetup/201806%40Shanghai/dubbo-practices-on-internet-finance-industries.pdf)
\ No newline at end of file
+Please enjoy the slides of the topics:
+ * Jerrick Zhu: Dubbo Status and Roadmap (Chinese) [slides](https://github.com/dubbo/awesome-dubbo/blob/master/slides/meetup/201806%40Shanghai/dubbo-status-and-roadmap.pdf)
+ * Mercy Ma: Dubbo Cloud Native Practices and Thoughts (Chinese) [slides](https://github.com/dubbo/awesome-dubbo/blob/master/slides/meetup/201806%40Shanghai/dubbo-cloud-native-practices-and-thoughts.pdf)
+ * Ping Guo: Nacos Open Source Initiative (Chinese) [slides](https://github.com/dubbo/awesome-dubbo/blob/master/slides/meetup/201806%40Shanghai/nacos-open-source-initiative.pdf)
+ * Zhiwei Pan: Dubbo Practices on Internet Finance Industries (Chinese) [slides](https://github.com/dubbo/awesome-dubbo/blob/master/slides/meetup/201806%40Shanghai/dubbo-practices-on-internet-finance-industries.pdf)
diff --git a/en-us/blog/dubbo-meetup-shenzhen.md b/en-us/blog/dubbo-meetup-shenzhen.md
index 23c40ca..21ed311 100644
--- a/en-us/blog/dubbo-meetup-shenzhen.md
+++ b/en-us/blog/dubbo-meetup-shenzhen.md
@@ -1,15 +1,15 @@
---
-title: 第三届Dubbo开发者沙龙在深圳成功举办
-keywords: Dubbo, 深圳, meetup
-description: 第三届Dubbo开发者沙龙在深圳成功举办。
+title: The third Dubbo meetup has been held in Shenzhen
+keywords: Dubbo, Shenzhen, meetup
+description: The third Dubbo meetup has been held in Shenzhen
---
-# 第三届Dubbo开发者沙龙在深圳成功举办
-
+The third Dubbo meetup has been held in Shenzhen
+---
-第三届Dubbo开发者沙龙在深圳成功举办,超过2000位开发者报名,现场参与人数700+,通过阿里云天池、云栖社区、大咖说引导线上直播观看次数17000+
+The third Dubbo meetup has successfully been held in Shenzhen, over 2000 people submitted registration, and over 700 were present, more than 17,000 watched the live online.
-分享嘉宾
- * 陈志轩: Dubbo开源现状和2.7规划
- * 康彬: 乐信集团的微服务化之路
- * 林佳梁: Sentinel——企业用户的全方位流量哨兵
\ No newline at end of file
+Please enjoy the slides of the topics:
+ * Zhixuan Chen: Dubbo-present-and-2.7-update (Chinese) [slides](https://github.com/dubbo/awesome-dubbo/blob/master/slides/meetup/201807%40shenzhen/dubbo-present-and-2.7-update.pdf)
+ * Bin Kang: Microservice-in-lexinfintech (Chinese) [slides](https://github.com/dubbo/awesome-dubbo/blob/master/slides/meetup/201807%40shenzhen/microservice-in-lexinfintech.pdf)
+ * Jialiang lin: sentinel (Chinese) [slides](https://github.com/dubbo/awesome-dubbo/blob/master/slides/meetup/201807%40shenzhen/sentinel.pdf)
diff --git a/en-us/blog/dubbo-mesh-in-thinking.md b/en-us/blog/dubbo-mesh-in-thinking.md
deleted file mode 100644
index 97dc63c..0000000
--- a/en-us/blog/dubbo-mesh-in-thinking.md
+++ /dev/null
@@ -1,135 +0,0 @@
----
-title: Dubbo在Service Mesh下的思考和方案
-keywords: Dubbo, Service Mesh, Cloud Native
-description: Dubbo是实现框架,融入service mesh理念就是我们今天分享的。
----
-
-# Dubbo在Service Mesh下的思考和方案
-
-
-## 开头
-Service Mesh这个“热”词是2016年9月被“造”出来,而今年2018年更是被称为service Mesh的关键之年,各家大公司都希望能在这个思潮下领先一步。今天我也分享阿里中间件在这方面的观点,思考和实践。考虑到有些人没了解过Dubbo(集团内以HSF为主)和Servicemesh,先简单介绍下这两个词。Dubbo应该是国内最受欢迎的远程服务框架,在Github上有超过2w的star数,也是阿里分布式架构互联互通的核心所在。跟Dubbo一样,servicemesh也是面向服务互联互通这一问题域,是云原生技术栈的核心之一;大家可以简单理解service mesh就是云原生组织定义的微服务架构解决理念。Dubbo是实现框架,融入service mesh理念就是我们今天分享的。
-
-## 现状和挑战
-
-
-
-
-当前Dubbo支撑的阿里分布式应用内支撑万级别的应用数,运行在20多万的服务器实例上,每天调用量是万亿级别,这应该是国内最大的分布式应用集群。
-
-挑战主要来自三方面
-
-* 首先, 数以万计的应用意味着有以十万级的服务,理顺错综复杂的服务拓扑关系,甚至及时诊断某个异常调用链路,需要考虑海量数据的拉取分析,是非常有挑战的,阿里通过EagleEye鹰眼链路系统提供可观察性和治理能力来解决;
-* 第二个挑战是机房级别容灾,阿里的机房是分布在天南海北,大家可以想象横跨数千公里的网络延迟会造成服务互通很大的影响,所以在保证一定恢复时间和一定数据容错的情况下做异地多活是有巨大挑战,阿里通过支持异地多活的单元化架构解决。
-* 第三个挑战是阿里业务众多,尤其像阿里生态中的高德,UC,优酷等所使用的开发语言跟淘系Java是不一样的,比如PHP,C,Nodejs,Dart等,要维护多个版本并保证各版本具有同样的功能是成本比较高的;这个挑战在云原生的新一代理念下更具挑战,毕竟。今天主题跟第三个挑战是息息相关,能解决一定的问题。
-
-这里讲个大鱼吃小鱼的故事来简单理解下云原生:软件会吃掉这个世界,也就是信息化不可避免,而开源会吃掉软件,最终云原生会吃掉开源。这正代表了云原生理念的颠覆性,从商业软件到开源到云原生,环环相套,以体系化和层次化的方式推荐各个方面的开源方案和标准,这会极大降低企业级架构服务的技术门槛,是企业信息化之路的一大利好,当然也是进化方向。这个故事跟今天的主题--开发者定义软件未来,是非常契合,也就是说这个趋势至少在企业级软件服务领域正在发生。云原生:Cloud Native is Patterns with A complete and trusted tool kit for modern architectures。
-
-<span data-type="color" style="color:white">Service Mesh的典型方案</span>
-## Service Mesh的典型方案
-
-
-
-
-讲完故事,回到servicemesh。
-
-传统形态下SDK代表着一个特定语言的库,由应用和微服务框架共处一进程内,在发布升级中共享生命周期。比较典型的代表是Twitter的finagle,Google的stubby/grpc,阿里巴巴的HSF/Dubbo.
-
-Serviemesh下推荐是右边Sidecar方案,Sidecar方案没有引入新的功能,只是改变了原有功能的位置,以独立的应用来存在,大家可以暂时以nginx来理解其网络代理能力也可以。
-
-在这张图中希望大家关注两个信息, 1)所有的sidecar形成逻辑网络被称为数据面,是业务服务的链路中是强依赖节点,承载了业务数据互联互通的基础;传统的ops管控服务被称为控制面,这部分跟传统是大同小异。 2)在sidecar形态下,网络会增加两跳,即应用与sidecar之间,他们之间的数据互通也是基于协议规范。后面会详细讲。
-
-## Sidecar模式的优劣
-
-
-
-
-接下来从开发和运维两个阶段来分开比较。
-
-* 多语言支持方面,既然sidecar是独立应用,用最合适的一种语言开发完成即可,就避免了需要针对不同语言的应用场景做不同的版本开发。当前阿里选择基于C语言的Envoy做二次开发来追求最小的footprint和性能,当然也曾经历一些弯路,比如曾经用Java开发过一个sidecar,但最终由于引入JRE体量大和GC带来的抖动等问题证明不可行。有必要强调的是:这里说的是sidecar自身开发现在避免了多语言多版本的问题,而真要支持任意服务自由采用任意语言实现这一理想,是需要站在从业务到数据面再到业务的整个链路上的数据交互做思考。
-* 性能方面,sidecar情形下由于会增加两跳,这两跳是业务应用与sidecar的两个进程之间的调用,这是本机,即便是经过优化,也是会增加进程切换以及数据转换的开销。经过我们的优化测试,在正常的业务访问下,相比SDK形态下最多增加1毫秒的开销,这在大多数业务情形下是基本无感知无影响。
-* 再看运维阶段的比较,一般SDK形态的服务框架都是只关心开发的诉求,对于如何运维都是不关心,而软件生命周期中运维是最长的,如何从中间件角度解决更多的运维问题是非常有意义的。阿里的中间件经常需要升级,以库的形式升级时就需要业务方应用重新打包,这个推动业务方变更的方式是比较被动,而且周期很长。
-* 当以镜像为基本原子单位进行发布部署时,阿里的中间件SDK体量大概是200兆,需要与业务一起打包,这样在业务应用升级时让分发的包就显得笨重,时效性相比sidecar形态就差一截。
-
-稍微总结下,sidecar具有两个明显优势,一个是多语言开发维护成本低 ,另一个是独立升级,当然代价是需要增加一点点的网络延迟。至此大家是不是觉得Sidecar基本完美? 别着急,需要大家再思考一个问题:SDK模式下中间件组件会随应用一起发布,拥有完全一致的生命周期;而在sidecar模式下,如何管理sidecar的生命周期?这里可以拿无线耳机来举个例子,无线耳机是独立了,但必须独立电源的驱动,所以充电是要的。是的,在大规模的集群中这个点会带来不小的复杂性。
-
-## 关键点
-
-
-
-
-下面跟大家分享下我们对servicemesh理解的三个关键技术点。分别是sidecar运维,数据面与控制面的集成,协议。
-
-* 先说sidecar的运维,这是个难点,也是为什么sidecar方案以前没有被广泛应用的重要原因。前面说sidecar与应用现在成为两个不同的进程,要考虑多个事宜,一是要考虑如何把sidecar与应用部署在一起,二是考虑业务进程或sidecar进程一方需要升级重启时如何协同来保证请求的正常处理或转发,即优雅上下线的问题。这些事宜考虑清楚并解决后,算是具备servicemesh的前提条件。当然,kubernetes解决了这块的事情,提供了initiator类似插件的机制来对原子性的pod进行注入sidecar,并通过健康检查机制来保证两个进程的协同。简单地也可以这么理解:先把kubernetes容器调度平台的实施是servicemesh的前提条件。
-* 数据面中的sidecar的服务治理能力则是其核心竞争力,包括负载均衡策略,路由,安全,权重等等,这些能力是以规则形式通过控制面来统一下发给数据面。在传统微服务框架下数据面和控制面的集成是紧耦合,也就是数据面和控制面是一体的,举例来说用了Dubbo框架,只能选择Dubbo-Ops。而Envoy作为servicemesh思潮的带领者,提出了一整套的API规范,Istio可以实现其xDS接口,阿里巴巴也可以根据自己的架构设计实现类似的服务平台。
-* 协议 协议 协议, 重要的事说三遍。。。sidecar和Dubbo的内核是网络协议的处理器,而sidecar又是面向多语言场景的,所以自然协议处理能力是要强调的。先说下阿里Dubbo当下向Mesh方向发展时遇到难点。首先我们的服务接口都是通过Java Interface描述,其次涉及的传输模型DTO也是Java POJO定义,最后协议也是私有的。这会导致跨语言比较难,而sidecar形态需要面向多语言,这些问题更是首当其冲。考虑到这里有点稍微偏细节点,希望大家带着如下问题来先思考下:业务应用到sidecar之间的数据交换要考虑什么? Sidecar自身在处理网络字节流时又要考虑什么?是的,首先业务应用最好都不依赖特定协议库,也不依赖特接口定义库;Sidecar自身处理数据时跟nginx很接近,但最好具备协议转换适配的能力,比如把基于HTTP的请求转换为Dubbo请求,就能轻松集成Dubbo遗留�
��统。
-
-## 回看协议
-
-
-
-
-既然协议在跨语言场景下如此重要,有必要稍微回归下协议的历史轨迹。看历史一般是轻松有趣的过程,最重要的好处是能使我们头脑清晰而不迷茫。
-
-我们先从2008年说起,很近也就10年,阿里服务框架诞生这一年。当年各大公司还在炒作SOA思想的时候,阿里在不清楚SOA思想的情况下根据自身业务诉求实践拥抱了SOA的架构。阿里服务框架一直是从三个层面来定义,第一RPC通信 第二是提供丰富强大的治理能力 第三就是基于容器隔离的运维能力,使得中间件可以独立升级。这个理念直到今日都是非常先进,非常的赞。就像前面说的,Dubbo主要是面向Java领域的微服务架构解决方案,在以Java为主导的技术架构下是绝对首选,但因为其协议设计是私有特性,要想成为跨语言的协议标准是有一定难度。
-
-事实上,之前已经出现了很多通用的跨语言的服务集成规范。最早是91年的考吧,是分布式对象访问协议,2000年的SOAP是当年webservice思想下的协议,无论是考吧还是SOAP都是支持所有平台和语言的一套规范,但是设计地比较复杂笨重,且性能存在一定问题。
-
-REST是一种架构风格,相比SOAP的设计,有非常优秀的理念和最佳实践指导,并且万维网作为世界上最大型最成功的的分布式应用是REST最好的证明。但跟SOAP一样,REST跑在1上有性能瓶颈,这个也可能是当年阿里服务框架没有选择REST规范的原因。额外提下,REST思想虽然很早就有,但事实上REST的规范在Java领域JAX-RS API 直到最近两年在2.2版本下才算稳定成形,且越来越接近微服务框架。
-
-1996年的1在连接通道不支持多工复用,根本无法发挥TCP/UDP的网络能力;而到了2015年HTTP2则解决这些,能够最大限度的利用TCP层的网络宽带,且支持了streaming,push等交互模式,这些跟很多的私有或专有应用协议干得是一个事,但是标准化的大家都容易接受的事。这里必须提一下,伴随HTTP2而来的是grpc,原先Google早早推出了Protocolbuffer,但一直没把自家stubby开源,我猜测最大的原因是不想grpc跑在一个私有协议上,而是在等HTTP2.
-
-总结下来,协议技术一直在向着轻量级和标准规范化的方向发展。像SOAP,考吧这些重量级的不跨平台的协议必然消失在历史车轮里,私有或专有的协议也会向标准协议靠拢。在面向跨语言的场景下,有两种的协议规范是大概率胜出,一种是REST,一种是grpc,两者都是以HTTP为交换通道。
-
-## 面向多语言协议的三层面
-
-
-
-
-展开来讲,在面向多语言的协议需要考虑三个层面。
-
-* 先从最右边的会话层,干得事是在tcp字节流的基础上形成交互模式,比如 一对一的标准请求响应模式, 以及onway, 一对多的streaming模式。Dubbo在这一层是有扩展能力的,目前除了支持自定义的Dubbo-Remoting,也支持基于HTTP通道能力,我们觉得未来的趋势是HTTP2,所以也会支持这块.这里在分享一句话跟大家一起思考,HTTP不是RPC,HTTP被翻译成超文本传输协议,但不是传输层。另外提一下,这一层是对于MQ,Streaming Compute,Cache等等都是通用的。
-* 再说展示层,干得事是在真正的服务调用过程中,业务对象以何种形式被格式化,比如HTTP头中的content-type就用于这个展示协议的描述,最常用的JSON,TXT,XML等。这一层对于sidecar来说,可以做透明处理,也就是说sidecar只需要解析出头部信息,前提是要求业务应用把需要在治理时用到的一些字段信息以字符串形式放到头部中。Dubbo当前是默认HEssion,跨语言能力比较弱,所以未来JSON是我们首选。
-* 最后,首先一个服务是干什么的,它的名字,方法,参数都是怎样的,等等基本元信息是需要统一描述的,即便像是REST这样基于URI,也是需要一种协议来定义,以前Dubbo是基于java interface来定义,现在我们在多语言的mesh环境下是考虑向OpenAPI specification方向考虑,支持swagger。
- 我们相信在这几个层面,尤其是会话层和应用层,用不多几年一定会是标准化的,尤其是在云原生的趋势下。
-
-### 方案之Kubernetes集成<span data-type="color" style="color:white">Du</span>
-
-
-
-<span data-type="color" style="color:white">bbo Mesh方案之Kubernetes集成</span>
-其实,servicemesh在最近两年流行最大的原因是云原生理念的逐渐深入人心,从广义角度看,能够融入云原生的微服务框架都能称得上servicemesh。谈云原生,肯定绕不开kubernetes,所以我们在Dubbo Mesh的方案的第一个分享是 在kubernetes下的集成,目标是复用Kubernetes的基础服务,从而使得Dubbo能解决kubernetes环境下的微服务集成问题,同时能最大限度的利用dubbo已有的功能。核心思路是两点,
-
-* Dubbo应用在构建阶段自动生成其deployment和service的声明文件。这个主要是解决Dubbo与kubernetes的服务映射。
-* Dubbo地址注册针对kubernetes的扩展实现,通过Kubernetes的APIServer来拉取并监听某个服务的podIP。这样,在kubernetes集群内,Dubbo服务就能在其podID的虚拟网络内实现服务发现。
-
-## 方案之跨语言协议支持
-
-
-
-
-前面讲了很多关于协议方面的东西,也为我们在Dubbo Mesh的方案的第二点分享是做了铺垫, 第二点的目标是Dubbo 协议的多语言支持。核心思路是
-* 积极兼容开源社区Envoy,这个使得Envoy上兼容支持Dubbo的私有协议。
-* Dubbo支持HTTP/2作为传输通道,这个是为了Dubbo的协议通道能力向更加开放更加标准规范的方向做努力。
-
-## ServiceMesh之云原生的指导
-
-
-
-
-孤立地看待servicemesh其实和传统服务框架,价值还不算大,甚至成本相对更高。这时候,当我们把servicemesh设定到云原生的上下文中,就会发现不一样的意义。
-
-servicemesh是云原生理念的路径地图的第五步,如果没有前面的容器化,CICD等四部,真正拥抱servicemesh也只是空中楼阁。阿里在这方面的实践经验是,servicemesh的实施是需要结合软件开发的整个生命周期进行统筹,从软件在本地开发测试,到通过持续集成服务的自动化构建,再到以镜像方式分发到仓库并依托调度云平台的持续部署,最后持续监控。
-
-dubbo已经开源好多年,是非常符合云原生这个原则,正向servicemesh方向和云原生理念上努力,为企业信息化做出一点贡献。
-
-## 总结
-
-
-总结一下Dubbo Mesh是Dubbo在cloud native下的一种演进,这个演进是为了更加开放更加靠近标准协议规范的方向做的探索。通过分享希望大家能带走三点思考。
-
-1. servicemesh的多语言方案其实是走规范化标准化的协议之路,这样才能覆盖多语言的诉求。
-2. 建议大家根据实际业务场景来慎重权衡sidecar模式下运维复杂性和收益回报。
-3. 一定把servicemesh设定在云原生的上下文中才具意义,离开了Kubernetes谈servicemesh的实践是不建议的大跃进。
- 最后希望大家一起共建共享的Dubbo开源社区,谢谢。
-
diff --git a/en-us/blog/dubbo-mesh-service-mesh-exploring.md b/en-us/blog/dubbo-mesh-service-mesh-exploring.md
deleted file mode 100644
index 47a71df..0000000
--- a/en-us/blog/dubbo-mesh-service-mesh-exploring.md
+++ /dev/null
@@ -1,157 +0,0 @@
----
-title: Dubbo Mesh | Service Mesh的实践与探索
-keywords: Dubbo, Service Mesh
-description: 本文介绍了Dubbo在Service Mesh方向的实践与探索
----
-
-# Dubbo Mesh | Service Mesh的实践与探索
-
-
-
-近日,在Aliware Open Source•成都站-Apache Dubbo 开发者沙龙上,阿里巴巴中间件高级技术专家李云(至简)向开发者们分享了阿里巴巴中间件团队在Service Mmesh领域的探索和最新实践。本文是根据至简的现场分享所整理,为大家回顾分享中的精彩内容。
-
-## 精彩观点导读
-
-* 我们去探索一项技术,并不会仅仅因为其先进性,而是因为我们目前遇到了一些无法解决的问题,而这项技术正好能解决这个问题。
-
-* 所有软件最重要的使命不是满足功能要求,而是演进,从而持续成长。
-
-* 微服务本质是对服务的拆分,微服务架构符合工程领域常用的“分而治之”范式。
-
-## 前言
-
-我们去探索一项技术,并不会仅仅因为其先进性,而是因为我们目前遇到了一些无法解决的问题,而这项技术正好能解决这个问题。现在,阿里巴巴整个集团业务的体量很大,在技术上会遇到很多的挑战。而正是因为这些挑战,让我们思考通过哪些新技术可以去解决这些痛点,这也是我们在Service Mesh领域进行探索和实践的出发点。首先,我们先来看看自己遇到了哪些挑战。
-
-## 微服务的5大挑战
-
-#### 挑战一:微服务框架自身演进困难。
-
-任何软件都会有他的生命进化曲线,从最初的萌芽,进入形成期,往上发展,再进入平台期,最后进入衰亡期。当然我们希望我们的软件可以在进入平台期后,能借助某次演进进入新的发展期。从这个维度看,所有软件最重要的使命不是满足功能要求,而是演进,从而持续成长。相反,当某个软件无法演进的时候,就会意味着死亡。但软件的演进并不是一个简单的事情,以微服务框架为例,为了进一步提升双11期间整个中间件平台的稳定性,我们会修改若干个功能,并以SDK的方式去提供给业务方,但业务代码和微服务框架SDK是强耦合的,这时候需要我们推动各个业务方和我们一同去做升级。虽然我们的初衷是实现平台稳定性的提升,帮助业务更好的发展,但这时由于大家的出发点和诉求有所不同,业务方和我们一起去做升级是比较困难的。所以�
�发展微服务框架,首先遇到的挑战就是演进困难。
-
-
-#### 挑战二:微服务框架SDK多语言并行开发与维护成本高。
-
-以前我们都是通过对技术栈的统一来提升成本优势和团队效率,大家可以用一种语言去开发和维护,避免多语言时团队的不聚焦。但在软件和开源生态演进的过程中,多语言已经成为一种流行,因为不同语言都有其自身的优势,今天大家能看到的一个现象是云原生的生态中有多种开发语言,使用频率最高的语言已经不是Java了,而是Go,是因为Go的footprint很小。再以 Dubbo为例,除了Java,我们还提供C++,Node.js的SDK,以便让更多的开发者可以加入Dubbo生态,但所有的这些,如果没有社区力量的参与,是很难维持的。
-
-
-#### 挑战三:异构服务框架难以共存完成渐进式演进。
-
-我们结合场景来看看这个挑战。阿里巴巴收购了一些企业,被收购企业的技术栈可能和阿里巴巴不同,比如有些用的是Go语言,有些用的是PHP,这时候为了统一技术栈,我们需要对这类技术平台推倒重来,但这个过程中,我们会面临一系列问题,首当其冲的就是推倒重来会带来巨大的技术风险,其次是可能会面临技术人员大批量流失的风险,这在社会责任的层面也是很难接受。所以我们在寻求一种可能的方案,去解决这类问题。
-
-#### 挑战四:是单一的语言限制了人才的多样性。
-
-这里,我们不去争论某个编程语言的好与坏,每个语言都有其适用场景,你不能说我手里有个榔头,你面对的都是钉子。以前我们觉得统一技术栈可以集中开发力量,并且带来较高的运维便利性。但伴随着互联网带来的快节奏,以往的团队能力设置已经很难满足这类变化,对工程师个体提出了更高的要求,我们不仅仅需要是某一方面的专家,而且还需要具备多域的工作技能,DevOps和全栈工程师就是这类快节奏变化下最好的注脚。
-
-
-#### 挑战五:是点状的服务治理难以做到及时、有效和经济。
-
-微服务和架构的核心是拆分,通过拆分,让每个模块可以独立运行,跟上业务的发展速度,持续推动业务的创新。但拆完后新的问题出来了,缺少横向的内容拉通所有独立的烟囱,从而在服务治理上带来极大的挑战。
-
-## 分布式应用的发展趋势
-
-微服务会成为大规模分布式应用的主流架构。任何复杂的工程问题都会归结为devide and conquer(分而治之),意思就是就是把一个复杂的问题分成两个或更多的相同或相似的子问题,再把子问题分成更小的子问题……直到最后子问题可以简单的直接求解,原问题的解即子问题的解的合并。微服务本质是对服务的拆分,与工程领域惯用的“分而治之”的思路是一致的。
-
-微服务架构下应用的开发是多语言的。没有一个语言是一家独大的,每种语言在特定场景下都有其自身的优势,我们希望这种优势能够将技术到产品的周期(time to market)缩短。技术的核心在于创造价值,无论是交付给客户,还是服务于整个社会。因此,微服务是需要不同语言的开发者发挥自身的优势,去进一步完善我们的微服务架构,释放技术价值。
-
-
-数据安全将成为公有云分布式应用的生命线。云原生时代,业务即便没上云,企业对自身数据的安全都是有诉求的,尤其是在金融行业,如果通过抓包就能获取一些敏感信息,这将会给企业带来巨大的风险。
-
-Cloud native成为distributionless(无分布式)的主要探索路径。分布式发展的终极形式是无分布式,在未来我们做开发,所有的代码在web上写好后,通过点击一个按钮,所有部署都会自动实现,所有的code review的工作可以在一个统一的工作台上全部实现。
-
-
-以更快的速度,通过构建软件去探索新业务。工程师服务的是客户,通过技术输出来实现技术价值,以互联网的架构帮助赋能传统企业,帮助企业获得差异化竞争力。
-
-## 什么是Service Mesh
-
-Service Mesh是层次化、规范化、体系化、无侵入的分布式服务治理技术平台。
-
-#### 层次化
-
-分为数据面和控制面两个概念,数据面是指所有数据流动的那个层面,控制面是用来控制这个数据面的,对服务去做处理。对数据面和控制面进行分层,带来的好处是,针对一个复杂的系统进行切分,可以获得更清晰的认识,这和devide and conque是同一个理念。
-
-#### 规范化
-
-是指通过标准协议完成数据平面和控制平面的连接,同时,sidecar成为所有traffic互联、互通的约束标准。
-
-
-
-#### 体系化
-
-包含两个维度,一是指observability全局考虑。目前在整个分布式治理过程中的最大挑战是:logging、metrics、tracing这三个observability领域的核心内容缺少体系性的关注。另一个是集中管理的维度,包括服务管理、限流、熔断、安全、灰度在内的服务模块都可以在获得体系化的呈现,每个服务都可以被看到,而非团队a只看限流,团队b只看logging,需要一种技术能力拉通所有的服务模块,这个体系化这个角度看,Service Mesh是一个理想的技术方案。
-
-#### 无侵入
-
-是指我们希望通过无侵入,当新增一个业务的时候,不需要考虑一个SDK去初始化,而是可以通过sidecar的进程方式来解耦。
-
-## Service Mesh的形态
-
-我们从三个维度对比的来看 ServiceMesh 的形态。
-
-图中左边是传统的微服务形态,调用者和被调用者是通过一个SDK的方式来实现共享服务的,以Dubbo为例,我们会在SDK里提供服务路由、服务发现等功能,虽然我们的开发者在做应用开发的时候并不会太关注SDK的构成,但这些功能是面临不断被变更的可能,有着比较重的逻辑。在右边Service Mesh的形态中,我们首先会对厚重的SDK进行分解,将复杂的逻辑下沉到sidecar,借助sidecar来实现服务的调用。
-
-
-
-虽然在Service Mesh的形态,调用路径要长于传统的形态,路径越长消耗越大,对性能影响越大。但在当前的分布式应用的治理过程中,易用性已经成为一个比性能更重要的话题。当我们给客户部署一套微服务,即便性能很强,但没有处理好易用性问题的话,这将会给技术的推广带来巨大的阻碍,不仅是会影响外部的客户,也会影响内部的用户,如何实现喝着咖啡从容应对双11,必须先解决易用性的问题。在解决易用性问题后,沿着技术的发展路径再去解决性能问题。
-
-Service Mesh的形态中的control plan不会导致重复建设,但在shared service是有可能存在重复建设的。
-
-## Service Mesh下的应用架构
-
-无论是单体应用,还是分布式应用,都可以建立在Service Mesh上,mesh上的sidecar支撑了所有的上层应用,业务开发者无须关心底层构成,可以用Java,也可以用Go等语言完成自己的业务开发。
-
-## Service Mesh的价值
-* 为单体应用向微服务架构演进提供了渐进的途径
-
-* 为异构(微)服务框架/平台提供了融合发展的可能
-
- * 被收购子公司与母公司的业务可以融合发展
-
-* 加速(微)服务框架/平台自身的演进
-
-* 让业务开发同学聚焦于业务逻辑本身
-
-* 业务开发时无需关心安全、灰度、限流、熔断等通用的技术内容
-
-* 培育了多语言业务开发的土壤
-
- * 助力人才发展中编程语言的多样性
-
-* 对(异构)微服务架构应用实现更为有效的全局一体化监管控
-
-## Dubbo Mesh的发展思路
-
-* 迎合Kubernetes已成orchestrator王者的大势
-
-* 开源版本与阿里巴巴集团内版本统一
-
-* 与领域主流开源项目形成合力发展,源于开源、反哺开源
-
-## Q&A
-
-#### 阿里巴巴是怎么从微服务过渡到sidecar模式,再过渡到Service Mesh?
-
-整个过渡是渐进式的,我们会将控制平面的一些组件先下沉到与sidecar部署在一起,这一下沉能很好复用开源软件已有的能力而减少开发工作量。当这一步骤完成后,被下沉的控制面组件会重新拉回到上面的控制面,那时就会面临一定的服务端改造,一旦改造完成就有了一个全新、完整的Service Mesh。
-
-#### Service Mesh中的服务注册发现,负载均衡,网关,熔断降级,超时,限流,消息总线,分布式配置,这些都是怎么实现的?
-
-Dubbo Mesh在控制面会基于Istio去做,而Istio已经具备了Kubernetes下的服务注册与发现能力,我们要做的是扩充Istio的能力,让服务注册与发现能与ZooKeeper、Nacos进行对接去完成。基于开源的Envoy所实现的sidecar已实现了超时处理的功能,相应的内容可以读代码去了解。其他内容我们仍在规划中。
-
-#### Dubbo Mesh目前性能怎么样? 增加一层sidecar导致Dubbo的RT有多少?
-
-在使用iptables的情形下,一跳增加1.5毫秒,如果不采用iptables直接proxy方式的情形下应当性能更好(这一点与Lyft也邮件确认过了),我们接下来会做更多的性能测试,目前的焦点更多在于功能层面。
-
-#### Dubbo Mesh是把双刃剑,经过的链路更复杂,运维和开发者问题排查有没有更有效的工具?
-
-理论上,增加一跳并没有改变服务调用的拓扑结构,但确实会增加复杂度,这个应当通过设计实现去解决。好在因为是一体化的方案,所以解决这类问题时需要更具全局视野。
-
-#### Service Mesh中控制面板也用C++吗?我看主流很多实现都是Go, 我相信大佬做过技术调研,有哪些优势?
-
-控制面是复用Istio的,是Go语言的。我们力争不重复造轮子,而是以开放的心态去共建。
-
-#### Client做解码和反序列化是吧,有计划支持HTTP2协议吗?
-
-Envoy默认就支持了,不需我们开发。这也是借力开源的收益。
-
-#### Dubbo Mesh已经支持UNIX Domain Socket了吗?
-
-目前不支持,这个还处于意向阶段。
diff --git a/en-us/blog/dubbo-network-interfaces.md b/en-us/blog/dubbo-network-interfaces.md
deleted file mode 100644
index 16dc1f3..0000000
--- a/en-us/blog/dubbo-network-interfaces.md
+++ /dev/null
@@ -1,526 +0,0 @@
----
-title: 研究 Dubbo 网卡地址注册时的一点思考
-keywords: 网卡地址注册
-description: 研究 Dubbo 网卡地址注册时的一点思考
----
-
-# 研究 Dubbo 网卡地址注册时的一点思考
-
-## 1 如何选择合适的网卡地址
-
-可能相当一部分人还不知道我这篇文章到底要讲什么,我说个场景,大家应该就明晰了。在分布式服务调用过程中,以 Dubbo 为例,服务提供者往往需要将自身的 IP 地址上报给注册中心,供消费者去发现。在大多数情况下 Dubbo 都可以正常工作,但如果你留意过 Dubbo 的 github issue,其实有不少人反馈:Dubbo Provider 注册了错误的 IP。如果你能立刻联想到:多网卡、内外网地址共存、VPN、虚拟网卡等关键词,那我建议你一定要继续将本文看下去,因为我也想到了这些,它们都是本文所要探讨的东西!那么“如何选择合适的网卡地址”呢,Dubbo 现有的逻辑到底算不算完备?我们不急着回答它,而是带着这些问题一起进行研究,相信到文末,其中答案,各位看官自有评说。
-
-## 2 Dubbo 是怎么做的
-
-Dubbo 获取网卡地址的逻辑在各个版本中也是千回百转,走过弯路,也做过优化,我们用最新的 2.7.2-SNAPSHOT 版本来介绍,在看以下源码时,大家可以怀着质疑的心态去阅读,在 dubbo github 的 master 分支可以获取源码。获取 localhost 的逻辑位于 `org.apache.dubbo.common.utils.NetUtils#getLocalAddress0()` 之中
-
-```java
-private static InetAddress getLocalAddress0() {
- InetAddress localAddress = null;
- // 首先尝试获取 /etc/hosts 中 hostname 对应的 IP
- localAddress = InetAddress.getLocalHost();
- Optional<InetAddress> addressOp = toValidAddress(localAddress);
- if (addressOp.isPresent()) {
- return addressOp.get();
- }
-
- // 没有找到适合注册的 IP,则开始轮询网卡
- Enumeration<NetworkInterface> interfaces = NetworkInterface.getNetworkInterfaces();
- if (null == interfaces) {
- return localAddress;
- }
- while (interfaces.hasMoreElements()) {
- NetworkInterface network = interfaces.nextElement();
- Enumeration<InetAddress> addresses = network.getInetAddresses();
- while (addresses.hasMoreElements()) {
- // 返回第一个匹配的适合注册的 IP
- Optional<InetAddress> addressOp = toValidAddress(addresses.nextElement());
- if (addressOp.isPresent()) {
- return addressOp.get();
- }
- }
- }
- return localAddress;
-}
-```
-
-Dubbo 这段选取本地地址的逻辑大致分成了两步
-
-1. 先去 /etc/hosts 文件中找 hostname 对应的 IP 地址,找到则返回;找不到则转 2
-2. 轮询网卡,寻找合适的 IP 地址,找到则返回;找不到返回 null,在 getLocalAddress0 外侧还有一段逻辑,如果返回 null,则注册 127.0.0.1 这个本地回环地址
-
-首先强调下,这段逻辑并没有太大的问题,先别急着挑刺,让我们来分析下其中的一些细节,并进行验证。
-
-### 2.1 尝试获取 hostname 映射 IP
-
-Dubbo 首先选取的是 hostname 对应的 IP,在源码中对应的 `InetAddress.getLocalHost();` 在 `*nix` 系统实际部署 Dubbo 应用时,可以首先使用 `hostname` 命令获取主机名
-
-```shell
-xujingfengdeMacBook-Pro:~ xujingfeng$ hostname
-xujingfengdeMacBook-Pro.local
-```
-
-紧接着在 `/etc/hosts` 配置 IP 映射,为了验证 Dubbo 的机制,我们随意为 hostname 配置一个 IP 地址
-
-```
-127.0.0.1 localhost
-1.2.3.4 xujingfengdeMacBook-Pro.local
-```
-
-接着调用 `NetUtils.getLocalAddress0()` 进行验证,控制台打印如下:
-
-```
-xujingfengdeMacBook-Pro.local/1.2.3.4
-```
-
-### 2.2 判定有效的 IP 地址
-
-在 toValidAddress 逻辑中,Dubbo 存在以下逻辑判定一个 IP 地址是否有效
-
-```java
-private static Optional<InetAddress> toValidAddress(InetAddress address) {
- if (address instanceof Inet6Address) {
- Inet6Address v6Address = (Inet6Address) address;
- if (isValidV6Address(v6Address)) {
- return Optional.ofNullable(normalizeV6Address(v6Address));
- }
- }
- if (isValidV4Address(address)) {
- return Optional.of(address);
- }
- return Optional.empty();
-}
-```
-
-依次校验其符合 Ipv6 或者 Ipv4 的 IP 规范,对于 Ipv6 的地址,见如下代码:
-
-```java
-static boolean isValidV6Address(Inet6Address address) {
- boolean preferIpv6 = Boolean.getBoolean("java.net.preferIPv6Addresses");
- if (!preferIpv6) {
- return false;
- }
- try {
- return address.isReachable(100);
- } catch (IOException e) {
- // ignore
- }
- return false;
-}
-```
-
-首先获取 `java.net.preferIPv6Addresses` 参数,其默认值为 false,鉴于大多数应用并没有使用 Ipv6 地址作为理想的注册 IP,这问题不大,紧接着通过 isReachable 判断网卡的连通性。例如一些网卡可能是 VPN/虚拟网卡的地址,如果没有配置路由表,往往无法连通,可以将之过滤。
-
-对于 Ipv4 的地址,见如下代码:
-
-```java
-static boolean isValidV4Address(InetAddress address) {
- if (address == null || address.isLoopbackAddress()) {
- return false;
- }
- String name = address.getHostAddress();
- boolean result = (name != null
- && IP_PATTERN.matcher(name).matches()
- && !Constants.ANYHOST_VALUE.equals(name)
- && !Constants.LOCALHOST_VALUE.equals(name));
- return result;
-}
-```
-
-对比 Ipv6 的判断,这里我们已经发现前后不对称的情况了
-
-- Ipv4 相比 Ipv6 的逻辑多了 Ipv4 格式的正则校验、本地回环地址校验、ANYHOST 校验
-- Ipv4 相比 Ipv6 的逻辑少了网卡连通性的校验
-
-大家都知道,Ipv4 将 127.0.0.1 定为本地回环地址, Ipv6 也存在回环地址:0:0:0:0:0:0:0:1 或者表示为 ::1。改进建议也很明显,我们放到文末统一总结。
-
-### 2.3 轮询网卡
-
-如果上述地址获取为 null 则进入轮询网卡的逻辑(例如 hosts 未指定 hostname 的映射或者 hostname 配置成了 127.0.0.1 之类的地址便会导致获取到空的网卡地址),轮询网卡对应的源码是 `NetworkInterface.getNetworkInterfaces()` ,这里面涉及的知识点就比较多了,支撑起了我写这篇文章的素材,Dubbo 的逻辑并不复杂,进行简单的校验,返回第一个可用的 IP 即可。
-
-性子急的读者可能忍不住了,多网卡!合适的网卡可能不止一个,Dubbo 怎么应对呢?按道理说,我们也替 Dubbo 说句公道话,客官要不你自己指定下?我们首先得对多网卡的场景达成一致看法,才能继续把这篇文章完成下去:我们只能**尽可能**过滤那些“**不对**”的网卡。Dubbo 看样子对所有网卡是一视同仁了,那么是不是可以尝试优化一下其中的逻辑呢?
-
-许多开源的服务治理框架在 stackoverflow 或者其 issue 中,注册错 IP 相关的问题都十分高频,大多数都是轮询网卡出了问题。既然事情发展到这儿,势必需要了解一些网络、网卡的知识,我们才能过滤掉那些明显不适合 RPC 服务注册的 IP 地址了。
-
-## 3 Ifconfig 介绍
-
-我并没有想要让大家对后续的内容望而却步,特地选择了这个大家最熟悉的 Linux 命令!对于那些吐槽:“天呐,都 2019 年了,你怎么还在用 net-tools/ifconfig,iproute2/ip 了解一下”的言论,请大家视而不见。无论你使用的是 mac,还是 linux,都可以使用它去 CRUD 你的网卡配置。
-
-### 3.1 常用指令
-
-**启动关闭指定网卡:**
-
-```
-ifconfig eth0 up
-ifconfig eth0 down
-```
-
-`ifconfig eth0 up` 为启动网卡 eth0,`ifconfig eth0 down` 为关闭网卡 eth0。ssh 登陆 linux 服务器操作的用户要小心执行这个操作了,千万不要蠢哭自己。不然你下一步就需要去 google:“禁用 eth0 网卡后如何远程连接 Linux 服务器” 了。
-
-**为网卡配置和删除IPv6地址:**
-
-```
-ifconfig eth0 add 33ffe:3240:800:1005::2/64 #为网卡eth0配置IPv6地址
-ifconfig eth0 del 33ffe:3240:800:1005::2/64 #为网卡eth0删除IPv6地址
-```
-
-**用 ifconfig 修改 MAC 地址:**
-
-```
-ifconfig eth0 hw ether 00:AA:BB:CC:dd:EE
-```
-
-**配置 IP 地址:**
-
-```
-[root@localhost ~]# ifconfig eth0 192.168.2.10
-[root@localhost ~]# ifconfig eth0 192.168.2.10 netmask 255.255.255.0
-[root@localhost ~]# ifconfig eth0 192.168.2.10 netmask 255.255.255.0 broadcast 192.168.2.255
-```
-
-**启用和关闭arp协议:**
-
-```
-ifconfig eth0 arp #开启网卡eth0 的arp协议
-ifconfig eth0 -arp #关闭网卡eth0 的arp协议
-```
-
-**设置最大传输单元:**
-
-```
-ifconfig eth0 mtu 1500 #设置能通过的最大数据包大小为 1500 bytes
-```
-
-### 3.2 查看网卡信息
-
-在一台 ubuntu 上执行 `ifconfig -a`
-
-```shell
-ubuntu@VM-30-130-ubuntu:~$ ifconfig -a
-eth0 Link encap:Ethernet HWaddr 52:54:00:a9:5f:ae
- inet addr:10.154.30.130 Bcast:10.154.63.255 Mask:255.255.192.0
- UP BROADCAST RUNNING MULTICAST MTU:1500 Metric:1
- RX packets:149673 errors:0 dropped:0 overruns:0 frame:0
- TX packets:152271 errors:0 dropped:0 overruns:0 carrier:0
- collisions:0 txqueuelen:1000
- RX bytes:15205083 (15.2 MB) TX bytes:21386362 (21.3 MB)
-
-lo Link encap:Local Loopback
- inet addr:127.0.0.1 Mask:255.0.0.0
- UP LOOPBACK RUNNING MTU:65536 Metric:1
- RX packets:0 errors:0 dropped:0 overruns:0 frame:0
- TX packets:0 errors:0 dropped:0 overruns:0 carrier:0
- collisions:0 txqueuelen:1
- RX bytes:0 (0.0 B) TX bytes:0 (0.0 B)
-
-docker0 Link encap:Ethernet HWaddr 02:42:58:45:c1:15
- inet addr:172.17.0.1 Bcast:172.17.255.255 Mask:255.255.0.0
- UP BROADCAST MULTICAST MTU:1500 Metric:1
- RX packets:0 errors:0 dropped:0 overruns:0 frame:0
- TX packets:0 errors:0 dropped:0 overruns:0 carrier:0
- collisions:0 txqueuelen:0
- RX bytes:0 (0.0 B) TX bytes:0 (0.0 B)
-
-tun0 Link encap:UNSPEC HWaddr 00-00-00-00-00-00-00-00-00-00-00-00-00-00-00-00
- UP POINTOPOINT NOARP MULTICAST MTU:1500 Metric:1
- RX packets:0 errors:0 dropped:0 overruns:0 frame:0
- TX packets:0 errors:0 dropped:0 overruns:0 carrier:0
- collisions:0 txqueuelen:100
- RX bytes:0 (0.0 B) TX bytes:0 (0.0 B)
-```
-
-为了防止黑客对我的 Linux 发起攻击,我还是偷偷对 IP 做了一点“改造”,请不要为难一个趁着打折+组团购买廉价云服务器的小伙子。对于部分网卡的详细解读:
-
-eth0 表示第一块网卡, 其中 HWaddr 表示网卡的物理地址,可以看到目前这个网卡的物理地址(MAC 地址)是 02:42:38:52:70:54
-
-inet addr 用来表示网卡的 IP 地址,此网卡的 IP 地址是 10.154.30.130,广播地址, Bcast: 172.18.255.255,掩码地址 Mask:255.255.0.0
-
-lo 是表示主机的回环地址,这个一般是用来测试一个网络程序,但又不想让局域网或外网的用户能够查看,只能在此台主机上运行和查看所用的网络接口。比如把 HTTPD 服务器的指定到回坏地址,在浏览器输入 127.0.0.1 就能看到你所架构的 WEB 网站了。但只有你能看得到,局域网的其它主机或用户则无从知晓。
-
-第一行:连接类型:Ethernet(以太网)HWaddr(硬件mac地址)
-
-第二行:网卡的IP地址、子网、掩码
-
-第三行:UP(代表网卡开启状态)RUNNING(代表网卡的网线被接上)MULTICAST(支持组播)MTU:1500(最大传输单元):1500字节(ifconfig 不加 -a 则无法看到 DOWN 的网卡)
-
-第四、五行:接收、发送数据包情况统计
-
-第七行:接收、发送数据字节数统计信息。
-
-紧接着的两个网卡 docker0,tun0 是怎么出来的呢?我在我的 ubuntu 上装了 docker 和 openvpn。这两个东西应该是日常干扰我们做服务注册时的罪魁祸首了,当然,也有可能存在 eth1 这样的第二块网卡。ifconfig -a 看到的东西就对应了 JDK 的 api :`NetworkInterface.getNetworkInterfaces()` 。我们简单做个总结,大致有三个干扰因素
-
-- 以 docker 网桥为首的虚拟网卡地址,毕竟这东西这么火,怎么也得单独列出来吧?
-- 以 TUN/TAP 为代表的虚拟网卡地址,多为 VPN 场景
-- 以 eth1 为代表的多网卡场景,有钱就可以装多网卡了!
-
-我们后续的篇幅将针对这些场景做分别的介绍,力求让大家没吃过猪肉,起码看下猪怎么跑的。
-
-## 4 干扰因素一:Docker 网桥
-
-熟悉 docker 的朋友应该知道 docker 会默认创建一个 docker0 的网桥,供容器实例连接。如果嫌默认的网桥不够直观,我们可以使用 bridge 模式自定义创建一个新的网桥:
-
-```shell
-ubuntu@VM-30-130-ubuntu:~$ docker network create kirito-bridge
-a38696dbbe58aa916894c674052c4aa6ab32266dcf6d8111fb794b8a344aa0d9
-ubuntu@VM-30-130-ubuntu:~$ ifconfig -a
-br-a38696dbbe58 Link encap:Ethernet HWaddr 02:42:6e:aa:fd:0c
- inet addr:172.19.0.1 Bcast:172.19.255.255 Mask:255.255.0.0
- UP BROADCAST MULTICAST MTU:1500 Metric:1
- RX packets:0 errors:0 dropped:0 overruns:0 frame:0
- TX packets:0 errors:0 dropped:0 overruns:0 carrier:0
- collisions:0 txqueuelen:0
- RX bytes:0 (0.0 B) TX bytes:0 (0.0 B)
-```
-
-使用 docker network 指令创建网桥之后,自动创建了对应的网卡,我只给出了 `ifconfig -a` 的增量返回部分,可以看出多了一个 br-a38696dbbe58 的网卡。
-
-我有意区分了“网桥”和“网卡”,可以使用 bridge-utils/brctl 来查看网桥信息:
-
-```shell
-ubuntu@VM-30-130-ubuntu:~$ sudo brctl show
-bridge name bridge id STP enabled interfaces
-br-a38696dbbe58 8000.02426eaafd0c no
-docker0 8000.02425845c215 no
-```
-
-网桥是一个虚拟设备,这个设备只有 brctl show 能看到,网桥创建之后,会自动创建一个同名的网卡,并将这个网卡加入网桥。
-
-## 5 干扰因素二:TUN/TAP 虚拟网络设备
-
-平时我们所说的虚拟网卡、虚拟机,大致都跟 TUN/TAP 有关。我的读者大多数是 Java 从业者,相信我下面的内容并没有太超纲,不要被陌生的名词唬住。对于被唬住的读者,也可以直接跳过 5.1~5.3,直接看 5.4 的实战。
-
-### 5.1 真实网卡工作原理
-
-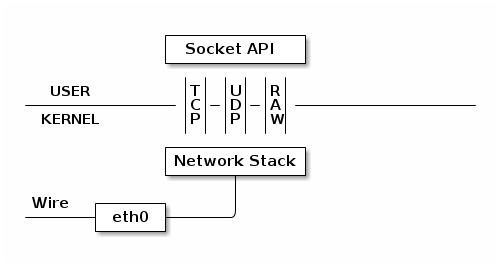
-
-上图中的 **eth0** 表示我们主机已有的真实的网卡接口 (**interface**)。
-
-网卡接口 **eth0** 所代表的真实网卡通过网线(**wire**)和外部网络相连,该物理网卡收到的数据包会经由接口 **eth0** 传递给内核的网络协议栈(**Network Stack**)。然后协议栈对这些数据包进行进一步的处理。
-
-对于一些错误的数据包,协议栈可以选择丢弃;对于不属于本机的数据包,协议栈可以选择转发;而对于确实是传递给本机的数据包,而且该数据包确实被上层的应用所需要,协议栈会通过 **Socket API** 告知上层正在等待的应用程序。
-
-### 5.2 TUN 工作原理
-
-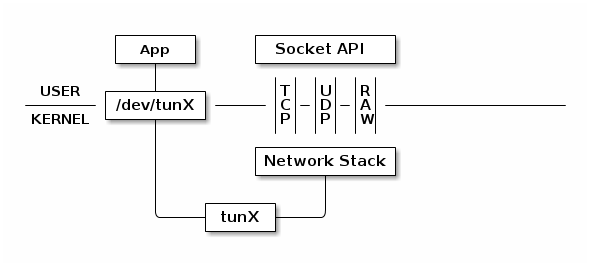
-
-我们知道,普通的网卡是通过网线来收发数据包的话,而 **TUN** 设备比较特殊,它通过一个文件收发数据包。
-
-如上图所示,**tunX** 和上面的 **eth0** 在逻辑上面是等价的, **tunX** 也代表了一个网络接口,虽然这个接口是系统通过软件所模拟出来的.
-
-网卡接口 **tunX 所代表的虚拟网卡通过文件 /dev/tunX 与我们的应用程序(App)相连**,应用程序每次使用 **write** 之类的系统调用将数据写入该文件,这些数据会以网络层数据包的形式,通过该虚拟网卡,经由网络接口 **tunX** 传递给网络协议栈,同时该应用程序也可以通过 **read** 之类的系统调用,经由文件 **/dev/tunX** 读取到协议栈向 **tunX** 传递的**所有**数据包。
-
-此外,协议栈可以像操纵普通网卡一样来操纵 **tunX** 所代表的虚拟网卡。比如说,给 **tunX** 设定 **IP** 地址,设置路由,总之,在协议栈看来,**tunX** 所代表的网卡和其他普通的网卡区别不大,当然,硬要说区别,那还是有的,那就是 **tunX** 设备不存在 **MAC** 地址,这个很好理解,**tunX** 只模拟到了网络层,要 **MAC**地址没有任何意义。当然,如果是 **tapX** 的话,在协议栈的眼中,**tapX** 和真实网卡没有任何区别。
-
-是不是有些懵了?我是谁,为什么我要在这篇文章里面学习 TUN!因为我们常用的 VPN 基本就是基于 TUN/TAP 搭建的,如果我们使用 **TUN** 设备搭建一个基于 **UDP** 的 **VPN** ,那么整个处理过程可能是这幅样子:
-
-
-
-### 5.3 TAP 工作原理
-
-**TAP** 设备与 **TUN** 设备工作方式完全相同,区别在于:
-
-1. **TUN** 设备是一个三层设备,它只模拟到了 **IP** 层,即网络层 我们可以通过 **/dev/tunX** 文件收发 **IP** 层数据包,它无法与物理网卡做 **bridge**,但是可以通过三层交换(如 **ip_forward**)与物理网卡连通。可以使用`ifconfig`之类的命令给该设备设定 **IP** 地址。
-2. **TAP** 设备是一个二层设备,它比 **TUN** 更加深入,通过 **/dev/tapX** 文件可以收发 **MAC** 层数据包,即数据链路层,拥有 **MAC** 层功能,可以与物理网卡做 **bridge**,支持 **MAC** 层广播。同样的,我们也可以通过`ifconfig`之类的命令给该设备设定 **IP** 地址,你如果愿意,我们可以给它设定 **MAC** 地址。
-
-关于文章中出现的二层,三层,我这里说明一下,第一层是物理层,第二层是数据链路层,第三层是网络层,第四层是传输层。
-
-### 5.4 openvpn 实战
-
-openvpn 是 Linux 上一款开源的 vpn 工具,我们通过它来复现出影响我们做网卡选择的场景。
-
-安装 openvpn
-
-```shell
-sudo apt-get install openvpn
-```
-
-安装一个 TUN 设备:
-
-```shell
-ubuntu@VM-30-130-ubuntu:~$ sudo openvpn --mktun --dev tun0
-Mon Apr 29 22:23:31 2019 TUN/TAP device tun0 opened
-Mon Apr 29 22:23:31 2019 Persist state set to: ON
-```
-
-安装一个 TAP 设备:
-
-```shell
-ubuntu@VM-30-130-ubuntu:~$ sudo openvpn --mktun --dev tap0
-Mon Apr 29 22:24:36 2019 TUN/TAP device tap0 opened
-Mon Apr 29 22:24:36 2019 Persist state set to: ON
-```
-
-执行 `ifconfig -a` 查看网卡,只给出增量的部分:
-
-```shell
-tap0 Link encap:Ethernet HWaddr 7a:a2:a8:f1:6b:df
- BROADCAST MULTICAST MTU:1500 Metric:1
- RX packets:0 errors:0 dropped:0 overruns:0 frame:0
- TX packets:0 errors:0 dropped:0 overruns:0 carrier:0
- collisions:0 txqueuelen:100
- RX bytes:0 (0.0 B) TX bytes:0 (0.0 B)
-
-tun0 Link encap:UNSPEC HWaddr 00-00-00-00-00-00-00-00-00-00-00-00-00-00-00-00
- inet addr:10.154.30.131 P-t-P:10.154.30.131 Mask:255.255.255.255
- UP POINTOPOINT NOARP MULTICAST MTU:1500 Metric:1
- RX packets:0 errors:0 dropped:0 overruns:0 frame:0
- TX packets:0 errors:0 dropped:0 overruns:0 carrier:0
- collisions:0 txqueuelen:100
- RX bytes:0 (0.0 B) TX bytes:0 (0.0 B)
-```
-
-这样就解释了文章一开始为什么会有 tun0 这样的网卡了。这里读者可能会有疑惑,使用 ifconfig 不是也可以创建 tap 和 tun 网卡吗?当然啦,openvpn 是一个 vpn 工具,只能创建名为 tunX/tapX 的网卡,其遵守着一定的规范,ifconfig 可以随意创建,但没人认那些随意创建的网卡。
-
-## 6 干扰因素三:多网卡
-
-
-
-这个没有太多好说的,有多张真实的网卡,从普哥那儿搞到如上的 IP 信息。
-
-## 7 MAC 下的差异
-
-虽然 ifconfig 等指令是 `*nux` 通用的,但是其展示信息,网卡相关的属性和命名都有较大的差异。例如这是我 MAC 下执行 `ifconfig -a` 的返回:
-
-```shell
-xujingfengdeMacBook-Pro:dubbo-in-action xujingfeng$ ifconfig -a
-lo0: flags=8049<UP,LOOPBACK,RUNNING,MULTICAST> mtu 16384
- options=1203<RXCSUM,TXCSUM,TXSTATUS,SW_TIMESTAMP>
- inet 127.0.0.1 netmask 0xff000000
- inet6 ::1 prefixlen 128
- inet6 fe80::1%lo0 prefixlen 64 scopeid 0x1
- nd6 options=201<PERFORMNUD,DAD>
-gif0: flags=8010<POINTOPOINT,MULTICAST> mtu 1280
-stf0: flags=0<> mtu 1280
-XHC0: flags=0<> mtu 0
-XHC20: flags=0<> mtu 0
-en0: flags=8863<UP,BROADCAST,SMART,RUNNING,SIMPLEX,MULTICAST> mtu 1500
- ether 88:e9:fe:88:a0:76
- inet6 fe80::1cab:f689:60d1:bacb%en0 prefixlen 64 secured scopeid 0x6
- inet 30.130.11.242 netmask 0xffffff80 broadcast 30.130.11.255
- nd6 options=201<PERFORMNUD,DAD>
- media: autoselect
- status: active
-p2p0: flags=8843<UP,BROADCAST,RUNNING,SIMPLEX,MULTICAST> mtu 2304
- ether 0a:e9:fe:88:a0:76
- media: autoselect
- status: inactive
-awdl0: flags=8943<UP,BROADCAST,RUNNING,PROMISC,SIMPLEX,MULTICAST> mtu 1484
- ether 66:d2:8c:8c:dd:85
- inet6 fe80::64d2:8cff:fe8c:dd85%awdl0 prefixlen 64 scopeid 0x8
- nd6 options=201<PERFORMNUD,DAD>
- media: autoselect
- status: active
-en1: flags=8963<UP,BROADCAST,SMART,RUNNING,PROMISC,SIMPLEX,MULTICAST> mtu 1500
- options=60<TSO4,TSO6>
- ether aa:00:d0:13:0e:01
- media: autoselect <full-duplex>
- status: inactive
-en2: flags=8963<UP,BROADCAST,SMART,RUNNING,PROMISC,SIMPLEX,MULTICAST> mtu 1500
- options=60<TSO4,TSO6>
- ether aa:00:d0:13:0e:00
- media: autoselect <full-duplex>
- status: inactive
-bridge0: flags=8863<UP,BROADCAST,SMART,RUNNING,SIMPLEX,MULTICAST> mtu 1500
- options=63<RXCSUM,TXCSUM,TSO4,TSO6>
- ether aa:00:d0:13:0e:01
- Configuration:
- id 0:0:0:0:0:0 priority 0 hellotime 0 fwddelay 0
- maxage 0 holdcnt 0 proto stp maxaddr 100 timeout 1200
- root id 0:0:0:0:0:0 priority 0 ifcost 0 port 0
- ipfilter disabled flags 0x2
- member: en1 flags=3<LEARNING,DISCOVER>
- ifmaxaddr 0 port 9 priority 0 path cost 0
- member: en2 flags=3<LEARNING,DISCOVER>
- ifmaxaddr 0 port 10 priority 0 path cost 0
- nd6 options=201<PERFORMNUD,DAD>
- media: <unknown type>
- status: inactive
-utun0: flags=8051<UP,POINTOPOINT,RUNNING,MULTICAST> mtu 2000
- inet6 fe80::3fe0:3e8b:384:9968%utun0 prefixlen 64 scopeid 0xc
- nd6 options=201<PERFORMNUD,DAD>
-utun1: flags=8051<UP,POINTOPOINT,RUNNING,MULTICAST> mtu 1380
- inet6 fe80::7894:3abc:5abd:457d%utun1 prefixlen 64 scopeid 0xd
- nd6 options=201<PERFORMNUD,DAD>
-```
-
-内容很多,我挑几点差异简述下:
-
-- 内容展示形式不一样,没有 Linux 下的接收、发送数据字节数等统计信息
-
-- 真实网卡的命名不一样:eth0 -> en0
-- 虚拟网卡的命名格式不一样:tun/tap -> utun
-
-对于这些常见网卡命名的解读,我摘抄一部分来自 stackoverflow 的回答:
-
-> In arbitrary order of my familarity / widespread relevance:
->
-> `lo0` is loopback.
->
-> `en0` at one point "ethernet", now is WiFi (and I have no idea what extra `en1` or `en2` are used for).
->
-> `fw0` is the FireWire network interface.
->
-> `stf0` is an [IPv6 to IPv4 tunnel interface](https://www.freebsd.org/cgi/man.cgi?gif(4)) to support [the transition](http://en.wikipedia.org/wiki/6to4) from IPv4 to the IPv6 standard.
->
-> `gif0` is a more [generic tunneling interface](https://www.freebsd.org/cgi/man.cgi?gif(4)) [46]-to-[46].
->
-> `awdl0` is [Apple Wireless Direct Link](https://stackoverflow.com/questions/19587701/what-is-awdl-apple-wireless-direct-link-and-how-does-it-work)
->
-> `p2p0` is related to AWDL features. Either as an old version, or virtual interface with different semantics than `awdl`.
->
-> the "Network" panel in System Preferences to see what network devices "exist" or "can exist" with current configuration.
->
-> many VPNs will add additional devices, often "utun#" or "utap#" following [TUN/TAP (L3/L2)](https://en.wikipedia.org/wiki/TUN/TAP)virtual networking devices.
->
-> use `netstat -nr` to see how traffic is currently routed via network devices according to destination.
->
-> interface naming conventions started in BSD were retained in OS X / macOS, and now there also additions.
-
-## 8 Dubbo 改进建议
-
-我们进行了以上探索,算是对网卡有一点了解了。回过头来看看 Dubbo 获取网卡的逻辑,是否可以做出改进呢?
-
-**Dubbo Action 1:**
-
-保持 Ipv4 和 Ipv6 的一致性校验。为 Ipv4 增加连通性校验;为 Ipv6 增加 LoopBack 和 ANYHOST 等校验。
-
-**Dubbo Action 2:**
-
-```java
-NetworkInterface network = interfaces.nextElement();
-if (network.isLoopback() || network.isVirtual() || !network.isUp()) {
- continue;
-}
-```
-
-JDK 提供了以上的 API,我们可以利用起来,过滤一部分一定不正确的网卡。
-
-**Dubbo Action 3:**
-
-我们本文花了较多的篇幅介绍了 docker 和 TUN/TAP 两种场景导致的虚拟网卡的问题,算是较为常见的一个影响因素,虽然他们的命名具有固定性,如 docker0、tunX、tapX,但我觉得通过网卡名称的判断方式去过滤注册 IP 有一些 hack,所以不建议 dubbo contributor 提出相应的 pr 去增加这些 hack 判断,尽管可能会对判断有所帮助。
-
-对于真实多网卡、内外网 IP 共存的场景,不能仅仅是框架侧在做努力,用户也需要做一些事,就像爱情一样,我可以主动一点,但你也得反馈,才能发展出故事。
-
-**Dubbo User Action 1:**
-
-可以配置 `/etc/hosts` 文件,将 hostname 对应的 IP 显式配置进去。
-
-**Dubbo User Action 2:**
-
-可以使用启动参数去显式指定注册的 IP:
-
-```java
--DDUBBO_IP_TO_REGISTRY=1.2.3.4
-```
-
-也可以指定 Dubbo 服务绑定在哪块网卡上:
-
-```java
--DDUBBO_IP_TO_BIND=1.2.3.4
... 8344 lines suppressed ...