You are viewing a plain text version of this content. The canonical link for it is here.
Posted to notifications@apisix.apache.org by sp...@apache.org on 2022/04/15 01:05:30 UTC
[apisix] branch master updated: docs: update "Authentication" Plugins (#6824)
This is an automated email from the ASF dual-hosted git repository.
spacewander pushed a commit to branch master
in repository https://gitbox.apache.org/repos/asf/apisix.git
The following commit(s) were added to refs/heads/master by this push:
new b2f3273b6 docs: update "Authentication" Plugins (#6824)
b2f3273b6 is described below
commit b2f3273b6accec8a1f163d16df246fe36cb8a907
Author: Navendu Pottekkat <na...@gmail.com>
AuthorDate: Fri Apr 15 06:35:25 2022 +0530
docs: update "Authentication" Plugins (#6824)
Co-authored-by: homeward <97...@users.noreply.github.com>
---
docs/en/latest/plugins/authz-casbin.md | 89 ++++++------
docs/en/latest/plugins/authz-casdoor.md | 55 ++++----
docs/en/latest/plugins/authz-keycloak.md | 203 ++++++++++++++--------------
docs/en/latest/plugins/basic-auth.md | 82 ++++++------
docs/en/latest/plugins/forward-auth.md | 81 ++++++-----
docs/en/latest/plugins/hmac-auth.md | 223 ++++++++++++++-----------------
docs/en/latest/plugins/jwt-auth.md | 198 ++++++++++++++++-----------
docs/en/latest/plugins/key-auth.md | 83 +++++++-----
docs/en/latest/plugins/ldap-auth.md | 84 +++++++-----
docs/en/latest/plugins/opa.md | 153 ++++++++++++++-------
docs/en/latest/plugins/openid-connect.md | 127 ++++++++----------
docs/en/latest/plugins/wolf-rbac.md | 127 ++++++++++--------
12 files changed, 817 insertions(+), 688 deletions(-)
diff --git a/docs/en/latest/plugins/authz-casbin.md b/docs/en/latest/plugins/authz-casbin.md
index d26bd3a4e..d20455d8c 100644
--- a/docs/en/latest/plugins/authz-casbin.md
+++ b/docs/en/latest/plugins/authz-casbin.md
@@ -1,5 +1,11 @@
---
title: authz-casbin
+keywords:
+ - APISIX
+ - Plugin
+ - Authz Casbin
+ - authz-casbin
+description: This document contains information about the Apache APISIX authz-casbin Plugin.
---
<!--
@@ -23,34 +29,40 @@ title: authz-casbin
## Description
-`authz-casbin` is an authorization plugin based on [Lua Casbin](https://github.com/casbin/lua-casbin/). This plugin supports powerful authorization scenarios based on various access control models.
-
-For detailed documentation on how to create model and policy, refer [Casbin](https://casbin.org/docs/en/supported-models).
+The `authz-casbin` Plugin is an authorization Plugin based on [Lua Casbin](https://github.com/casbin/lua-casbin/). This Plugin supports powerful authorization scenarios based on various [access control models](https://casbin.org/docs/en/supported-models).
## Attributes
-| Name | Type | Requirement | Default | Valid | Description |
-| ----------- | ------ | ----------- | ------- | ----- | ------------------------------------------------------------ |
-| model_path | string | required | | | The path of the Casbin model configuration file. |
-| policy_path | string | required | | | The path of the Casbin policy file. |
-| model | string | required | | | The Casbin model configuration in text format. |
-| policy | string | required | | | The Casbin policy in text format. |
-| username | string | required | | | The header you will be using in request to pass the username (subject). |
+| Name | Type | Required | Description |
+|-------------|--------|----------|----------------------------------------------------------------------------------------|
+| model_path | string | True | Path of the Casbin model configuration file. |
+| policy_path | string | True | Path of the Casbin policy file. |
+| model | string | True | Casbin model configuration in text format. |
+| policy | string | True | Casbin policy in text format. |
+| username | string | True | Header in the request that will be used in the request to pass the username (subject). |
+
+:::note
+
+You must either specify the `model_path`, `policy_path`, and the `username` attributes or specify the `model`, `policy` and the `username` attributes in the Plugin configuration for it to be valid.
-**NOTE**: You must either specify `model_path`, `policy_path` and `username` in plugin config or specify `model`, `policy` and `username` in the plugin config for the configuration to be valid. Or if you wish to use a global Casbin configuration, you can first specify `model` and `policy` in the plugin metadata and only `username` in the plugin configuration, all routes will use the plugin metadata configuration in this way.
+If you wish to use a global Casbin configuration, you can first specify `model` and `policy` attributes in the Plugin metadata and only the `username` attribute in the Plugin configuration. All Routes will use the Plugin configuration this way.
+
+:::
## Metadata
-| Name | Type | Requirement | Default | Valid | Description |
-| ----------- | ------ | ----------- | ------- | ----- | ---------------------------------------------------------------------- |
-| model | string | required | | | The Casbin model configuration in text format. |
-| policy | string | required | | | The Casbin policy in text format. |
+| Name | Type | Required | Description |
+|--------|--------|----------|--------------------------------------------|
+| model | string | True | Casbin model configuration in text format. |
+| policy | string | True | Casbin policy in text format. |
+
+## Enabling the Plugin
-## How To Enable
+You can enable the Plugin on a Route by either using the model/policy file paths or using the model/policy text in Plugin configuration/metadata.
-You can enable the plugin on any route either by using the model/policy file paths or directly using the model/policy text.
+### By using model/policy file paths
-### By using file paths
+The example below shows setting up Casbin authentication from your model/policy configuration file:
```shell
curl http://127.0.0.1:9080/apisix/admin/routes/1 -H 'X-API-KEY: edd1c9f034335f136f87ad84b625c8f1' -X PUT -d '
@@ -72,9 +84,9 @@ curl http://127.0.0.1:9080/apisix/admin/routes/1 -H 'X-API-KEY: edd1c9f034335f13
}'
```
-This will create a Casbin enforcer from the model and policy files at your first request.
+### By using model/policy text in Plugin configuration
-### By using model/policy text
+The example below shows setting up Casbin authentication from your model/policy text in your Plugin configuration:
```shell
curl http://127.0.0.1:9080/apisix/admin/routes/1 -H 'X-API-KEY: edd1c9f034335f136f87ad84b625c8f1' -X PUT -d '
@@ -113,11 +125,11 @@ curl http://127.0.0.1:9080/apisix/admin/routes/1 -H 'X-API-KEY: edd1c9f034335f13
}'
```
-This will create a Casbin enforcer from the model and policy text at your first request.
+### By using model/policy text in Plugin metadata
-### By using model/policy text using plugin metadata
+First, you need to send a `PUT` request to the Admin API to add the `model` and `policy` text to the Plugin metadata.
-First, send a `PUT` request to add the model and policy text to the plugin's metadata using the Admin API. All routes configured in this way will use a single Casbin enforcer with plugin metadata configuration. You can also update the model/policy this way, the plugin will automatically update itself with the updated configuration.
+All Routes configured this way will use a single Casbin enforcer with the configured Plugin metadata. You can also update the model/policy in this way and the Plugin will automatically update to the new configuration.
```shell
curl http://127.0.0.1:9080/apisix/admin/plugin_metadata/authz-casbin -H 'X-API-KEY: edd1c9f034335f136f87ad84b625c8f1' -i -X PUT -d '
@@ -143,7 +155,7 @@ g, alice, admin"
}'
```
-Then add this plugin on a route by sending the following request. Note, there is no requirement for model/policy now.
+Once you have updated the Plugin metadata, you can add the Plugin to a specific Route:
```shell
curl http://127.0.0.1:9080/apisix/admin/routes/1 -H 'X-API-KEY: edd1c9f034335f136f87ad84b625c8f1' -X PUT -d '
@@ -163,11 +175,15 @@ curl http://127.0.0.1:9080/apisix/admin/routes/1 -H 'X-API-KEY: edd1c9f034335f13
}'
```
-**NOTE**: The plugin route configuration has a higher precedence than the plugin metadata configuration. Hence if the model/policy configuration is present in the plugin route config, the plugin will use that instead of the metadata config.
+:::note
-## Test Plugin
+The Plugin Route configuration has a higher precedence than the Plugin metadata configuration. If the model/policy configuration is present in the Plugin Route configuration, it is used instead of the metadata configuration.
-We defined the example model as:
+:::
+
+## Example usage
+
+We define the example model as:
```conf
[request_definition]
@@ -194,22 +210,24 @@ p, admin, *, *
g, alice, admin
```
-This means that anyone can access the homepage (`/`) using `GET` request method while only users with admin permissions can access other pages and use other request methods.
+See [examples](https://github.com/casbin/lua-casbin/tree/master/examples) for more policy and model configurations.
+
+The above configuration will let anyone access the homepage (`/`) using a `GET` request while only users with admin permissions can access other pages and use other request methods.
-For example, here anyone can access the homepage with the GET request method and the request proceeds normally:
+So if we make a get request to the homepage:
```shell
curl -i http://127.0.0.1:9080/ -X GET
```
-If some unauthorized user `bob` tries to access any other page, they will get a 403 error:
+But if an unauthorized user tries to access any other page, they will get a 403 error:
```shell
curl -i http://127.0.0.1:9080/res -H 'user: bob' -X GET
HTTP/1.1 403 Forbidden
```
-But someone with admin permissions like `alice`can access it:
+And only users with admin privileges can access the endpoints:
```shell
curl -i http://127.0.0.1:9080/res -H 'user: alice' -X GET
@@ -217,11 +235,10 @@ curl -i http://127.0.0.1:9080/res -H 'user: alice' -X GET
## Disable Plugin
-Remove the corresponding json configuration in the plugin configuration to disable the `authz-casbin` plugin.
-APISIX plugins are hot-reloaded, therefore no need to restart APISIX.
+To disable the `authz-casbin` Plugin, you can delete the corresponding JSON configuration from the Plugin configuration. APISIX will automatically reload and you do not have to restart for this to take effect.
```shell
-$ curl http://127.0.0.1:9080/apisix/admin/routes/1 -H 'X-API-KEY: edd1c9f034335f136f87ad84b625c8f1' -X PUT -d '
+curl http://127.0.0.1:9080/apisix/admin/routes/1 -H 'X-API-KEY: edd1c9f034335f136f87ad84b625c8f1' -X PUT -d '
{
"methods": ["GET"],
"uri": "/*",
@@ -234,7 +251,3 @@ $ curl http://127.0.0.1:9080/apisix/admin/routes/1 -H 'X-API-KEY: edd1c9f034335
}
}'
```
-
-## Examples
-
-Checkout examples for model and policy conguration [here](https://github.com/casbin/lua-casbin/tree/master/examples).
diff --git a/docs/en/latest/plugins/authz-casdoor.md b/docs/en/latest/plugins/authz-casdoor.md
index bf6583dc0..49b3a6ccc 100644
--- a/docs/en/latest/plugins/authz-casdoor.md
+++ b/docs/en/latest/plugins/authz-casdoor.md
@@ -1,5 +1,11 @@
---
title: authz-casdoor
+keywords:
+ - APISIX
+ - Plugin
+ - Authz Casdoor
+ - authz-casdoor
+description: This document contains information about the Apache APISIX authz-casdoor Plugin.
---
<!--
@@ -23,24 +29,32 @@ title: authz-casdoor
## Description
-`authz-casdoor` is an authorization plugin based on [Casdoor](https://casdoor.org/). Casdoor is a centralized authentication / Single-Sign-On (SSO) platform supporting OAuth 2.0, OIDC and SAML, integrated with Casbin RBAC and ABAC permission management.
+The `authz-casdoor` Plugin can be used to add centralized authentication with [Casdoor](https://casdoor.org/).
## Attributes
-| Name | Type | Requirement | Default | Valid | Description |
-| ----------- | ------ | ----------- | ------- | ----- | ------------------------------------------------------------ |
-| endpoint_addr | string | required | | | The url of casdoor. |
-| client_id | string | required | | | The client id in casdoor. |
-| client_secret | string | required | | | The client secret in casdoor. |
-| callback_url | string | required | | | The callback url which is used to receive state and code. |
+| Name | Type | Required | Description |
+|---------------|--------|----------|----------------------------------------------|
+| endpoint_addr | string | True | URL of Casdoor. |
+| client_id | string | True | Client ID in Casdoor. |
+| client_secret | string | True | Client secret in Casdoor. |
+| callback_url | string | True | Callback URL used to receive state and code. |
-*Note: endpoint_addr and callback_url should not end with '/'*
+:::info IMPORTANT
-## How To Enable
+`endpoint_addr` and `callback_url` should not end with '/'.
-You can enable the plugin on any route by giving out all attributes mentioned above.
+:::
-### Example
+:::info IMPORTANT
+
+The `callback_url` must belong to the URI of your Route. See the code snippet below for an example configuration.
+
+:::
+
+## Enabling the Plugin
+
+You can enable the Plugin on a specific Route as shown below:
```shell
curl "http://127.0.0.1:9080/apisix/admin/routes/1" -H "X-API-KEY: edd1c9f034335f136f87ad84b625c8f1" -X PUT -d '
@@ -62,23 +76,12 @@ curl "http://127.0.0.1:9080/apisix/admin/routes/1" -H "X-API-KEY: edd1c9f034335f
}
}
}'
-
```
-In this example, using apisix's admin API we created a route "/anything/*" pointed to "httpbin.org:80", and with "authz-casdoor" enabled. This route is now under authentication protection of Casdoor.
-
-#### Explanations about parameters of this plugin
-
-In the configuration of "authz-casdoor" plugin we can see four parameters.
-
-The first one is "callback_url". This is exactly the callback url in OAuth2. It should be emphasized that this callback url **must belong to the "uri" you specified for the route**, for example, in this example, http://localhost:9080/anything/callback obviously belong to "/anything/*". Only by this way can the visit toward callback_url can be intercepted and utilized by the plugin(so that the plugin can get the code and state in Oauth2). The logic of callback_url is implemented completel [...]
-
-The second parameter "endpoint_addr" is obviously the url of Casdoor. The third and fourth parameters are "client_id" and "client_secret", which you can acquire from Casdoor when you register an app.
-
-#### How it works?
+## Example usage
-Suppose a new user who has never visited this route before is going to visit it (http://localhost:9080/anything/d?param1=foo¶m2=bar), considering that "authz-casdoor" is enabled, this visit would be processed by "authz-casdoor" plugin first. After checking the session and confirming that this user hasn't been authenticated, the visit will be intercepted. With the original url user wants to visit kept, he will be redirected to the login page of Casdoor.
+Once you have enabled the Plugin, a new user visiting this Route would first be processed by the `authz-casdoor` Plugin. They would be redirected to the login page of Casdoor.
-After successfully logging in with username and password(or whatever method he uses), Casdoor will redirect this user to the "callback_url" with GET parameter "code" and "state" specified. Because the "callback_url" is known by the plugin, when the visit toward the "callback_url" is intercepted this time, the logic of "Authorization code Grant Flow" in Oauth2 will be triggered, which means this plugin will request the access token to confirm whether this user is really logged in. After t [...]
+After successfully logging in, Casdoor will redirect this user to the `callback_url` with GET parameters `code` and `state` specified. The Plugin will also request for an access token and confirm whether the user is really logged in. This process is only done once and subsequent requests are left uninterrupted.
-Next time this user want to visit url behind this route (for example, http://localhost:9080/anything/d), after discovering that this user has been authenticated previously, this plugin won't redirect this user anymore so that this user can visit whatever he wants under this route without being interfered.
+Once this is done, the user is redirected to the original URL they wanted to visit.
diff --git a/docs/en/latest/plugins/authz-keycloak.md b/docs/en/latest/plugins/authz-keycloak.md
index 1b7388f90..b66357999 100644
--- a/docs/en/latest/plugins/authz-keycloak.md
+++ b/docs/en/latest/plugins/authz-keycloak.md
@@ -1,5 +1,11 @@
---
title: authz-keycloak
+keywords:
+ - APISIX
+ - Plugin
+ - Authz Keycloak
+ - authz-keycloak
+description: This document contains information about the Apache APISIX authz-keycloak Plugin.
---
<!--
@@ -23,118 +29,111 @@ title: authz-keycloak
## Description
-`authz-keycloak` is an authorization plugin to be used with the Keycloak Identity Server. Keycloak is an OAuth/OIDC and
-UMA compliant Identity Server. Although, it's developed working in conjunction with Keycloak it should work with any
-OAuth/OIDC and UMA compliant identity providers as well.
+The `authz-keycloak` Plugin can be used to add authentication with [Keycloak Identity Server](https://www.keycloak.org/).
-For more information on Keycloak, refer to [Keycloak Authorization Docs](https://www.keycloak.org/docs/latest/authorization_services) for more information.
+:::tip
+
+Although this Plugin was developed to work with Keycloak, it should work with any OAuth/OIDC and UMA compliant identity providers as well.
+
+:::
+
+Refer to [Authorization Services Guide](https://www.keycloak.org/docs/latest/authorization_services/) for more information on Keycloak.
## Attributes
-| Name | Type | Requirement | Default | Valid | Description |
-| ------------------------------ | ------------- | ----------- | --------------------------------------------- | ------------------------------------------------------------------ | ----------------------------------------------------------------------------------------------------------------------------------------------------------- |
-| discovery | string | optional | | https://host.domain/auth/realms/foo/.well-known/uma2-configuration | URL to discovery document for Keycloak Authorization Services. |
-| token_endpoint | string | optional | | https://host.domain/auth/realms/foo/protocol/openid-connect/token | A OAuth2-compliant Token Endpoint that supports the `urn:ietf:params:oauth:grant-type:uma-ticket` grant type. Overrides value from discovery, if given. |
-| resource_registration_endpoint | string | optional | | https://host.domain/auth/realms/foo/authz/protection/resource_set | A Keycloak Protection API-compliant resource registration endpoint. Overrides value from discovery, if given. |
-| client_id | string | optional | | | The client identifier of the resource server to which the client is seeking access. One of `client_id` or `audience` is required. |
-| audience | string | optional | | | Legacy parameter now replaced by `client_id`. Kept for backwards compatibility. One of `client_id` or `audience` is required. |
-| client_secret | string | optional | | | The client secret, if required. |
-| grant_type | string | optional | "urn:ietf:params:oauth:grant-type:uma-ticket" | ["urn:ietf:params:oauth:grant-type:uma-ticket"] | |
-| policy_enforcement_mode | string | optional | "ENFORCING" | ["ENFORCING", "PERMISSIVE"] | |
-| permissions | array[string] | optional | | | Static permission to request, an array of strings each representing a resources and optionally one or more scopes the client is seeking access. |
-| lazy_load_paths | boolean | optional | false | | Dynamically resolve the request URI to resource(s) using the resource registration endpoint instead of using the static permission. |
-| http_method_as_scope | boolean | optional | false | | Map HTTP request type to scope of same name and add to all permissions requested. |
-| timeout | integer | optional | 3000 | [1000, ...] | Timeout(ms) for the http connection with the Identity Server. |
-| access_token_expires_in | integer | optional | 300 | [1, ...] | The expiration time(s) of the access token. |
-| access_token_expires_leeway | integer | optional | 0 | [0, ...] | Expiration leeway(s) for access_token renewal. If this is set, renewal will happen access_token_expires_leeway seconds before the token expiration. This avoids errors in case the access_token just expires when arriving to the OAuth Resource Server.|
-| refresh_token_expires_in | integer | optional | 3600 | [1, ...] | The expiration time(s) of the refresh token. |
-| refresh_token_expires_leeway | integer | optional | 0 | [0, ...] | Expiration leeway(s) for refresh_token renewal. If this is set, renewal will happen refresh_token_expires_leeway seconds before the token expiration. This avoids errors in case the refresh_token just expires when arriving to the OAuth Resource Server.|
-| ssl_verify | boolean | optional | true | | Verify if TLS certificate matches hostname. |
-| cache_ttl_seconds | integer | optional | 86400 (equivalent to 24h) | positive integer >= 1 | The maximum period in seconds up to which the plugin caches discovery documents and tokens, used by the plugin to authenticate to Keycloak. |
-| keepalive | boolean | optional | true | | Enable HTTP keep-alive to keep connections open after use. Set to `true` if you expect a lot of requests to Keycloak. |
-| keepalive_timeout | integer | optional | 60000 | positive integer >= 1000 | Idle timeout after which established HTTP connections will be closed. |
-| keepalive_pool | integer | optional | 5 | positive integer >= 1 | Maximum number of connections in the connection pool. |
-| access_denied_redirect_uri | string | optional | | [1, 2048] | Redirect unauthorized user with the given uri like "http://127.0.0.1/test", instead of returning `"error_description":"not_authorized"`. |
-| password_grant_token_generation_incoming_uri | string | optional | | /api/token | You can set this uri value to generate token using password grant type. Plugin will compare incoming request uri with this value. |
+| Name | Type | Required | Default | Valid values | Description |
+|----------------------------------------------|---------------|----------|-----------------------------------------------|--------------------------------------------------------------------|-------------------------------------------------------------------------------------------------------------------------------------------------------------------------------------------------------------------------------------------------------|
+| discovery | string | False | | https://host.domain/auth/realms/foo/.well-known/uma2-configuration | URL to [discovery document](https://www.keycloak.org/docs/14.0/authorization_services/#_service_authorization_api) of Keycloak Authorization Services. |
+| token_endpoint | string | False | | https://host.domain/auth/realms/foo/protocol/openid-connect/token | An OAuth2-compliant token endpoint that supports the `urn:ietf:params:oauth:grant-type:uma-ticket` grant type. If provided, overrides the value from discovery. |
+| resource_registration_endpoint | string | False | | https://host.domain/auth/realms/foo/authz/protection/resource_set | A UMA-compliant resource registration endpoint. If provided, overrides the value from discovery. |
+| client_id | string | False | | | The identifier of the resource server to which the client is seeking access. Either `client_id` or `audience` is required. |
+| audience | string | False | | | Legacy parameter now replaced by `client_id` kept for backwards compatibility. Either `client_id` or `audience` is required. |
+| client_secret | string | False | | | The client secret, if required. |
+| grant_type | string | False | "urn:ietf:params:oauth:grant-type:uma-ticket" | ["urn:ietf:params:oauth:grant-type:uma-ticket"] | |
+| policy_enforcement_mode | string | False | "ENFORCING" | ["ENFORCING", "PERMISSIVE"] | |
+| permissions | array[string] | False | | | An array of strings, each representing a set of one or more resources and scopes the client is seeking access. |
+| lazy_load_paths | boolean | False | false | | When set to true, dynamically resolves the request URI to resource(s) using the resource registration endpoint instead of the static permission. |
+| http_method_as_scope | boolean | False | false | | When set to true, maps the HTTP request type to scope of the same name and adds to all requested permissions. |
+| timeout | integer | False | 3000 | [1000, ...] | Timeout in ms for the HTTP connection with the Identity Server. |
+| access_token_expires_in | integer | False | 300 | [1, ...] | Expiration time(s) of the access token. |
+| access_token_expires_leeway | integer | False | 0 | [0, ...] | Expiration leeway(s) for access_token renewal. When set, the token will be renewed access_token_expires_leeway seconds before expiration. This avoids errors in cases where the access_token just expires when reaching the OAuth Resource Server. |
+| refresh_token_expires_in | integer | False | 3600 | [1, ...] | The expiration time(s) of the refresh token. |
+| refresh_token_expires_leeway | integer | False | 0 | [0, ...] | Expiration leeway(s) for refresh_token renewal. When set, the token will be renewed refresh_token_expires_leeway seconds before expiration. This avoids errors in cases where the refresh_token just expires when reaching the OAuth Resource Server. |
+| ssl_verify | boolean | False | true | | When set to true, verifies if TLS certificate matches hostname. |
+| cache_ttl_seconds | integer | False | 86400 (equivalent to 24h) | positive integer >= 1 | Maximum time in seconds up to which the Plugin caches discovery documents and tokens used by the Plugin to authenticate to Keycloak. |
+| keepalive | boolean | False | true | | When set to true, enables HTTP keep-alive to keep connections open after use. Set to `true` if you are expecting a lot of requests to Keycloak. |
+| keepalive_timeout | integer | False | 60000 | positive integer >= 1000 | Idle time after which the established HTTP connections will be closed. |
+| keepalive_pool | integer | False | 5 | positive integer >= 1 | Maximum number of connections in the connection pool. |
+| access_denied_redirect_uri | string | False | | [1, 2048] | URI to redirect the user to instead of returning an error message like `"error_description":"not_authorized"`. |
+| password_grant_token_generation_incoming_uri | string | False | | /api/token | Set this to generate token using the password grant type. The Plugin will compare incoming request URI to this value. |
-### Discovery and Endpoints
+### Discovery and endpoints
-The plugin can discover Keycloak API endpoints from a URL in the `discovery` attribute that points to
-Keycloak's discovery document for Authorization Services for the respective realm. This is the recommended
-option and typically most convenient.
+It is recommended to use the `discovery` attribute as the `authz-keycloak` Plugin can discover the Keycloak API endpoints from it.
-If the discovery document is available, the plugin determines the token endpoint URL from it. If present, the
-`token_endpoint` attribute overrides the URL.
+If set, the `token_endpoint` and `resource_registration_endpoint` will override the values obtained from the discovery document.
-Analogously, the plugin determines the registration endpoint from the discovery document. The
-`resource_registration_endpoint` overrides, if present.
+### Client ID and secret
-### Client ID and Secret
+The Plugin needs the `client_id` or `audience` (for backwards compatibility) attribute for identification and to specify the context in which to evaluate permissions when interacting with Keycloak.
-The plugin needs the `client_id` attribute to identify itself when interacting with Keycloak.
-For backwards compatibility, you can still use the `audience` attribute as well instead. The plugin
-prefers `client_id` over `audience` if both are configured.
+If both are configured, `client_id` is preferred.
-The plugin always needs the `client_id` or `audience` to specify the context in which Keycloak
-should evaluate permissions.
+If the `lazy_load_paths` attribute is set to true, then the Plugin additionally needs to obtain an access token for itself from Keycloak. In such cases, if the client access to Keycloak is confidential, you need to configure the `client_secret` attribute.
-If `lazy_load_paths` is `true` then the plugin additionally needs to obtain an access token for
-itself from Keycloak. In this case, if the client access to Keycloak is confidential, the plugin
-needs the `client_secret` attribute as well.
+### Policy enforcement mode
-### Policy Enforcement Mode
+The `policy_enforcement_mode` attribute specifies how policies are enforced when processing authorization requests sent to the server.
-Specifies how policies are enforced when processing authorization requests sent to the server.
+#### `ENFORCING` mode
-**Enforcing**
+Requests are denied by default even when there is no policy associated with a resource.
-- (default mode) Requests are denied by default even when there is no policy associated with a given resource.
+The `policy_enforcement_mode` is set to `ENFORCING` by default.
-**Permissive**
+#### `PERMISSIVE` mode
-- Requests are allowed even when there is no policy associated with a given resource.
+Requests are allowed when there is no policy associated with a given resource.
### Permissions
-When handling an incoming request, the plugin can determine the permissions to check with Keycloak either
-statically, or dynamically from properties of the request.
+When handling incoming requests, the Plugin can determine the permissions to check with Keycloak statically or dynamically from the properties of the request.
+
+If the `lazy_load_paths` attribute is set to `false`, the permissions are taken from the `permissions` attribute. Each entry in `permissions` needs to be formatted as expected by the token endpoint's `permission` parameter. See [Obtaining Permissions](https://www.keycloak.org/docs/latest/authorization_services/index.html#_service_obtaining_permissions).
+
+:::note
+
+A valid permission can be a single resource or a resource paired with on or more scopes.
+
+:::
-If `lazy_load_paths` is `false`, the plugin takes the permissions from the `permissions` attribute. Each entry
-needs to be formatted as expected by the token endpoint's `permission` parameter;
-see https://www.keycloak.org/docs/latest/authorization_services/index.html#_service_obtaining_permissions.
-Note that a valid permission can be a single resource, or a resource paired with one or more scopes.
+If the `lazy_load_paths` attribute is set to `true`, the request URI is resolved to one or more resources configured in Keycloak using the resource registration endpoint. The resolved resources are used as the permissions to check.
-if `lazy_load_paths` is `true`, the plugin resolves the request URI to one or more resources, as configured
-in Keycloak. It uses the resource registration endpoint to do so. The plugin uses the resolved resources
-as the permissions to check.
+:::note
-Note that this requires that the plugin can obtain a separate access token for itself from the token endpoint.
-Therefore, in the respective client settings in Keycloak, make sure to set the `Service Accounts Enabled`
-option. Also make sure that the issued access token contains the `resource_access` claim with the
-`uma_protection` role. Otherwise, plugin may be unable to query resources through the Protection API.
+This requires the Plugin to obtain a separate access token for itself from the token endpoint. So, make sure to set the `Service Accounts Enabled` option in the client settings in Keycloak.
-### Automatic Mapping of HTTP Method to Scope
+Also make sure that the issued access token contains the `resource_access` claim with the `uma_protection` role to ensure that the Plugin is able to query resources through the Protection API.
-This option is often used together with `lazy_load_paths`, but can also be used with a static permission list.
+:::
-If the `http_method_as_scope` attribute is set to `true`, the plugin maps the request's HTTP method to a scope
-of the same name. The scope is then added to every permission to check.
+### Automatically mapping HTTP method to scope
-If `lazy_load_paths` is `false`, the plugin adds the mapped scope to any of the static permissions configured
-in the `permissions` attribute, even if they contain one or more scopes already.
+The `http_method_as_scope` is often used together with `lazy_load_paths` but can also be used with a static permission list.
-### Password Grant Token Generation Incoming URI
+If the `http_method_as_scope` attribute is set to `true`, the Plugin maps the request's HTTP method to the scope with the same name. The scope is then added to every permission to check.
-If you want to generate a token using `password` grant, you can set the value of `password_grant_token_generation_incoming_uri`.
+If the `lazy_load_paths` attribute is set to false, the Plugin adds the mapped scope to any of the static permissions configured in the `permissions` attribute—even if they contain on or more scopes already.
-Incoming request URI will be matched with this value and if matched, it will generate a token using `Token Endpoint`.
-It will also check if the request method is `POST`.
+### Generating a token using `password` grant
-You need to pass `application/x-www-form-urlencoded` as `Content-Type` header and `username`, `password` as parameters.
+To generate a token using `password` grant, you can set the value of the `password_grant_token_generation_incoming_uri` attribute.
-**Sample request**
+If the incoming URI matches the configured attribute and the request method is POST, a token is generated using the `token_endpoint`.
-If value of `password_grant_token_generation_incoming_uri` is `/api/token`, you can use following curl request.
+You also need to add `application/x-www-form-urlencoded` as `Content-Type` header and `username` and `password` as parameters.
+
+The example below shows a request if the `password_grant_token_generation_incoming_uri` is `/api/token`:
```shell
curl --location --request POST 'http://127.0.0.1:9080/api/token' \
@@ -144,9 +143,9 @@ curl --location --request POST 'http://127.0.0.1:9080/api/token' \
--data-urlencode 'password=<Password>'
```
-## How To Enable
+## Enabling the Plugin
-Create a `route` and enable the `authz-keycloak` plugin on the route,`${realm}` is the realm name in `keyloak`:
+The example below shows how you can enable the `authz-keycloak` Plugin on a specific Route. `${realm}` represents the realm name in Keycloak.
```shell
curl http://127.0.0.1:9080/apisix/admin/routes/5 -H 'X-API-KEY: edd1c9f034335f136f87ad84b625c8f1' -X PUT -d '
@@ -168,9 +167,11 @@ curl http://127.0.0.1:9080/apisix/admin/routes/5 -H 'X-API-KEY: edd1c9f034335f13
}'
```
-## Test Plugin
+## Example usage
+
+Once you have enabled the Plugin on a Route you can use it.
-Get `{JWT Token}`
+First, you have to get the JWT token from Keycloak:
```shell
curl \
@@ -181,16 +182,27 @@ curl \
"http://<YOUR_KEYCLOAK_HOST>/auth/realms/${realm}/protocol/openid-connect/token"
```
-Request with token
+Now you can make requests with the obtained JWT token:
```shell
curl http://127.0.0.1:9080/get -H 'Authorization: Bearer {JWT Token}'
```
+To learn more about how you can integrate authorization policies into your API workflows you can checkout the unit test [authz-keycloak.t](https://github.com/apache/apisix/blob/master/t/plugin/authz-keycloak.t).
+
+Run the following Docker image and go to `http://localhost:8090` to view the associated policies for the unit tests.
+
+```bash
+docker run -e KEYCLOAK_USER=admin -e KEYCLOAK_PASSWORD=123456 -p 8090:8080 sshniro/keycloak-apisix
+```
+
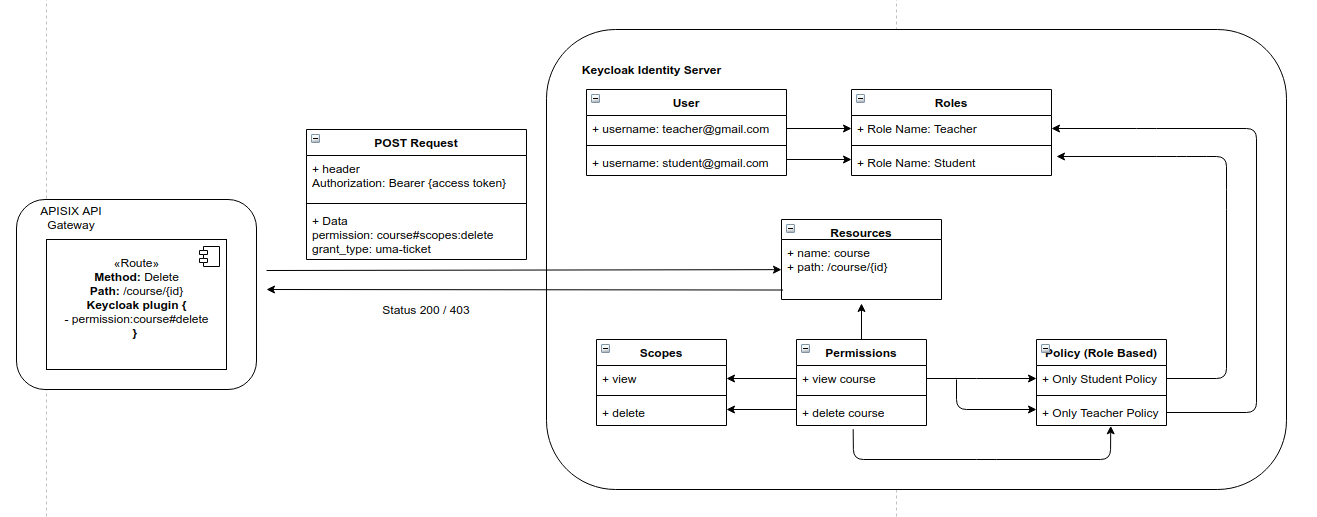
+The image below shows how the policies are configured in the Keycloak server:
+
+
+
## Disable Plugin
-Remove the corresponding json configuration in the plugin configuration to disable the `authz-keycloak`.
-APISIX plugins are hot-reloaded, therefore no need to restart APISIX.
+To disable the `authz-keycloak` Plugin, you can delete the corresponding JSON configuration from the Plugin configuration. APISIX will automatically reload and you do not have to restart for this to take effect.
```shell
curl http://127.0.0.1:9080/apisix/admin/routes/5 -H 'X-API-KEY: edd1c9f034335f136f87ad84b625c8f1' -X PUT -d '
@@ -207,23 +219,8 @@ curl http://127.0.0.1:9080/apisix/admin/routes/5 -H 'X-API-KEY: edd1c9f034335f13
}'
```
-## Examples
-
-Checkout the unit test for of the authz-keycloak.t to understand how the authorization policies can be integrated into your
-API workflows. Run the following docker image and visit `http://localhost:8090` to view the associated policies for the unit tests.
-
-```bash
-docker run -e KEYCLOAK_USER=admin -e KEYCLOAK_PASSWORD=123456 -p 8090:8080 sshniro/keycloak-apisix
-```
-
-The following image shows how the policies are configures in the Keycloak server.
-
-
-
-## Future Development
+## Plugin roadmap
-- Currently the `authz-plugin` requires to define the resource name and required scopes in order to enforce policies for the routes.
-However, Keycloak's official adapters (Java, JS) also provides path matching by querying Keycloak paths dynamically, and
-lazy loading the paths to identity resources. Future version on authz-plugin will support this functionality.
+- Currently, the `authz-keycloak` Plugin requires you to define the resource name and the required scopes to enforce policies for a Route. Keycloak's official adapted (Java, Javascript) provides path matching by querying Keycloak paths dynamically and lazy loading the paths to identity resources. Upcoming releases of the Plugin will support this function.
-- Support to read scope and configurations from the Keycloak JSON File
+- To support reading scope and configurations from the Keycloak JSON file.
diff --git a/docs/en/latest/plugins/basic-auth.md b/docs/en/latest/plugins/basic-auth.md
index 10ccc2cdf..a01b598b9 100644
--- a/docs/en/latest/plugins/basic-auth.md
+++ b/docs/en/latest/plugins/basic-auth.md
@@ -1,5 +1,11 @@
---
title: basic-auth
+keywords:
+ - APISIX
+ - Plugin
+ - Basic Auth
+ - basic-auth
+description: This document contains information about the Apache APISIX basic-auth Plugin.
---
<!--
@@ -23,30 +29,28 @@ title: basic-auth
## Description
-`basic-auth` is an authentication plugin that need to work with `consumer`. Add Basic Authentication to a `service` or `route`.
+The `basic-auth` Plugin is used to add [basic access authentication](https://en.wikipedia.org/wiki/Basic_access_authentication) to a Route or a Service.
-The `consumer` then adds its key to the request header to verify its request.
-
-For more information on Basic authentication, refer to [Wiki](https://en.wikipedia.org/wiki/Basic_access_authentication) for more information.
+This works well with a [Consumer](../architecture-design/consumer.md). Consumers of the API can then add their key to the header to authenticate their requests.
## Attributes
-For consumer side:
+For Consumer:
-| Name | Type | Requirement | Default | Valid | Description |
-| -------- | ------ | ----------- | ------- | ----- | ---------------------------------------------------------------------------------------------------------------------------------------------------------------- |
-| username | string | required | | | Different `consumer` should have different value which is unique. When different `consumer` use a same `username`, a request matching exception would be raised. |
-| password | string | required | | | the user's password |
+| Name | Type | Required | Description |
+|----------|--------|----------|------------------------------------------------------------------------------------------------------------------------|
+| username | string | True | Unique username for a Consumer. If multiple Consumers use the same `username`, a request matching exception is raised. |
+| password | string | True | Password of the user. |
-For route side:
+For Route:
-| Name | Type | Requirement | Default | Valid | Description |
-| -------- | ------ | ----------- | ------- | ----- | ---------------------------------------------------------------------------------------------------------------------------------------------------------------- |
-| hide_credentials | boolean | optional | false | | Whether to pass the Authorization request headers to the upstream. |
+| Name | Type | Required | Default | Description |
+|------------------|---------|----------|---------|------------------------------------------------------------------------|
+| hide_credentials | boolean | False | false | Set to true to pass the authorization request headers to the Upstream. |
-## How To Enable
+## Enabling the Plugin
-### 1. set a consumer and config the value of the `basic-auth` option
+To enable the Plugin, you have to create a Consumer object with the authentication configuration:
```shell
curl http://127.0.0.1:9080/apisix/admin/consumers -H 'X-API-KEY: edd1c9f034335f136f87ad84b625c8f1' -X PUT -d '
@@ -61,15 +65,15 @@ curl http://127.0.0.1:9080/apisix/admin/consumers -H 'X-API-KEY: edd1c9f034335f1
}'
```
-you also can add a Consumer through the web console:
-
-
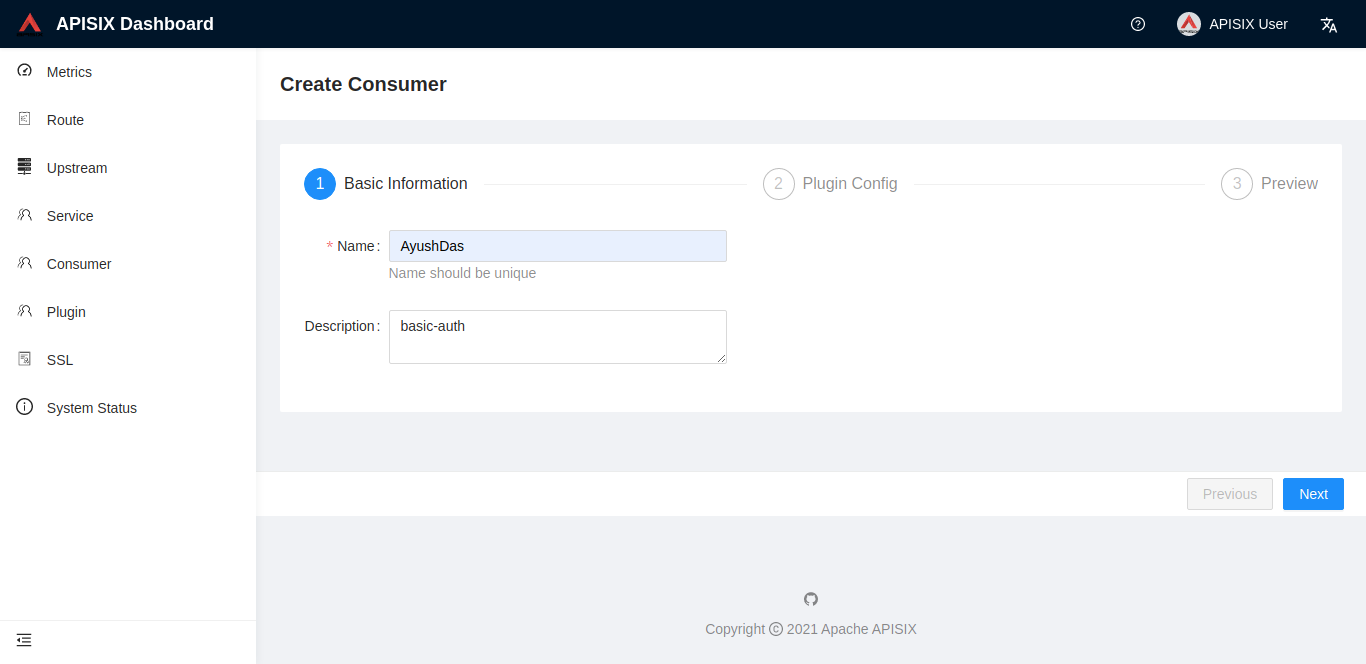
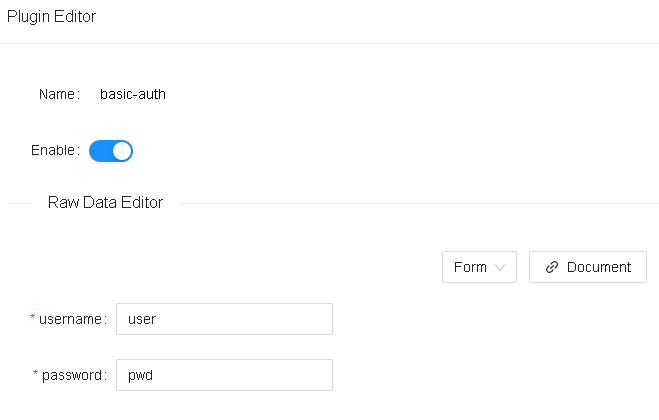
+You can also use the [APISIX Dashboard](/docs/dashboard/USER_GUIDE) to complete the operation through a web UI.
-then add basic-auth plugin in the Consumer page:
+<!--
+
-
+
+-->
-### 2. add a Route or add a Service, and enable the `basic-auth` plugin
+Once you have created a Consumer object, you can then configure a Route or a Service to authenticate requests:
```shell
curl http://127.0.0.1:9080/apisix/admin/routes/1 -H 'X-API-KEY: edd1c9f034335f136f87ad84b625c8f1' -X PUT -d '
@@ -88,52 +92,42 @@ curl http://127.0.0.1:9080/apisix/admin/routes/1 -H 'X-API-KEY: edd1c9f034335f13
}'
```
-## Test Plugin
+## Example usage
-- missing Authorization header
+After you have configured the Plugin as mentioned above, you can make a request to the Route as shown below:
```shell
-$ curl -i http://127.0.0.1:9080/hello
-HTTP/1.1 401 Unauthorized
-...
-{"message":"Missing authorization in request"}
+curl -i -ufoo:bar http://127.0.0.1:9080/hello
```
-- user is not exists:
-
-```shell
-$ curl -i -ubar:bar http://127.0.0.1:9080/hello
-HTTP/1.1 401 Unauthorized
+```
+HTTP/1.1 200 OK
...
-{"message":"Invalid user authorization"}
+hello, world
```
-- password is invalid:
+If the request is not authorized, an error will be thrown:
```shell
-$ curl -i -ufoo:foo http://127.0.0.1:9080/hello
HTTP/1.1 401 Unauthorized
...
-{"message":"Invalid user authorization"}
+{"message":"Missing authorization in request"}
```
-- success:
+And if the user or password is not valid:
```shell
-$ curl -i -ufoo:bar http://127.0.0.1:9080/hello
-HTTP/1.1 200 OK
+HTTP/1.1 401 Unauthorized
...
-hello, world
+{"message":"Invalid user authorization"}
```
## Disable Plugin
-When you want to disable the `basic-auth` plugin, it is very simple,
-you can delete the corresponding json configuration in the plugin configuration,
-no need to restart the service, it will take effect immediately:
+To disable the `jwt-auth` Plugin, you can delete the corresponding JSON configuration from the Plugin configuration. APISIX will automatically reload and you do not have to restart for this to take effect.
```shell
-$ curl http://127.0.0.1:9080/apisix/admin/routes/1 -X PUT -d '
+curl http://127.0.0.1:9080/apisix/admin/routes/1 -X PUT -d '
{
"methods": ["GET"],
"uri": "/hello",
diff --git a/docs/en/latest/plugins/forward-auth.md b/docs/en/latest/plugins/forward-auth.md
index f7426642b..7aa928ce4 100644
--- a/docs/en/latest/plugins/forward-auth.md
+++ b/docs/en/latest/plugins/forward-auth.md
@@ -1,5 +1,11 @@
---
title: forward-auth
+keywords:
+ - APISIX
+ - Plugin
+ - Forward Authentication
+ - forward-auth
+description: This document contains information about the Apache APISIX forward-auth Plugin.
---
<!--
@@ -23,36 +29,36 @@ title: forward-auth
## Description
-The `forward-auth` plugin implements a classic external authentication model. We can implement a custom error return or user redirection to the authentication page if the authentication fails.
+The `forward-auth` Plugin implements a classic external authentication model. When authentication fails, you can have a custom error message or redirect the user to an authentication page.
-Forward Auth cleverly moves the authentication and authorization logic to a dedicated external service, where the gateway forwards the user's request to the authentication service and blocks the original request, and replaces the result when the authentication service responds with a non-2xx status.
+This Plugin moves the authentication and authorization logic to a dedicated external service. APISIX forwards the user's requests to the external service, blocks the original request, and replaces the result when the external service responds with a non 2xx status code.
## Attributes
-| Name | Type | Requirement | Default | Valid | Description |
-| -- | -- | -- | -- | -- | -- |
-| uri | string | required | | | Authorization service uri (eg. https://localhost/auth) |
-| ssl_verify | boolean | optional | true | | Whether to verify the certificate |
-| request_method | string | optional | GET | ["GET","POST"] | The method for `client` to request the `authorization` service. When it is `POST`, the request body will be send to the `authorization` service. |
-| request_headers | array[string] | optional | | | `client` request header that will be sent to the `authorization` service. When it is not set, no `client` request headers are sent to the `authorization` service, except for those provided by APISIX (X-Forwarded-XXX). |
-| upstream_headers | array[string] | optional | | | `authorization` service response header that will be sent to the `upstream`. When it is not set, will not forward the `authorization` service response header to the `upstream`. |
-| client_headers | array[string] | optional | | | `authorization` response header that will be sent to the `client` when authorize failure. When it is not set, will not forward the `authorization` service response header to the `client`. |
-| timeout | integer | optional | 3000ms | [1, 60000]ms | Authorization service HTTP call timeout |
-| keepalive | boolean | optional | true | | HTTP keepalive |
-| keepalive_timeout | integer | optional | 60000ms | [1000, ...]ms | keepalive idle timeout |
-| keepalive_pool | integer | optional | 5 | [1, ...]ms | Connection pool limit |
-
-## Data Definition
-
-The request headers in the following list will have APISIX generated and sent to the `authorization` service.
-
-| Scheme | HTTP Method | Host | URI | Source IP |
-| -- | -- | -- | -- | -- |
+| Name | Type | Required | Default | Valid values | Description |
+| ----------------- | ------------- | -------- | ------- | -------------- | ---------------------------------------------------------------------------------------------------------------------------------------------------------- |
+| uri | string | True | | | URI of the authorization service. |
+| ssl_verify | boolean | False | true | | When set to `true`, verifies the SSL certificate. |
+| request_method | string | False | GET | ["GET","POST"] | HTTP method for a client to send requests to the authorization service. When set to `POST` the request body is send to the authorization service. |
+| request_headers | array[string] | False | | | Client request headers to be sent to the authorization service. If not set, only the headers provided by APISIX are sent (for example, `X-Forwarded-XXX`). |
+| upstream_headers | array[string] | False | | | Authorization service response headers to be forwarded to the Upstream. If not set, no headers are forwarded to the Upstream service. |
+| client_headers | array[string] | False | | | Authorization service response headers to be sent to the client when authorization fails. If not set, no headers will be sent to the client. |
+| timeout | integer | False | 3000ms | [1, 60000]ms | Timeout for the authorization service HTTP call. |
+| keepalive | boolean | False | true | | When set to `true`, keeps the connection alive for multiple requests. |
+| keepalive_timeout | integer | False | 60000ms | [1000, ...]ms | Idle time after which the connection is closed. |
+| keepalive_pool | integer | False | 5 | [1, ...]ms | Connection pool limit. |
+
+## Data definition
+
+APISIX will generate and the send the request headers listed below to the authorization service:
+
+| Scheme | HTTP Method | Host | URI | Source IP |
+| ----------------- | ------------------ | ---------------- | --------------- | --------------- |
| X-Forwarded-Proto | X-Forwarded-Method | X-Forwarded-Host | X-Forwarded-Uri | X-Forwarded-For |
-## Example
+## Example usage
-First, you need to setup an external authorization service. Here is an example of using Apache APISIX's serverless plugin to mock.
+First, you need to setup your external authorization service. The example below uses Apache APISIX's [serverless](./serverless.md) Plugin to mock the service:
```shell
curl -X PUT 'http://127.0.0.1:9080/apisix/admin/routes/auth' \
@@ -82,7 +88,7 @@ curl -X PUT 'http://127.0.0.1:9080/apisix/admin/routes/auth' \
}'
```
-Next, we create a route for testing.
+Now you can configure the `forward-auth` Plugin to a specific Route:
```shell
curl -X PUT 'http://127.0.0.1:9080/apisix/admin/routes/1' \
@@ -106,9 +112,7 @@ curl -X PUT 'http://127.0.0.1:9080/apisix/admin/routes/1' \
}'
```
-We can perform the following three tests.
-
-1. **request_headers** Send Authorization header from `client` to `authorization` service
+Now if we send the authorization details in the request header:
```shell
curl http://127.0.0.1:9080/headers -H 'Authorization: 123'
@@ -123,7 +127,7 @@ curl http://127.0.0.1:9080/headers -H 'Authorization: 123'
}
```
-2. **upstream_headers** Send `authorization` service response header to the `upstream`
+The authorization service response can also be forwarded to the Upstream:
```shell
curl http://127.0.0.1:9080/headers -H 'Authorization: 321'
@@ -139,7 +143,7 @@ curl http://127.0.0.1:9080/headers -H 'Authorization: 321'
}
```
-3. **client_headers** Send `authorization` service response header to `client` when authorizing failed
+When authorization fails, the authorization service can send custom response back to the user:
```shell
curl -i http://127.0.0.1:9080/headers
@@ -150,4 +154,21 @@ HTTP/1.1 403 Forbidden
Location: http://example.com/auth
```
-Finally, you can disable the `forward-auth` plugin by removing it from the route.
+## Disable Plugin
+
+To disable the `forward-auth` Plugin, you can delete the corresponding JSON configuration from the Plugin configuration. APISIX will automatically reload and you do not have to restart for this to take effect.
+
+```shell
+curl http://127.0.0.1:2379/apisix/admin/routes/1 -X PUT -d value='
+{
+ "methods": ["GET"],
+ "uri": "/hello",
+ "plugins": {},
+ "upstream": {
+ "type": "roundrobin",
+ "nodes": {
+ "127.0.0.1:1980": 1
+ }
+ }
+}'
+```
diff --git a/docs/en/latest/plugins/hmac-auth.md b/docs/en/latest/plugins/hmac-auth.md
index 268b8a979..4205bbc83 100644
--- a/docs/en/latest/plugins/hmac-auth.md
+++ b/docs/en/latest/plugins/hmac-auth.md
@@ -1,5 +1,11 @@
---
title: hmac-auth
+keywords:
+ - APISIX
+ - Plugin
+ - HMAC Authentication
+ - hmac-auth
+description: This document contains information about the Apache APISIX hmac-auth Plugin.
---
<!--
@@ -23,27 +29,27 @@ title: hmac-auth
## Description
-`hmac-auth` is an authentication plugin that need to work with `consumer`. Add HMAC Authentication to a `service` or `route`.
+The `hmac-auth` Plugin adds [HMAC authentication](https://en.wikipedia.org/wiki/HMAC) to a Route or a Service.
-The `consumer` then adds its key to request header to verify its request.
+This Plugin works with a [Consumer](../terminology/consumer.md) object and a consumer of your API has to add its key to the request header for verification.
## Attributes
-| Name | Type | Requirement | Default | Valid | Description |
-| ----------------- | ------------- | ----------- | ------------- | ------------------------------------------- | ----------------------------------------------------------------------------------------------------------------------------------------------------------------------------------------------------------------------------------------------------------------------------- |
-| access_key | string | required | | | Different `consumer` objects should have different values, and it should be unique. If different consumers use the same `access_key`, a request matching exception will occur. |
-| secret_key | string | required | | | Use as a pair with `access_key`. |
-| algorithm | string | optional | "hmac-sha256" | ["hmac-sha1", "hmac-sha256", "hmac-sha512"] | Encryption algorithm. |
-| clock_skew | integer | optional | 0 | | The clock skew allowed by the signature in seconds. For example, if the time is allowed to skew by 10 seconds, then it should be set to `10`. especially, `0` means not checking `Date` |
-| signed_headers | array[string] | optional | | | Restrict the headers that are added to the encrypted calculation. After the specified, the client request can only specify the headers within this range. When this item is empty, all the headers specified by the client request will be added to the encrypted calculation |
-| keep_headers | boolean | optional | false | [ true, false ] | Whether it is necessary to keep the request headers of `X-HMAC-SIGNATURE`, `X-HMAC-ALGORITHM` and `X-HMAC-SIGNED-HEADERS` in the http request after successful authentication. true: means to keep the http request header, false: means to remove the http request header. |
-| encode_uri_params | boolean | optional | true | [ true, false ] | Whether to encode the uri parameter in the signature, for example: `params1=hello%2Cworld` is encoded, `params2=hello,world` is not encoded. true: means to encode the uri parameter in the signature, false: not to encode the uri parameter in the signature. |
-| validate_request_body | boolean | optional | false | [ true, false ] | Whether to check request body. |
-| max_req_body | integer | optional | 512 * 1024 | | Max allowed body size. |
+| Name | Type | Required | Default | Valid values | Description |
+|-----------------------|---------------|----------|---------------|---------------------------------------------|-----------------------------------------------------------------------------------------------------------------------------------------------------------------------------------------------------------|
+| access_key | string | True | | | Unique key of a Consumer. If different Consumers have the same key, a request matching exception will occur. |
+| secret_key | string | True | | | Used in pair with `access_key`. |
+| algorithm | string | False | "hmac-sha256" | ["hmac-sha1", "hmac-sha256", "hmac-sha512"] | Encryption algorithm used. |
+| clock_skew | integer | False | 0 | | Clock skew allowed by the signature in seconds. Setting it to `0` will skip checking the date. |
+| signed_headers | array[string] | False | | | List of headers to be used in the encryption algorithm. If specified, the client request can only contain the specified headers. When unspecified, all the headers are used in the encryption algorithm. |
+| keep_headers | boolean | False | false | [ true, false ] | When set to `true`, keeps the request headers `X-HMAC-SIGNATURE`, `X-HMAC-ALGORITHM` and `X-HMAC-SIGNED-HEADERS` in the HTTP request after successful authentication. Otherwise, the headers are removed. |
+| encode_uri_params | boolean | False | true | [ true, false ] | When set to `true` encodes the URI parameters. For example, `params1=hello%2Cworld` is encoded whereas, `params2=hello,world` is not. |
+| validate_request_body | boolean | False | false | [ true, false ] | When set to `true`, validates the request body. |
+| max_req_body | integer | False | 512 * 1024 | | Max size of the request body to allow. |
-## How To Enable
+## Enabling the Plugin
-1. set a consumer and config the value of the `hmac-auth` option
+First we enable the Plugin on a Consumer object as shown below:
```shell
curl http://127.0.0.1:9080/apisix/admin/consumers -H 'X-API-KEY: edd1c9f034335f136f87ad84b625c8f1' -X PUT -d '
@@ -60,15 +66,15 @@ curl http://127.0.0.1:9080/apisix/admin/consumers -H 'X-API-KEY: edd1c9f034335f1
}'
```
-The default `keep_headers` is false and `encode_uri_params` is true.
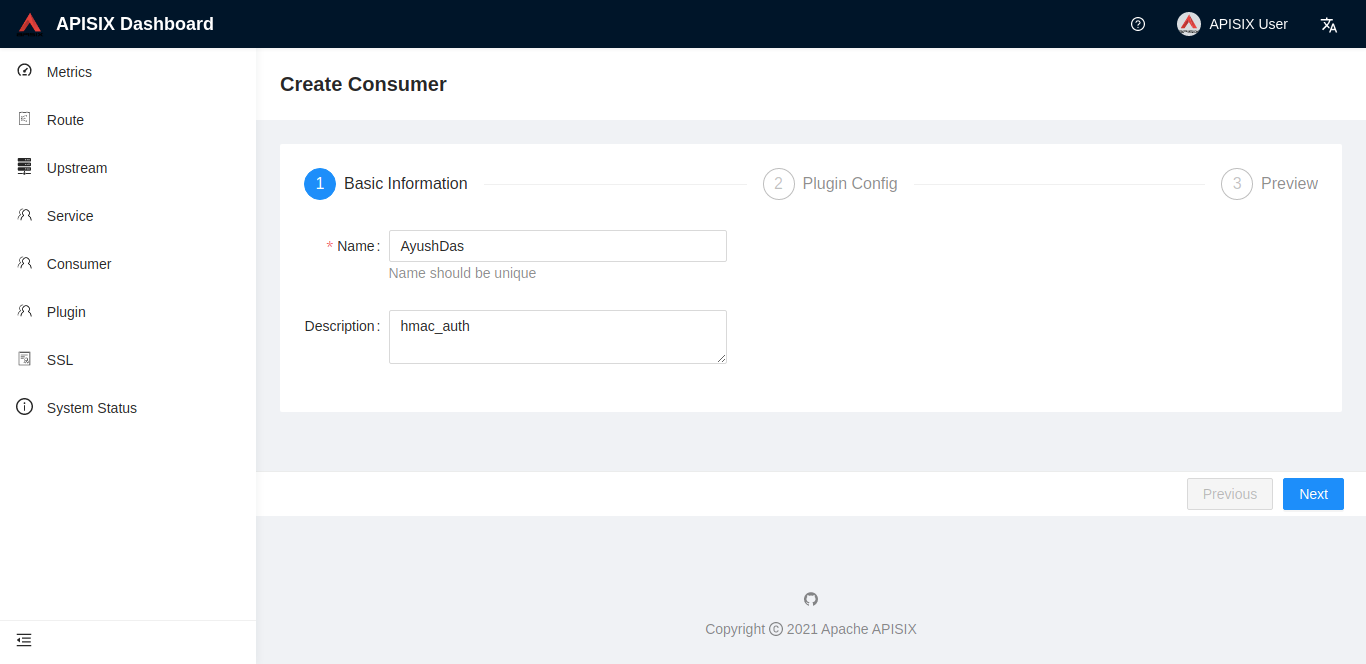
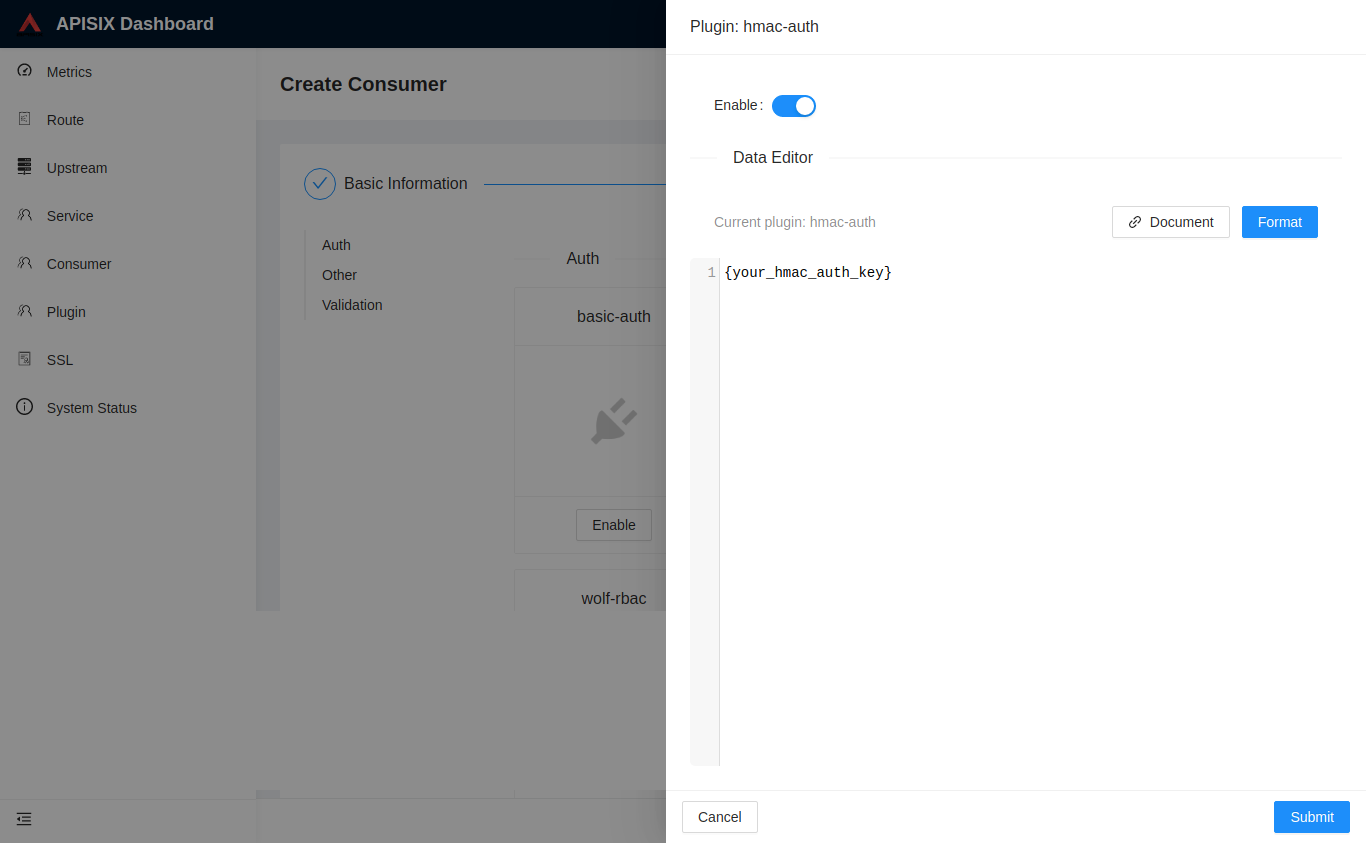
+You can also use the [APISIX Dashboard](/docs/dashboard/USER_GUIDE) to complete the operation through a web UI.
-You can visit the dashboard to complete the above operations through the web interface, first add a consumer:
-
+<!--
+
-Then add the hmac-auth plugin to the consumer page:
-
+
+-->
-2. add a Route or add a Service, and enable the `hmac-auth` plugin
+Next, you can configure the Plugin to a Route or a Service:
```shell
curl http://127.0.0.1:9080/apisix/admin/routes/1 -H 'X-API-KEY: edd1c9f034335f136f87ad84b625c8f1' -X PUT -d '
@@ -86,38 +92,37 @@ curl http://127.0.0.1:9080/apisix/admin/routes/1 -H 'X-API-KEY: edd1c9f034335f13
}'
```
-## Test Plugin
+## Example usage
+
+### Generating the signature
-### generate signature:
+The formula for calculating the signature is `signature = HMAC-SHAx-HEX(secret_key, signing_string)`.
-The calculation formula of the signature is `signature = HMAC-SHAx-HEX(secret_key, signing_string)`. From the formula, it can be seen that in order to obtain the signature, two parameters, `SECRET_KEY` and `signing_STRING`, are required. Where secret_key is configured by the corresponding consumer, the calculation formula of `signing_string` is `signing_string = HTTP Method + \n + HTTP URI + \n + canonical_query_string + \n + access_key + \n + Date + \n + signed_headers_string`. If one o [...]
+In order to generate the signature, two parameters, `secret_key` and `signing_string` are required. The `secret_key` is configured by a Consumer and the `signing_string` is calculated as `signing_string = HTTP Method + \n + HTTP URI + \n + canonical_query_string + \n + access_key + \n + Date + \n + signed_headers_string`. If any of the terms are missing, they are replaced by an empty string. The different terms in this calculation are explained below:
-1. **HTTP Method** : Refers to the GET, PUT, POST and other request methods defined in the HTTP protocol, and must be in all uppercase.
-2. **HTTP URI** : `HTTP URI` requirements must start with "/", those that do not start with "/" need to be added, and the empty path is "/".
-3. **Date** : Date in http header(GMT format).
-4. **canonical_query_string** :`canonical_query_string` is the result of encoding the `query` in the URL (`query` is the string "key1 = valve1 & key2 = valve2" after the "?" in the URL).
-5. **signed_headers_string** :`signed_headers_string` is the result of obtaining the fields specified by the client from the request header and concatenating the strings in order.
+- **HTTP Method** : HTTP request method in uppercase. For example, GET, PUT, POST etc.
+- **HTTP URI** : HTTP URI. Should start with "/" and "/" denotes an empty path.
+- **Date** : Date in the HTTP header in GMT format.
+- **canonical_query_string** : The result of encoding the query string in the URL (the string "key1 = value1 & key2 = value2" after the "?" in the URL).
+- **signed_headers_string** : Concatenation of the specified request headers.
-> The coding steps of canonical_query_string are as follows:
+The algorithm for generating `canonical_query_string` is described below:
-* Extract the `query` item in the URL, that is, the string "key1 = valve1 & key2 = valve2" after the "?" in the URL.
-* Split the `query` into several items according to the & separator, each item is in the form of key=value or only key.
-* According to whether the uri parameter is encoded, there are two situations:
-* When `encode_uri_params` is true:
- * Encoding each item after disassembly is divided into the following two situations.
- * When the item has only key, the conversion formula is uri_encode(key) + "=".
- * When the item is in the form of key=value, the conversion formula is in the form of uri_encode(key) + "=" + uri_encode(value). Here value can be an empty string.
- * After converting each item, sort by key in lexicographic order (ASCII code from small to large), and connect them with the & symbol to generate the corresponding canonical_query_string.
-* When `encode_uri_params` is false:
- * Encoding each item after disassembly is divided into the following two situations.
- * When the item has only key, the conversion formula is key + "=".
- * When the item is in the form of key=value, the conversion formula is in the form of key + "=" + value. Here value can be an empty string.
- * After converting each item, sort by key in lexicographic order (ASCII code from small to large), and connect them with the & symbol to generate the corresponding canonical_query_string.
+1. Extract the query terms from the URL.
+2. Split the query terms into key-value pairs by using `&` as the separator.
+3. If `encode_uri_params` is `true`:
+ 1. If there are only keys, the conversion formula is `uri_encode(key) + "="`.
+ 2. If there are both keys and values, the conversion formula is `uri_encode(key) + "=" + uri_encode(value)`. Here, the value can even be an empty string.
+ 3. Sort by key in lexicographic order and connect them with & symbol to generate the corresponding `canonical_query_string`.
+4. If `encode_uri_params` is `false`:
+ 1. If there are only keys, the conversion formula is `key + "="`.
+ 2. If there are both keys and values, the conversion formula is `key + "=" + value`. Here, the value can even be an empty string.
+ 3. Sort by key in lexicographic order and connect them with & symbol to generate the corresponding `canonical_query_string`.
-> The signed_headers_string generation steps are as follows:
+And the algorithm for generating the `signed_headers_string` is as follows:
-* Obtain the headers specified to be added to the calculation from the request header. For details, please refer to the placement of `SIGNED_HEADERS` in the next section `Use the generated signature to make a request attempt`.
-* Take out the headers specified by `SIGNED_HEADERS` in order from the request header, and splice them together in order of `name:value`. After splicing, a `signed_headers_string` is generated.
+1. Obtain the specified headers to add to the calculation from the request header.
+2. Splice the specified headers in `name:value` format. This is the `signed_headers_string`.
```plain
HeaderKey1 + ":" + HeaderValue1 + "\n"\+
@@ -126,18 +131,16 @@ HeaderKey2 + ":" + HeaderValue2 + "\n"\+
HeaderKeyN + ":" + HeaderValueN + "\n"
```
-**Signature string splicing example**
-
-Take the following request as an example:
+The example below shows signature string splicing:
```shell
-$ curl -i http://127.0.0.1:9080/index.html?name=james&age=36 \
+curl -i http://127.0.0.1:9080/index.html?name=james&age=36 \
-H "X-HMAC-SIGNED-HEADERS: User-Agent;x-custom-a" \
-H "x-custom-a: test" \
-H "User-Agent: curl/7.29.0"
```
-The `signing_string` generated according to the `signature generation formula` is:
+The `signing_string` generated according to the algorithm above is:
```plain
"GET
@@ -150,11 +153,9 @@ x-custom-a:test
"
```
-Note: The last request header also needs + `\n`.
-
-**Generate Signature**
+The last request header also needs + `\n`.
-Use Python to generate the signature `SIGNATURE`:
+The Python code below shows how to generate the signature:
```python
import base64
@@ -181,22 +182,30 @@ print(base64.b64encode(hash.digest()))
| --------- | -------------------------------------------- |
| SIGNATURE | 8XV1GB7Tq23OJcoz6wjqTs4ZLxr9DiLoY4PxzScWGYg= |
-### Request body checking
+You can also refer to [Generating HMAC signatures](../examples/plugins-hmac-auth-generate-signature.md) for how to generate signatures for different programming languages.
-When `validate_request_body` is assigned to `true`, the plugin will check the request body. The plugin will calculate the hmac-sha value of the request body,and check against the `X-HMAC-DIGEST` header.
+### Validating request body
+
+When the `validate_request_body` attribute is set to `true`, the Plugin will calculate the HMAC-SHA value of the request body and checks it again the `X-HMAC-DIGEST` header:
```
X-HMAC-DIGEST: base64(hmac-sha(<body>))
```
-When there is no request body, you can set `X-HMAC-DIGEST` value to the hmac-sha of empty string.
+If there is no request body, you can set the `X-HMAC-DIGEST` value to the HMAC-SHA of an empty string.
+
+:::note
+
+To calculate the digest of the request body, the Plugin will load the body to memory which can cause high memory consumption if the body is large. To avoid this, you can limit the max allowed body size by configuring `max_req_body` (default 512KB). Request bodies larger than the set size will be rejected.
-**Note:** The plugin will load the request body to memory to calculate the digest of the request body, which might cause high memory consumption with large bodies. You can limit the max allowed body size by the configuration of `max_req_body`(default=512KB), request body larger than that will be rejected.
+:::
-### Use the generated signature to try the request
+### Using the generated signature to make requests
+
+You can now use the generated signature to make requests as shown below:
```shell
-$ curl -i "http://127.0.0.1:9080/index.html?name=james&age=36" \
+curl -i "http://127.0.0.1:9080/index.html?name=james&age=36" \
-H "X-HMAC-SIGNATURE: 8XV1GB7Tq23OJcoz6wjqTs4ZLxr9DiLoY4PxzScWGYg=" \
-H "X-HMAC-ALGORITHM: hmac-sha256" \
-H "X-HMAC-ACCESS-KEY: user-key" \
@@ -204,7 +213,9 @@ $ curl -i "http://127.0.0.1:9080/index.html?name=james&age=36" \
-H "X-HMAC-SIGNED-HEADERS: User-Agent;x-custom-a" \
-H "x-custom-a: test" \
-H "User-Agent: curl/7.29.0"
+```
+```shell
HTTP/1.1 200 OK
Content-Type: text/html; charset=utf-8
Transfer-Encoding: chunked
@@ -214,12 +225,13 @@ Server: APISIX/2.2
......
```
-**Below are two assembly forms of signature information**
+The signature can be put in the `Authorization` header of the request:
-* The signature information is put together in the request header `Authorization` field:
+```shell
+curl http://127.0.0.1:9080/index.html -H 'Authorization: hmac-auth-v1# + ACCESS_KEY + # + base64_encode(SIGNATURE) + # + ALGORITHM + # + DATE + # + SIGNED_HEADERS' -i
+```
```shell
-$ curl http://127.0.0.1:9080/index.html -H 'Authorization: hmac-auth-v1# + ACCESS_KEY + # + base64_encode(SIGNATURE) + # + ALGORITHM + # + DATE + # + SIGNED_HEADERS' -i
HTTP/1.1 200 OK
Content-Type: text/html
Content-Length: 13175
@@ -231,10 +243,13 @@ Accept-Ranges: bytes
...
```
-* The signature information is separately placed in the request header:
+Or, the signature can be placed separately in another request header:
+
+```shell
+curl http://127.0.0.1:9080/index.html -H 'X-HMAC-SIGNATURE: base64_encode(SIGNATURE)' -H 'X-HMAC-ALGORITHM: ALGORITHM' -H 'Date: DATE' -H 'X-HMAC-ACCESS-KEY: ACCESS_KEY' -H 'X-HMAC-SIGNED-HEADERS: SIGNED_HEADERS' -i
+```
```shell
-$ curl http://127.0.0.1:9080/index.html -H 'X-HMAC-SIGNATURE: base64_encode(SIGNATURE)' -H 'X-HMAC-ALGORITHM: ALGORITHM' -H 'Date: DATE' -H 'X-HMAC-ACCESS-KEY: ACCESS_KEY' -H 'X-HMAC-SIGNED-HEADERS: SIGNED_HEADERS' -i
HTTP/1.1 200 OK
Content-Type: text/html
Content-Length: 13175
@@ -245,15 +260,16 @@ Accept-Ranges: bytes
<html lang="cn">
```
-**Note:**
+:::note
+
+1. If there are multiple signed headers, they must be separated by `;`. For example, `x-custom-header-a;x-custom-header-b`.
+2. `SIGNATURE` needs to be base64 encoded for encryption.
-1. **ACCESS_KEY, SIGNATURE, ALGORITHM, DATE, SIGNED_HEADERS respectively represent the corresponding variables**
-2. **SIGNED_HEADERS is the headers specified by the client to join the encryption calculation. If there are multiple headers, they must be separated by ";": `x-custom-header-a;x-custom-header-b`**
-3. **SIGNATURE needs to use base64 for encryption: `base64_encode(SIGNATURE)`**
+:::
-## Custom header key
+### Using custom header keys
-We can customize header key for auth parameters by adding the attribute configuration of the plugin under `plugin_attr` in `conf / config.yaml`.
+You can use custom header keys for the auth parameters by changing the `plugin_attr` in your configuration file (`conf/config.yaml`):
```yaml
plugin_attr:
@@ -266,10 +282,19 @@ plugin_attr:
body_digest_key: X-APISIX-HMAC-BODY-DIGEST
```
-**After customizing the header, request example:**
+Now you can use the new keys while making a request:
+
+```shell
+curl http://127.0.0.1:9080/index.html \
+-H 'X-APISIX-HMAC-SIGNATURE: base64_encode(SIGNATURE)' \
+-H 'X-APISIX-HMAC-ALGORITHM: ALGORITHM' \
+-H 'X-APISIX-DATE: DATE' \
+-H 'X-APISIX-HMAC-ACCESS-KEY: ACCESS_KEY' \
+-H 'X-APISIX-HMAC-SIGNED-HEADERS: SIGNED_HEADERS' \
+-H 'X-APISIX-HMAC-BODY-DIGEST: BODY_DIGEST' -i
+```
```shell
-$ curl http://127.0.0.1:9080/index.html -H 'X-APISIX-HMAC-SIGNATURE: base64_encode(SIGNATURE)' -H 'X-APISIX-HMAC-ALGORITHM: ALGORITHM' -H 'X-APISIX-DATE: DATE' -H 'X-APISIX-HMAC-ACCESS-KEY: ACCESS_KEY' -H 'X-APISIX-HMAC-SIGNED-HEADERS: SIGNED_HEADERS' -H 'X-APISIX-HMAC-BODY-DIGEST: BODY_DIGEST' -i
HTTP/1.1 200 OK
Content-Type: text/html
Content-Length: 13175
@@ -280,37 +305,12 @@ Accept-Ranges: bytes
<html lang="cn">
```
-### Enable request body checking
-
-```shell
-$ curl -X "POST" "http://localhost:9080/index.html?age=36&name=james" \
- -H 'X-HMAC-ACCESS-KEY: my-access-key' \
- -H 'X-HMAC-SIGNATURE: lSWO4vcyVoZG5bn8miHudzABAeJQd8tqEHyM7RsjeiU=' \
- -H 'X-HMAC-ALGORITHM: hmac-sha256' \
- -H 'Date: Tue, 24 Aug 2021 03:19:21 GMT' \
- -H 'X-HMAC-SIGNED-HEADERS: User-Agent;X-HMAC-DIGEST' \
- -H 'User-Agent: curl/7.29.0' \
- -H 'X-HMAC-DIGEST: L9b/+QMvhvnoUlSw5vq+kHPqnZiHGl61T8oavMVTaC4=' \
- -H 'Content-Type: text/plain; charset=utf-8' \
- -d "{\"hello\":\"world\"}"
-
-HTTP/1.1 200 OK
-Content-Type: text/html; charset=utf-8
-Transfer-Encoding: chunked
-Connection: keep-alive
-Date: Tue, 14 Sep 2021 03:28:14 GMT
-Server: APISIX/2.9
-...
-```
-
## Disable Plugin
-When you want to disable the `hmac-auth` plugin, it is very simple,
-you can delete the corresponding json configuration in the plugin configuration,
-no need to restart the service, it will take effect immediately:
+To disable the `hmac-auth` Plugin, you can delete the corresponding JSON configuration from the Plugin configuration. APISIX will automatically reload and you do not have to restart for this to take effect.
```shell
-$ curl http://127.0.0.1:9080/apisix/admin/routes/1 -H 'X-API-KEY: edd1c9f034335f136f87ad84b625c8f1' -X PUT -d '
+curl http://127.0.0.1:9080/apisix/admin/routes/1 -H 'X-API-KEY: edd1c9f034335f136f87ad84b625c8f1' -X PUT -d '
{
"uri": "/index.html",
"plugins": {},
@@ -322,24 +322,3 @@ $ curl http://127.0.0.1:9080/apisix/admin/routes/1 -H 'X-API-KEY: edd1c9f034335f
}
}'
```
-
-## Generate Signature Examples
-
-Take HMAC SHA256 as an example to introduce the signature generation examples in different languages.
-Need to pay attention to the handling of newline characters in signature strings in various languages, which can easily lead to the problem of `{"message":"Invalid signature"}`.
-
-Example inputs:
-
-| Variable | Value |
-| -------- | -------------------------- |
-| secret | the shared secret key here |
-| message | this is signature string |
-
-Example outputs:
-
-| Type | Hash |
-| ------ | ---------------------------------------------------------------- |
-| hexit | ad1b76c7e5054009380edca35d3f36cc5b6f45c82ee02ea3af64197ebddb9345 |
-| base64 | rRt2x+UFQAk4DtyjXT82zFtvRcgu4C6jr2QZfr3bk0U= |
-
-Please refer to [**HMAC Generate Signature Examples**](../examples/plugins-hmac-auth-generate-signature.md)
diff --git a/docs/en/latest/plugins/jwt-auth.md b/docs/en/latest/plugins/jwt-auth.md
index 5f2c6437b..f6591a199 100644
--- a/docs/en/latest/plugins/jwt-auth.md
+++ b/docs/en/latest/plugins/jwt-auth.md
@@ -1,5 +1,11 @@
---
title: jwt-auth
+keywords:
+ - APISIX
+ - Plugin
+ - JWT Auth
+ - jwt-auth
+description: This document contains information about the Apache APISIX jwt-auth Plugin.
---
<!--
@@ -23,47 +29,58 @@ title: jwt-auth
## Description
-`jwt-auth` is an authentication plugin that need to work with `consumer`. Add JWT Authentication to a `service` or `route`.
+The `jwt-auth` Plugin is used to add [JWT](https://jwt.io/) authentication to a [Service](../terminology/service.md) or a [Route](../terminology/route.md).
-The `consumer` then adds its key to the query string parameter, request header, or `cookie` to verify its request.
+A [Consumer](../terminology/consumer.md) of the service then needs to provide a key through a query string, a request header or a cookie to verify its request.
-For more information on JWT, refer to [JWT](https://jwt.io/) for more information.
-
-`jwt-auth` plugin can be integrated with HashiCorp Vault for storing and fetching secrets, RSA key pairs from its encrypted kv engine. See the [examples](#enable-jwt-auth-with-vault-compatibility) below to have an overview of how things work.
+The `jwt-auth` Plugin can be integrated with [HashiCorp Vault](https://www.vaultproject.io/) to store and fetch secrets and RSA keys pairs from its [encrypted KV engine](https://www.vaultproject.io/docs/secrets/kv). Learn more from the [examples](#enable-jwt-auth-with-vault-compatibility) below.
## Attributes
-For consumer side:
+For Consumer:
+
+| Name | Type | Required | Default | Valid values | Description |
+|---------------|---------|-------------------------------------------------------|---------|-----------------------------|---------------------------------------------------------------------------------------------------------------------------------------------------------------------------------------------|
+| key | string | True | | | Unique key for a Consumer. |
+| secret | string | False | | | The encryption key. If unspecified, auto generated in the background. |
+| public_key | string | True if `RS256` is set for the `algorithm` attribute. | | | RSA public key. |
+| private_key | string | True if `RS256` is set for the `algorithm` attribute. | | | RSA private key. |
+| algorithm | string | False | "HS256" | ["HS256", "HS512", "RS256"] | Encryption algorithm. |
+| exp | integer | False | 86400 | [1,...] | Expiry time of the token in seconds. |
+| base64_secret | boolean | False | false | | Set to true if the secret is base64 encoded. |
+| vault | object | False | | | Set to true to use Vault for storing and retrieving secret (secret for HS256/HS512 or public_key and private_key for RS256). By default, the Vault path is `kv/apisix/consumer/<consumer_name>/jwt-auth`. |
+
+:::info IMPORTANT
+
+To enable Vault integration, you have to first update your configuration file (`conf/config.yaml`) with your Vault server configuration, host address and access token.
-| Name | Type | Requirement | Default | Valid | Description |
-|:--------------|:--------|:------------|:--------|:----------------------------|:-------------------------------------------------------------------------------------------------------------------------------------------------|
-| key | string | required | | | different `consumer` have different value, it's unique. different `consumer` use the same `key`, and there will be a request matching exception. |
-| secret | string | optional | | | encryption key. if you do not specify, the value is auto-generated in the background. |
-| public_key | string | optional | | | RSA public key, required when `algorithm` attribute selects `RS256` algorithm. |
-| private_key | string | optional | | | RSA private key, required when `algorithm` attribute selects `RS256` algorithm. |
-| algorithm | string | optional | "HS256" | ["HS256", "HS512", "RS256"] | encryption algorithm. |
-| exp | integer | optional | 86400 | [1,...] | token's expire time, in seconds |
-| base64_secret | boolean | optional | false | | whether secret is base64 encoded |
-| vault | object | optional | | | whether vault to be used for secret (secret for HS256/HS512 or public_key and private_key for RS256) storage and retrieval. The plugin by default uses the vault path as `kv/apisix/consumer/<consumer name>/jwt-auth` for secret retrieval. |
+Refer to the Vault attributes in the default configuration file ([config-default.yaml](https://github.com/apache/apisix/blob/master/conf/config-default.yaml)) to learn more about these configurations.
-**Note**: To enable vault integration, first visit the [config.yaml](https://github.com/apache/apisix/blob/master/conf/config.yaml) update it with your vault server configuration, host address and access token. You can take a look of what APISIX expects from the config.yaml at [config-default.yaml](https://github.com/apache/apisix/blob/master/conf/config-default.yaml) under the vault attributes.
+:::
-For route side:
+For Route:
-| Name | Type | Requirement | Default | Valid | Description |
-| ---- | ------ | ----------- | ------- | ----- | ---------------------------------------------------------------------------- |
-| header | string | optional | authorization | | the header we get the token from |
-| query | string | optional | jwt | | the query string we get the token from, which priority is lower than `header` |
-| cookie | string | optional | jwt | | the cookie we get the token from, which priority is lower than `query` |
+| Name | Type | Required | Default | Description |
+|--------|--------|----------|---------------|---------------------------------------------------------------------|
+| header | string | False | authorization | The header to get the token from. |
+| query | string | False | jwt | The query string to get the token from. Lower priority than header. |
+| cookie | string | False | jwt | The cookie to get the token from. Lower priority than query. |
## API
-This plugin will add `/apisix/plugin/jwt/sign` to sign.
-You may need to use [public-api](public-api.md) plugin to expose it.
+This Plugin adds `/apisix/plugin/jwt/sign` as an endpoint.
+
+:::note
+
+You may need to use the [public-api](public-api.md) plugin to expose this endpoint.
+
+:::
-## How To Enable
+## Enabling the Plugin
-1. set a consumer and config the value of the `jwt-auth` option
+To enable the Plugin, you have to create a Consumer object with the JWT token and configure your Route to use JWT authentication.
+
+First, you can create a Consumer object through the Admin API:
```shell
curl http://127.0.0.1:9080/apisix/admin/consumers -H 'X-API-KEY: edd1c9f034335f136f87ad84b625c8f1' -X PUT -d '
@@ -78,7 +95,9 @@ curl http://127.0.0.1:9080/apisix/admin/consumers -H 'X-API-KEY: edd1c9f034335f1
}'
```
-`jwt-auth` uses the `HS256` algorithm by default, and if you use the `RS256` algorithm, you need to specify the algorithm and configure the public key and private key, as follows:
+:::note
+
+The `jwt-auth` Plugin uses the HS256 algorithm by default. To use the RS256 algorithm, you can configure the public key and private key and specify the algorithm:
```shell
curl http://127.0.0.1:9080/apisix/admin/consumers -H 'X-API-KEY: edd1c9f034335f136f87ad84b625c8f1' -X PUT -d '
@@ -95,7 +114,9 @@ curl http://127.0.0.1:9080/apisix/admin/consumers -H 'X-API-KEY: edd1c9f034335f1
}'
```
-2. add a Route or add a Service, and enable the `jwt-auth` plugin
+:::
+
+Once you have created a Consumer object, you can configure a Route to authenticate requests:
```shell
curl http://127.0.0.1:9080/apisix/admin/routes/1 -H 'X-API-KEY: edd1c9f034335f136f87ad84b625c8f1' -X PUT -d '
@@ -114,15 +135,23 @@ curl http://127.0.0.1:9080/apisix/admin/routes/1 -H 'X-API-KEY: edd1c9f034335f13
}'
```
-### Enable jwt-auth with Vault Compatibility
+### Usage with HashiCorp Vault
+
+[HashiCorp Vault](https://www.vaultproject.io/) offers a centralized key management solution and it can be used along with APISIX for authentication.
+
+So, if your organization frequently changes the secret/keys (secret for HS256/HS512 or public_key and private_key for RS256) and you don't want to update the APISIX consumer each time or if you don't want to use the key through the Admin API (to reduce secret sprawl), you can use Vault and the `jwt-auth` Plugin.
+
+:::note
+
+The current version of Apache APISIX expects the key names of the secrets stored in Vault to be among `secret`, `public_key`, and `private_key`. The former one is for the HS256/HS512 algorithm and the latter two are for the RS256 algorithm.
-Sometimes, it's quite natural in production to have a centralized key management solution like [HashiCorp Vault](https://www.vaultproject.io/) where you don't have to update the APISIX consumer each time some part of your organization changes the signing secret key (secret for HS256/HS512 or public_key and private_key for RS256) and/or for privacy concerns you don't want to use the key through APISIX admin APIs. APISIX got you covered here. The `jwt-auth` is capable of referencing keys f [...]
+Support for custom names will be added in a future release.
-**Note**: For early version of this integration support, the plugin expects the key name of secrets stored into the vault path is among [ `secret`, `public_key`, `private_key` ] to successfully use the key. In future releases, we are going to add the support of referencing custom named keys.
+:::
-To enable vault compatibility, just add the empty vault object inside the jwt-auth plugin.
+To use Vault, you can add an empty vault object in your configuration.
-1. You have stored HS256 signing secret inside vault and you want to use it for jwt signing and verification.
+For example, if you have a stored HS256 signing secret inside Vault, you can use it in APISIX by:
```shell
curl http://127.0.0.1:9080/apisix/admin/consumers -H 'X-API-KEY: edd1c9f034335f136f87ad84b625c8f1' -X PUT -d '
@@ -137,14 +166,24 @@ curl http://127.0.0.1:9080/apisix/admin/consumers -H 'X-API-KEY: edd1c9f034335f1
}'
```
-Here the plugin looks up for key `secret` inside vault path (`<vault.prefix from conf.yaml>/consumer/jack/jwt-auth`) for consumer username `jack` mentioned in the consumer config and uses it for subsequent signing and jwt verification. If the key is not found in the same path, the plugin logs error and fails to perform jwt authentication.
+The Plugin will look for a key "secret" in the provided Vault path (`<vault.prefix>/consumer/jack/jwt-auth`) and uses it for JWT authentication. If the key is not found in the same path, the Plugin logs an error and JWT authentication fails.
-2. RS256 rsa key pairs, both public and private keys are stored into vault.
+:::note
+
+The `vault.prefix` should be set in your configuration file (`conf/config.yaml`) file based on the base path you have chosen while enabling the Vault kv secret engine.
+
+For example, if you did `vault secrets enable -path=foobar kv`, you should use `foobar` in `vault.prefix`.
+
+:::
+
+If the key is not found in this path, the Plugin will log an error.
+
+And for RS256, both the public and private keys should stored in Vault and it can be configured by:
```shell
curl http://127.0.0.1:9080/apisix/admin/consumers -H 'X-API-KEY: edd1c9f034335f136f87ad84b625c8f1' -X PUT -d '
{
- "username": "kowalski",
+ "username": "jack",
"plugins": {
"jwt-auth": {
"key": "rsa-keypair",
@@ -155,9 +194,11 @@ curl http://127.0.0.1:9080/apisix/admin/consumers -H 'X-API-KEY: edd1c9f034335f1
}'
```
-The plugin looks up for `public_key` and `private_key` keys inside vault kv path (`<vault.prefix from conf.yaml>/consumer/kowalski/jwt-auth`) for username `kowalski` mentioned inside plugin vault configuration. If not found, authentication fails.
+The Plugin will look for keys "public_key" and "private_key" in the provided Vault path (`<vault.prefix>/consumer/jack/jwt-auth`) and uses it for JWT authentication.
+
+If the key is not found in this path, the Plugin will log an error.
-3. public key in consumer configuration, while the private key is in vault.
+You can also configure the `public_key` in the Consumer configuration and use the `private_key` stored in Vault:
```shell
curl http://127.0.0.1:9080/apisix/admin/consumers -H 'X-API-KEY: edd1c9f034335f136f87ad84b625c8f1' -X PUT -d '
@@ -174,29 +215,20 @@ curl http://127.0.0.1:9080/apisix/admin/consumers -H 'X-API-KEY: edd1c9f034335f1
}'
```
-This plugin uses rsa public key from consumer configuration and uses the private key directly fetched from vault.
-
-You can use [APISIX Dashboard](https://github.com/apache/apisix-dashboard) to complete the above operations through the web console.
-
-1. Add a Consumer through the web console:
+You can also use the [APISIX Dashboard](/docs/dashboard/USER_GUIDE) to complete the operation through a web UI.
+<!--

-
-then add jwt-auth plugin in the Consumer page:

-
-2. Create a Route or Service object and enable the jwt-auth plugin:
-

+-->
-## Test Plugin
-
-#### Get the Token in `jwt-auth` Plugin:
+## Example usage
-First, you need to set up the route for the API that signs the token, which will use the [public-api](public-api.md) plugin.
+You need to first setup a Route for an API that signs the token using the [public-api](public-api.md) Plugin:
```shell
-$ curl http://127.0.0.1:9080/apisix/admin/routes/jas -H 'X-API-KEY: edd1c9f034335f136f87ad84b625c8f1' -X PUT -d '
+curl http://127.0.0.1:9080/apisix/admin/routes/jas -H 'X-API-KEY: edd1c9f034335f136f87ad84b625c8f1' -X PUT -d '
{
"uri": "/apisix/plugin/jwt/sign",
"plugins": {
@@ -205,12 +237,15 @@ $ curl http://127.0.0.1:9080/apisix/admin/routes/jas -H 'X-API-KEY: edd1c9f03433
}'
```
-Let's get a token.
+Now, we can get a token:
-* without extension payload:
+- Without extension payload:
```shell
-$ curl http://127.0.0.1:9080/apisix/plugin/jwt/sign?key=user-key -i
+curl http://127.0.0.1:9080/apisix/plugin/jwt/sign?key=user-key -i
+```
+
+```
HTTP/1.1 200 OK
Date: Wed, 24 Jul 2019 10:33:31 GMT
Content-Type: text/plain
@@ -221,10 +256,13 @@ Server: APISIX web server
eyJhbGciOiJIUzI1NiIsInR5cCI6IkpXVCJ9.eyJrZXkiOiJ1c2VyLWtleSIsImV4cCI6MTU2NDA1MDgxMX0.Us8zh_4VjJXF-TmR5f8cif8mBU7SuefPlpxhH0jbPVI
```
-* with extension payload:
+- With extension payload:
```shell
-$ curl -G --data-urlencode 'payload={"uid":10000,"uname":"test"}' http://127.0.0.1:9080/apisix/plugin/jwt/sign?key=user-key -i
+curl -G --data-urlencode 'payload={"uid":10000,"uname":"test"}' http://127.0.0.1:9080/apisix/plugin/jwt/sign?key=user-key -i
+```
+
+```
HTTP/1.1 200 OK
Date: Wed, 21 Apr 2021 06:43:59 GMT
Content-Type: text/plain; charset=utf-8
@@ -235,21 +273,13 @@ Server: APISIX/2.4
eyJ0eXAiOiJKV1QiLCJhbGciOiJIUzI1NiJ9.eyJ1bmFtZSI6InRlc3QiLCJ1aWQiOjEwMDAwLCJrZXkiOiJ1c2VyLWtleSIsImV4cCI6MTYxOTA3MzgzOX0.jI9-Rpz1gc3u8Y6lZy8I43RXyCu0nSHANCvfn0YZUCY
```
-#### Try Request with Token
-
-* without token:
+You can now use this token while making requests:
```shell
-$ curl http://127.0.0.1:9080/index.html -i
-HTTP/1.1 401 Unauthorized
-...
-{"message":"Missing JWT token in request"}
+curl http://127.0.0.1:9080/index.html -H 'Authorization: eyJhbGciOiJIUzI1NiIsInR5cCI6IkpXVCJ9.eyJrZXkiOiJ1c2VyLWtleSIsImV4cCI6MTU2NDA1MDgxMX0.Us8zh_4VjJXF-TmR5f8cif8mBU7SuefPlpxhH0jbPVI' -i
```
-* request header with token:
-
-```shell
-$ curl http://127.0.0.1:9080/index.html -H 'Authorization: eyJhbGciOiJIUzI1NiIsInR5cCI6IkpXVCJ9.eyJrZXkiOiJ1c2VyLWtleSIsImV4cCI6MTU2NDA1MDgxMX0.Us8zh_4VjJXF-TmR5f8cif8mBU7SuefPlpxhH0jbPVI' -i
+```
HTTP/1.1 200 OK
Content-Type: text/html
Content-Length: 13175
@@ -261,10 +291,21 @@ Accept-Ranges: bytes
...
```
-* request params with token:
+Without the token, you will receive an error:
```shell
-$ curl http://127.0.0.1:9080/index.html?jwt=eyJhbGciOiJIUzI1NiIsInR5cCI6IkpXVCJ9.eyJrZXkiOiJ1c2VyLWtleSIsImV4cCI6MTU2NDA1MDgxMX0.Us8zh_4VjJXF-TmR5f8cif8mBU7SuefPlpxhH0jbPVI -i
+HTTP/1.1 401 Unauthorized
+...
+{"message":"Missing JWT token in request"}
+```
+
+You can also pass the token as query parameters:
+
+```shell
+curl http://127.0.0.1:9080/index.html?jwt=eyJhbGciOiJIUzI1NiIsInR5cCI6IkpXVCJ9.eyJrZXkiOiJ1c2VyLWtleSIsImV4cCI6MTU2NDA1MDgxMX0.Us8zh_4VjJXF-TmR5f8cif8mBU7SuefPlpxhH0jbPVI -i
+```
+
+```
HTTP/1.1 200 OK
Content-Type: text/html
Content-Length: 13175
@@ -276,10 +317,13 @@ Accept-Ranges: bytes
...
```
-* request cookie with token:
+And also as cookies:
```shell
-$ curl http://127.0.0.1:9080/index.html --cookie jwt=eyJhbGciOiJIUzI1NiIsInR5cCI6IkpXVCJ9.eyJrZXkiOiJ1c2VyLWtleSIsImV4cCI6MTU2NDA1MDgxMX0.Us8zh_4VjJXF-TmR5f8cif8mBU7SuefPlpxhH0jbPVI -i
+curl http://127.0.0.1:9080/index.html --cookie jwt=eyJhbGciOiJIUzI1NiIsInR5cCI6IkpXVCJ9.eyJrZXkiOiJ1c2VyLWtleSIsImV4cCI6MTU2NDA1MDgxMX0.Us8zh_4VjJXF-TmR5f8cif8mBU7SuefPlpxhH0jbPVI -i
+```
+
+```
HTTP/1.1 200 OK
Content-Type: text/html
Content-Length: 13175
@@ -293,12 +337,10 @@ Accept-Ranges: bytes
## Disable Plugin
-When you want to disable the `jwt-auth` plugin, it is very simple,
-you can delete the corresponding json configuration in the plugin configuration,
-no need to restart the service, it will take effect immediately:
+To disable the `jwt-auth` Plugin, you can delete the corresponding JSON configuration from the Plugin configuration. APISIX will automatically reload and you do not have to restart for this to take effect.
```shell
-$ curl http://127.0.0.1:9080/apisix/admin/routes/1 -H 'X-API-KEY: edd1c9f034335f136f87ad84b625c8f1' -X PUT -d '
+curl http://127.0.0.1:9080/apisix/admin/routes/1 -H 'X-API-KEY: edd1c9f034335f136f87ad84b625c8f1' -X PUT -d '
{
"methods": ["GET"],
"uri": "/index.html",
diff --git a/docs/en/latest/plugins/key-auth.md b/docs/en/latest/plugins/key-auth.md
index 400b6c56a..c2b47d71a 100644
--- a/docs/en/latest/plugins/key-auth.md
+++ b/docs/en/latest/plugins/key-auth.md
@@ -1,5 +1,11 @@
---
title: key-auth
+keywords:
+ - APISIX
+ - Plugin
+ - Key Auth
+ - key-auth
+description: This document contains information about the Apache APISIX key-auth Plugin.
---
<!--
@@ -23,31 +29,31 @@ title: key-auth
## Description
-`key-auth` is an authentication plugin, it should work with `consumer` together.
+The `key-auth` Plugin is used to add an authentication key (API key) to a Route or a Service.
-Add Key Authentication (also sometimes referred to as an API key) to a Service or a Route. Consumers then add their key either in a query string parameter or a header to authenticate their requests.
+This works well with a [Consumer](../architecture-design/consumer.md). Consumers of the API can then add their key to the query string or the header to authenticate their requests.
## Attributes
-For consumer side:
+For Consumer:
-| Name | Type | Requirement | Default | Valid | Description |
-| ---- | ------ | ----------- | ------- | ----- | ---------------------------------------------------------------------------- |
-| key | string | required | | | different consumer objects should use different values, it should be unique. |
+| Name | Type | Requirement | Description |
+|------|--------|-------------|----------------------------|
+| key | string | required | Unique key for a Consumer. |
-For route side:
+For Route:
-| Name | Type | Requirement | Default | Valid | Description |
-| ---- | ------ | ----------- | ------- | ----- | ---------------------------------------------------------------------------- |
-| header | string | optional | apikey | | the header we get the key from |
-| query | string | optional | apikey | | the query string we get the key from, which priority is lower than `header` |
-| hide_credentials | bool | optional | false | | Whether to pass the request header containing authentication information to upstream. |
+| Name | Type | Requirement | Default | Valid | Description |
+|--------|--------|-------------|---------|-------|-------------------------------------------------------------------|
+| header | string | optional | apikey | | The header to get the key from. |
+| query | string | optional | apikey | | The query string to get the key from. Lower priority than header. |
+| hide_credentials | bool | optional | false | | When set to `false` passes the request header containing authentication information to the Upstream. |
-## How To Enable
+## Enabling the Plugin
-Two steps are required:
+To enable the Plugin, you have to create a Consumer object with an authentication key and configure your Route to authenticate requests.
-1. creates a consumer object, and set the attributes of plugin `key-auth`.
+First you can create a Consumer object through the [Admin API](../admin-api.md) with a unique key:
```shell
curl http://127.0.0.1:9080/apisix/admin/consumers -H 'X-API-KEY: edd1c9f034335f136f87ad84b625c8f1' -X PUT -d '
@@ -61,13 +67,17 @@ curl http://127.0.0.1:9080/apisix/admin/consumers -H 'X-API-KEY: edd1c9f034335f1
}'
```
-You also can complete the above operation through the web interface, first add a route:
-
+You can also use the [APISIX Dashboard](/docs/dashboard/USER_GUIDE) to complete the operation through a web UI.
-Then add key-auth plugin:
-
+First, create a Consumer object:
-2. creates a route or service object, and enable plugin `key-auth`.
+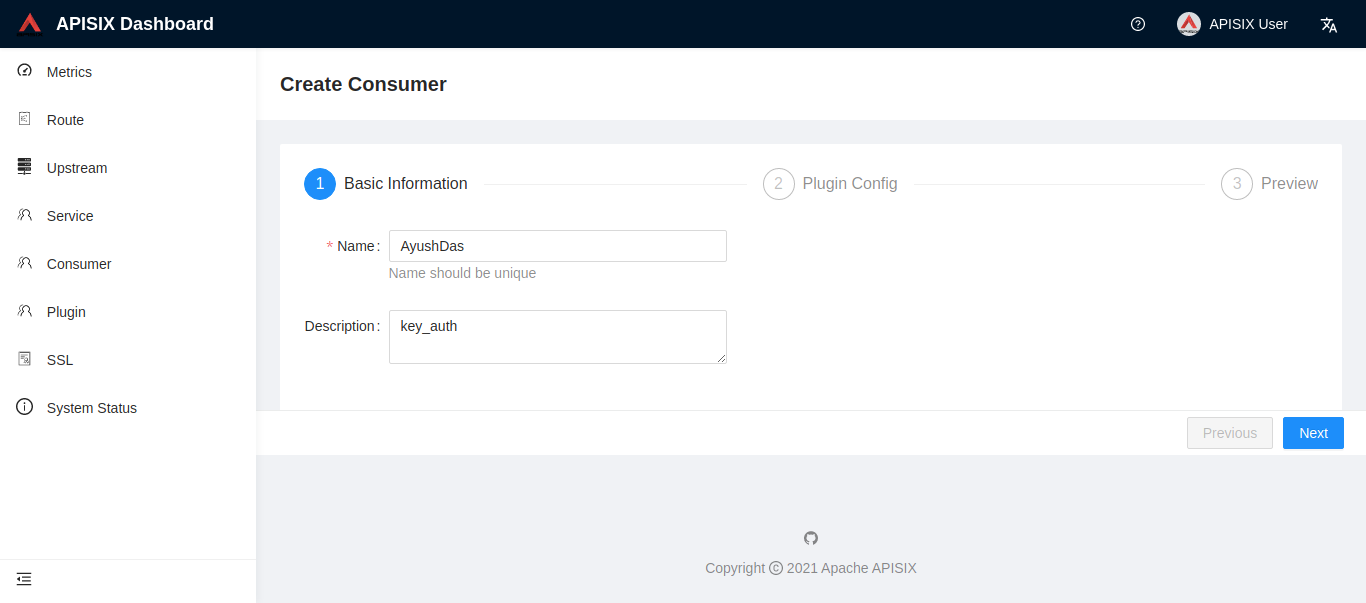
+
+You can then add the `key-auth` Plugin:
+
+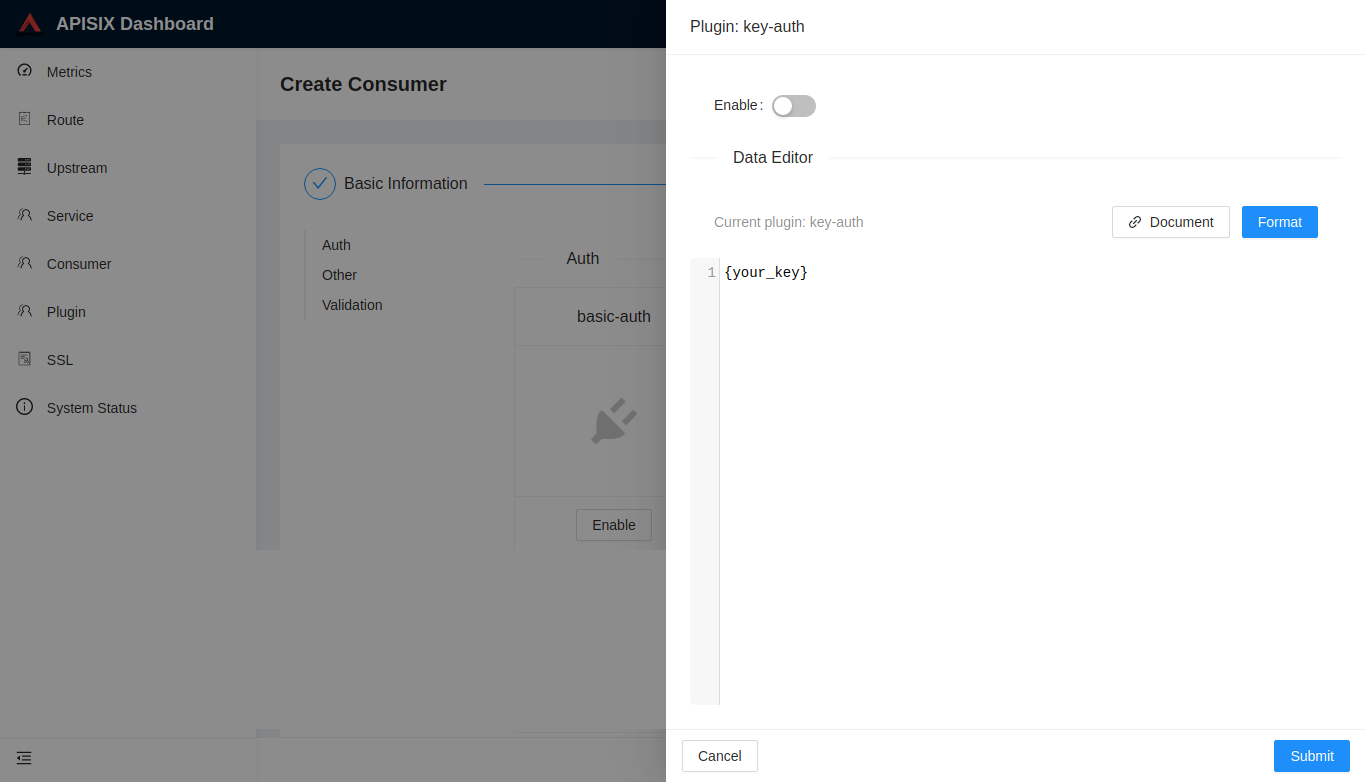
+
+Once you have created a Consumer object, you can then configure a Route or a Service to authenticate requests:
```shell
curl http://127.0.0.1:9080/apisix/admin/routes/1 -H 'X-API-KEY: edd1c9f034335f136f87ad84b625c8f1' -X PUT -d '
@@ -87,7 +97,7 @@ curl http://127.0.0.1:9080/apisix/admin/routes/1 -H 'X-API-KEY: edd1c9f034335f13
}'
```
-If you don't want to fetch key from the default `apikey` header, you can customize the header:
+To fetch the key from a different header than `apikey`, change the `header` in the configuration:
```json
{
@@ -97,25 +107,36 @@ If you don't want to fetch key from the default `apikey` header, you can customi
}
```
-## Test Plugin
+## Example usage
-Here is a correct test example:
+After you have configured the Plugin as mentioned above, you can make a request as shown:
```shell
-$ curl http://127.0.0.2:9080/index.html -H 'apikey: auth-one' -i
+curl http://127.0.0.2:9080/index.html -H 'apikey: auth-one' -i
+```
+
+```
HTTP/1.1 200 OK
...
```
-If the request does not set `apikey` correctly, will get a `401` response.
+And if the request has a missing key or a wrong key:
```shell
-$ curl http://127.0.0.2:9080/index.html -i
+curl http://127.0.0.2:9080/index.html -i
+```
+
+```
HTTP/1.1 401 Unauthorized
...
{"message":"Missing API key found in request"}
+```
+
+```shell
+curl http://127.0.0.2:9080/index.html -H 'apikey: abcabcabc' -i
+```
-$ curl http://127.0.0.2:9080/index.html -H 'apikey: abcabcabc' -i
+```
HTTP/1.1 401 Unauthorized
...
{"message":"Invalid API key in request"}
@@ -123,12 +144,10 @@ HTTP/1.1 401 Unauthorized
## Disable Plugin
-When you want to disable the `key-auth` plugin, it is very simple,
- you can delete the corresponding json configuration in the plugin configuration,
- no need to restart the service, it will take effect immediately:
+To disable the `key-auth` Plugin, you can delete the corresponding JSON configuration from the Plugin configuration. APISIX will automatically reload and you do not have to restart for this to take effect.
```shell
-$ curl http://127.0.0.1:9080/apisix/admin/routes/1 -H 'X-API-KEY: edd1c9f034335f136f87ad84b625c8f1' -X PUT -d '
+curl http://127.0.0.1:9080/apisix/admin/routes/1 -H 'X-API-KEY: edd1c9f034335f136f87ad84b625c8f1' -X PUT -d '
{
"uri": "/index.html",
"plugins": {},
@@ -140,5 +159,3 @@ $ curl http://127.0.0.1:9080/apisix/admin/routes/1 -H 'X-API-KEY: edd1c9f034335f
}
}'
```
-
-The `key-auth` plugin has been disabled now. It works for other plugins.
diff --git a/docs/en/latest/plugins/ldap-auth.md b/docs/en/latest/plugins/ldap-auth.md
index 6ca6aec27..4bc86401d 100644
--- a/docs/en/latest/plugins/ldap-auth.md
+++ b/docs/en/latest/plugins/ldap-auth.md
@@ -1,5 +1,11 @@
---
title: ldap-auth
+keywords:
+ - APISIX
+ - Plugin
+ - LDAP Authentication
+ - ldap-auth
+description: This document contains information about the Apache APISIX ldap-auth Plugin.
---
<!--
@@ -23,34 +29,32 @@ title: ldap-auth
## Description
-`ldap-auth` is an authentication plugin that can works with `consumer`. Add Ldap Authentication to a `service` or `route`.
+The `ldap-auth` Plugin can be used to add LDAP authentication to a Route or a Service.
-The `consumer` then authenticate against the Ldap server using Basic authentication.
+This Plugin works with the Consumer object and the consumers of the API can authenticate with an LDAP server using [basic authentication](https://en.wikipedia.org/wiki/Basic_access_authentication).
-For more information on Basic authentication, refer to [Wiki](https://en.wikipedia.org/wiki/Basic_access_authentication) for more information.
-
-This authentication plugin use [lualdap](https://lualdap.github.io/lualdap/) plugin to connect against the ldap server
+This Plugin uses [lualdap](https://lualdap.github.io/lualdap/) for connecting with an LDAP server.
## Attributes
-For consumer side:
+For Consumer:
-| Name | Type | Requirement | Default | Valid | Description |
-| -------- | ------- | ----------- | ------- | ----- | ----------- |
-| user_dn | string | required | | | the user dn of the `ladp` client (example: `cn=user01,ou=users,dc=example,dc=org`) |
+| Name | Type | Required | Description |
+| ------- | ------ | -------- | -------------------------------------------------------------------------------- |
+| user_dn | string | True | User dn of the LDAP client. For example, `cn=user01,ou=users,dc=example,dc=org`. |
-For route side:
+For Route:
-| Name | Type | Requirement | Default | Valid | Description |
-| -------- | ------- | ----------- | ------- | ----- | ----------- |
-| base_dn | string | required | | | the base dn of the `ldap` server (example : `ou=users,dc=example,dc=org`) |
-| ldap_uri | string | required | | | the uri of the ldap server |
-| use_tls | boolean | optional | `true` | | Boolean flag indicating if Transport Layer Security (TLS) should be used. |
-| uid | string | optional | `cn` | | the `uid` attribute |
+| Name | Type | Required | Default | Description |
+|----------|---------|----------|---------|------------------------------------------------------------------------|
+| base_dn | string | True | | Base dn of the LDAP server. For example, `ou=users,dc=example,dc=org`. |
+| ldap_uri | string | True | | URI of the LDAP server. |
+| use_tls | boolean | False | `true` | If set to `true` uses TLS. |
+| uid | string | False | `cn` | uid attribute. |
-## How To Enable
+## Enabling the plugin
-### 1. set a consumer and config the value of the `ldap-auth` option
+First, you have to create a Consumer and enable the `ldap-auth` Plugin on it:
```shell
curl http://127.0.0.1:9080/apisix/admin/consumers -H 'X-API-KEY: edd1c9f034335f136f87ad84b625c8f1' -X PUT -d '
@@ -64,7 +68,7 @@ curl http://127.0.0.1:9080/apisix/admin/consumers -H 'X-API-KEY: edd1c9f034335f1
}'
```
-### 2. add a Route or add a Service, and enable the `ldap-auth` plugin
+Now you can enable the Plugin on a specific Route or a Service as shown below:
```shell
curl http://127.0.0.1:9080/apisix/admin/routes/1 -H 'X-API-KEY: edd1c9f034335f136f87ad84b625c8f1' -X PUT -d '
@@ -87,52 +91,58 @@ curl http://127.0.0.1:9080/apisix/admin/routes/1 -H 'X-API-KEY: edd1c9f034335f13
}'
```
-## Test Plugin
+## Example usage
-- missing Authorization header
+After configuring the Plugin as mentioned above, clients can make requests with authorization to access the API:
```shell
-$ curl -i http://127.0.0.1:9080/hello
-HTTP/1.1 401 Unauthorized
+curl -i -uuser01:password1 http://127.0.0.1:9080/hello
+```
+
+```shell
+HTTP/1.1 200 OK
...
-{"message":"Missing authorization in request"}
+hello, world
```
-- user is not exists:
+If an authorization header is missing or invalid, the request is denied:
+
+```shell
+curl -i http://127.0.0.1:9080/hello
+```
```shell
-$ curl -i -uuser:password1 http://127.0.0.1:9080/hello
HTTP/1.1 401 Unauthorized
...
-{"message":"Invalid user authorization"}
+{"message":"Missing authorization in request"}
```
-- password is invalid:
+```shell
+curl -i -uuser:password1 http://127.0.0.1:9080/hello
+```
```shell
-$ curl -i -uuser01:passwordfalse http://127.0.0.1:9080/hello
HTTP/1.1 401 Unauthorized
...
{"message":"Invalid user authorization"}
```
-- success:
+```shell
+curl -i -uuser01:passwordfalse http://127.0.0.1:9080/hello
+```
```shell
-$ curl -i -uuser01:password1 http://127.0.0.1:9080/hello
-HTTP/1.1 200 OK
+HTTP/1.1 401 Unauthorized
...
-hello, world
+{"message":"Invalid user authorization"}
```
## Disable Plugin
-When you want to disable the `ldap-auth` plugin, it is very simple,
- you can delete the corresponding json configuration in the plugin configuration,
- no need to restart the service, it will take effect immediately:
+To disable the `ldap-auth` Plugin, you can delete the corresponding JSON configuration from the Plugin configuration. APISIX will automatically reload and you do not have to restart for this to take effect.
```shell
-$ curl http://127.0.0.1:2379/apisix/admin/routes/1 -X PUT -d value='
+curl http://127.0.0.1:2379/apisix/admin/routes/1 -X PUT -d value='
{
"methods": ["GET"],
"uri": "/hello",
diff --git a/docs/en/latest/plugins/opa.md b/docs/en/latest/plugins/opa.md
index c40e5efa7..6cc24c00e 100644
--- a/docs/en/latest/plugins/opa.md
+++ b/docs/en/latest/plugins/opa.md
@@ -1,5 +1,11 @@
---
title: opa
+keywords:
+ - APISIX
+ - Plugin
+ - Open Policy Agent
+ - opa
+description: This document contains information about the Apache APISIX opa Plugin.
---
<!--
@@ -23,31 +29,28 @@ title: opa
## Description
-The `opa` plugin is used to integrate with [Open Policy Agent](https://www.openpolicyagent.org). By using this plugin, users can decouple functions such as authentication and access to services and reduce the complexity of the application system.
+The `opa` Plugin can be used to integrate with [Open Policy Agent](https://www.openpolicyagent.org). This can help you decouple functions such as authentication and access to services and reduce the complexity of your system.
## Attributes
-| Name | Type | Requirement | Default | Valid | Description |
-| -- | -- | -- | -- | -- | -- |
-| host | string | required | | | Open Policy Agent service host (eg. https://localhost:8181) |
-| ssl_verify | boolean | optional | true | | Whether to verify the certificate |
-| policy | string | required | | | OPA policy path (It is a combination of `package` and `decision`. When you need to use advanced features such as custom response, `decision` can be omitted) |
-| timeout | integer | optional | 3000ms | [1, 60000]ms | HTTP call timeout. |
-| keepalive | boolean | optional | true | | HTTP keepalive |
-| keepalive_timeout | integer | optional | 60000ms | [1000, ...]ms | keepalive idle timeout |
-| keepalive_pool | integer | optional | 5 | [1, ...]ms | Connection pool limit |
-| with_route | boolean | optional | false | | Whether to send information about the current route. |
-| with_service | boolean | optional | false | | Whether to send information about the current service. |
-| with_consumer | boolean | optional | false | | Whether to send information about the current consumer. (It may contain sensitive information such as apikey, so please turn it on only if you are sure it is safe) |
-
-## Data Definition
+| Name | Type | Required | Default | Valid values | Description |
+|-------------------|---------|----------|---------|---------------|--------------------------------------------------------------------------------------------------------------------------------------------------------------------------------------------|
+| host | string | True | | | Host address of the OPA service. For example, `https://localhost:8181`. |
+| ssl_verify | boolean | False | true | | When set to `true` verifies the SSL certificates. |
+| policy | string | True | | | OPA policy path. A combination of `package` and `decision`. While using advanced features like custom response, you can omit `decision`. |
+| timeout | integer | False | 3000ms | [1, 60000]ms | Timeout for the HTTP call. |
+| keepalive | boolean | False | true | | When set to `true`, keeps the connection alive for multiple requests. |
+| keepalive_timeout | integer | False | 60000ms | [1000, ...]ms | Idle time after which the connection is closed. |
+| keepalive_pool | integer | False | 5 | [1, ...]ms | Connection pool limit. |
+| with_route | boolean | False | false | | When set to true, sends information about the current Route. |
+| with_service | boolean | False | false | | When set to true, sends information about the current Service. |
+| with_consumer | boolean | False | false | | When set to true, sends information about the current Consumer. Note that this may send sensitive information like the API key. Make sure to turn it on only when you are sure it is safe. |
+
+## Data definition
### APISIX to OPA service
-The `type` indicates that the request type. (e.g. `http` or `stream`)
-The `reqesut` is used when the request type is `http`, it contains the basic information of the request. (e.g. url, header)
-The `var` contains basic information about this requested connection. (e.g. IP, port, request timestamp)
-The `route`, `service`, and `consumer` will be sent only after the `opa` plugin has enabled the relevant features, and their contents are same as those stored by APISIX in etcd.
+The JSON below shows the data sent to the OPA service by APISIX:
```json
{
@@ -78,10 +81,16 @@ The `route`, `service`, and `consumer` will be sent only after the `opa` plugin
}
```
-### OPA service response to APISIX
+Each of these keys are explained below:
-In the response, `result` is automatically added by OPA. The `allow` is indispensable and will indicate whether the request is allowed to be forwarded through the APISIX.
-The `reason`, `headers`, and `status_code` are optional and are only returned when you need to use a custom response, as you'll see in the next section with the actual use case for it.
+- `type` indicates the request type (`http` or `stream`).
+- `request` is used when the `type` is `http` and contains the basic request information (URL, headers etc).
+- `var` contains the basic information about the requested connection (IP, port, request timestamp etc).
+- `route`, `service` and `consumer` contains the same data as stored in APISIX and are only sent if the `opa` Plugin is configured on these objects.
+
+### OPA service to APISIX
+
+The JSON below shows the response from the OPA service to APISIX:
```json
{
@@ -96,20 +105,25 @@ The `reason`, `headers`, and `status_code` are optional and are only returned wh
}
```
-## Example
+The keys in the response are explained below:
+
+- `allow` is indispensable and indicates whether the request is allowed to be forwarded through APISIX.
+- `reason`, `headers`, and `status_code` are optional and are only returned when you configure a custom response. See the next section use cases for this.
-First, you need to launch the Open Policy Agent environment.
+## Example usage
+
+First, you need to launch the Open Policy Agent environment:
```shell
-$ docker run -d --name opa -p 8181:8181 openpolicyagent/opa:0.35.0 run -s
+docker run -d --name opa -p 8181:8181 openpolicyagent/opa:0.35.0 run -s
```
-### Basic Use Case
+### Basic usage
-You can create a basic policy for testing.
+Once you have the OPA service running, you can create a basic policy:
```shell
-$ curl -X PUT '127.0.0.1:8181/v1/policies/example1' \
+curl -X PUT '127.0.0.1:8181/v1/policies/example1' \
-H 'Content-Type: text/plain' \
-d 'package example1
@@ -123,10 +137,10 @@ allow {
}'
```
-After that, you can create a route and turn on the `opa` plugin.
+Then, you can configure the `opa` Plugin on a specific Route:
```shell
-$ curl -X PUT 'http://127.0.0.1:9080/apisix/admin/routes/r1' \
+curl -X PUT 'http://127.0.0.1:9080/apisix/admin/routes/r1' \
-H 'X-API-KEY: <api-key>' \
-H 'Content-Type: application/json' \
-d '{
@@ -146,26 +160,32 @@ $ curl -X PUT 'http://127.0.0.1:9080/apisix/admin/routes/r1' \
}'
```
-Try it out.
+Now, to test it out:
+
+```shell
+curl -i -X GET 127.0.0.1:9080/get
+```
```shell
-# Successful request
-$ curl -i -X GET 127.0.0.1:9080/get
HTTP/1.1 200 OK
+```
-# Failed request
-$ curl -i -X POST 127.0.0.1:9080/post
-HTTP/1.1 403 FORBIDDEN
+Now if we try to make a request to a different endpoint the request will fail:
+
+```
+curl -i -X POST 127.0.0.1:9080/post
```
-### Complex Use Case (custom response)
+```shell
+HTTP/1.1 403 FORBIDDEN
+```
-Next, let's think about some more complex scenarios.
+### Using custom response
-When you need to return a custom error message for an incorrect request, you can implement it this way.
+You can also configure custom responses for more complex scenarios:
```shell
-$ curl -X PUT '127.0.0.1:8181/v1/policies/example2' \
+curl -X PUT '127.0.0.1:8181/v1/policies/example2' \
-H 'Content-Type: text/plain' \
-d 'package example2
@@ -195,29 +215,39 @@ status_code = 302 {
}'
```
-Update the route and set `opa` plugin's `policy` parameter to `example2`. Then, let's try it.
+Now you can test it out by changing the `opa` Plugin's policy parameter to `example2` and then making a request:
```shell
-# Successful request
-$ curl -i -X GET 127.0.0.1:9080/get
+curl -i -X GET 127.0.0.1:9080/get
+```
+
+```
HTTP/1.1 200 OK
+```
-# Failed request
-$ curl -i -X POST 127.0.0.1:9080/post
+Now if you make a failing request, you will see the custom response from the OPA service:
+
+```
+curl -i -X POST 127.0.0.1:9080/post
+```
+
+```
HTTP/1.1 302 FOUND
Location: http://example.com/auth
test
```
-### Complex Use Case (send APISIX data)
+### Sending APISIX data
Let's think about another scenario, when your decision needs to use some APISIX data, such as `route`, `consumer`, etc., how should we do it?
-Create a simple policy `echo`, which will return the data sent by APISIX to the OPA service as is, so we can simply see them.
+If your OPA service needs to make decisions based on APISIX data like Route and Consumer details, you can configure the Plugin to do so.
+
+The example below shows a simple `echo` policy which will return the data sent by APISIX as it is:
```shell
-$ curl -X PUT '127.0.0.1:8181/v1/policies/echo' \
+curl -X PUT '127.0.0.1:8181/v1/policies/echo' \
-H 'Content-Type: text/plain' \
-d 'package echo
@@ -225,10 +255,10 @@ allow = false
reason = input'
```
-Next, update the config of the route to enable sending route data.
+Now we can configure the Plugin on the Route to send APISIX data:
```shell
-$ curl -X PUT 'http://127.0.0.1:9080/apisix/admin/routes/r1' \
+curl -X PUT 'http://127.0.0.1:9080/apisix/admin/routes/r1' \
-H 'X-API-KEY: <api-key>' \
-H 'Content-Type: application/json' \
-d '{
@@ -249,10 +279,10 @@ $ curl -X PUT 'http://127.0.0.1:9080/apisix/admin/routes/r1' \
}'
```
-Try it. As you can see, we output this data with the help of the custom response body function described above, along with the data from the route.
+Now if you make a request, you can see the data from the Route through the custom response:
```shell
-$ curl -X GET 127.0.0.1:9080/get
+curl -X GET 127.0.0.1:9080/get
{
"type": "http",
"request": {
@@ -266,3 +296,22 @@ $ curl -X GET 127.0.0.1:9080/get
}
}
```
+
+## Disable Plugin
+
+To disable the `opa` Plugin, you can delete the corresponding JSON configuration from the Plugin configuration. APISIX will automatically reload and you do not have to restart for this to take effect.
+
+```shell
+curl http://127.0.0.1:2379/apisix/admin/routes/1 -X PUT -d value='
+{
+ "methods": ["GET"],
+ "uri": "/hello",
+ "plugins": {},
+ "upstream": {
+ "type": "roundrobin",
+ "nodes": {
+ "127.0.0.1:1980": 1
+ }
+ }
+}'
+```
diff --git a/docs/en/latest/plugins/openid-connect.md b/docs/en/latest/plugins/openid-connect.md
index abdf086bf..29949107e 100644
--- a/docs/en/latest/plugins/openid-connect.md
+++ b/docs/en/latest/plugins/openid-connect.md
@@ -1,5 +1,11 @@
---
title: openid-connect
+keywords:
+ - APISIX
+ - Plugin
+ - OpenID Connect
+ - openid-connect
+description: This document contains information about the Apache APISIX openid-connect Plugin.
---
<!--
@@ -23,72 +29,56 @@ title: openid-connect
## Description
-The OAuth 2 / Open ID Connect(OIDC) plugin provides authentication and introspection capability to APISIX.
+The `openid-connect` Plugin provides authentication and introspection capability to APISIX with [OpenID Connect](https://openid.net/connect/).
## Attributes
-| Name | Type | Requirement | Default | Valid | Description |
-| ------------------------------------ | ------- | ----------- | --------------------- | ------- | ------------------------------------------------------------------------------------------------------------------------------- |
-| client_id | string | required | | | OAuth client ID |
-| client_secret | string | required | | | OAuth client secret |
-| discovery | string | required | | | URL of the discovery endpoint of the identity server |
-| scope | string | optional | "openid" | | Scope used for the authentication |
-| realm | string | optional | "apisix" | | Realm used for the authentication |
-| bearer_only | boolean | optional | false | | Setting this `true` will check for the authorization header in the request with a bearer token |
-| logout_path | string | optional | "/logout" | | |
-| post_logout_redirect_uri | string | optional | | | URL want to redirect when request logout_path |
-| redirect_uri | string | optional | "ngx.var.request_uri" | | |
-| timeout | integer | optional | 3 | [1,...] | Timeout in seconds |
-| ssl_verify | boolean | optional | false | | |
-| introspection_endpoint | string | optional | | | URL of the token verification endpoint of the identity server |
-| introspection_endpoint_auth_method | string | optional | "client_secret_basic" | | Authentication method name for token introspection |
-| public_key | string | optional | | | The public key to verify the token |
-| use_jwks | boolean | optional | | | Use the jwks endpoint of the identity server to verify the token |
-| token_signing_alg_values_expected | string | optional | | | Algorithm used to sign the token |
-| set_access_token_header | boolean | optional | true | | Whether to ensure the access token is set in a request header. |
-| access_token_in_authorization_header | boolean | optional | false | | If set to `true`, ensure that the access token is set in the `Authorization` header, otherwise use the `X-Access-Token` header. |
-| set_id_token_header | boolean | optional | true | | Whether to ensure the ID token, if available, is set in the `X-ID-Token` request header. |
-| set_userinfo_header | boolean | optional | true | | Whether to ensure the UserInfo object, if available, is set in the `X-Userinfo` request header. |
+| Name | Type | Required | Default | Valid values | Description |
+|--------------------------------------|---------|----------|-----------------------|--------------|--------------------------------------------------------------------------------------------------------------------|
+| client_id | string | True | | | OAuth client ID. |
+| client_secret | string | True | | | OAuth client secret. |
+| discovery | string | True | | | Discovery endpoint URL of the identity server. |
+| scope | string | False | "openid" | | Scope used for authentication. |
+| realm | string | False | "apisix" | | Realm used for authentication. |
+| bearer_only | boolean | False | false | | When set to true, the Plugin will check for if the authorization header in the request matches a bearer token. |
+| logout_path | string | False | "/logout" | | Path for logging out. |
+| post_logout_redirect_uri | string | False | | | URL to redirect to after logging out. |
+| redirect_uri | string | False | "ngx.var.request_uri" | | URI to which the identity provider redirects back to. |
+| timeout | integer | False | 3 | [1,...] | Request timeout time in seconds. |
+| ssl_verify | boolean | False | false | | When set to true, verifies the identity provider's SSL certificates. |
+| introspection_endpoint | string | False | | | URL of the token verification endpoint of the identity server. |
+| introspection_endpoint_auth_method | string | False | "client_secret_basic" | | Authentication method name for token introspection. |
+| public_key | string | False | | | Public key to verify the token. |
+| use_jwks | boolean | False | | | When set to true, uses the JWKS endpoint of the identity server to verify the token. |
+| token_signing_alg_values_expected | string | False | | | Algorithm used for signing the authentication token. |
+| set_access_token_header | boolean | False | true | | When set to true, sets the access token in a request header. |
+| access_token_in_authorization_header | boolean | False | false | | When set to true, sets the access token in the `Authorization` header. Otherwise, set the `X-Access-Token` header. |
+| set_id_token_header | boolean | False | true | | When set to true and the ID token is available, sets the ID token in the `X-ID-Token` request header. |
+| set_userinfo_header | boolean | False | true | | When set to true and the UserInfo object is available, sets it in the `X-Userinfo` request header. |
## Modes of operation
-The plugin supports different modes of operation.
+The `openid-connect` Plugin offers three modes of operation:
-1) It can be configured to just validate an access token that is expected to be present in a request header.
-In this case, requests without a token or where the token is invalid are always rejected. This requires
-`bearer_only` be set to `true` and that either an introspection endpoint has been configured through
-`introspection_endpoint`, or that a public key has been configured through `public_key`. See the relevant
-sections below.
+1. The Plugin can be configured to just validate an access token that is expected to be present in a request header. In such cases, requests without a token or with an invalid token are rejected. This requires the `bearer_only` attribute to be set to `true` and either `introspection_endpoint` or `public_key` attribute to be configured. This mode of operation can be used for service-to-service communication where the requester can reasonably be expected to obtain and manage a valid token [...]
-2) Alternatively, the plugin can also be configured to authenticate a request without a valid token against
-an identity provider by going through the OIDC Authorization Code flow. The plugin then acts as an OIDC Relying Party.
-In this scenario, when the requesting user has authenticated successfully, the plugin will obtain and manage
-an access token and further user claims on behalf of the user in a session cookie. Subsequent requests that
-contain the cookie will use the access token stored in the cookie. In this case, `bearer_only` must be set to `false`.
+2. The Plugin can be configured to authenticate requests without a valid token against an identity provider through OIDC authorization. The Plugin then acts as an OIDC Relying Party. In such cases, after successful authentication, the Plugin obtains and manages an access token in a session cookie. Subsequent requests that contain the cookie will use the access token. This requires the `bearer_only` attribute to be set to `false`. This mode of operation can be used to support cases where [...]
-The first option is typically appropriate for service-to-service communication where the requesting side can
-be reasonably expected to obtain and manage a valid access token by itself. The second option is convenient
-to support web browser interaction with endpoints through a human user that may still need to be authenticated
-when accessing for the first time.
+3. The Plugin can also be configured to support both the scenarios by setting `bearer_only` to `false` and also configuring either the `introspection_endpoint` or `public_key` attribute. In such cases, introspection of an existing token from a request header takes precedence over the Relying Party flow. That is, if a request contains an invalid token, it will be rejected without redirecting to the ID provider to obtain a valid token.
-The plugin can also be configured to support both scenarios by setting `bearer_only` to false, but still configuring
-either an introspection endpoint or a public key. In this case, introspection of an existing token from a request
-header takes precedence over the Relying Party flow. That is, if a request contains an invalid token, the request
-will be rejected without redirecting to the ID provider to obtain a valid token.
+The method used to authenticate a request also affects the headers that can be enforced on the request before sending it to an Upstream service. You can learn more about this on the sections below.
-The method used to authenticate a request also affects the headers that can be enforced on the request before
-sending it to upstream. The headers that can be enforced are mentioned below in each relevant section.
+### Token introspection
-### Token Introspection
+Token introspection validates a request by verifying the token with an OAuth 2 authorization server.
-Token introspection helps to validate a request by verifying the token against an Oauth 2 authorization server.
-As prerequisite, you should create a trusted client in the identity server and generate a valid token(JWT) for introspection.
-The following image shows an example(successful) flow of the token introspection via the gateway.
+You should first create a trusted client in the identity server and generate a valid JWT token for introspection.
-
+The image below shows an example token introspection flow via a Gateway:
-The following is the curl command to enable the plugin to an external service.
-This route will protect `https://httpbin.org/get`(echo service) by introspecting the token provided in the header of the request.
+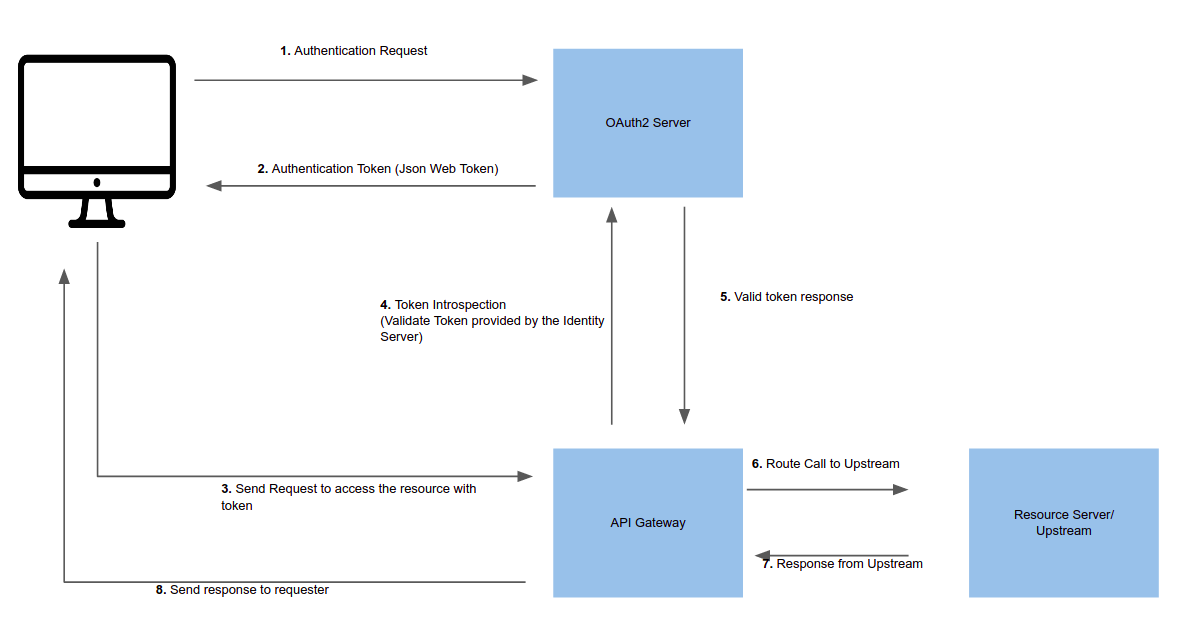
+
+The example below shows how you can enable the Plugin on Route. The Rouet below will protect the Upstream by introspecting the token provided in the request header:
```bash
curl http://127.0.0.1:9080/apisix/admin/routes/5 -H 'X-API-KEY: edd1c9f034335f136f87ad84b625c8f1' -X PUT -d '
@@ -117,27 +107,24 @@ curl http://127.0.0.1:9080/apisix/admin/routes/5 -H 'X-API-KEY: edd1c9f034335f13
}'
```
-The following command can be used to access the new route.
+Now, to access the Route:
```bash
curl -i -X GET http://127.0.0.1:9080/get -H "Host: httpbin.org" -H "Authorization: Bearer {replace_jwt_token}"
```
-In this case, the plugin can enforce that the access token and the UserInfo object get set in respective configured request headers.
+In this example, the Plugin enforces that the access token and the Userinfo object be set in the request headers.
-When the Oauth 2 authorization server returns an expire time with the token, the token will be cached in APISIX until it is expired.
-For more details, please read:
+When the OAuth 2 authorization server returns an expire time with the token, it is cached in APISIX until expiry. For more details, read:
-1. [lua-resty-openidc](https://github.com/zmartzone/lua-resty-openidc)'s doc and source code.
+1. [lua-resty-openidc](https://github.com/zmartzone/lua-resty-openidc)'s documentation and source code.
2. `exp` field in the RFC's [Introspection Response](https://tools.ietf.org/html/rfc7662#section-2.2) section.
### Introspecting with public key
-You can also provide the public key of the JWT token to verify the token. In case if you have provided a public key and
-a token introspection endpoint, the public key workflow will be executed instead of verifying with the identity server.
-This method can be used if you want to reduce additional network calls and to speedup the process.
+You can also provide the public key of the JWT token for verification. If you have provided a public key and a token introspection endpoint, the public key workflow will be executed instead of verification through an identity server. This is useful if you want to reduce network calls and speedup the process.
-The following configurations shows how to add a public key introspection to a route.
+The example below shows how you can add public key introspection to a Route:
```bash
curl http://127.0.0.1:9080/apisix/admin/routes/5 -H 'X-API-KEY: edd1c9f034335f136f87ad84b625c8f1' -X PUT -d '
@@ -168,19 +155,15 @@ curl http://127.0.0.1:9080/apisix/admin/routes/5 -H 'X-API-KEY: edd1c9f034335f13
}'
```
-In this case, the plugin can only enforce that the access token gets set in the configured request headers.
+In this example, the Plugin can only enforce that the access token should be set in the request headers.
+
+### Authentication through OIDC Relying Party flow
-#### Authentication through OIDC Relying Party flow
+When an incoming request does not contain an access token in its header nor in an appropriate session cookie, the Plugin can act as an OIDC Relying Party and redirect to the authorization endpoint of the identity provider to go through the [OIDC authorization code flow](https://openid.net/specs/openid-connect-core-1_0.html#CodeFlowAuth).
-When an incoming request does not contain an access token in a header, nor in an appropriate session cookie,
-the plugin can act as an OIDC Relying Party and redirect to the authorization endpoint of the identity provider
-to go through the OIDC Authorization Code flow; see https://openid.net/specs/openid-connect-core-1_0.html#CodeFlowAuth.
-Once the user has authenticated against the identity provider, the plugin will obtain and manage an access token
-and further information from the identity provider on behalf of the user. The information is currently stored
-in a session cookie that the user agent can submit on subsequent requests. The plugin will recognize the cookie
-and use the information therein to avoid having to go through the flow again.
+Once the user has authenticated with the identity provider, the Plugin will obtain and manage the access token and further interaction with the identity provider. The access token will be stored in a session cookie.
-The following command adds this mode of operation to a route.
+The example below adds the Plugin with this mode of operation to the Route:
```bash
curl http://127.0.0.1:9080/apisix/admin/routes/5 -H 'X-API-KEY: edd1c9f034335f136f87ad84b625c8f1' -X PUT -d '
@@ -207,8 +190,8 @@ curl http://127.0.0.1:9080/apisix/admin/routes/5 -H 'X-API-KEY: edd1c9f034335f13
}'
```
-In this case, the plugin can enforce that the access token, the ID token, and the UserInfo object get set in respective configured request headers.
+In this example, the Plugin can enforce that the access token, the ID token, and the UserInfo object to be set in the request headers.
## Troubleshooting
-Check/modify the DNS settings (`conf/config.yaml`) if APISIX cannot resolve/connect to the identity provider.
+If APISIX cannot resolve/connect to the identity provider, check/modify the DNS settings in your configuration file (`conf/config.yaml`).
diff --git a/docs/en/latest/plugins/wolf-rbac.md b/docs/en/latest/plugins/wolf-rbac.md
index 459f2b85b..4e20d952f 100644
--- a/docs/en/latest/plugins/wolf-rbac.md
+++ b/docs/en/latest/plugins/wolf-rbac.md
@@ -1,5 +1,11 @@
---
title: wolf-rbac
+keywords:
+ - APISIX
+ - Plugin
+ - wolf RBAC
+ - wolf-rbac
+description: This document contains information about the Apache APISIX wolf-rbac Plugin.
---
<!--
@@ -23,40 +29,39 @@ title: wolf-rbac
## Description
-`wolf-rbac` is an authentication and authorization (rbac) plugin. It needs to work with `consumer`. Also need to add `wolf-rbac` to a `service` or `route`.
-The rbac feature is provided by [wolf](https://github.com/iGeeky/wolf). For more information about `wolf`, please refer to [wolf documentation](https://github.com/iGeeky/wolf).
+The `wolf-rbac` Plugin provides a [role-based access control](https://en.wikipedia.org/wiki/Role-based_access_control) system with [wolf](https://github.com/iGeeky/wolf) to a Route or a Service. This Plugin can be used with a [Consumer](../terminology/consumer.md).
## Attributes
-| Name | Type | Requirement | Default | Valid | Description |
-| ------------- | ------ | ----------- | ------------------------ | ----- | --------------------------------------------------------- |
-| server | string | optional | "http://127.0.0.1:12180" | | Set the service address of `wolf-server`. |
-| appid | string | optional | "unset" | | Set the app id. The app id must be added in wolf-console. |
-| header_prefix | string | optional | "X-" | | prefix of custom HTTP header. After authentication is successful, three headers will be added to the request header (for backend) and response header (for frontend): `X-UserId`, `X-Username`, `X-Nickname`. |
+| Name | Type | Required | Default | Description |
+|---------------|--------|----------|--------------------------|-----------------------------------------------------------------------------------------------------------------------------------------------------------------------------------------------------------------------------|
+| server | string | False | "http://127.0.0.1:12180" | Service address of wolf server. |
+| appid | string | False | "unset" | App id added in wolf console. |
+| header_prefix | string | False | "X-" | Prefix for a custom HTTP header. After authentication is successful, three headers will be added to the request header (for backend) and response header (for frontend) namely: `X-UserId`, `X-Username`, and `X-Nickname`. |
## API
-This plugin will add several API:
+This Plugin will add the following endpoints when enabled:
-* /apisix/plugin/wolf-rbac/login
-* /apisix/plugin/wolf-rbac/change_pwd
-* /apisix/plugin/wolf-rbac/user_info
+- `/apisix/plugin/wolf-rbac/login`
+- `/apisix/plugin/wolf-rbac/change_pwd`
+- `/apisix/plugin/wolf-rbac/user_info`
-You may need to use [public-api](public-api.md) plugin to expose it.
+:::note
-## Dependencies
+You may need to use the [public-api](public-api.md) Plugin to expose this endpoint.
-### Install wolf and start the service
+:::
-[Wolf quick start](https://github.com/iGeeky/wolf/blob/master/quick-start-with-docker/README.md)
+## Pre-requisites
-### Add `application`, `admin`, `normal user`, `permission`, `resource` and user authorize
+To use this Plugin, you have to first [install wolf](https://github.com/iGeeky/wolf/blob/master/quick-start-with-docker/README.md) and start it.
-[Wolf-console usage](https://github.com/iGeeky/wolf/blob/master/docs/usage.md)
+Once you have done that you need to add `application`, `admin`, `normal user`, `permission`, `resource` and user authorize to the [wolf-console](https://github.com/iGeeky/wolf/blob/master/docs/usage.md).
-## How To Enable
+## Enabling the Plugin
-1. set a consumer and config the value of the `wolf-rbac`。
+You need to first configure the Plugin on a Consumer:
```shell
curl http://127.0.0.1:9080/apisix/admin/consumers -H 'X-API-KEY: edd1c9f034335f136f87ad84b625c8f1' -X PUT -d '
@@ -72,15 +77,13 @@ curl http://127.0.0.1:9080/apisix/admin/consumers -H 'X-API-KEY: edd1c9f034335f
}'
```
-You also can complete the above operations through the web interface, first add a consumer:
-
+:::note
-Then add the wolf-rbac plugin to the consumer page:
-
+The `appid` added in the configuration should already exist in wolf.
-Notes: The `appid` filled in above needs to already exist in the wolf system.
+:::
-1. Add a `Route` or `Service` and enable the wolf-rbac plugin.
+You can now add the Plugin to a Route or a Service:
```shell
curl http://127.0.0.1:9080/apisix/admin/routes/1 -H 'X-API-KEY: edd1c9f034335f136f87ad84b625c8f1' -X PUT -d '
@@ -99,14 +102,20 @@ curl http://127.0.0.1:9080/apisix/admin/routes/1 -H 'X-API-KEY: edd1c9f034335f1
}'
```
-## Test Plugin
+You can also use the [APISIX Dashboard](/docs/dashboard/USER_GUIDE) to complete the operation through a web UI.
-#### Setup routes for public API
+<!--
+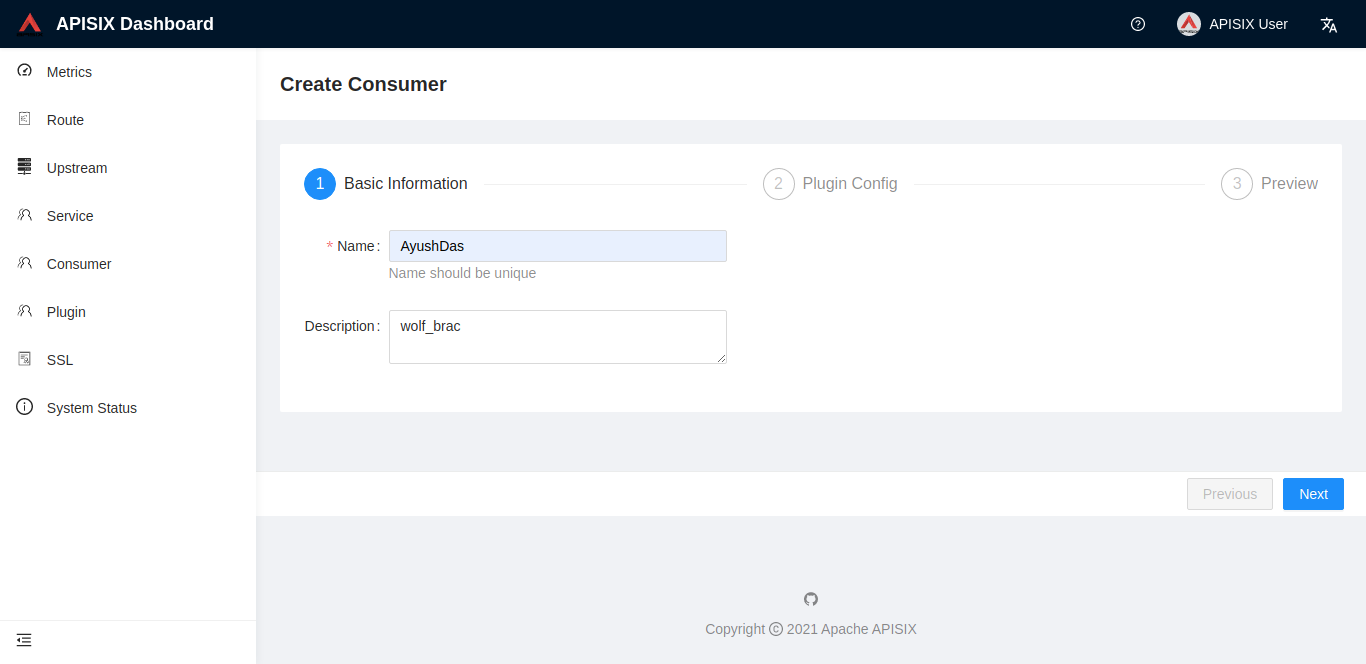
+
+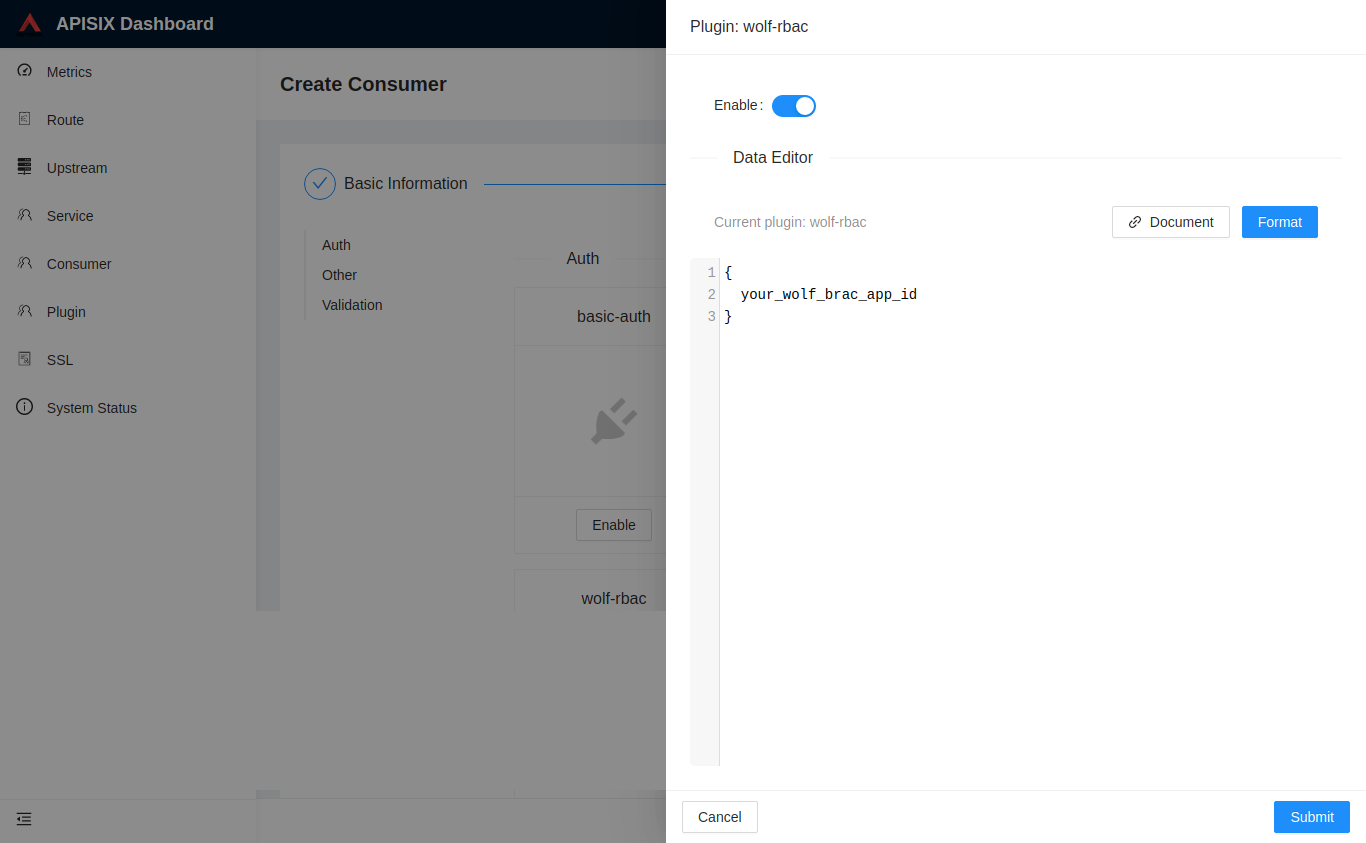
+-->
+
+## Example usage
-Use the `public-api` plugin to expose the public API.
+You can use the `public-api` Plugin to expose the API:
```shell
-$ curl http://127.0.0.1:9080/apisix/admin/routes/wal -H 'X-API-KEY: edd1c9f034335f136f87ad84b625c8f1' -X PUT -d '
+curl http://127.0.0.1:9080/apisix/admin/routes/wal -H 'X-API-KEY: edd1c9f034335f136f87ad84b625c8f1' -X PUT -d '
{
"uri": "/apisix/plugin/wolf-rbac/login",
"plugins": {
@@ -115,20 +124,17 @@ $ curl http://127.0.0.1:9080/apisix/admin/routes/wal -H 'X-API-KEY: edd1c9f03433
}'
```
-You also need to setup the `change_pwd` and `user_info` routes together.
+Similarly, you can setup the Routes for `change_pwd` and `user_info`.
-#### Login and get `wolf-rbac` token:
-
-The following `appid`, `username`, and `password` must be real ones in the wolf system.
-`authType` is the authentication type, `1` is password authentication, `2` is `LDAP` authentication. The default is `1`. `wolf` supports `LDAP` authentication since version 0.5.0
-
-* Login as `POST application/json`
+You can now login and get a wolf `rbac_token`:
```shell
curl http://127.0.0.1:9080/apisix/plugin/wolf-rbac/login -i \
-H "Content-Type: application/json" \
-d '{"appid": "restful", "username":"test", "password":"user-password", "authType":1}'
+```
+```shell
HTTP/1.1 200 OK
Date: Wed, 24 Jul 2019 10:33:31 GMT
Content-Type: text/plain
@@ -138,7 +144,15 @@ Server: APISIX web server
{"rbac_token":"V1#restful#eyJhbGciOiJIUzI1NiIsInR5cCI6IkpXVCJ9.eyJpZCI6NzQ5LCJ1c2VybmFtZSI6InRlc3QiLCJtYW5hZ2VyIjoiIiwiYXBwaWQiOiJyZXN0ZnVsIiwiaWF0IjoxNTc5NDQ5ODQxLCJleHAiOjE1ODAwNTQ2NDF9.n2-830zbhrEh6OAxn4K_yYtg5pqfmjpZAjoQXgtcuts","user_info":{"nickname":"test","username":"test","id":"749"}}
```
-* Login as `POST x-www-form-urlencoded`
+:::note
+
+The `appid`, `username`, and `password` must be configured in the wolf system.
+
+`authType` is the authentication type—1 for password authentication (default) and 2 for LDAP authentication (v0.5.0+).
+
+:::
+
+You can also make a post request with `x-www-form-urlencoded` instead of JSON:
```shell
curl http://127.0.0.1:9080/apisix/plugin/wolf-rbac/login -i \
@@ -146,71 +160,79 @@ curl http://127.0.0.1:9080/apisix/plugin/wolf-rbac/login -i \
-d 'appid=restful&username=test&password=user-password'
```
-#### try request with token
+Now you can test the Route:
-* without token
+- without token:
```shell
curl http://127.0.0.1:9080/ -H"Host: www.baidu.com" -i
+```
+```
HTTP/1.1 401 Unauthorized
...
{"message":"Missing rbac token in request"}
```
-* request header(Authorization) with token:
+- with token in `Authorization` header:
```shell
curl http://127.0.0.1:9080/ -H"Host: www.baidu.com" \
-H 'Authorization: V1#restful#eyJhbGciOiJIUzI1NiIsInR5cCI6IkpXVCJ9.eyJpZCI6NzQ5LCJ1c2VybmFtZSI6InRlc3QiLCJtYW5hZ2VyIjoiIiwiYXBwaWQiOiJyZXN0ZnVsIiwiaWF0IjoxNTc5NDQ5ODQxLCJleHAiOjE1ODAwNTQ2NDF9.n2-830zbhrEh6OAxn4K_yYtg5pqfmjpZAjoQXgtcuts' -i
+```
+```shell
HTTP/1.1 200 OK
<!DOCTYPE html>
```
-* request header(x-rbac-token) with token:
+- with token in `x-rbac-token` header:
```shell
curl http://127.0.0.1:9080/ -H"Host: www.baidu.com" \
-H 'x-rbac-token: V1#restful#eyJhbGciOiJIUzI1NiIsInR5cCI6IkpXVCJ9.eyJpZCI6NzQ5LCJ1c2VybmFtZSI6InRlc3QiLCJtYW5hZ2VyIjoiIiwiYXBwaWQiOiJyZXN0ZnVsIiwiaWF0IjoxNTc5NDQ5ODQxLCJleHAiOjE1ODAwNTQ2NDF9.n2-830zbhrEh6OAxn4K_yYtg5pqfmjpZAjoQXgtcuts' -i
+```
-
+```shell
HTTP/1.1 200 OK
<!DOCTYPE html>
```
-* request params with token:
+- with token in request parameters:
```shell
curl 'http://127.0.0.1:9080?rbac_token=V1%23restful%23eyJhbGciOiJIUzI1NiIsInR5cCI6IkpXVCJ9.eyJpZCI6NzQ5LCJ1c2VybmFtZSI6InRlc3QiLCJtYW5hZ2VyIjoiIiwiYXBwaWQiOiJyZXN0ZnVsIiwiaWF0IjoxNTc5NDQ5ODQxLCJleHAiOjE1ODAwNTQ2NDF9.n2-830zbhrEh6OAxn4K_yYtg5pqfmjpZAjoQXgtcuts' -H"Host: www.baidu.com" -i
+```
-
+```shell
HTTP/1.1 200 OK
<!DOCTYPE html>
```
-* request cookie with token:
+- with token in cookie:
```shell
curl http://127.0.0.1:9080 -H"Host: www.baidu.com" \
--cookie x-rbac-token=V1#restful#eyJhbGciOiJIUzI1NiIsInR5cCI6IkpXVCJ9.eyJpZCI6NzQ5LCJ1c2VybmFtZSI6InRlc3QiLCJtYW5hZ2VyIjoiIiwiYXBwaWQiOiJyZXN0ZnVsIiwiaWF0IjoxNTc5NDQ5ODQxLCJleHAiOjE1ODAwNTQ2NDF9.n2-830zbhrEh6OAxn4K_yYtg5pqfmjpZAjoQXgtcuts -i
+```
-
+```
HTTP/1.1 200 OK
<!DOCTYPE html>
```
-#### Get `RBAC` user information
+And to get a user information:
```shell
curl http://127.0.0.1:9080/apisix/plugin/wolf-rbac/user_info \
--cookie x-rbac-token=V1#restful#eyJhbGciOiJIUzI1NiIsInR5cCI6IkpXVCJ9.eyJpZCI6NzQ5LCJ1c2VybmFtZSI6InRlc3QiLCJtYW5hZ2VyIjoiIiwiYXBwaWQiOiJyZXN0ZnVsIiwiaWF0IjoxNTc5NDQ5ODQxLCJleHAiOjE1ODAwNTQ2NDF9.n2-830zbhrEh6OAxn4K_yYtg5pqfmjpZAjoQXgtcuts -i
+```
-
+```shell
HTTP/1.1 200 OK
{
"user_info":{
@@ -229,24 +251,23 @@ HTTP/1.1 200 OK
}
```
-#### Change 'RBAC' user password
+And to change a user's password:
```shell
curl http://127.0.0.1:9080/apisix/plugin/wolf-rbac/change_pwd \
-H "Content-Type: application/json" \
--cookie x-rbac-token=V1#restful#eyJhbGciOiJIUzI1NiIsInR5cCI6IkpXVCJ9.eyJpZCI6NzQ5LCJ1c2VybmFtZSI6InRlc3QiLCJtYW5hZ2VyIjoiIiwiYXBwaWQiOiJyZXN0ZnVsIiwiaWF0IjoxNTc5NDQ5ODQxLCJleHAiOjE1ODAwNTQ2NDF9.n2-830zbhrEh6OAxn4K_yYtg5pqfmjpZAjoQXgtcuts -i \
-X PUT -d '{"oldPassword": "old password", "newPassword": "new password"}'
+```
-
+```shell
HTTP/1.1 200 OK
{"message":"success to change password"}
```
## Disable Plugin
-When you want to disable the `wolf-rbac` plugin, it is very simple,
- you can delete the corresponding json configuration in the plugin configuration,
- no need to restart the service, it will take effect immediately:
+To disable the `wolf-rbac` Plugin, you can delete the corresponding JSON configuration from the Plugin configuration. APISIX will automatically reload and you do not have to restart for this to take effect.
```shell
curl http://127.0.0.1:9080/apisix/admin/routes/1 -H 'X-API-KEY: edd1c9f034335f136f87ad84b625c8f1' -X PUT -d '