You are viewing a plain text version of this content. The canonical link for it is here.
Posted to commits@hugegraph.apache.org by ji...@apache.org on 2026/09/04 06:45:09 UTC
(hugegraph-doc) 01/02: docs(cn): refresh docs for 1.7.0 updates
This is an automated email from the ASF dual-hosted git repository.
imbajin pushed a commit to branch sync-doc
in repository https://gitbox.apache.org/repos/asf/hugegraph-doc.git
commit 71885f3239b1ddf13b59d03df5996688b6f124b2
Author: imbajin <ji...@apache.org>
AuthorDate: Fri Sep 4 14:39:46 2026 +0800
docs(cn): refresh docs for 1.7.0 updates
- rewrite major Chinese docs pages for clearer structure and terminology
- align Server/REST examples to graphspace-based paths and current defaults
- update component guidance across Toolchain, Computer, Vermeer, and HugeGraph-AI
- replace project CLA text with ASF ICLA/CCLA contribution instructions
- add /.goal-task to .gitignore
---
.gitignore | 1 +
content/cn/docs/CLA.md | 113 +-----
content/cn/docs/SUMMARY.md | 130 +++---
content/cn/docs/_index.md | 24 +-
content/cn/docs/clients/_index.md | 8 +-
content/cn/docs/clients/gremlin-console.md | 10 +-
content/cn/docs/clients/hugegraph-client.md | 16 +-
content/cn/docs/clients/restful-api/_index.md | 10 +-
content/cn/docs/clients/restful-api/graphs.md | 8 +-
content/cn/docs/clients/restful-api/other.md | 6 +-
content/cn/docs/clients/restful-api/traverser.md | 4 +-
content/cn/docs/config/_index.md | 10 +-
content/cn/docs/config/config-authentication.md | 36 +-
content/cn/docs/config/config-guide.md | 170 +++-----
content/cn/docs/config/config-option.md | 23 +-
content/cn/docs/contribution-guidelines/_index.md | 6 +-
.../committer-guidelines.md | 4 +-
.../cn/docs/contribution-guidelines/contribute.md | 196 +++------
.../hugegraph-server-idea-setup.md | 2 +-
.../cn/docs/contribution-guidelines/subscribe.md | 42 +-
.../contribution-guidelines/validate-release.md | 215 ++--------
content/cn/docs/guides/_index.md | 8 +-
content/cn/docs/guides/architectural.md | 12 +-
content/cn/docs/guides/backup-restore.md | 4 +-
content/cn/docs/guides/custom-plugin.md | 12 +-
content/cn/docs/guides/faq.md | 24 +-
content/cn/docs/guides/security.md | 8 +-
content/cn/docs/guides/toolchain-local-test.md | 68 ++--
content/cn/docs/introduction/_index.md | 181 +++------
content/cn/docs/language/_index.md | 8 +-
content/cn/docs/quickstart/_index.md | 6 +-
content/cn/docs/quickstart/client/_index.md | 2 +
.../docs/quickstart/client/hugegraph-client-go.md | 160 ++------
.../quickstart/client/hugegraph-client-python.md | 204 +++-------
.../cn/docs/quickstart/client/hugegraph-client.md | 15 +-
content/cn/docs/quickstart/computing/_index.md | 13 +-
.../computing/hugegraph-computer-config.md | 32 +-
.../quickstart/computing/hugegraph-computer.md | 240 ++++-------
.../docs/quickstart/computing/hugegraph-vermeer.md | 178 ++++-----
content/cn/docs/quickstart/hugegraph-ai/_index.md | 191 ++-------
.../quickstart/hugegraph-ai/config-reference.md | 444 +++++----------------
.../docs/quickstart/hugegraph-ai/hugegraph-llm.md | 308 +++-----------
.../docs/quickstart/hugegraph-ai/hugegraph-ml.md | 284 +++----------
.../cn/docs/quickstart/hugegraph-ai/quick_start.md | 271 +++----------
.../cn/docs/quickstart/hugegraph-ai/rest-api.md | 433 ++++++--------------
content/cn/docs/quickstart/hugegraph-spark.md | 4 +-
content/cn/docs/quickstart/hugegraph/_index.md | 4 +-
.../docs/quickstart/hugegraph/hugegraph-hstore.md | 20 +-
.../cn/docs/quickstart/hugegraph/hugegraph-pd.md | 18 +-
.../docs/quickstart/hugegraph/hugegraph-server.md | 93 ++---
content/cn/docs/quickstart/toolchain/_index.md | 6 +-
.../docs/quickstart/toolchain/hugegraph-hubble.md | 60 ++-
.../docs/quickstart/toolchain/hugegraph-loader.md | 28 +-
.../toolchain/hugegraph-spark-connector.md | 16 +-
.../docs/quickstart/toolchain/hugegraph-tools.md | 36 +-
55 files changed, 1263 insertions(+), 3162 deletions(-)
diff --git a/.gitignore b/.gitignore
index 86f2983b1..5fad68d9b 100644
--- a/.gitignore
+++ b/.gitignore
@@ -29,3 +29,4 @@ GEMINI.md
.aider*
.gemini/
WARP.md
+/.goal-task
diff --git a/content/cn/docs/CLA.md b/content/cn/docs/CLA.md
index 784a53a62..ff39375e8 100644
--- a/content/cn/docs/CLA.md
+++ b/content/cn/docs/CLA.md
@@ -1,107 +1,18 @@
-## Contributor Agreement
+---
+title: "Apache 贡献者协议"
+linkTitle: "贡献者协议"
+weight: 10
+---
-## Individual Contributor exclusive License Agreement
+## Apache 贡献者协议
-## (including the TRADITIONAL PATENT LICENSE OPTION)
+HugeGraph 使用 Apache Software Foundation(ASF)的标准贡献者协议,不再使用项目自定义的 CLA 或 GitHub CLA Assistant 流程。
-Thank you for your interest in contributing to HugeGraph's all projects ("We" or "Us").
+普通的小型贡献按 Apache License 2.0 第 5 条提交。成为 committer 前,或提交较大贡献时,需要签署 ASF Individual Contributor License Agreement(ICLA)。如果贡献的知识产权属于公司,还可能需要 Corporate Contributor License Agreement(CCLA);CCLA 不能替代个人 ICLA。
-The purpose of this contributor agreement ("Agreement") is to clarify and document the rights granted by contributors to Us. To make this document effective, please follow the comment of GitHub CLA-Assistant when submitting a new pull request.
+协议正文、填写要求和提交方式以 ASF 官方页面为准:
-### How to use this Contributor Agreement
+- [ASF Contributor Agreements](https://www.apache.org/licenses/contributor-agreements.html)
+- [Individual Contributor License Agreement](https://www.apache.org/licenses/icla.pdf)
-If You are an employee and have created the Contribution as part of your employment, You need to have Your employer approve this Agreement or sign the Entity version of this document. If You do not own the Copyright in the entire work of authorship, any other author of the Contribution should also sign this – in any event, please contact Us at hugegraph@googlegroups.com
-
-### 1. Definitions
-
-**"You"** means the individual Copyright owner who Submits a Contribution to Us.
-
-**"Contribution"** means any original work of authorship, including any original modifications or additions to an existing work of authorship, Submitted by You to Us, in which You own the Copyright.
-
-**"Copyright"** means all rights protecting works of authorship, including copyright, moral and neighboring rights, as appropriate, for the full term of their existence.
-
-**"Material"** means the software or documentation made available by Us to third parties. When this Agreement covers more than one software project, the Material means the software or documentation to which the Contribution was Submitted. After You Submit the Contribution, it may be included in the Material.
-
-**"Submit"** means any act by which a Contribution is transferred to Us by You by means of tangible or intangible media, including but not limited to electronic mailing lists, source code control systems, and issue tracking systems that are managed by, or on behalf of, Us, but excluding any transfer that is conspicuously marked or otherwise designated in writing by You as "Not a Contribution."
-
-**"Documentation"** means any non-software portion of a Contribution.
-
-### 2. License grant
-
-#### 2.1 Copyright license to Us
-
-Subject to the terms and conditions of this Agreement, You hereby grant to Us a worldwide, royalty-free, Exclusive, perpetual and irrevocable (except as stated in Section 8.2) license, with the right to transfer an unlimited number of non-exclusive licenses or to grant sublicenses to third parties, under the Copyright covering the Contribution to use the Contribution by all means, including, but not limited to:
-
-- publish the Contribution,
-- modify the Contribution,
-- prepare derivative works based upon or containing the Contribution and/or to combine the Contribution with other Materials,
-- reproduce the Contribution in original or modified form,
-- distribute, to make the Contribution available to the public, display and publicly perform the Contribution in original or modified form.
-
-#### 2.2 Moral rights
-
-Moral Rights remain unaffected to the extent they are recognized and not waivable by applicable law. Notwithstanding, You may add your name to the attribution mechanism customary used in the Materials you Contribute to, such as the header of the source code files of Your Contribution, and We will respect this attribution when using Your Contribution.
-
-#### 2.3 Copyright license back to You
-
-Upon such grant of rights to Us, We immediately grant to You a worldwide, royalty-free, non-exclusive, perpetual and irrevocable license, with the right to transfer an unlimited number of non-exclusive licenses or to grant sublicenses to third parties, under the Copyright covering the Contribution to use the Contribution by all means, including, but not limited to:
-
-- publish the Contribution,
-- modify the Contribution,
-- prepare derivative works based upon or containing the Contribution and/or to combine the Contribution with other Materials,
-- reproduce the Contribution in original or modified form,
-- distribute, to make the Contribution available to the public, display and publicly perform the Contribution in original or modified form.
-
-This license back is limited to the Contribution and does not provide any rights to the Material.
-
-### 3. Patents
-
-#### 3.1 Patent license
-
-Subject to the terms and conditions of this Agreement You hereby grant to Us and to recipients of Materials distributed by Us a worldwide, royalty-free, non-exclusive, perpetual and irrevocable (except as stated in Section 3.2) patent license, with the right to transfer an unlimited number of non-exclusive licenses or to grant sublicenses to third parties, to make, have made, use, sell, offer for sale, import and otherwise transfer the Contribution and the Contribution in combination wit [...]
-
-#### 3.2 Revocation of patent license
-
-You reserve the right to revoke the patent license stated in section 3.1 if We make any infringement claim that is targeted at your Contribution and not asserted for a Defensive Purpose. An assertion of claims of the Patents shall be considered for a "Defensive Purpose" if the claims are asserted against an entity that has filed, maintained, threatened, or voluntarily participated in a patent infringement lawsuit against Us or any of Our licensees.
-
-### 4. License obligations by Us
-
-We agree to (sub)license the Contribution or any Materials containing, based on or derived from your Contribution under the terms of any licenses the Free Software Foundation classifies as Free Software License and which are approved by the Open Source Initiative as Open Source licenses.
-
-More specifically and in strict accordance with the above paragraph, we agree to (sub)license the Contribution or any Materials containing, based on or derived from the Contribution only in accordance with our licensing policy available at: http://www.apache.org/licenses/LICENSE-2.0.
-
-In addition, We may use the following licenses for Documentation in the Contribution: GFDL-1.2 (including any right to adopt any future version of a license).
-
-We agree to license patents owned or controlled by You only to the extent necessary to (sub)license Your Contribution(s) and the combination of Your Contribution(s) with the Material under the terms of any licenses the Free Software Foundation classifies as Free Software licenses and which are approved by the Open Source Initiative as Open Source licenses..
-
-### 5. Disclaimer
-
-THE CONTRIBUTION IS PROVIDED "AS IS". MORE PARTICULARLY, ALL EXPRESS OR IMPLIED WARRANTIES INCLUDING, WITHOUT LIMITATION, ANY IMPLIED WARRANTY OF SATISFACTORY QUALITY, FITNESS FOR A PARTICULAR PURPOSE AND NON-INFRINGEMENT ARE EXPRESSLY DISCLAIMED BY YOU TO US AND BY US TO YOU. TO THE EXTENT THAT ANY SUCH WARRANTIES CANNOT BE DISCLAIMED, SUCH WARRANTY IS LIMITED IN DURATION AND EXTENT TO THE MINIMUM PERIOD AND EXTENT PERMITTED BY LAW.
-
-### 6. Consequential damage waiver
-
-TO THE MAXIMUM EXTENT PERMITTED BY APPLICABLE LAW, IN NO EVENT WILL YOU OR WE BE LIABLE FOR ANY LOSS OF PROFITS, LOSS OF ANTICIPATED SAVINGS, LOSS OF DATA, INDIRECT, SPECIAL, INCIDENTAL, CONSEQUENTIAL AND EXEMPLARY DAMAGES ARISING OUT OF THIS AGREEMENT REGARDLESS OF THE LEGAL OR EQUITABLE THEORY (CONTRACT, TORT OR OTHERWISE) UPON WHICH THE CLAIM IS BASED.
-
-### 7. Approximation of disclaimer and damage waiver
-
-IF THE DISCLAIMER AND DAMAGE WAIVER MENTIONED IN SECTION 5. AND SECTION 6. CANNOT BE GIVEN LEGAL EFFECT UNDER APPLICABLE LOCAL LAW, REVIEWING COURTS SHALL APPLY LOCAL LAW THAT MOST CLOSELY APPROXIMATES AN ABSOLUTE WAIVER OF ALL CIVIL OR CONTRACTUAL LIABILITY IN CONNECTION WITH THE CONTRIBUTION.
-
-### 8. Term
-
-8.1 This Agreement shall come into effect upon Your acceptance of the terms and conditions.
-
-8.2 This Agreement shall apply for the term of the copyright and patents licensed here. However, You shall have the right to terminate the Agreement if We do not fulfill the obligations as set forth in Section 4. Such termination must be made in writing.
-
-8.3 In the event of a termination of this Agreement Sections 5, 6, 7, 8 and 9 shall survive such termination and shall remain in full force thereafter. For the avoidance of doubt, Free and Open Source Software (sub)licenses that have already been granted for Contributions at the date of the termination shall remain in full force after the termination of this Agreement.
-
-### 9 Miscellaneous
-
-9.1 This Agreement and all disputes, claims, actions, suits or other proceedings arising out of this agreement or relating in any way to it shall be governed by the laws of China excluding its private international law provisions.
-
-9.2 This Agreement sets out the entire agreement between You and Us for Your Contributions to Us and overrides all other agreements or understandings.
-
-9.3 In case of Your death, this agreement shall continue with Your heirs. In case of more than one heir, all heirs must exercise their rights through a commonly authorized person.
-
-9.4 If any provision of this Agreement is found void and unenforceable, such provision will be replaced to the extent possible with a provision that comes closest to the meaning of the original provision and that is enforceable. The terms and conditions set forth in this Agreement shall apply notwithstanding any failure of essential purpose of this Agreement or any limited remedy to the maximum extent possible under law.
-
-9.5 You agree to notify Us of any facts or circumstances of which you become aware that would make this Agreement inaccurate in any respect.
+请阅读协议后按官方要求签名,并将完整文件作为附件单独发送至 `secretary@apache.org`。不要把协议发送到 HugeGraph 开发者邮件列表,也不要提交到 GitHub 仓库。
diff --git a/content/cn/docs/SUMMARY.md b/content/cn/docs/SUMMARY.md
index ab5e32bf9..30c3e97ac 100644
--- a/content/cn/docs/SUMMARY.md
+++ b/content/cn/docs/SUMMARY.md
@@ -1,77 +1,53 @@
-# HugeGraph Docs
-
-* [Download](download/download)
-
-## Quickstart
-* [Install HugeGraph-Server](quickstart/hugegraph/hugegraph-server)
-* [Load data with HugeGraph-Loader](quickstart/toolchain/hugegraph-loader)
-* [Visual with HugeGraph-Hubble](quickstart/toolchain/hugegraph-hubble)
-* [Develop with HugeGraph-Client](quickstart/client/hugegraph-client)
-* [Manage with HugeGraph-Tools](quickstart/toolchain/hugegraph-tools)
-* [Analysis with HugeGraph-Computer](quickstart/computing/hugegraph-computer)
-
-## Config
-* [Config Guide](config/config-guide)
-* [Config Options](config/config-option)
-* [Config Authentication](config/config-authentication)
-* [Config HTTPS](config/config-https)
-* [Config Computer](quickstart/computing/hugegraph-computer)
-
-## API
-* [RESTful API](clients/restful-api)
- * [Schema](clients/restful-api/schema)
- * [PropertyKey](clients/restful-api/propertykey)
- * [VertexLabel](clients/restful-api/vertexlabel)
- * [EdgeLabel](clients/restful-api/edgelabel)
- * [IndexLabel](clients/restful-api/indexlabel)
- * [Rebuild](clients/restful-api/rebuild)
- * [Vertex](clients/restful-api/vertex)
- * [Edge](clients/restful-api/edge)
- * [Traverser](clients/restful-api/traverser)
- * [Rank](clients/restful-api/rank)
- * [Variable](clients/restful-api/variable)
- * [Graphs](clients/restful-api/graphs)
- * [Task](clients/restful-api/task)
- * [Gremlin](clients/restful-api/gremlin)
- * [Cypher](clients/restful-api/cypher)
- * [Authentication](clients/restful-api/auth)
- * [Other](clients/restful-api/other)
-* [Java Client](clients/hugegraph-client)
-* [Gremlin Console](clients/gremlin-console)
-
-## Guides
-* [Architecture Overview](guides/architectural)
-* [Design Concepts](guides/desgin-concept)
-* [Custom Plugins](guides/custom-plugin)
-* [Backup Restore](guides/backup-restore)
-* [FAQ](guides/faq)
-
-## Query Language
-* [Gremlin Query Language](language/hugegraph-gremlin)
-* [HugeGraph Examples](language/hugegraph-example)
-
-## Performance
-* [HugeGraph Benchmark Performance](performance/hugegraph-benchmark-0.5.6)
-* [HugeGraph API Performance-Outdated](performance/api-performance)
- * [v0.5.6 Stand-alone(RocksDB)](performance/api-performance/hugegraph-api-0.5.6-rocksdb)
- * [v0.5.6 Cluster(Cassandra)](performance/api-performance/hugegraph-api-0.5.6-cassandra)
- * [v0.4.4](performance/api-performance/hugegraph-api-0.4.4)
- * [v0.2](performance/api-performance/hugegraph-api-0.2)
-* [HugeGraph-Loader Performance](performance/hugegraph-loader-performance)
-
-## ChangeLogs
-* [Release-1.3.0](changelog/hugegraph-1.3.0-release-notes)
-* [Release-1.2.0](changelog/hugegraph-1.2.0-release-notes)
-* [Release-1.0.0](changelog/hugegraph-1.0.0-release-notes)
-* [Release-0.12.0](changelog/hugegraph-0.12.0-release-notes)
-* [Release-0.11.2](changelog/hugegraph-0.11.2-release-notes)
-* [Release-0.10.4](changelog/hugegraph-0.10.4-release-notes)
-* [Release-0.9.2](changelog/hugegraph-0.9.2-release-notes)
-* [Release-0.8.0](changelog/hugegraph-0.8.0-release-notes)
-* [Release-0.7.4](changelog/hugegraph-0.7.4-release-notes)
-* [Release-0.6.1](changelog/hugegraph-0.6.1-release-notes)
-* [Release-0.5.6](changelog/hugegraph-0.5.6-release-notes)
-* [Release-0.4.4](changelog/hugegraph-0.4.4-release-notes)
-* [Release-0.3.3](changelog/hugegraph-0.3.3-release-notes)
-* [Release-0.2.4](changelog/hugegraph-0.2.4-release-notes)
-* [Release-0.2](changelog/hugegraph-0.2-release-notes)
+# HugeGraph 中文文档
+
+- [系统介绍](introduction/_index)
+- [下载](download/download)
+
+## 快速开始
+
+- [HugeGraph Server](quickstart/hugegraph/hugegraph-server)
+- [PD](quickstart/hugegraph/hugegraph-pd)
+- [HStore](quickstart/hugegraph/hugegraph-hstore)
+- [Java Client](quickstart/client/hugegraph-client)
+- [Go Client](quickstart/client/hugegraph-client-go)
+- [Python Client](quickstart/client/hugegraph-client-python)
+- [Loader](quickstart/toolchain/hugegraph-loader)
+- [Hubble](quickstart/toolchain/hugegraph-hubble)
+- [Spark Connector](quickstart/toolchain/hugegraph-spark-connector)
+- [Tools](quickstart/toolchain/hugegraph-tools)
+- [Vermeer](quickstart/computing/hugegraph-vermeer)
+- [Computer](quickstart/computing/hugegraph-computer)
+- [HugeGraph-AI](quickstart/hugegraph-ai/quick_start)
+
+## Server 配置与 API
+
+- [配置指南](config/config-guide)
+- [配置选项](config/config-option)
+- [认证与授权](config/config-authentication)
+- [HTTPS](config/config-https)
+- [REST API](clients/restful-api/_index)
+- [Gremlin Console](clients/gremlin-console)
+
+## 使用指南
+
+- [架构](guides/architectural)
+- [设计](guides/desgin-concept)
+- [备份与恢复](guides/backup-restore)
+- [自定义插件](guides/custom-plugin)
+- [Docker 集群](guides/hugegraph-docker-cluster)
+- [安全](guides/security)
+- [Toolchain 本地测试](guides/toolchain-local-test)
+- [常见问题](guides/faq)
+
+## 查询语言
+
+- [Gremlin](language/hugegraph-gremlin)
+- [示例](language/hugegraph-example)
+
+## 参与贡献
+
+- [贡献流程](contribution-guidelines/contribute)
+- [Contributor Agreement](CLA)
+- [邮件列表](contribution-guidelines/subscribe)
+- [Committer 指南](contribution-guidelines/committer-guidelines)
+- [版本验证](contribution-guidelines/validate-release)
diff --git a/content/cn/docs/_index.md b/content/cn/docs/_index.md
index 82bd55a87..8073489f6 100755
--- a/content/cn/docs/_index.md
+++ b/content/cn/docs/_index.md
@@ -9,7 +9,7 @@ menu:
## Apache HugeGraph 文档
-Apache HugeGraph 是一套完整的图数据库生态系统,支持 OLTP 实时查询、OLAP 离线分析和 AI 智能应用。
+Apache HugeGraph 包含图数据库、图计算和图 AI 组件。Server 负责图数据存储与查询,Computer 和 Vermeer 运行图算法,HugeGraph-AI 提供 GraphRAG、图机器学习和 Python 客户端。
### 按场景快速导航
@@ -17,7 +17,7 @@ Apache HugeGraph 是一套完整的图数据库生态系统,支持 OLTP 实时
|----------|-----------|
| **运行图查询** (OLTP) | [HugeGraph Server 快速开始](quickstart/hugegraph/hugegraph-server) |
| **大规模图计算** (OLAP) | [图计算引擎](quickstart/computing/hugegraph-computer) |
-| **构建 AI/RAG 应用** | [HugeGraph-AI](quickstart/hugegraph-ai/quick_start) |
+| **构建 GraphRAG 应用** | [HugeGraph-AI](quickstart/hugegraph-ai/quick_start) |
| **批量导入数据** | [HugeGraph Loader](quickstart/toolchain/hugegraph-loader) |
| **可视化管理图** | [Hubble Web UI](quickstart/toolchain/hugegraph-hubble) |
@@ -35,24 +35,16 @@ Apache HugeGraph 是一套完整的图数据库生态系统,支持 OLTP 实时
│ │ │ │ │
│ ┌──────┴───────────────┴────────────────────┴──────────────┐ │
│ │ HugeGraph Toolchain │ │
-│ │ Hubble (UI) | Loader | Client (Java/Go/Python) | Tools │ │
+│ │ Hubble (UI) | Loader | Client (Java/Go) | Tools │ │
│ └───────────────────────────────────────────────────────────┘ │
└─────────────────────────────────────────────────────────────────┘
```
### 核心组件
-- **HugeGraph Server** - 图数据库核心,REST API + Gremlin + Cypher 支持
-- **HugeGraph Toolchain** - 客户端 SDK、数据导入、可视化、运维工具
-- **HugeGraph Computer** - 分布式图计算 (Vermeer 高性能内存版 / Computer 海量存储外存版)
-- **HugeGraph-AI** - GraphRAG、知识图谱构建、20+ 图机器学习算法
+- **HugeGraph Server**:提供 REST API,并支持 Gremlin 和 Cypher 查询
+- **HugeGraph Toolchain**:包含 Java/Go Client、Loader、Hubble、Spark Connector 和 Tools
+- **HugeGraph Computer**:仓库内包含分布式 Computer 引擎和内存计算引擎 Vermeer
+- **HugeGraph-AI**:包含 GraphRAG、图机器学习、Python Client 和 Vermeer Python Client
-### 部署模式
-
-| 模式 | 适用场景 | 数据规模 |
-|-----|---------|---------|
-| **单机版** | 极速稳定、存算一体 | < 4TB |
-| **分布式** | 海量存储、存算分离 | < 1000TB |
-| **Docker** | 快速体验 | 任意 |
-
-[📖 详细介绍](introduction/)
+部署 Server 时可以使用单机 RocksDB 后端,也可以使用由 PD 和 Store 组成的 HStore 分布式后端。各组件的适用范围和启动方式见[系统介绍](introduction/)及对应快速开始文档。
diff --git a/content/cn/docs/clients/_index.md b/content/cn/docs/clients/_index.md
index d3395c548..b31bade12 100644
--- a/content/cn/docs/clients/_index.md
+++ b/content/cn/docs/clients/_index.md
@@ -1,5 +1,7 @@
---
-title: "API"
-linkTitle: "API"
+title: "客户端与 API"
+linkTitle: "客户端与 API"
weight: 5
----
\ No newline at end of file
+---
+
+本节包含 REST API、Gremlin Console 和客户端说明。当前 Server REST API 使用图空间和图名称组成资源路径;具体路径以各 API 页面和 Server 的 OpenAPI 页面为准。
diff --git a/content/cn/docs/clients/gremlin-console.md b/content/cn/docs/clients/gremlin-console.md
index 468bea58e..8af671973 100644
--- a/content/cn/docs/clients/gremlin-console.md
+++ b/content/cn/docs/clients/gremlin-console.md
@@ -69,20 +69,16 @@ gremlin>
### 2 Client/Server 请求模式
-因为 Gremlin-Console 只能通过 WebSocket 连接 HugeGraph-Server,默认 HugeGraph-Server 是对外提供 HTTP 连接的,所以先修改 gremlin-server 的配置。
-
-**注意:将连接方式修改为 WebSocket 后,HugeGraph-Client、HugeGraph-Loader、HugeGraph-Hubble 等配套工具都不能使用了。**
+Gremlin-Console 通过 WebSocket 连接 HugeGraph-Server。默认配置使用 `WsAndHttpChannelizer`,可同时处理 WebSocket 和 HTTP 请求,无需切换 Channelizer。
```yaml
# vim conf/gremlin-server.yaml
# ......
-# If you want to start gremlin-server for gremlin-console (web-socket),
-# please change `HttpChannelizer` to `WebSocketChannelizer` or comment this line.
-channelizer: org.apache.tinkerpop.gremlin.server.channel.HttpChannelizer
+channelizer: org.apache.tinkerpop.gremlin.server.channel.WsAndHttpChannelizer
# ......
```
-将 `channelizer: org.apache.tinkerpop.gremlin.server.channel.HttpChannelizer` 修改成 `channelizer: org.apache.tinkerpop.gremlin.server.channel.WebSocketChannelizer` 或直接注释,然后按照[步骤](/cn/docs/quickstart/hugegraph/hugegraph-server/)启动 HugeGraph-Server。
+确认 `host`、`port` 与 `remote.yaml` 一致,然后按照[步骤](/cn/docs/quickstart/hugegraph/hugegraph-server/)启动 HugeGraph-Server。
下面进入 Gremlin-Console:
diff --git a/content/cn/docs/clients/hugegraph-client.md b/content/cn/docs/clients/hugegraph-client.md
index 4b51ed729..1760e02bb 100644
--- a/content/cn/docs/clients/hugegraph-client.md
+++ b/content/cn/docs/clients/hugegraph-client.md
@@ -13,7 +13,7 @@ weight: 2
HugeGraph-Client 是操作 graph 的总入口,用户必须先创建出 HugeGraph-Client 对象,与 HugeGraph-Server 建立连接(伪连接)后,才能获取到 schema、graph 以及 gremlin 的操作入口对象。
-目前 HugeGraph-Client 只允许连接服务端已存在的图,无法自定义图进行创建。1.7.0 版本后,client 支持 graphSpace 设置,默认为DEFAULT。其创建方法如下:
+HugeGraph-Client 连接服务端已有的图。构造器支持传入 GraphSpace;使用双参数构造器或传入空值时,GraphSpace 默认为 `DEFAULT`。
```java
// HugeGraphServer 地址:"http://localhost:8080"
@@ -47,7 +47,7 @@ SchemaManager schema = hugeClient.schema()
schema = graph.schema()
```
-下面分别对三种元数据的定义过程进行介绍。
+下面分别介绍四种元数据的定义过程。
#### 2.2 PropertyKey
@@ -457,8 +457,7 @@ Edge knows1 = marko.addEdge("knows", vadas, "city", "Beijing");
**注意:当 frequency 为 multiple 时必须要设置 sortKeys 对应属性类型的值。**
### 4 图管理
-client支持一个物理部署中多个 GraphSpace,每个 GraphSpace 下可以含多个图(graph)。
-- 兼容:不指定 GraphSpace 时,默认使用 "DEFAULT" 空间
+Client 支持管理一个物理部署中的多个 GraphSpace,每个 GraphSpace 可以包含多个图。不指定 GraphSpace 时使用 `DEFAULT`。
#### 4.1 创建GraphSpace
@@ -479,11 +478,14 @@ spaceManager.createGraphSpace(graphSpace);
| 类别 | 接口 | 描述 |
|------|------|------|
-| Manager - 查询 | listGraphSpace() | 获取所有 GraphSpace 列表 |
+| Manager - 查询 | listGraphSpace() | 获取所有 GraphSpace 名称 |
+| | listProfile() / listProfile(String prefix) | 获取 GraphSpace 概要 |
| | getGraphSpace(String name) | 获取指定 GraphSpace |
+| | getDefault() | 获取默认 GraphSpace |
| Manager - 创建/更新 | createGraphSpace(GraphSpace) | 创建 GraphSpace |
-| | updateGraphSpace(String, GraphSpace) | 更新配置 |
-| Manager - 删除 | removeGraphSpace(String) | 删除指定 GraphSpace |
+| | updateGraphSpace(GraphSpace) | 更新配置 |
+| | setDefault(String name) | 设置默认 GraphSpace |
+| Manager - 删除 | deleteGraphSpace(String name) | 删除指定 GraphSpace |
| GraphSpace - 属性 | getName() / getDescription() | 获取名称/描述 |
| | getGraphNumber() | 获取图数量 |
| GraphSpace - 配置 | setDescription(String) | 设置描述 |
diff --git a/content/cn/docs/clients/restful-api/_index.md b/content/cn/docs/clients/restful-api/_index.md
index 67097fa59..1142a6def 100644
--- a/content/cn/docs/clients/restful-api/_index.md
+++ b/content/cn/docs/clients/restful-api/_index.md
@@ -4,14 +4,14 @@ linkTitle: "RESTful API"
weight: 1
---
-> ⚠️ **版本兼容性说明**
+> **版本兼容性说明**
>
-> - HugeGraph 1.7.0+ 引入了图空间功能,API 路径格式为:`/graphspaces/{graphspace}/graphs/{graph}`
-> - HugeGraph 1.5.x 及之前版本使用旧路径:`/graphs/{graph}`, 以及创建/克隆图的 api 使用 text/plain 作为 Content-Type, 1.7.0 及之后使用 json
-> - 默认图空间名称为 `DEFAULT`,可直接使用
+> - 当前 API 的图资源路径以 `/graphspaces/{graphspace}/graphs/{graph}` 开头。
+> - HugeGraph 1.5.x 及更早版本使用 `/graphs/{graph}`。创建、克隆图等接口的请求格式也与当前版本不同。
+> - 默认图空间名是 `DEFAULT`。
> - 旧版本 doc 参考:[HugeGraph 1.5.x RESTful API](https://github.com/apache/hugegraph-doc/tree/release-1.5.0)
-除了下方的文档,你还可以通过 `localhost:8080/swagger-ui/index.html` 访问 `swagger-ui` 以查看 `RESTful API`。[示例可以参考此处](/cn/docs/quickstart/hugegraph/hugegraph-server#swaggerui-example)
+Server 启动后,可访问 `http://localhost:8080/swagger-ui/index.html` 查看当前版本的 OpenAPI 页面。[使用示例](/cn/docs/quickstart/hugegraph/hugegraph-server#swaggerui-example)
[comment]: <> (- Graph Schema)
diff --git a/content/cn/docs/clients/restful-api/graphs.md b/content/cn/docs/clients/restful-api/graphs.md
index 560efc610..7765cae6c 100644
--- a/content/cn/docs/clients/restful-api/graphs.md
+++ b/content/cn/docs/clients/restful-api/graphs.md
@@ -66,7 +66,7 @@ GET http://localhost:8080/graphspaces/DEFAULT/graphs/hugegraph
```javascript
{
"name": "hugegraph",
- "backend": "cassandra"
+ "backend": "rocksdb"
}
```
@@ -281,8 +281,8 @@ gremlin.graph=org.apache.hugegraph.HugeFactory
#vertex.default_label=vertex
-backend=cassandra
-serializer=cassandra
+backend=rocksdb
+serializer=binary
store=hugegraph
...=
@@ -508,4 +508,4 @@ PUT http://localhost:8080/graphspaces/DEFAULT/graphs/hugegraph/compact
"local": "OK"
}
}
-```
\ No newline at end of file
+```
diff --git a/content/cn/docs/clients/restful-api/other.md b/content/cn/docs/clients/restful-api/other.md
index 0e6fd0458..f1b78d64e 100644
--- a/content/cn/docs/clients/restful-api/other.md
+++ b/content/cn/docs/clients/restful-api/other.md
@@ -27,9 +27,9 @@ GET http://localhost:8080/versions
{
"versions": {
"version": "v1",
- "core": "0.4.5.1",
- "gremlin": "3.2.5",
- "api": "0.13.2.0"
+ "core": "1.7.0",
+ "gremlin": "3.5.1",
+ "api": "0.71.0.0"
}
}
```
diff --git a/content/cn/docs/clients/restful-api/traverser.md b/content/cn/docs/clients/restful-api/traverser.md
index 3d4f210b4..10b35bf1a 100644
--- a/content/cn/docs/clients/restful-api/traverser.md
+++ b/content/cn/docs/clients/restful-api/traverser.md
@@ -454,7 +454,7 @@ POST http://localhost:8080/graphspaces/DEFAULT/graphs/{graph}/traversers/kout
###### Method & Url
```
-GET http://localhost:8080/graphspaces/DEFAULT/graphs/{graph}/traversers/kneighbor?source=“1:marko”&max_depth=2
+GET http://localhost:8080/graphspaces/DEFAULT/graphs/{graph}/traversers/kneighbor?source=%221:marko%22&max_depth=2
```
###### Response Status
@@ -753,7 +753,7 @@ POST http://localhost:8080/graphspaces/DEFAULT/graphs/{graph}/traversers/kneighb
###### Method & Url
```
-GET http://localhost:8080/graphspaces/DEFAULT/graphs/{graph}/traversers/sameneighbors?vertex=“1:marko”&other="1:josh"
+GET http://localhost:8080/graphspaces/DEFAULT/graphs/{graph}/traversers/sameneighbors?vertex=%221:marko%22&other=%221:josh%22
```
###### Response Status
diff --git a/content/cn/docs/config/_index.md b/content/cn/docs/config/_index.md
index ce83888d7..dbf60c91d 100644
--- a/content/cn/docs/config/_index.md
+++ b/content/cn/docs/config/_index.md
@@ -4,9 +4,9 @@ linkTitle: "Server 配置"
weight: 4
---
-本节介绍 HugeGraph-Server 的配置方法,包括:
+本节介绍 HugeGraph-Server 的配置文件、可用选项、认证和 HTTPS 设置。
-- **[Server 启动指南](config-guide)** - 了解配置文件结构和基本配置方法
-- **[Server 完整配置手册](config-option)** - 完整的配置选项列表和说明
-- **[权限配置](config-authentication)** - 用户认证和授权配置
-- **[HTTPS 配置](config-https)** - 启用 HTTPS 安全协议
\ No newline at end of file
+- [Server 配置指南](config-guide)
+- [Server 配置选项](config-option)
+- [认证与授权](config-authentication)
+- [HTTPS 配置](config-https)
diff --git a/content/cn/docs/config/config-authentication.md b/content/cn/docs/config/config-authentication.md
index f5e33c7f6..acf9c2757 100644
--- a/content/cn/docs/config/config-authentication.md
+++ b/content/cn/docs/config/config-authentication.md
@@ -6,8 +6,7 @@ weight: 3
### 概述
-HugeGraph 为了方便不同用户场景下的鉴权使用,目前内置了完备的`StandardAuthenticator`权限模式,支持多用户认证、
-以及细粒度的权限访问控制,采用基于“用户 - 用户组 - 操作 - 资源”的 4 层设计,灵活控制用户角色与权限 (支持多 GraphServer)
+HugeGraph 内置 `StandardAuthenticator`,支持多用户认证和基于“用户、用户组、操作、资源”的权限控制。
`StandardAuthenticator` 模式的几个核心设计:
- 初始化时创建超级管理员 (`admin`) 用户,后续通过超级管理员创建其它用户,新创建的用户被分配足够权限后,可以创建或管理更多的用户
@@ -28,15 +27,15 @@ HugeGraph 目前默认**未启用**用户认证功能,需通过修改配置文
> ⚠️ **SEC 提醒:图查询语言 (Gremlin/Cypher) 的安全性**
>
-> 出于图查询语言的灵活性可能带来的潜在系统安全隐患,**请避免直接在公网/外网环境暴露任何查询相关接口**。在实际生产部署时,请以此处的 **[鉴权认证体系](/cn/docs/config/config-authentication/)** 结合 **IP 白名单** 为安全双重保障机制,同时建议开启 Audit Log (审计日志) 以精准定位用户执行的具体查询语句。鉴于 Server 的无状态特性,整体架构上强烈推荐采用 **[容器化环境 (Docker/K8s)](/cn/docs/quickstart/hugegraph/hugegraph-server/#31-使用-docker-容器-便于测试)** 部署,以极低成本有效隔离底层系统的安全风险。
+> 不要把 Gremlin、Cypher 等查询接口直接暴露到公网。生产环境应同时启用[鉴权](/cn/docs/config/config-authentication/)、IP 白名单和审计日志,并通过 [Docker 或 Kubernetes](/cn/docs/quickstart/hugegraph/hugegraph-server/#31-使用-docker-容器-便于测试) 隔离 Server 进程。
-目前已内置实现了`StandardAuthenticator`模式,该模式支持多用户认证与细粒度权限控制。此外,开发者可以自定义实现`HugeAuthenticator`接口来对接自身的权限系统。
+`StandardAuthenticator` 支持多用户认证和细粒度权限控制。也可以实现 `HugeAuthenticator` 接口来接入已有的用户系统。
-用户认证方式均采用 [HTTP Basic Authentication](https://zh.wikipedia.org/wiki/HTTP%E5%9F%BA%E6%9C%AC%E8%AE%A4%E8%AF%81) ,简单说就是在发送 HTTP 请求时在 `Authentication` 设置选择 `Basic` 然后输入对应的用户名和密码,对应 HTTP 明文如下所示 :
+用户认证使用 [HTTP Basic Authentication](https://zh.wikipedia.org/wiki/HTTP%E5%9F%BA%E6%9C%AC%E8%AE%A4%E8%AF%81)。`Basic` 后面的值是 `用户名:密码` 的 Base64 编码。使用 curl 时可直接通过 `-u` 传入凭据:
-```http
-GET http://localhost:8080/graphs/hugegraph/schema/vertexlabels
-Authorization: Basic admin xxxx
+```bash
+curl -u 'admin:<password>' \
+ http://localhost:8080/graphspaces/DEFAULT/graphs/hugegraph/schema/vertexlabels
```
**警告**:在 1.5.0 之前版本的 HugeGraph-Server 在鉴权模式下存在 JWT 相关的安全隐患,请务必使用新版本或自行修改 JWT token 的 secretKey。
@@ -67,11 +66,13 @@ authentication: {
}
```
-在配置文件`rest-server.properties`中配置`authenticator`及其`graph_store`信息:
+在 `rest-server.properties` 中配置认证器和权限数据存储图:
```properties
auth.authenticator=org.apache.hugegraph.auth.StandardAuthenticator
auth.graph_store=hugegraph
+# PD 模式首次创建 admin 用户时可设置初始密码
+#auth.admin_pa=<your-admin-password>
# auth client config
# 如果是分开部署 GraphServer 和 AuthServer,还需要指定下面的配置,地址填写 AuthServer 的 IP:RPC 端口
@@ -86,7 +87,7 @@ auth.graph_store=hugegraph
gremlin.graph=org.apache.hugegraph.auth.HugeFactoryAuthProxy
```
-然后详细的权限 API 调用和说明请参考 [Authentication-API](/docs/clients/restful-api/auth) 文档。
+权限 API 的调用方式见 [Authentication API](/cn/docs/clients/restful-api/auth/) 文档。
### 自定义用户认证系统
@@ -94,20 +95,13 @@ gremlin.graph=org.apache.hugegraph.auth.HugeFactoryAuthProxy
### 基于鉴权模式启动
-在鉴权配置完成后,需在首次执行 `init-store.sh` 时命令行中输入 `admin` 密码 (非 docker 部署模式下)
-
-如果基于 docker 镜像部署或者已经初始化 HugeGraph 并需要转换为鉴权模式,需要删除相关图数据并重新启动 HugeGraph, 若图已有业务数据,暂时**无法直接转换**鉴权模式 (hugegraph 版本 <= 1.2.0)
-> 对于该功能的改进已经在最新版本发布 (Docker latest 可用),可参考 [PR 2411](https://github.com/apache/hugegraph/pull/2411), 此时可无缝切换。
+首次执行 `init-store.sh` 时,如果尚未创建 `admin` 用户,命令会要求输入管理员密码。对于已经初始化的持久化后端,`init-store.sh` 会补充认证所需的系统信息,无需删除原有图数据。
```bash
# stop the hugeGraph firstly
bin/stop-hugegraph.sh
-# delete the store data (here we use the default path for rocksdb)
-# Note: no need to delete data in the latest code (fixed in https://github.com/apache/hugegraph/pull/2411)
-rm -rf rocksdb-data/
-
-# init store again
+# 初始化认证系统信息;已有后端数据会被保留
bin/init-store.sh
# start hugeGraph again
@@ -126,7 +120,7 @@ bin/start-hugegraph.sh
在 `docker run` 中添加环境变量 `PASSWORD=xxx`(密码可以自由设置)即可开启鉴权模式::
```bash
-docker run -itd -e PASSWORD=xxx --name=server -p 8080:8080 hugegraph/hugegraph:1.5.0
+docker run -itd -e PASSWORD=xxx --name=server -p 8080:8080 hugegraph/hugegraph:1.7.0
```
#### 2. 采用 docker-compose
@@ -137,7 +131,7 @@ docker run -itd -e PASSWORD=xxx --name=server -p 8080:8080 hugegraph/hugegraph:1
version: '3'
services:
server:
- image: hugegraph/hugegraph:1.5.0
+ image: hugegraph/hugegraph:1.7.0
container_name: server
ports:
- 8080:8080
diff --git a/content/cn/docs/config/config-guide.md b/content/cn/docs/config/config-guide.md
index fed7ba856..00ea93556 100644
--- a/content/cn/docs/config/config-guide.md
+++ b/content/cn/docs/config/config-guide.md
@@ -12,14 +12,14 @@ weight: 1
HugeGraphServer 内部集成了 GremlinServer 和 RestServer,而 gremlin-server.yaml 和 rest-server.properties 就是用来配置这两个 Server 的。
-- [GremlinServer](http://tinkerpop.apache.org/docs/3.2.3/reference/#gremlin-server):GremlinServer 接受用户的 gremlin 语句,解析后转而调用 Core 的代码。
+- [GremlinServer](https://tinkerpop.apache.org/docs/3.5.1/reference/#gremlin-server):GremlinServer 接收 Gremlin 请求并调用图引擎。
- RestServer:提供 RESTful API,根据不同的 HTTP 请求,调用对应的 Core API,如果用户请求体是 gremlin 语句,则会转发给 GremlinServer,实现对图数据的操作。
下面对这三个配置文件逐一介绍。
### 2 gremlin-server.yaml
-gremlin-server.yaml 文件默认的内容如下:
+`gremlin-server.yaml` 的主要结构如下。示例省略了部分导入项;完整内容以发布包中的文件为准。
```yaml
# host and port of gremlin server, need to be consistent with host and port in rest-server.properties
@@ -134,12 +134,9 @@ ssl: {
}
```
-上面的配置项很多,但目前只需要关注如下几个配置项:channelizer 和 graphs。
+通常只需关注 `channelizer`、`host` 和 `port`。图不在 Gremlin Server 的 `graphs` 段加载;是否读取本地图配置由 `rest-server.properties` 中的 `graph.load_from_local_config` 控制。
-- graphs:GremlinServer 启动时需要打开的图,该项是一个 map 结构,key 是图的名字,value 是该图的配置文件路径;
-- channelizer:GremlinServer 与客户端有两种通信方式,分别是 WebSocket 和 HTTP(默认)。如果选择 WebSocket,
-用户可以通过 [Gremlin-Console](../clients/gremlin-console) 快速体验 HugeGraph 的特性,但是不支持大规模数据导入,
-推荐使用 HTTP 的通信方式,HugeGraph 的外围组件都是基于 HTTP 实现的;
+- channelizer:默认的 `WsAndHttpChannelizer` 同时支持 WebSocket 和 HTTP。Gremlin-Console 使用 WebSocket,HugeGraph-Client、Loader 和 Hubble 使用 HTTP;
默认 GremlinServer 是服务在 localhost:8182,如果需要修改,配置 host、port 即可
@@ -150,7 +147,7 @@ ssl: {
### 3 rest-server.properties
-rest-server.properties 文件的默认内容如下:
+下面是可用的 `rest-server.properties` 示例。当前上游发布模板没有写出 `graph.load_from_local_config`,而源码默认值为 `false`;使用 `conf/graphs` 中的本地图配置时必须显式设为 `true`。
```properties
# bind url
@@ -161,46 +158,26 @@ restserver.url=http://127.0.0.1:8080
#gremlinserver.url=http://127.0.0.1:8182
graphs=./conf/graphs
+graph.load_from_local_config=true
# The maximum thread ratio for batch writing, only take effect if the batch.max_write_threads is 0
batch.max_write_ratio=80
batch.max_write_threads=0
# configuration of arthas
-arthas.telnet_port=8562
-arthas.http_port=8561
+arthas.telnetPort=8562
+arthas.httpPort=8561
arthas.ip=127.0.0.1
-arthas.disabled_commands=jad
+arthas.disabledCommands=jad
# authentication configs
-# choose 'org.apache.hugegraph.auth.StandardAuthenticator' or a custom implementation
-#auth.authenticator=
-
-# for StandardAuthenticator mode
+#auth.authenticator=org.apache.hugegraph.auth.StandardAuthenticator
+# for admin password, By default, it is pa and takes effect upon the first startup
+#auth.admin_pa=pa
#auth.graph_store=hugegraph
-# auth client config
-#auth.remote_url=127.0.0.1:8899,127.0.0.1:8898,127.0.0.1:8897
-
-# TODO: Deprecated & removed later (useless from version 1.5.0)
-# rpc server configs for multi graph-servers or raft-servers
-#rpc.server_host=127.0.0.1
-#rpc.server_port=8091
-#rpc.server_timeout=30
-
-# rpc client configs (like enable to keep cache consistency)
-#rpc.remote_url=127.0.0.1:8091,127.0.0.1:8092,127.0.0.1:8093
-#rpc.client_connect_timeout=20
-#rpc.client_reconnect_period=10
-#rpc.client_read_timeout=40
-#rpc.client_retries=3
-#rpc.client_load_balancer=consistentHash
-
-# raft group initial peers
-#raft.group_peers=127.0.0.1:8091,127.0.0.1:8092,127.0.0.1:8093
-
-# lightweight load balancing (beta)
-server.id=server-1
-server.role=master
+
+# use pd
+# usePD=true
# slow query log
log.slow_query_threshold=1000
@@ -211,9 +188,10 @@ memory_monitor.period=2000
```
- restserver.url:RestServer 提供服务的 url,根据实际环境修改。如果其他 IP 地址无法访问,可以尝试修改为特定的地址;或修改为 `http://0.0.0.0` 来监听来自任何 IP 地址的请求,这种方案较为便捷,但需要留意服务可被访问的网络范围;
-- graphs:RestServer 启动时也需要打开图,该项为 map 结构,key 是图的名字,value 是该图的配置文件路径;
+- graphs:图配置文件所在目录,默认值是 `./conf/graphs`。`init-store` 会扫描该目录;Server 仅在 `graph.load_from_local_config=true` 时加载其中的 properties 文件;
+- graph.load_from_local_config:是否在 Server 启动时读取本地图配置,源码默认值为 `false`;
-> 注意:gremlin-server.yaml 和 rest-server.properties 都包含 graphs 配置项,而 `init-store` 命令是根据 gremlin-server.yaml 的 graphs 下的图进行初始化的。
+> 当前上游模板中的 Arthas 键仍写作 `arthas.telnet_port`、`arthas.http_port` 和 `arthas.disabled_commands`,但 `ServerOptions` 读取的是下方示例中的 camelCase 名称。自定义配置应使用 `arthas.telnetPort`、`arthas.httpPort` 和 `arthas.disabledCommands`。
> 配置项 gremlinserver.url 是 GremlinServer 为 RestServer 提供服务的 url,该配置项默认为 http://localhost:8182,如需修改,需要和 gremlin-server.yaml 中的 host 和 port 相匹配;
@@ -237,30 +215,20 @@ gremlin.graph=org.apache.hugegraph.HugeFactory
# schema illegal name template
#schema.illegal_name_regex=\s+|~.*
-#vertex.default_label=vertex
-
+# NOTE: since 1.7.0, only hstore, rocksdb, hbase, memory are supported for backend.
+# if you want to use Cassandra/MySql/PG... as backend, please use version < 1.7.0
backend=rocksdb
serializer=binary
store=hugegraph
-raft.mode=false
-raft.safe_read=false
-raft.use_snapshot=false
-raft.endpoint=127.0.0.1:8281
-raft.group_peers=127.0.0.1:8281,127.0.0.1:8282,127.0.0.1:8283
-raft.path=./raft-log
-raft.use_replicator_pipeline=true
-raft.election_timeout=10000
-raft.snapshot_interval=3600
-raft.backend_threads=48
-raft.read_index_threads=8
-raft.queue_size=16384
-raft.queue_publish_timeout=60
-raft.apply_batch=1
-raft.rpc_threads=80
-raft.rpc_connect_timeout=5000
-raft.rpc_timeout=60000
+# pd config
+#pd.peers=127.0.0.1:8686
+
+# task config
+task.schedule_period=10
+task.retry=0
+task.wait_timeout=10
# if use 'ikanalyzer', need download jar from 'https://github.com/apache/hugegraph-doc/raw/ik_binary/dist/server/ikanalyzer-2012_u6.jar' to lib directory
search.text_analyzer=jieba
@@ -270,61 +238,26 @@ search.text_analyzer_mode=INDEX
#rocksdb.data_path=/path/to/disk
#rocksdb.wal_path=/path/to/disk
-# cassandra backend config
-cassandra.host=localhost
-cassandra.port=9042
-cassandra.username=
-cassandra.password=
-#cassandra.connect_timeout=5
-#cassandra.read_timeout=20
-#cassandra.keyspace.strategy=SimpleStrategy
-#cassandra.keyspace.replication=3
-
# hbase backend config
#hbase.hosts=localhost
#hbase.port=2181
#hbase.znode_parent=/hbase
#hbase.threads_max=64
-# mysql backend config
-#jdbc.driver=com.mysql.jdbc.Driver
-#jdbc.url=jdbc:mysql://127.0.0.1:3306
-#jdbc.username=root
-#jdbc.password=
-#jdbc.reconnect_max_times=3
-#jdbc.reconnect_interval=3
-#jdbc.ssl_mode=false
-
-# postgresql & cockroachdb backend config
-#jdbc.driver=org.postgresql.Driver
-#jdbc.url=jdbc:postgresql://localhost:5432/
-#jdbc.username=postgres
-#jdbc.password=
-
-# palo backend config
-#palo.host=127.0.0.1
-#palo.poll_interval=10
-#palo.temp_dir=./palo-data
-#palo.file_limit_size=32
```
重点关注未注释的几项:
- gremlin.graph:GremlinServer 的启动入口,用户不要修改此项;
-- backend:使用的后端存储,可选值有 memory、cassandra、scylladb、mysql、hbase、postgresql 和 rocksdb;
-- serializer:主要为内部使用,用于将 schema、vertex 和 edge 序列化到后端,对应的可选值为 text、cassandra、scylladb 和 binary;(注:rocksdb 后端值需是 binary,其他后端 backend 与 serializer 值需保持一致,如 hbase 后端该值为 hbase)
-- store:图存储到后端使用的数据库名,在 cassandra 和 scylladb 中就是 keyspace 名,此项的值与 GremlinServer 和 RestServer 中的图名并无关系,但是出于直观考虑,建议仍然使用相同的名字;
-- cassandra.host:backend 为 cassandra 或 scylladb 时此项才有意义,cassandra/scylladb 集群的 seeds;
-- cassandra.port:backend 为 cassandra 或 scylladb 时此项才有意义,cassandra/scylladb 集群的 native port;
+- backend:使用的后端存储。1.7.0 支持 memory、rocksdb、hstore 和 hbase;
+- serializer:schema、vertex 和 edge 写入后端时使用的序列化器。RocksDB 使用 binary;
+- store:图在后端使用的存储名称;
- rocksdb.data_path:backend 为 rocksdb 时此项才有意义,rocksdb 的数据目录
- rocksdb.wal_path:backend 为 rocksdb 时此项才有意义,rocksdb 的日志目录
-- admin.token: 通过一个 token 来获取服务器的配置信息,例如:<http://localhost:8080/graphs/hugegraph/conf?token=162f7848-0b6d-4faf-b557-3a0797869c55>
### 5 多图配置
-我们的系统是可以存在多个图的,并且各个图的后端可以不一样,比如图 `hugegraph_rocksdb` 和 `hugegraph_mysql`,其中 `hugegraph_rocksdb` 以 `RocksDB` 作为后端,`hugegraph_mysql` 以 `MySQL` 作为后端。
-
-配置方法也很简单:
+一个 Server 可以加载多个图,每个图使用单独的 properties 文件。下面创建 RocksDB 图 `hugegraph_rocksdb` 和内存图 `hugegraph_memory`。
**[可选]:修改 rest-server.properties**
@@ -332,29 +265,20 @@ cassandra.password=
```properties
graphs=./conf/graphs
+graph.load_from_local_config=true
```
-在 `conf/graphs` 路径下基于 `hugegraph.properties` 修改得到 `hugegraph_mysql_backend.properties` 和 `hugegraph_rocksdb_backend.properties`
+在 `conf/graphs` 路径下基于 `hugegraph.properties` 创建 `hugegraph_memory.properties` 和 `hugegraph_rocksdb.properties`。
-`hugegraph_mysql_backend.properties` 修改的部分如下:
+`hugegraph_memory.properties` 修改如下:
```properties
-backend=mysql
-serializer=mysql
-
-store=hugegraph_mysql
-
-# mysql backend config
-jdbc.driver=com.mysql.cj.jdbc.Driver
-jdbc.url=jdbc:mysql://127.0.0.1:3306
-jdbc.username=root
-jdbc.password=xxx
-jdbc.reconnect_max_times=3
-jdbc.reconnect_interval=3
-jdbc.ssl_mode=false
+backend=memory
+serializer=text
+store=hugegraph_memory
```
-`hugegraph_rocksdb_backend.properties` 修改的部分如下:
+`hugegraph_rocksdb.properties` 修改如下:
```properties
backend=rocksdb
@@ -374,12 +298,12 @@ $ ./bin/init-store.sh
Initializing HugeGraph Store...
2023-06-11 14:16:14 [main] [INFO] o.a.h.u.ConfigUtil - Scanning option 'graphs' directory './conf/graphs'
-2023-06-11 14:16:14 [main] [INFO] o.a.h.c.InitStore - Init graph with config file: ./conf/graphs/hugegraph_rocksdb_backend.properties
+2023-06-11 14:16:14 [main] [INFO] o.a.h.c.InitStore - Init graph with config file: ./conf/graphs/hugegraph_rocksdb.properties
...
2023-06-11 14:16:15 [main] [INFO] o.a.h.StandardHugeGraph - Graph 'hugegraph_rocksdb' has been initialized
-2023-06-11 14:16:15 [main] [INFO] o.a.h.c.InitStore - Init graph with config file: ./conf/graphs/hugegraph_mysql_backend.properties
+2023-06-11 14:16:15 [main] [INFO] o.a.h.c.InitStore - Init graph with config file: ./conf/graphs/hugegraph_memory.properties
...
-2023-06-11 14:16:16 [main] [INFO] o.a.h.StandardHugeGraph - Graph 'hugegraph_mysql' has been initialized
+2023-06-11 14:16:16 [main] [INFO] o.a.h.StandardHugeGraph - Graph 'hugegraph_memory' has been initialized
2023-06-11 14:16:16 [main] [INFO] o.a.h.StandardHugeGraph - Close graph standardhugegraph[hugegraph_rocksdb]
...
2023-06-11 14:16:16 [main] [INFO] o.a.h.HugeFactory - HugeFactory shutdown
@@ -391,28 +315,28 @@ Initialization finished.
$ ./bin/start-hugegraph.sh
Starting HugeGraphServer...
-Connecting to HugeGraphServer (http://127.0.0.1:8080/graphs)...OK
+Connecting to HugeGraphServer (http://127.0.0.1:8080/graphspaces/DEFAULT/graphs)...OK
Started [pid 21614]
```
查看创建的图:
```bash
-curl http://127.0.0.1:8080/graphs/
+curl http://127.0.0.1:8080/graphspaces/DEFAULT/graphs
-{"graphs":["hugegraph_rocksdb","hugegraph_mysql"]}
+{"graphs":["hugegraph_rocksdb","hugegraph_memory"]}
```
查看某个图的信息:
```bash
-curl http://127.0.0.1:8080/graphs/hugegraph_mysql_backend
+curl http://127.0.0.1:8080/graphspaces/DEFAULT/graphs/hugegraph_memory
-{"name":"hugegraph_mysql","backend":"mysql"}
+{"name":"hugegraph_memory","backend":"memory"}
```
```bash
-curl http://127.0.0.1:8080/graphs/hugegraph_rocksdb_backend
+curl http://127.0.0.1:8080/graphspaces/DEFAULT/graphs/hugegraph_rocksdb
{"name":"hugegraph_rocksdb","backend":"rocksdb"}
```
diff --git a/content/cn/docs/config/config-option.md b/content/cn/docs/config/config-option.md
index 7719ac4b7..e5d0432b6 100644
--- a/content/cn/docs/config/config-option.md
+++ b/content/cn/docs/config/config-option.md
@@ -12,10 +12,10 @@ weight: 2
|-------------------------|--------------------------------------------------------------------------------------------------------------|---------------------------------------------------------------------------------|
| host | 127.0.0.1 | The host or ip of Gremlin Server. |
| port | 8182 | The listening port of Gremlin Server. |
-| graphs | hugegraph: conf/hugegraph.properties | The map of graphs with name and config file path. |
-| scriptEvaluationTimeout | 30000 | The timeout for gremlin script execution(millisecond). |
-| channelizer | org.apache.tinkerpop.gremlin.server.channel.HttpChannelizer | Indicates the protocol which the Gremlin Server provides service. |
-| authentication | authenticator: org.apache.hugegraph.auth.StandardAuthenticator, config: {tokens: conf/rest-server.properties} | The authenticator and config(contains tokens path) of authentication mechanism. |
+| graphs | {} | 图由 Server 动态加载,不要在此处配置。 |
+| evaluationTimeout | 30000 | Gremlin 脚本执行超时,单位为毫秒。 |
+| channelizer | org.apache.tinkerpop.gremlin.server.channel.WsAndHttpChannelizer | 同时处理 WebSocket 和 HTTP 请求。 |
+| authentication | 未配置 | 启用认证时配置认证器、处理器和 `rest-server.properties` 路径。 |
### Rest Server & API 配置项
@@ -23,12 +23,13 @@ weight: 2
| config option | default value | description |
|------------------------------------|--------------------------------------------------|---------------------------------------------------------------------------------------------------------------------------------------------------------------------------------------------------------------|
-| graphs | [hugegraph:conf/hugegraph.properties] | The map of graphs' name and config file. |
-| server.id | server-1 | The id of rest server, used for license verification. |
+| graphs | ./conf/graphs | 图配置 properties 文件所在目录。 |
+| graph.load_from_local_config | false | 是否在 Server 启动时读取 `graphs` 目录;使用本地图配置时需设为 `true`。 |
+| server.id | 空字符串 | The id of rest server, used for license verification. |
| server.role | master | The role of nodes in the cluster, available types are [master, worker, computer] |
| restserver.url | http://127.0.0.1:8080 | The url for listening of rest server. |
-| ssl.keystore_file | server.keystore | The path of server keystore file used when https protocol is enabled. |
-| ssl.keystore_password | | The password of the path of the server keystore file used when the https protocol is enabled. |
+| ssl.keystore_file | conf/hugegraph-server.keystore | The path of server keystore file used when https protocol is enabled. |
+| ssl.keystore_password | hugegraph | The password of the path of the server keystore file used when the https protocol is enabled. |
| restserver.max_worker_threads | 2 * CPUs | The maximum worker threads of rest server. |
| restserver.min_free_memory | 64 | The minimum free memory(MB) of rest server, requests will be rejected when the available memory of system is lower than this value. |
| restserver.request_timeout | 30 | The time in seconds within which a request must complete, -1 means no timeout. |
@@ -43,12 +44,13 @@ weight: 2
| batch.max_write_threads | 0 | The maximum threads for batch writing, if the value is 0, the actual value will be set to batch.max_write_ratio * restserver.max_worker_threads. |
| auth.authenticator | | The class path of authenticator implementation. e.g., org.apache.hugegraph.auth.StandardAuthenticator, or a custom implementation. |
| auth.graph_store | hugegraph | The name of graph used to store authentication information, like users, only for org.apache.hugegraph.auth.StandardAuthenticator. |
+| auth.admin_pa | pa | PD 模式下内置 admin 用户的初始密码,仅首次创建该用户时生效;部署前必须修改。 |
| auth.audit_log_rate | 1000.0 | The max rate of audit log output per user, default value is 1000 records per second. |
| auth.cache_capacity | 10240 | The max cache capacity of each auth cache item. |
| auth.cache_expire | 600 | The expiration time in seconds of vertex cache. |
| auth.remote_url | | If the address is empty, it provide auth service, otherwise it is auth client and also provide auth service through rpc forwarding. The remote url can be set to multiple addresses, which are concat by ','. |
| auth.token_expire | 86400 | The expiration time in seconds after token created |
-| auth.token_secret | FXQXbJtbCLxODc6tGci732pkH1cyf8Qg | Secret key of HS256 algorithm. |
+| auth.token_secret | 启动时随机生成 | HS256 的密钥;需要跨重启保持既有 token 有效时应显式配置。 |
| exception.allow_trace | true | Whether to allow exception trace stack. |
| memory_monitor.threshold | 0.85 | The threshold of JVM(in-heap) memory usage monitoring , 1 means disabling this function. |
| memory_monitor.period | 2000 | The period in ms of JVM(in-heap) memory usage monitoring. |
@@ -62,6 +64,7 @@ weight: 2
|------------------|------------------------|--------------------------------------------|
| pd.peers | 127.0.0.1:8686 | PD server addresses (comma separated). |
| meta.endpoints | http://127.0.0.1:2379 | Meta service endpoints. |
+| usePD | false | 是否通过 PD 管理分布式元数据。 |
### 基本配置项
@@ -218,6 +221,7 @@ weight: 2
| arthas.telnetPort | 8562 | Arthas telnet port. |
| arthas.httpPort | 8561 | Arthas HTTP port. |
| arthas.ip | 0.0.0.0 | Arthas bind IP. |
+| arthas.disabledCommands | jad | Disabled Arthas commands, separated by commas. |
</details>
@@ -340,4 +344,3 @@ weight: 2
> - `jdbc.url=jdbc:postgresql://localhost:5432/`
</details>
-
diff --git a/content/cn/docs/contribution-guidelines/_index.md b/content/cn/docs/contribution-guidelines/_index.md
index 2cdf8103d..735c4e160 100755
--- a/content/cn/docs/contribution-guidelines/_index.md
+++ b/content/cn/docs/contribution-guidelines/_index.md
@@ -1,5 +1,7 @@
---
-title: "Contribution Guidelines"
-linkTitle: "Contribution Guidelines"
+title: "贡献指南"
+linkTitle: "贡献指南"
weight: 9
---
+
+提交代码或文档前,请先阅读贡献流程。Committer 提名、邮件列表订阅和版本验证分别由对应页面说明;贡献者协议使用 ASF 官方 ICLA/CCLA。
diff --git a/content/cn/docs/contribution-guidelines/committer-guidelines.md b/content/cn/docs/contribution-guidelines/committer-guidelines.md
index f77129418..148898c85 100644
--- a/content/cn/docs/contribution-guidelines/committer-guidelines.md
+++ b/content/cn/docs/contribution-guidelines/committer-guidelines.md
@@ -123,7 +123,7 @@ I believe making him/her a Committer will enhance the work for HugeGraph.
So, I am happy to call VOTE to accept xxx as a HugeGraph Committer.
-Voting will continue for at least 72 hours or until the required number of votes is reached.
+Voting will remain open for one week.
Please vote accordingly:
[ ] +1 approve
@@ -133,7 +133,7 @@ Please vote accordingly:
Thanks!
```
-然后 PMC 成员回复 +1 或 -1 的邮件回复表达意见,一般来说至少需要 ≥3 票 +1 才能结束投票。
+投票应保持开放一周。通过需要至少 3 票 `+1`,并且没有否决票;提前达到 3 票也不能提前结束。
## 宣布投票结果 (RESULT)
diff --git a/content/cn/docs/contribution-guidelines/contribute.md b/content/cn/docs/contribution-guidelines/contribute.md
index 5f4407c17..32eaca662 100644
--- a/content/cn/docs/contribution-guidelines/contribute.md
+++ b/content/cn/docs/contribution-guidelines/contribute.md
@@ -1,180 +1,84 @@
---
-title: "如何参与 HugeGraph 社区"
-linkTitle: "如何参与 HugeGraph 社区"
+title: "参与 HugeGraph 社区"
+linkTitle: "贡献流程"
weight: 1
---
-> TODO: translate this article to Chinese
+## 选择贡献方式
-Thanks for taking the time to contribute! As an open source project, HugeGraph is looking forward to be contributed from everyone, and we are also grateful to all the contributors.
+可以通过 [GitHub Issues](https://github.com/apache/hugegraph/issues) 报告问题,也可以提交代码、测试或文档。准备较大的改动前,建议先创建 Issue 并说明范围,避免重复工作。
-The following is a contribution guide for HugeGraph:
+下面以 `apache/hugegraph` 为例。其他 HugeGraph 仓库的流程相同,但构建和测试命令应以各仓库的 `README.md`、`AGENTS.md` 和 CI 配置为准。
-<img width="884" alt="image" src="https://user-images.githubusercontent.com/9625821/159643158-8bf72c0a-93c3-4a58-8912-7b2ab20ced1d.png">
+## 准备仓库
-## 1. Preparation
+先在 GitHub 上 fork [apache/hugegraph](https://github.com/apache/hugegraph),再克隆自己的 fork:
-**建议**: 使用 [GitHub desktop](https://desktop.github.com/) 可以大幅简化和改善你提交 PR/Commit 的过程, 特别适合新人
-
-We can contribute by reporting issues, submitting code patches or any other feedback.
-
-Before submitting the code, we need to do some preparation:
-
-1. Sign up or login to GitHub: [https://github.com](https://github.com)
-
-2. Fork HugeGraph repo from GitHub: [https://github.com/apache/hugegraph/fork](https://github.com/apache/hugegraph/fork)
-
-3. Clone code from fork repo to local: [https://github.com/${GITHUB_USER_NAME}/hugegraph](https://github.com/${GITHUB_USER_NAME}/hugegraph)
-
- ```shell
- # clone code from remote to local repo
- git clone https://github.com/${GITHUB_USER_NAME}/hugegraph
- ```
-
-4. Configure local HugeGraph repo
-
- ```shell
- cd hugegraph
-
- # add upstream to synchronize the latest code
- git remote add hugegraph https://github.com/apache/hugegraph
-
- # set name and email to push code to github
- git config user.name "{full-name}" # like "Jermy Li"
- git config user.email "{email-address-of-github}" # like "jermy@apache.org"
- ```
-
-## 2. Create an Issue on GitHub
-
-If you encounter bugs or have any questions, please go to [GitHub Issues](https://github.com/apache/hugegraph/issues) to report them and feel free to [create an issue](https://github.com/apache/hugegraph/issues/new).
-
-## 3. Make changes of code locally
-
-#### 3.1 Create a new branch
-
-Please don't use master branch for development. We should create a new branch instead:
-
-```shell
-# checkout master branch
-git checkout master
-# pull the latest code from official hugegraph
-git pull hugegraph
-# create new branch: bugfix-branch
-git checkout -b bugfix-branch
+```bash
+git clone https://github.com/<your-name>/hugegraph.git
+cd hugegraph
+git remote add upstream https://github.com/apache/hugegraph.git
+git fetch upstream master
```
-#### 3.2 Change the code
-
-Assume that we need to modify some files like "HugeGraph.java" and "HugeFactory.java":
+不要直接在 `master` 上开发。每项改动使用单独分支:
-```shell
-# modify code to fix a bug
-vim hugegraph-core/src/main/java/org/apache/hugegraph/HugeGraph.java
-vim hugegraph-core/src/main/java/org/apache/hugegraph/HugeFactory.java
-# run test locally (optional)
-mvn test -Pcore-test,memory
+```bash
+git switch master
+git merge --ff-only upstream/master
+git switch -c fix/<short-description>
```
-Note: In order to be consistent with the code style easily, if you use IDEA as your IDE, you can import our code style configuration file.
-##### 3.2.1 添加第三方依赖
+## 修改和验证
-如果我们要在 `HugeGraph` 项目中添加新的第三方依赖, 我们需要做下面的几件事情:
-1. 找到第三方依赖的仓库,将依赖的 `license` 文件放到 [./hugegraph-dist/release-docs/licenses/](https://github.com/apache/hugegraph/tree/master/hugegraph-server/hugegraph-dist/release-docs/licenses) 路径下。
-2. 在[./hugegraph-dist/release-docs/LICENSE](https://github.com/apache/hugegraph/blob/master/hugegraph-server/hugegraph-dist/release-docs/LICENSE) 中声明该依赖的 `LICENSE` 信息。
-3. 找到仓库里的 NOTICE 文件,将其追加到 [./hugegraph-dist/release-docs/NOTICE](https://github.com/apache/hugegraph/blob/master/hugegraph-server/hugegraph-dist/release-docs/NOTICE) 文件后面(如果没有NOTICE文件则跳过这一步)。
-4. 本地执行[./hugegraph-dist/scripts/dependency/regenerate_known_dependencies.sh](https://github.com/apache/hugegraph/blob/master/hugegraph-server/hugegraph-dist/scripts/dependency/regenerate_known_dependencies.sh) 脚本来更新依赖列表[known-dependencies.txt](https://github.com/apache/hugegraph/blob/master/hugegraph-server/hugegraph-dist/scripts/dependency/known-dependencies.txt) (或者手动更新)。
+HugeGraph Server 的代码位于 `hugegraph-server/`。例如,核心模块路径是:
-**例如**:在项目中引入了第三方新依赖 -> `ant-1.9.1.jar`
-- 项目源码位于:https://github.com/apache/ant/tree/rel/1.9.1
-- LICENSE 文件:https://github.com/apache/ant/blob/rel/1.9.1/LICENSE
-- NOTICE 文件:https://github.com/apache/ant/blob/rel/1.9.1/NOTICE
-
-`ant-1.9.1.jar` 的 license 信息需要在 LICENSE 文件中指定,notice 信息需要在 NOTICE 文件中指定。 ant-1.9.1.jar 对应的详细 LICENSE 文件需要复制到我们的 licenses/ 目录下。最后更新 known-dependencies.txt 文件。
-
-#### 3.3 Commit changes to git repo
-
-After the code has been completed, we submit them to the local git repo:
-
-```shell
-# add files to local git index
-git add hugegraph-core/src/main/java/org/apache/hugegraph/HugeGraph.java
-git add hugegraph-core/src/main/java/org/apache/hugegraph/HugeFactory.java
-# commit to local git repo
-git commit
-```
-
-Please edit the commit message after running `git commit`, we can explain what and how to fix a bug or implement a feature, the following is an example:
-
-```sh
-Fix bug: run deploy multiple times
-
-fix #ISSUE_ID
+```text
+hugegraph-server/hugegraph-core/src/main/java/org/apache/hugegraph/
```
-> Please remember to fill in the issue id, which was generated by GitHub after issue creation.
+先运行与改动直接相关的测试。Server 常用测试入口如下:
-#### 3.4 Push commit to GitHub fork repo
+```bash
+# Core 测试,使用内存后端
+mvn test -pl hugegraph-server/hugegraph-test -am -P core-test,memory
-Push the local commit to GitHub fork repo:
+# API 测试,使用 RocksDB 后端
+mvn test -pl hugegraph-server/hugegraph-test -am -P api-test,rocksdb
-```shell
-# push the local commit to fork repo
-git push origin bugfix-branch:bugfix-branch
+# 格式化并检查编译
+mvn editorconfig:format
+mvn clean compile -Dmaven.javadoc.skip=true
```
-Note that since GitHub requires submitting code through `username + token` (instead of using `username + password` directly), you need to create a GitHub token from https://github.com/settings/tokens:
-<img width="1280" alt="image" src="https://user-images.githubusercontent.com/9625821/163524204-7fe0e6bf-9c8b-4b1a-ac65-6a0ac423eb16.png">
+提交第三方依赖时,还要同步发行包中的许可证信息:
-## 4. Create a Pull Request
+1. 把依赖的许可证文件放入 `hugegraph-server/hugegraph-dist/release-docs/licenses/`。
+2. 更新 `hugegraph-server/hugegraph-dist/release-docs/LICENSE`;依赖包含 NOTICE 时,同时更新 `NOTICE`。
+3. 运行 `hugegraph-server/hugegraph-dist/scripts/dependency/regenerate_known_dependencies.sh`,更新已知依赖清单。
-Go to the web page of GitHub fork repo, there would be a chance to create a Pull Request after pushing to a new branch, just click button "Compare & pull request" to do it. Then edit the description for proposed changes, which can just be copied from the commit message.
+## 提交 Pull Request
-Note: please make sure the email address you used to submit the code is bound to the GitHub account. For how to bind the email address, please refer to https://github.com/settings/emails:
-<img width="1280" alt="image" src="https://user-images.githubusercontent.com/9625821/163522445-2a50a72a-dea2-434f-9868-3a0d40d0d037.png">
+提交信息使用 `type(module): message` 格式,例如:
-## 5. Code review
-
- Maintainers will start the code review after all the **automatic** checks are passed:
-
-- Check: Contributor License Agreement is signed
-- Check: Travis CI builds is passed (automatically Test and Deploy)
-
-The commit will be accepted and merged if there is no problem after review.
-
-Please click on "Details" to find the problem if any check does not pass.
-
-If there are checks not passed or changes requested, then continue to modify the code and push again.
+```bash
+git add <changed-files>
+git commit -m "fix(core): handle empty vertex query"
+git push -u origin fix/<short-description>
+```
-## 6. More changes after review
+然后从 fork 分支向 `apache/hugegraph:master` 创建 Pull Request。说明问题、修改方法和实际运行的验证命令;界面变化应附截图。
-If we have not passed the review, don't be discouraged. Usually a commit needs to be reviewed several times before being accepted! Please follow the review comments and make further changes.
+## 处理 Review
-After the further changes, we submit them to the local repo:
+CI 失败或 reviewer 要求修改时,在原分支继续提交并推送。需要同步上游时,可以 rebase:
-```shell
-# commit all updated files in a new commit,
-# please feel free to enter any appropriate commit message, note that
-# we will squash all commits in the pull request as one commit when
-# merging into the master branch.
-git commit -a
+```bash
+git fetch upstream master
+git rebase upstream/master
+git push --force-with-lease
```
-> If there are conflicts that prevent the code from being merged, we need to rebase on master branch:
->
-> ```shell
-> # synchronize the latest code
-> git checkout master
-> git pull hugegraph
-> # rebase on master
-> git checkout bugfix-branch
-> git rebase -i master
-> ```
-
-And push it to GitHub fork repo again:
-
-```shell
-# force push the local commit to fork repo
-git push -f origin bugfix-branch:bugfix-branch
-```
+不要使用普通 `--force` 覆盖远端分支。完成所有 CI 和 review 要求后,由项目 maintainer 合并 Pull Request。
-GitHub will automatically update the Pull Request after we push it, just wait for code review.
+Contributor Agreement 使用 ASF 官方流程,见[贡献者协议](/cn/docs/CLA/)。
diff --git a/content/cn/docs/contribution-guidelines/hugegraph-server-idea-setup.md b/content/cn/docs/contribution-guidelines/hugegraph-server-idea-setup.md
index 8561312e5..f6457eae7 100644
--- a/content/cn/docs/contribution-guidelines/hugegraph-server-idea-setup.md
+++ b/content/cn/docs/contribution-guidelines/hugegraph-server-idea-setup.md
@@ -128,7 +128,7 @@ public String list(@Context GraphManager manager,
然后,使用 RESTful API 请求 `HugeGraphServer`:
```bash
-curl "http://localhost:8080/graphs/hugegraph/graph/vertices" | gunzip
+curl "http://localhost:8080/graphspaces/DEFAULT/graphs/hugegraph/graph/vertices" | gunzip
```
此时,可以在调试器中查看详细的变量信息。
diff --git a/content/cn/docs/contribution-guidelines/subscribe.md b/content/cn/docs/contribution-guidelines/subscribe.md
index 1d824f240..f0808e6c6 100644
--- a/content/cn/docs/contribution-guidelines/subscribe.md
+++ b/content/cn/docs/contribution-guidelines/subscribe.md
@@ -1,39 +1,25 @@
---
-title: "订阅社区邮箱"
-linkTitle: "订阅社区邮箱"
+title: "订阅社区邮件列表"
+linkTitle: "邮件列表"
weight: 2
---
-按照以下步骤订阅邮件列表:
+HugeGraph 使用 `dev@hugegraph.apache.org` 讨论开发和使用问题。向列表发信前需要先订阅,否则邮件可能被拦截。
-- 通过您的电子邮件账户发送邮件至 [dev-subscribe@hugegraph.apache.org](mailto:dev-subscribe@hugegraph.apache.org),然后您将收到一封确认邮件。
-- 回复确认邮件以确认您的订阅。然后,您将收到另一封确认邮件。
-- 现在您已经成为该邮件列表的订阅者。如果您有更多问题,只需发送邮件到邮件列表,社区同学看到后会及时回复。
+## 订阅
-您可以随时订阅邮件列表。此外,您也可以直接浏览[历史邮件/所有邮件](https://lists.apache.org/list.html?dev@hugegraph.apache.org)(即使没有订阅列表)。
+1. 使用准备订阅的邮箱向 [dev-subscribe@hugegraph.apache.org](mailto:dev-subscribe@hugegraph.apache.org) 发送一封任意主题、任意内容的邮件。
+2. 收到确认邮件后直接回复。
+3. 收到订阅成功邮件后,即可向 [dev@hugegraph.apache.org](mailto:dev@hugegraph.apache.org) 发信。
- 注意事项:
+如果没有收到确认邮件,先检查垃圾邮件和自动分类目录。仍未收到时,等待一段时间后重新发送订阅邮件。
- - 如果您没有收到确认邮件,请在24小时后再重试发送邮件。
- - 在成功订阅邮件列表之前,请勿发送电子邮件到 **dev**(未订阅发送的邮件将被自动拦截)。
+未订阅也可以在 [ASF Mailing List Archives](https://lists.apache.org/list.html?dev@hugegraph.apache.org) 浏览公开邮件。
-HugeGraph提供了一个供开发和用户讨论的电子邮件列表。
+## 退订
-- hugegraph-dev: [dev@hugegraph.apache.org](mailto:dev@hugegraph.apache.org) 用于开发和用户讨论。
+1. 使用订阅邮箱向 [dev-unsubscribe@hugegraph.apache.org](mailto:dev-unsubscribe@hugegraph.apache.org) 发信。
+2. 收到 `dev-help@hugegraph.apache.org` 的确认邮件后直接回复。
+3. 收到主题包含 `GOODBYE` 的邮件后,退订完成。
-有关邮件订阅的更多信息,请参阅:
-
-- [https://lists.apache.org/list.html?dev@hugegraph.apache.org](https://lists.apache.org/list.html?dev@hugegraph.apache.org)
-- [http://apache.org/foundation/mailinglists.html#subscribing](http://apache.org/foundation/mailinglists.html#subscribing)
-
-# 退订邮件列表
-
-如果您不再需要了解 HugeGraph 的最新动态,可以退订邮件列表。
-
-退订邮件列表的步骤如下:
-
-1. 使用您订阅时的电子邮件发送邮件到 [dev-unsubscribe@hugegraph.apache.org](mailto:dev-unsubscribe@hugegraph.apache.org)(主题和内容任意)。
-
-2. 收到确认邮件并回复。完成第一步后,您将收到来自 [dev-help@hugegraph.apache.org](mailto:dev-help@hugegraph.apache.org) 的确认邮件(如果未收到,请确认邮件是否被自动归类为垃圾邮件、推广邮件、订阅邮件等)。然后直接回复邮件,或点击邮件中的链接快速回复(主题和内容任意)。
-
-3. 收到再见邮件。完成上述步骤后,您将收到一封主题为 "GOODBYE from [dev@hugegraph.apache.org](mailto:dev@hugegraph.apache.org)" 的再见邮件,表示您已成功退订 Apache HugeGraph 邮件列表,您将不再接收来自 [dev@hugegraph.apache.org](mailto:dev@hugegraph.apache.org) 的邮件。
+ASF 邮件列表的通用说明见 [Apache Mailing Lists](https://apache.org/foundation/mailinglists.html)。
diff --git a/content/cn/docs/contribution-guidelines/validate-release.md b/content/cn/docs/contribution-guidelines/validate-release.md
index 7e5032158..2cb9a8f09 100644
--- a/content/cn/docs/contribution-guidelines/validate-release.md
+++ b/content/cn/docs/contribution-guidelines/validate-release.md
@@ -4,206 +4,71 @@ linkTitle: "验证 Apache 发版"
weight: 3
---
-> Note: 这篇文档会持续更新。
-> 你需要使用 Java11 验证测试 (如果希望测试功能/运行时),从 1.5.0 版本开始 (除 client 外) 不再支持 Java8
->
-> 毕业说明:Apache HugeGraph 已于 2026 年 1 月毕业。正式发版投票现由 HugeGraph 社区内部完成(`dev@hugegraph.apache.org` 上的 PMC binding 投票),不再需要 Incubator `general@incubator.apache.org` 审批。
+Apache HugeGraph 已毕业为顶级项目。候选版本在 `dev@hugegraph.apache.org` 投票,不再提交 Incubator `general@incubator.apache.org` 审批。当前发布包名称必须以 `apache-hugegraph` 开头,不能包含 `incubating`;旧版本归档中的名称不受此规则影响。
-## 验证阶段
+## 准备环境
-当内部的临时发布和打包工作完成后,其他的社区开发者 (尤其是 PMC)
-需要按 ASF 发版规范参与验证,可参考:
-- [ASF 发布策略](https://www.apache.org/legal/release-policy.html)
-- [Incubator 检查清单(历史参考)](https://cwiki.apache.org/confluence/display/INCUBATOR/Incubator+Release+Checklist)
-确保某个人发布版本的"正确性 + 完整性", 这里需要**每个人**都尽量参与,然后后序**邮件回复**的时候说明自己
-**已检查**了哪些项。(下面是核心项)
+验证脚本需要 Bash、Subversion、GnuPG、Java 和 Maven。运行功能测试时使用 Java 11;不同组件的额外依赖以候选版本说明为准。
-#### 1. 准备工作
-
-如果本地没有 svn 或 gpg 或 wget 环境,建议先安装一下 (windows 推荐使用 WSL2 环境,
-或者至少是 `git-bash`), 同时确保安装 Java(推荐 11) 和 maven 软件。
+先从投票邮件确认版本号和发布经理的 Apache ID,然后在 `hugegraph-doc` 根目录运行:
```bash
-# 1. 安装svn
-# ubuntu/debian
-sudo apt install subversion -y
-# MacOS
-brew install subversion
-# 验证安装是否成功, 执行以下命令:
-svn --version
-
-# 2. 安装gpg
-# ubuntu/debian
-sudo apt-get install gnupg -y
-# MacOS
-brew install gnupg
-# 验证安装是否成功, 执行以下命令:
-gpg --version
-
-# 3. 安装wget
-# ubuntu/debian
-sudo apt-get install wget -y
-# MacOS
-brew install wget
-
-# 4. 下载 hugegraph-svn 目录 (版本号注意填写此次验证版本)
-svn co https://dist.apache.org/repos/dist/dev/hugegraph/1.x.x/
-# (注) 如果出现 svn 下载某个文件速度很慢的情况, 可以考虑 wget 单个文件下载, 如下 (或考虑使用 VPN / 代理)
-wget https://dist.apache.org/repos/dist/dev/hugegraph/1.x.x/apache-hugegraph-toolchain-incubating-1.x.x.tar.gz
-```
-
-#### 2. 检查 hash 值
-
-首先需要检查 `source + binary` 包的文件完整性,通过 `shasum` 进行校验,确保和发布到 apache/github 上的
-hash 值一致 (一般是 sha512)
+# 从 ASF development distribution 下载并验证
+./dist/validate-release.sh <version> <apache-id>
-```bash
-执行命令:
-for i in *.tar.gz; do echo $i; shasum -a 512 --check $i.sha512; done
+# 验证已经下载到本地的候选包
+./dist/validate-release.sh <version> <apache-id> /path/to/release-files 11
```
-#### 3. 检查 gpg 签名
-
-这个就是为了确保发布的包是由**可信赖**的人上传的,假设 tom 签名后上传,其他人应该下载 A 的**公钥**
-然后进行**签名确认**, 相关命令:
-
-```bash
-# 1. 下载项目可信赖公钥到本地 (首次需要) & 导入
-curl https://downloads.apache.org/hugegraph/KEYS > KEYS
-gpg --import KEYS
-
-# 导入后可以看到如下输出, 这代表导入了 x 个用户公钥
-gpg: /home/ubuntu/.gnupg/trustdb.gpg: trustdb created
-gpg: key BA7E78F8A81A885E: public key "imbajin (apache mail) <ji...@apache.org>" imported
-gpg: key 818108E7924549CC: public key "vaughn <va...@apache.org>" imported
-gpg: key 28DCAED849C4180E: public key "coderzc (CODE SIGNING KEY) <zh...@apache.org>" imported
-....
-gpg: Total number processed: x
-gpg: imported: x
-
-# 2. 信任发版用户 (你需要信任 n 个邮件里提到的 gpg 用户名, >1则依次执行相同操作)
-gpg --edit-key $USER # 这里填写具体用户名或者公钥串, 回车进入交互模式
-gpg> trust
-...输出选项..
-Your decision? 5 # 选择5
-Do you really want to set this key to ultimate trust? (y/N) y # 选择y, 然后 q 退出信任下一个用户
-
-# (可选) 你也可以直接使用非交互模式的如下命令:
-echo -e "5\ny\n" | gpg --batch --command-fd 0 --edit-key $USER trust
-# 或者是信任所有当前导入过的 gpg 公钥 (请小心检查)
-for key in $(gpg --no-tty --list-keys --with-colons | awk -F: '/^pub/ {print $5}'); do
- echo -e "5\ny\n" | gpg --batch --command-fd 0 --edit-key "$key" trust
-done
-
-# 3. 检查签名(确保没有 Warning 输出, 每一个 source/binary 文件都提示 Good Signature)
-#单个文件验证
-gpg --verify xx.asc xxx-src.tar.gz
-gpg --verify xx.asc xxx.tar.gz # 注:目前没有 bin/binary 后缀
-
-# 一行脚本快速验证所有包 (推荐使用,请确保所有 gpg 公钥已经信任)
-for i in *.tar.gz; do echo $i; gpg --verify $i.asc $i ; done
-```
-
-先确认了整体的"完整性 + 一致性", 然后接下来确认具体的内容 (**关键**)
-
-#### 4. 检查压缩包内容
-
-这里检查准备工作下载的压缩包内容。分源码包 + 二进制包两个方面,源码包更为严格,挑核心的部分说
-(完整的列表可参考官方 [Wiki](https://cwiki.apache.org/confluence/display/INCUBATOR/Incubator+Release+Checklist), 比较长)
-
-##### A. 源码包
-
-解压 `*hugegraph*src.tar.gz`后,进行如下检查:
-
-1. 包名/目录名应符合当前发版命名(历史版本可能仍包含 `incubating`),且不存在**空的**文件/文件夹
-2. 存在 `LICENSE` + `NOTICE` 且内容正常;历史 incubating 制品需检查 `DISCLAIMER`
-3. **不存在** 缺乏 License 的二进制文件
-4. 源码文件都包含标准 `ASF License` 头 (这个用插件跑一下为主)
-5. 检查每个父 / 子模块的 `pom.xml` 版本号是否一致 (且符合期望)
-6. 最后,确保源码可以正常 / 正确编译 (然后看看测试和规范)
-
-PMC 同学请特别注意认真检查 `LICENSE` + `NOTICE` 文件,确保文件严格遵循了 ASF 的发版要求,
-大部分的发版问题都与之相关
+脚本会检查 SHA-512、GPG 签名、包名、LICENSE、NOTICE、许可证类别、空文件、未声明的二进制文件,并尝试编译源码包和启动主要服务。完整参数见:
```bash
-# 请优先使用/切换到 `java 11` 版本进行后序的编译和运行操作 (注:`Computer` 仅支持 `java >= 11`)
-# java --version
-
-# 尝试在 Unix 环境下编译测试是否正常
-mvn clean package -DskipTests -Dcheckstyle.skip=true -P stage
+./dist/validate-release.sh --help
```
-##### B. 二进制包
+GitHub Actions 中的 `Validate Apache Release` workflow 使用同一发布目录,并在 Ubuntu 和 macOS 上执行对应检查。自动化结果不能替代人工检查。
-解压 `xxx-hugegraph.tar.gz`后,进行如下检查:
+## 人工检查
-1. 包名/目录名应符合当前发版命名(历史版本可能仍包含 `incubating`)
-2. 存在 `LICENSE` + `NOTICE` 且内容正常(历史 incubating 制品需检查 `DISCLAIMER`)
-3. 服务启动
+### 发布来源
-```bash
-# hugegraph-server
-bin/start-hugegraph.sh
-
-# hugegraph-loader
-bin/hugegraph-loader.sh -g hugegraph -f example/file/struct.json -s example/file/schema.groovy
+- 候选包来自 `https://dist.apache.org/repos/dist/dev/hugegraph/<version>/`。
+- KEYS 文件来自 `https://downloads.apache.org/hugegraph/KEYS`。
+- 投票邮件中的 Git tag、commit 和下载目录相互对应。
-# hugegraph-hubble
-bin/start-hubble.sh
+### 源码包
-更多参考官网: https://hugegraph.apache.org/cn/docs/quickstart
-```
+- 根目录包含 LICENSE 和 NOTICE,内容与打包依赖一致。
+- 源文件带有适用的 ASF License 头;没有未声明的二进制文件。
+- Maven、Python、Go 等模块版本与候选版本一致。
+- 按各仓库 README 和 CI 配置编译源码,并记录操作系统、Java/Python/Go 版本和执行命令。
-**注:** 如果二进制包里面引入了第三方依赖, 则需要更新 LICENSE, 加入第三方依赖的 LICENSE; 若第三方依赖
-LICENSE 是 Apache 2.0, 且对应的项目中包含了 NOTICE, 则还需要更新我们的 NOTICE 文件
+### 二进制包
-#### 5. 检查官网以及 github 等页面
+- 解压后的目录名和文件版本正确。
+- Server、Loader、Hubble 等实际包含在候选版本中的程序可以启动或执行基本命令。
+- LICENSE 和 NOTICE 覆盖随包分发的第三方文件。
-1. 确保官网至少满足 [apache website check](https://whimsy.apache.org/pods/project/hugegraph),
- 以及没有死链等
-2. 更新**下载链接**存在,以及版本更新说明页面更新
-3. ...
+历史 incubating 制品还需要检查 DISCLAIMER;毕业后的新制品不应包含 `incubating` 名称,也不把 DISCLAIMER 当作必需文件。
-## 邮件模板
+## 回复投票
-检查完成后,你应该按不同角色回复邮件:(普通开发者 & PMC 成员)
+回复必须列出实际完成的检查,不要只写结论。普通开发者使用 `non-binding`,PMC 成员使用 `binding`:
-```markdown
-[] +1 approve
+```text
++1 (binding 或 non-binding)
-[] +0 no opinion
-
-[] -1 disapprove with the reason
-```
-
-```markdown
-+1 (non-binding)
I checked:
-1. Download link/tag in mail are valid
-2. Checksum and GPG signatures are OK
-3. LICENSE & NOTICE & DISCLAIMER are exist
-4. Build successfully on XX OS version XXX
-5. No unexpected binary files
-6. Date is right in the NOTICE file
-7. Compile from source is fine under JavaX
-8. No empty file & directory found
-9. Test running xxx service OK
-10. ....
+- Download URL, tag and commit match
+- SHA-512 checksums and GPG signatures pass
+- LICENSE and NOTICE are present and consistent with package contents
+- Source package builds on <OS> with <runtime versions>
+- <services or commands actually tested>
```
-特别注意 PMC 成员必须使用 `binding` 标记回复邮件,这对于统计有效投票很重要;
+如果投反对票,应附上可以复现的问题和对应文件。发现发布阻断问题后,停止当前候选版本并重新生成制品,不要在已投票的压缩包上直接替换文件。
-```markdown
-+1 (binding)
-I checked:
-1. Download link/tag in mail are valid
-2. Checksum and GPG signatures are OK
-3. LICENSE & NOTICE & DISCLAIMER are exist
-4. Build successfully on XX OS Version XX
-5. No unexpected binary files
-6. Date is right in the NOTICE file
-7. Compile from source is fine under JavaXX
-8. No empty file & directory found
-9. Test running XXX service OK
-10. ....
-```
+参考资料:
+
+- [ASF Release Policy](https://www.apache.org/legal/release-policy.html)
+- [HugeGraph KEYS](https://downloads.apache.org/hugegraph/KEYS)
diff --git a/content/cn/docs/guides/_index.md b/content/cn/docs/guides/_index.md
index b0b4c0252..9a2dd205a 100644
--- a/content/cn/docs/guides/_index.md
+++ b/content/cn/docs/guides/_index.md
@@ -1,5 +1,7 @@
---
-title: "GUIDES"
-linkTitle: "GUIDES"
+title: "使用指南"
+linkTitle: "使用指南"
weight: 6
----
\ No newline at end of file
+---
+
+本节说明 HugeGraph 的架构、设计、备份恢复、插件开发、安全设置和常见问题。
diff --git a/content/cn/docs/guides/architectural.md b/content/cn/docs/guides/architectural.md
index 509686dc4..aab202710 100644
--- a/content/cn/docs/guides/architectural.md
+++ b/content/cn/docs/guides/architectural.md
@@ -6,7 +6,7 @@ weight: 1
### 1 概述
-作为一套覆盖**图数据库、图计算与图 AI** 的全栈图系统,HugeGraph 以高性能图引擎(HugeGraph Server)为核心,支持 OLTP 和 OLAP 两种图计算类型。其中 OLTP 层实现了 [Apache TinkerPop3](https://tinkerpop.apache.org) 框架,支持 [Gremlin](https://tinkerpop.apache.org/gremlin.html) 和 [Cypher](https://en.wikipedia.org/wiki/Cypher) 查询语言,拥有功能齐全的应用工具链,还提供了插件式后端存储驱动框架。
+HugeGraph 包含图数据库、图计算和图 AI 组件。HugeGraph Server 实现 Apache TinkerPop 接口,提供 Gremlin、Cypher 和 REST API;Computer 负责 OLAP 图计算,AI 仓库提供图与大模型相关工具。
下面是 HugeGraph 的整体架构图:
@@ -17,14 +17,14 @@ weight: 1
HugeGraph 包括三个层次的功能,分别是应用程序层、图引擎层和存储层。
- 应用程序层:
- - [Hubble](/cn/docs/quickstart/toolchain/hugegraph-hubble/): 一站式可视化分析平台,平台涵盖了从数据建模,到数据快速导入,再到数据的在线、离线分析、以及图的统一管理的全过程,实现了图应用的全流程向导式操作。
- - [Loader](/cn/docs/quickstart/toolchain/hugegraph-loader/): 数据导入组件,能够将多种数据源的数据转化为图的顶点和边并批量导入到图数据库中。
+ - [Hubble](/cn/docs/quickstart/toolchain/hugegraph-hubble/): 图建模、数据导入、查询和管理的 Web 界面。
+ - [Loader](/cn/docs/quickstart/toolchain/hugegraph-loader/): 将外部数据转换为顶点和边并批量写入 HugeGraph。
- [Tools](/cn/docs/quickstart/toolchain/hugegraph-tools/): 命令行工具,用于部署、管理和备份/恢复 HugeGraph 中的数据。
- - [Computer](/cn/docs/quickstart/computing/hugegraph-computer/): 分布式图处理系统 (OLAP),它是 [Pregel](https://kowshik.github.io/JPregel/pregel_paper.pdf) 的一个实现,可以运行在 Kubernetes 上。
- - [Client](/cn/docs/quickstart/client/hugegraph-client/): 使用 Java 编写的 HugeGraph 客户端,用户可以使用 Client 编写 Java 代码操作 HugeGraph,后续可根据需要提供 Python、Go、C++ 等多语言支持。
+ - [Computer](/cn/docs/quickstart/computing/hugegraph-computer/): 基于 Pregel 模型的分布式图计算系统,可运行在 Kubernetes 上。
+ - [Client](/cn/docs/quickstart/client/hugegraph-client/): Java 客户端。文档还提供 Python 和 Go 客户端入口。
- [图引擎层](/cn/docs/quickstart/hugegraph/hugegraph-server/):
- REST Server: 提供 RESTful API 用于查询 Graph/Schema 等信息,支持 [Gremlin](https://tinkerpop.apache.org/gremlin.html) 和 [Cypher](https://en.wikipedia.org/wiki/Cypher) 查询语言,提供服务监控和运维的 APIs。
- Graph Engine: 支持 OLTP 和 OLAP 两种图计算类型,其中 OLTP 实现了 [Apache TinkerPop3](https://tinkerpop.apache.org) 框架。
- Backend Interface: 实现将图数据存储到后端。
- 存储层:
- - Storage Backend: 支持多种内置存储后端 (RocksDB/MySQL/HBase/...),也允许用户无需更改现有源码的情况下扩展自定义后端。
+ - Storage Backend: 1.7.0 支持 RocksDB、HStore、HBase 和 Memory。自定义后端可通过插件扩展。
diff --git a/content/cn/docs/guides/backup-restore.md b/content/cn/docs/guides/backup-restore.md
index 93e5b06bb..636fed676 100644
--- a/content/cn/docs/guides/backup-restore.md
+++ b/content/cn/docs/guides/backup-restore.md
@@ -105,7 +105,7 @@ Restore 时存在两种不同的模式: Restoring 和 Merging,另外,还
###### Method & Url
```
-GET http://localhost:8080/graphs/{graph}/mode
+GET http://localhost:8080/graphspaces/DEFAULT/graphs/{graph}/mode
```
###### Response Status
@@ -129,7 +129,7 @@ GET http://localhost:8080/graphs/{graph}/mode
###### Method & Url
```
-PUT http://localhost:8080/graphs/{graph}/mode
+PUT http://localhost:8080/graphspaces/DEFAULT/graphs/{graph}/mode
```
###### Request Body
diff --git a/content/cn/docs/guides/custom-plugin.md b/content/cn/docs/guides/custom-plugin.md
index ce11904e1..ddddb9113 100644
--- a/content/cn/docs/guides/custom-plugin.md
+++ b/content/cn/docs/guides/custom-plugin.md
@@ -6,9 +6,7 @@ weight: 3
### 背景
-1. HugeGraph 不仅开源开放,而且要做到简单易用,一般用户无需更改源码也能轻松增加插件扩展功能。
-2. HugeGraph 支持多种内置存储后端,也允许用户无需更改现有源码的情况下扩展自定义后端。
-3. HugeGraph 支持全文检索,全文检索功能涉及到各语言分词,目前已内置 8 种中文分词器,也允许用户无需更改现有源码的情况下扩展自定义分词器。
+HugeGraph 通过 Java SPI 加载插件。插件可以注册后端、序列化器、配置项和分词器,无需修改 Server 源码。
### 可扩展维度
@@ -52,11 +50,15 @@ maven pom.xml 详细内容如下:
<name>hugegraph-plugin-demo</name>
+ <properties>
+ <hugegraph.version>1.7.0</hugegraph.version>
+ </properties>
+
<dependencies>
<dependency>
<groupId>org.apache.hugegraph</groupId>
<artifactId>hugegraph-core</artifactId>
- <version>${project.version}</version>
+ <version>${hugegraph.version}</version>
</dependency>
</dependencies>
</project>
@@ -313,4 +315,4 @@ public class DemoPlugin implements HugeGraphPlugin {
#### 5. 打 Jar 包
通过 maven 打包,在项目目录下执行命令`mvn package`,在 target 目录下会生成 Jar 包文件。
-使用时将该 Jar 包拷到`plugins`目录,重启服务即可生效。
\ No newline at end of file
+使用时将该 Jar 包拷到`plugins`目录,重启服务即可生效。
diff --git a/content/cn/docs/guides/faq.md b/content/cn/docs/guides/faq.md
index 0fb08eea6..caafc6b18 100644
--- a/content/cn/docs/guides/faq.md
+++ b/content/cn/docs/guides/faq.md
@@ -7,38 +7,34 @@ weight: 6
- 如何选择后端存储? 选 RocksDB 还是分布式存储?
HugeGraph 支持多种部署模式,根据数据规模和场景选择:
- - **单机模式**:Server + RocksDB,适合开发测试和中小规模数据(< 4TB)
- - **分布式模式**:HugeGraph-PD + HugeGraph-Store (HStore),支持水平扩展和高可用(< 1000TB 数据规模),适合生产环境和大规模图数据应用
+ - **单机模式**:Server + RocksDB,适合开发测试和小于 1 TB 的数据
+ - **分布式模式**:HugeGraph-PD + HugeGraph-Store(HStore),用于需要水平扩展和多副本的部署
- 注:Cassandra、HBase、MySQL 等后端仅在 HugeGraph <= 1.5 版本中可用,官方后续不再单独维护
+ 1.7.0 支持 RocksDB、HStore、HBase 和 Memory。Cassandra、ScyllaDB、MySQL、PostgreSQL 等旧后端需使用 1.5.x 或更早版本。
- 启动服务时提示:`xxx (core dumped) xxx`
- 请检查JDK版本是否为 Java11 (至少是Java8)
+ 请先确认 JDK 版本不低于 Java 11。HugeGraph 1.7.0 不再支持 Java 8。
- 启动服务成功了,但是操作图时有类似于"无法连接到后端或连接未打开"的提示
- 第一次启动服务前,需要先使用`init-store`初始化后端,后续版本会将提示得更清晰直接。
+ RocksDB、HBase 等本地持久化后端首次启动前需要使用 `init-store` 初始化。HStore 由 PD、Store 管理,不执行该脚本。
- 所有的后端在使用前都需要执行`init-store`吗,序列化的选择可以随意填写么?
- 除了`memory`不需要,其他后端均需要,如:`cassandra`、`hbase`和`rocksdb`等,序列化需一一对应不可随意填写。
+ Memory 和 HStore 不执行 `init-store`;RocksDB、HBase 等本地持久化后端首次使用前需要初始化。序列化器必须与后端匹配,例如 RocksDB 使用 `binary`。
- 执行`init-store`报错:```Exception in thread "main" java.lang.UnsatisfiedLinkError: /tmp/librocksdbjni3226083071221514754.so: /usr/lib64/libstdc++.so.6: version `GLIBCXX_3.4.10' not found (required by /tmp/librocksdbjni3226083071221514754.so)```
RocksDB需要 gcc 4.3.0 (GLIBCXX_3.4.10) 及以上版本
-- 执行`init-store.sh`时报错:`NoHostAvailableException`
-
- `NoHostAvailableException` 是指无法连接到`Cassandra`服务,如果确定是要使用`cassandra`后端,请先安装并启动这个服务。至于这个提示本身可能不够直白,我们会更新到文档进行说明的。
-
- `bin`目录下包含`start-hugegraph.sh`、`start-restserver.sh`和`start-gremlinserver.sh`三个似乎与启动有关的脚本,到底该使用哪个
- 自0.3.3版本以来,已经把 GremlinServer 和 RestServer 合并为 HugeGraphServer 了,使用`start-hugegraph.sh`启动即可,后两个在后续版本会被删掉。
+ 当前发布包只保留 `start-hugegraph.sh` 作为 Server 启动脚本。GremlinServer 和 REST Server 由同一进程启动。
- 配置了两个图,名字是`hugegraph`和`hugegraph1`,而启动服务的命令是`start-hugegraph.sh`,是只打开了`hugegraph`这个图吗
- `start-hugegraph.sh`会打开所有`gremlin-server.yaml`的`graphs`下的图,这二者并无名字上的直接关系
+ 脚本名称与图名无关。需要从 `graphs` 目录加载多个本地图时,在 `rest-server.properties` 中设置 `graph.load_from_local_config=true`;该选项的源码默认值是 `false`。
- 服务启动成功后,使用`curl`查询所有顶点时返回乱码
@@ -77,9 +73,9 @@ weight: 6
持续地导入数据会使`Server`的压力过大,然后导致有些请求超时。可以通过调整`Loader`的参数来适当缓解`Server`压力(如:重试次数,重试间隔,错误容忍数等),降低该问题出现频率。
-- 如何删除全部的顶点和边,RESTful API中没有这样的接口,调用`gremlin`的`g.V().drop()`会报错`Vertices in transaction have reached capacity xxx`
+- 如何删除图中的全部数据
- 目前确实没有好办法删除全部的数据,用户如果是自己部署的`Server`和后端,可以直接清空数据库,重启`Server`。可以使用paging API或scan API先获取所有数据,再逐条删除。
+ 管理员可调用 `DELETE /graphspaces/{graphspace}/graphs/{graph}/clear`。请求必须携带源码要求的 `confirm_message`,具体格式见 [Graph API](../clients/restful-api/graphs)。该操作会清除 schema、顶点、边和索引。
- 清空了数据库,并且执行了`init-store`,但是添加`schema`时提示"xxx has existed"
diff --git a/content/cn/docs/guides/security.md b/content/cn/docs/guides/security.md
index 9c25ae8e2..253c672bc 100644
--- a/content/cn/docs/guides/security.md
+++ b/content/cn/docs/guides/security.md
@@ -8,15 +8,13 @@ weight: 7
> ⚠️ **SEC 提醒:致漏洞研究人员关于图查询语言的说明**
>
-> 鉴于图查询语言 (如 Gremlin/Cypher) 本身在解析与执行上的灵活性,HugeGraph 推荐在生产环境依赖 **"[Auth (配置鉴权)](/cn/docs/config/config-authentication/) + IP 白名单 + Audit Log (审计日志)"** 机制来践行最小权限原则。同时由于 Server 节点基本是无状态的,**所有生产环境均明确建议使用[容器环境 (Docker/K8s)](/cn/docs/quickstart/hugegraph/hugegraph-server/#31-使用-docker-容器-便于测试) 进行隔离部署**。
+> 生产环境应启用[鉴权](/cn/docs/config/config-authentication/)、IP 白名单和审计日志,并使用 [Docker 或 Kubernetes](/cn/docs/quickstart/hugegraph/hugegraph-server/#31-使用-docker-容器-便于测试) 隔离 Server 进程。
>
> 近期社区已收到较多关于图查询语言灵活性的安全反馈。在 HugeGraph 安全体系整体重构完成前,对于在**不启用或跳过 Auth 系统/避开授权身份**的前提下执行 DSL 查询的情况,此类已知风险将**不再单独视为新漏洞**进行处理。
>
-> 但是,如果在**已开启 Auth 系统**的环境中,仍能以**匿名或未授权身份访问**并进行漏洞利用,或者成功**绕过 IP 白名单 / 逃逸容器**造成严重越权或底层系统破坏,我们仍然将其视为高危安全漏洞,非常欢迎您随时向我们反馈!
+> 如果开启 Auth 后仍可匿名或越权访问,或者可以绕过 IP 白名单、逃逸容器并破坏底层系统,请按高危安全漏洞报告。
-遵循 ASF 的规范,HugeGraph 社区对**解决修复**项目中的安全问题保持非常积极和开放的态度。
-
-我们强烈建议用户首先向我们的独立安全邮件列表报告此类问题,相关详细的流程规范请参考 [ASF SEC](https://www.apache.org/security/committers.html) 守则。
+请先通过项目的私有安全邮件列表报告安全问题。流程见 [ASF Security](https://www.apache.org/security/committers.html)。
请注意,安全邮件组适用于报告**未公开**的安全漏洞并跟进漏洞处理的过程。常规的软件 `Bug/Error` 报告应该使用 `Github Issue/Discussion`
或是 `HugeGraph-Dev` 邮箱组。发送到安全邮件组但与安全问题无关的邮件将被忽略。
diff --git a/content/cn/docs/guides/toolchain-local-test.md b/content/cn/docs/guides/toolchain-local-test.md
index 0aae55fe4..0e898518b 100644
--- a/content/cn/docs/guides/toolchain-local-test.md
+++ b/content/cn/docs/guides/toolchain-local-test.md
@@ -24,13 +24,13 @@ weight: 4
- **操作系统**:Linux / macOS(Windows 使用 WSL2)
- **JDK**:>= 11,配置好 `JAVA_HOME`
-- **Maven**:>= 3.5
+- **Maven**:>= 3.6
- **Python**:>= 3.11(仅 Hubble 测试需要)
### 2.2 克隆代码
```bash
-git clone https://github.com/${GITHUB_USER_NAME}/hugegraph-toolchain.git
+git clone https://github.com/apache/hugegraph-toolchain.git
cd hugegraph-toolchain
```
@@ -38,12 +38,12 @@ cd hugegraph-toolchain
### 方式选择
-- **脚本部署(推荐)**:通过指定 Commit ID 精确控制 Server 版本,避免接口不兼容
-- **Docker 部署**:快速启动,但可能版本滞后导致测试失败
+- **脚本部署**:指定 Server Commit,可复现 CI 使用的服务端版本
+- **Docker 部署**:适合快速检查;测试失败时应先核对镜像与 Toolchain 的兼容性
> 详细安装说明参考 [社区文档](https://hugegraph.apache.org/cn/docs/quickstart/hugegraph/hugegraph-server/)
-### 3.1 脚本部署(推荐)
+### 3.1 脚本部署
#### 参数说明
@@ -55,15 +55,15 @@ cd hugegraph-toolchain
**1. 安装 HugeGraph Server**
```bash
-# 设置版本
-export COMMIT_ID="master" # 或特定 commit hash,如 "8b90977"
+# 设置 Server 基线;需要可复现结果时请使用完整 commit SHA
+export COMMIT_ID="master"
# 执行安装(脚本位于 /assembly/travis/ 目录)
hugegraph-client/assembly/travis/install-hugegraph-from-source.sh $COMMIT_ID
```
-- 默认端口:http 8080, https 8443
-- 确保端口未被占用
+- 脚本会启动 HTTP 8080 和 HTTPS 8443 两个实例,并配置 `admin`/`pa` 认证。
+- 执行前确认两个端口未被占用。
**2. 安装可选依赖**
@@ -78,7 +78,7 @@ hugegraph-loader/assembly/travis/install-mysql.sh $DB_DATABASE $DB_PASS
**3. 健康检查**
```bash
-curl http://localhost:8080/graphs
+curl -u admin:pa http://localhost:8080/graphspaces/DEFAULT/graphs
# 返回 {"graphs":["hugegraph"]} 表示成功
```
@@ -113,7 +113,7 @@ services:
# 如果需要持久化数据或挂载配置文件,可以在这里添加卷
# - ./hugegraph-data:/opt/hugegraph/data
healthcheck:
- test: ["CMD-SHELL", "curl -f http://localhost:8080/graphs || exit 1"]
+ test: ["CMD-SHELL", "curl -f http://localhost:8080/graphspaces/DEFAULT/graphs || exit 1"]
interval: 5s
timeout: 3s
retries: 5
@@ -267,15 +267,14 @@ mvn -e compile -pl hugegraph-client -Dmaven.javadoc.skip=true -ntp
##### Server 鉴权配置
-> **注意**:Docker 镜像 <= 1.5.0 不支持鉴权测试,需 1.6.0+
-
-ApiTest 需要鉴权配置,使用脚本安装可跳过。使用 Docker 需手动配置:
+ApiTest 需要认证。使用 3.1 节的脚本安装时无需重复配置;自行部署 Server 时,认证配置和测试凭证必须与测试代码一致。
```bash
# 1. 修改鉴权模式
cp conf/rest-server.properties conf/rest-server.properties.backup
-sed -i '/^auth.authenticator=/c\auth.authenticator=org.apache.hugegraph.auth.StandardAuthenticator' conf/rest-server.properties
+sed -i 's|#auth.authenticator=.*|auth.authenticator=org.apache.hugegraph.auth.StandardAuthenticator|' conf/rest-server.properties
grep auth.authenticator conf/rest-server.properties
+sed -i 's|gremlin.graph=org.apache.hugegraph.HugeFactory|gremlin.graph=org.apache.hugegraph.auth.HugeFactoryAuthProxy|' conf/graphs/hugegraph.properties
# 2. 设置密码
# 注:测试代码中默认使用 "pa" 作为密码,设置时需与测试保持一致
@@ -289,8 +288,7 @@ bin/start-hugegraph.sh
```bash
# 检查环境
-curl http://localhost:8080/graphs # 应返回 {"graphs":["hugegraph"]}
-curl -u admin:pa http://localhost:8080/graphs # 鉴权测试(密码 pa 是测试默认值)
+curl -u admin:pa http://localhost:8080/graphspaces/DEFAULT/graphs
# 运行测试
cd hugegraph-client
@@ -352,10 +350,9 @@ python -m pip install -r hubble-dist/assembly/travis/requirements.txt
```bash
mvn package -Dmaven.test.skip=true
# 可选:启动验证
-# 兼容历史(-incubating-)与毕业后 TLP 命名
cd apache-hugegraph-hubble*/bin
./start-hubble.sh -d && sleep 10
-curl http://localhost:8088/api/health
+curl http://localhost:8088/actuator/health
./stop-hubble.sh
```
@@ -365,11 +362,15 @@ curl http://localhost:8088/api/health
# 单元测试
mvn test -P unit-test -pl hugegraph-hubble/hubble-be -ntp
-# API测试(需 Server + Hubble 运行)
-curl http://localhost:8080/graphs # 检查 Server
-curl http://localhost:8088/api/health # 检查 Hubble
-cd hugegraph-hubble/hubble-dist
-./assembly/travis/run-api-test.sh
+# 旧版 Python API 测试(需 Server;脚本会安装并启动 Hubble)
+curl -u admin:pa http://localhost:8080/graphspaces/DEFAULT/graphs # 检查 Server
+cd hugegraph-hubble
+./hubble-dist/assembly/travis/run-api-test.sh
+
+# 当前 CI 的完整验收入口(需先生成 Hubble tar 包)
+HUBBLE_TARBALL="$(ls target/apache-hugegraph-hubble-*.tar.gz | head -n 1)"
+hubble-dist/assembly/travis/verify-hubble-issue-694.sh \
+ "$HUBBLE_TARBALL" http://127.0.0.1:8080
```
### 4.4 hugegraph-spark-connector
@@ -406,39 +407,34 @@ mvn test -Dtest=FuncTestSuite -ntp # 需 Server 运行
### 服务连接问题
-**症状**:无法连接 Server/MySQL/Hadoop
+无法连接 Server、MySQL 或 Hadoop 时:
-**排查**:
- 确认服务已启动(Server 必须在 8080 端口)
- 检查端口占用:`lsof -i:8080`
- Docker 检查:`docker compose ps` 和 `docker compose logs`
### 配置问题
-**症状**:找不到文件、参数错误
-
-**排查**:
+找不到文件或参数错误时:
- 检查环境变量:`echo $COMMIT_ID`
- 脚本权限:`chmod +x hugegraph-*/assembly/travis/*.sh`
### HDFS 测试失败
-**排查**:
- 确认 NameNode/DataNode 运行正常
- 检查 Hadoop 日志
- 验证 HDFS 连接:`hdfs dfsadmin -report`
### JDBC 测试失败
-**排查**:
- 确认 MySQL 运行正常
- 验证数据库连接:`mysql -u root -p$DB_PASS`
- 检查 MySQL 日志
## 6. 参考资料
-* **HugeGraph GitHub 仓库**:[https://github.com/apache/hugegraph](https://github.com/apache/hugegraph)
-* **HugeGraph 工具链 GitHub 仓库**:[https://github.com/apache/hugegraph-toolchain](https://github.com/apache/hugegraph-toolchain)
-* **HugeGraph Server 官方文档**:[https://hugegraph.apache.org/cn/docs/quickstart/hugegraph/hugegraph-server/](https://hugegraph.apache.org/cn/docs/quickstart/hugegraph/hugegraph-server/)
-* **CI 脚本路径**:`.github/workflows/*-ci.yml`(HugeGraph 工具链项目中的 CI 配置文件,可作为参考)
-* **依赖服务安装脚本**:`hugegraph-*/assembly/travis/`(HugeGraph 工具链项目中用于 CI 和本地测试的安装脚本,可直接使用或作为参考)
+- **HugeGraph GitHub 仓库**:[https://github.com/apache/hugegraph](https://github.com/apache/hugegraph)
+- **HugeGraph 工具链 GitHub 仓库**:[https://github.com/apache/hugegraph-toolchain](https://github.com/apache/hugegraph-toolchain)
+- **HugeGraph Server 文档**:[https://hugegraph.apache.org/cn/docs/quickstart/hugegraph/hugegraph-server/](https://hugegraph.apache.org/cn/docs/quickstart/hugegraph/hugegraph-server/)
+- **CI 配置**:`.github/workflows/*-ci.yml`
+- **依赖服务安装脚本**:`hugegraph-*/assembly/travis/`
diff --git a/content/cn/docs/introduction/_index.md b/content/cn/docs/introduction/_index.md
index a586f1081..31b93418c 100644
--- a/content/cn/docs/introduction/_index.md
+++ b/content/cn/docs/introduction/_index.md
@@ -1,148 +1,93 @@
---
-title: "Introduction with HugeGraph"
-linkTitle: "Introduction"
+title: "Apache HugeGraph 介绍"
+linkTitle: "系统介绍"
weight: 1
aliases:
- /cn/docs/introduction/readme/
- /cn/docs/introduction/README/
---
-### 什么是 Apache HugeGraph?
-
-[Apache HugeGraph](https://hugegraph.apache.org/) 是一套易用、高效、通用的开源**全栈图系统**([GitHub](https://github.com/apache/hugegraph)),
-覆盖**图数据库**(OLTP 实时查询)、**图计算**(OLAP 大规模分析)与**图 AI**(GraphRAG / 图机器学习)三大领域。
-
-HugeGraph 支持百亿以上的顶点和边的快速存储与查询,具备出色的 OLTP 性能。
-其图引擎完全兼容 [Apache TinkerPop 3](https://tinkerpop.apache.org) 框架,同时支持
-[Gremlin](https://tinkerpop.apache.org/gremlin.html) 和 [Cypher](https://en.wikipedia.org/wiki/Cypher)(OpenCypher 标准)双查询语言。
-
-**典型应用场景:** 深度关系探索、关联分析、路径搜索、特征抽取、社区检测、知识图谱等,
-**适用领域:** 网络安全、电信反欺诈、金融风控、广告推荐、社交网络、智能问答等。
-
----
-
-### 生态系统全景
-
+## Apache HugeGraph 是什么
+
+Apache HugeGraph 由多个独立仓库组成,覆盖图数据库、图计算和图 AI。各组件可以单独使用,也可以通过 HugeGraph Server 的 REST API 或分布式存储接口协作。
+
+```text
+应用与工具
+ ├─ HugeGraph Toolchain:Client、Loader、Hubble、Spark Connector、Tools
+ └─ HugeGraph-AI:GraphRAG、图机器学习、Python Client
+ │
+图数据库 ▼
+ HugeGraph Server:REST API、Gremlin、Cypher
+ ├─ RocksDB 等单机后端
+ └─ HStore 分布式后端 → PD + Store
+ │
+图计算 ▼
+ HugeGraph-Computer:Vermeer(Go)与 Computer(Java)
```
-┌──────────────────────────────────────────────────────────────┐
-│ Apache HugeGraph - Full-Stack Graph System │
-├──────────────────┬────────────────────┬──────────────────────┤
-│ Graph DB (OLTP) │ Graph Compute │ Graph AI │
-│ HugeGraph │ Vermeer (Memory) │ HugeGraph-AI │
-│ Server │ Computer (Dist.) │ GraphRAG/GNN/Py │
-├──────────────────┴────────────────────┴──────────────────────┤
-│ HugeGraph Toolchain │
-│ Hubble | Loader | Client(Java/Go/Py) | Spark | Tools │
-└──────────────────────────────────────────────────────────────┘
-```
-
----
-
-### 核心组件
-
-#### 🗄️ HugeGraph Server — 图引擎(OLTP)
-
-HugeGraph 项目的核心模块,提供高性能的图数据存储与实时查询能力:
-
-- **图引擎核心**:支持属性图(Property Graph)建模,包含 VertexLabel、EdgeLabel、PropertyKey、IndexLabel 完整 Schema 管理
-- **双查询语言**:全面兼容 Gremlin(TinkerPop 3)和 Cypher(OpenCypher)
-- **REST API**:内置 REST Server,提供 RESTful 图操作接口
-- **多类型索引**:精确查询、范围查询、复合条件组合查询
-- **插件式存储后端**:1.7.0+ 默认支持 `RocksDB`(单机默认)、`HStore`(分布式)、`HBase`、`Memory`,1.5.x 及以前还支持 MySQL / PostgreSQL / Cassandra 等
-
-**子模块:**
-- `Core` — 图引擎实现,向下连接 Backend,向上支持 API
-- `Backend` — 多后端存储适配层
-- `API` — RESTful 接入层,兼容 Gremlin/Cypher 查询
-
-📖 [Server 快速开始](/cn/docs/quickstart/hugegraph/hugegraph-server)
-
----
-
-#### 📊 图计算引擎(OLAP)
-
-提供两种互补的图分析引擎:
-
-- **Vermeer**(推荐):高性能纯内存图计算引擎,部署简单、响应快,适合中小规模图分析和快速上手
-- **HugeGraph-Computer**:基于 [Pregel](https://kowshik.github.io/JPregel/pregel_paper.pdf) 的分布式 OLAP 引擎,可运行在 Kubernetes / Yarn 上,适合超大规模图算法任务
-
-📖 [图计算快速开始](/cn/docs/quickstart/computing/hugegraph-vermeer)
-
----
-
-#### 🤖 HugeGraph-AI — 图 AI 生态
-
-HugeGraph 独立的 AI 组件,连接图与大语言模型(LLM):
-- **GraphRAG**:基于图的检索增强生成,实现 LLM 智能问答
-- **知识图谱构建**:自动从非结构化文本中提取实体和关系,构建知识图谱
-- **图神经网络**:支持 GNN 模型的训练与推理
-- **20+ 图机器学习算法**:内置丰富的图分析算法,持续更新
-- **Python Client**:为 AI 应用提供便捷的 Python SDK
+## HugeGraph Server
-📖 [HugeGraph-AI 快速开始](/cn/docs/quickstart/hugegraph-ai/quick_start)
+Server 是图数据库服务。`hugegraph-core` 实现属性图、Schema、查询和后端接口,`hugegraph-api` 提供 REST API。当前 REST 资源路径包含图空间与图名称,例如:
----
+```text
+/graphspaces/{graphspace}/graphs/{graph}
+```
-#### 🛠️ HugeGraph Toolchain — 工具链
+Server 支持 Gremlin 和 Cypher。单机部署通常使用 RocksDB;分布式部署使用 HStore,并由 PD 管理元数据和分区、Store 保存数据副本。
-围绕图系统的完整工具生态([toolchain 仓库](https://github.com/apache/hugegraph-toolchain)):
+- [Server 快速开始](/cn/docs/quickstart/hugegraph/hugegraph-server/)
+- [PD 快速开始](/cn/docs/quickstart/hugegraph/hugegraph-pd/)
+- [HStore 快速开始](/cn/docs/quickstart/hugegraph/hugegraph-hstore/)
+- [REST API](/cn/docs/clients/restful-api/)
-| 工具 | 说明 |
-|------|------|
-| [Hubble](/cn/docs/quickstart/toolchain/hugegraph-hubble) | Web 可视化平台:数据建模 → 批量导入 → 在线/离线分析 一站式操作 |
-| [Loader](/cn/docs/quickstart/toolchain/hugegraph-loader) | 数据导入工具:支持本地文件、HDFS、MySQL 等多数据源,TXT/CSV/JSON 等格式 |
-| [Client](/cn/docs/quickstart/client/hugegraph-client) | 多语言 SDK:Java / Python / Go |
-| [Spark-connector](/cn/docs/quickstart/toolchain/hugegraph-spark-connector) | Spark 集成:支持通过 Spark 批量读写图数据,适合大数据离线处理场景 |
-| [Tools](/cn/docs/quickstart/toolchain/hugegraph-tools) | 命令行运维工具:图管理、备份恢复、Gremlin 执行等 |
+## Toolchain
----
+Toolchain 仓库包含以下模块:
-### 部署模式
+| 模块 | 用途 |
+|---|---|
+| [Java Client](/cn/docs/quickstart/client/hugegraph-client/) | 调用 Server 的 Schema、图数据、Gremlin 和 Traverser API |
+| [Go Client](/cn/docs/quickstart/client/hugegraph-client-go/) | Go 语言客户端;当前仍处于开发阶段 |
+| [Loader](/cn/docs/quickstart/toolchain/hugegraph-loader/) | 从文件、HDFS、JDBC、Kafka 或其他图读取数据并写入 HugeGraph |
+| [Hubble](/cn/docs/quickstart/toolchain/hugegraph-hubble/) | 图管理 Web 界面和后端服务 |
+| [Spark Connector](/cn/docs/quickstart/toolchain/hugegraph-spark-connector/) | 在 Spark 作业中读写 HugeGraph |
+| [Tools](/cn/docs/quickstart/toolchain/hugegraph-tools/) | 图管理、备份和恢复命令 |
-HugeGraph 支持两种主要部署模式:
+## 图计算
-| 模式 | 核心组件 | 适用场景 | 数据规模 | 高可用 |
-|------|---------|---------|---------|-------|
-| **单机 (Standalone)** | Server + RocksDB | 开发、测试、单节点生产 | < 4TB | 基础 |
-| **分布式 (Distributed)** | Server + PD(3-5节点)+ Store(3+节点) | 生产环境、水平扩展 | < 1000TB | ✅ |
+HugeGraph-Computer 仓库包含两个实现:
-**Docker 快速体验:**
+- Vermeer 使用 Go 编写,采用 master-worker 架构,图数据以内存存储为主,并提供 REST API、gRPC 和 Web UI。
+- Computer 使用 Java 编写,是 BSP/Pregel 风格的分布式计算框架,可部署到 Kubernetes 或 YARN。
-```bash
-docker run -itd --name=hugegraph -p 8080:8080 hugegraph/hugegraph
-```
+两者都能读取 HugeGraph 数据,但部署方式、配置和算法接口不同。
----
+- [Vermeer 快速开始](/cn/docs/quickstart/computing/hugegraph-vermeer/)
+- [Computer 快速开始](/cn/docs/quickstart/computing/hugegraph-computer/)
-### 快速入门导航
+## HugeGraph-AI
-| 我想要... | 从这里开始 |
-|---------|---------|
-| 🚀 **快速体验** | [Docker 部署](/cn/docs/quickstart/hugegraph/hugegraph-server) |
-| 🔍 **运行图查询** (OLTP) | [HugeGraph Server 快速开始](/cn/docs/quickstart/hugegraph/hugegraph-server) |
-| 📈 **大规模图计算** (OLAP) | [Vermeer / Computer](/cn/docs/quickstart/computing/hugegraph-computer) |
-| 🤖 **构建 AI/RAG 应用** | [HugeGraph-AI](/cn/docs/quickstart/hugegraph-ai/quick_start) |
-| 📥 **批量导入数据** | [HugeGraph Loader](/cn/docs/quickstart/toolchain/hugegraph-loader) |
-| 🖥️ **可视化管理** | [Hubble Web UI](/cn/docs/quickstart/toolchain/hugegraph-hubble) |
+HugeGraph-AI 要求 Python 3.10 或更高版本,使用 `uv` 管理工作区。仓库包含 `hugegraph-llm`、`hugegraph-ml`、`hugegraph-python-client` 和 `vermeer-python-client`:
----
+- `hugegraph-llm` 提供 GraphRAG、知识图谱构建和自然语言查询相关功能。
+- `hugegraph-ml` 包含图分类、节点分类、图嵌入和链接预测实现。
+- 两个 Python Client 分别连接 HugeGraph Server 和 Vermeer。
-### 系统特性
+[HugeGraph-AI 快速开始](/cn/docs/quickstart/hugegraph-ai/quick_start/)
-- **易用**:Gremlin/Cypher 双查询语言 + RESTful API,功能齐全的工具链,轻松上手
-- **高效**:图存储与查询深度优化,毫秒级响应,支持数千并发在线操作,百亿级数据快速导入
-- **通用**:支持 OLTP + OLAP 双模式,无缝对接 Apache Hadoop、Spark、Flink 大数据生态
-- **可扩展**:分布式存储、数据多副本、横向扩容,插件式后端可灵活扩展
-- **开放**:Apache 2.0 License,完全开源,欢迎社区贡献
+## 选择入口
----
+| 需求 | 文档 |
+|---|---|
+| 启动图数据库并执行查询 | [Server 快速开始](/cn/docs/quickstart/hugegraph/hugegraph-server/) |
+| 批量导入数据 | [Loader](/cn/docs/quickstart/toolchain/hugegraph-loader/) |
+| 使用 Web 界面管理图 | [Hubble](/cn/docs/quickstart/toolchain/hugegraph-hubble/) |
+| 运行图算法 | [Vermeer 与 Computer](/cn/docs/quickstart/computing/) |
+| 构建 GraphRAG 或图机器学习应用 | [HugeGraph-AI](/cn/docs/quickstart/hugegraph-ai/) |
-### 联系我们
+## 社区
-- [GitHub Issues](https://github.com/apache/hugegraph/issues):问题反馈与功能建议(推荐)
-- 邮件:[dev@hugegraph.apache.org](mailto:dev@hugegraph.apache.org)([订阅方式](/cn/docs/contribution-guidelines/subscribe/))
+- [GitHub Issues](https://github.com/apache/hugegraph/issues)
+- 开发者邮件列表:[dev@hugegraph.apache.org](mailto:dev@hugegraph.apache.org)
+- [邮件列表订阅方法](/cn/docs/contribution-guidelines/subscribe/)
- 安全问题:[security@hugegraph.apache.org](mailto:security@hugegraph.apache.org)
-- 微信公众号:Apache HugeGraph
-
-<img src="https://github.com/apache/hugegraph-doc/blob/master/assets/images/wechat.png?raw=true" alt="微信公众号二维码" width="300"/>
diff --git a/content/cn/docs/language/_index.md b/content/cn/docs/language/_index.md
index eaacdd517..16dc29be7 100644
--- a/content/cn/docs/language/_index.md
+++ b/content/cn/docs/language/_index.md
@@ -1,5 +1,7 @@
---
-title: "QUERY LANGUAGE"
-linkTitle: "QUERY LANGUAGE"
+title: "查询语言"
+linkTitle: "查询语言"
weight: 7
----
\ No newline at end of file
+---
+
+HugeGraph 支持 Gremlin 和 Cypher。这里主要介绍 Gremlin 用法;Cypher HTTP 接口见 [Cypher API](/cn/docs/clients/restful-api/cypher/)。
diff --git a/content/cn/docs/quickstart/_index.md b/content/cn/docs/quickstart/_index.md
index 1a116113e..efe594db4 100644
--- a/content/cn/docs/quickstart/_index.md
+++ b/content/cn/docs/quickstart/_index.md
@@ -1,5 +1,7 @@
---
title: "Quick Start"
-linkTitle: "Quick Start"
+linkTitle: "快速开始"
weight: 3
----
\ No newline at end of file
+---
+
+根据需要选择 Server、Toolchain、图计算或 HugeGraph-AI 的快速开始文档。各组件独立发布,安装前请核对对应仓库的运行环境和版本。
diff --git a/content/cn/docs/quickstart/client/_index.md b/content/cn/docs/quickstart/client/_index.md
index c18f3ebef..8fa46cf0e 100644
--- a/content/cn/docs/quickstart/client/_index.md
+++ b/content/cn/docs/quickstart/client/_index.md
@@ -3,3 +3,5 @@ title: "HugeGraph Client"
linkTitle: "HugeGraph Client"
weight: 5
---
+
+Java 和 Go Client 位于 HugeGraph Toolchain 仓库,Python Client 位于 HugeGraph-AI 仓库。三者的安装方式和 API 不完全相同,请进入对应页面查看。
diff --git a/content/cn/docs/quickstart/client/hugegraph-client-go.md b/content/cn/docs/quickstart/client/hugegraph-client-go.md
index 11c7eb5bb..4a89aa262 100644
--- a/content/cn/docs/quickstart/client/hugegraph-client-go.md
+++ b/content/cn/docs/quickstart/client/hugegraph-client-go.md
@@ -4,160 +4,74 @@ linkTitle: "Go 客户端"
weight: 3
---
-基于 Go 语言的 HugeGraph Client SDK 工具。
+HugeGraph Go Client 是 Toolchain 仓库中的 Go SDK,目前提供版本查询、Schema、顶点、边和 Gremlin API。
-## 软件架构
+> 该模块仍在开发中。接口范围以 [`hugegraph-client-go/api/v1`](https://github.com/apache/hugegraph-toolchain/tree/master/hugegraph-client-go/api/v1) 下的源码为准。
-(软件架构说明)
+## 环境要求
-## 安装教程
+- Go 1.19 或更高版本
+- 可访问的 HugeGraph Server,默认示例地址为 `http://127.0.0.1:8080`
+
+## 安装
+
+在 Go module 项目中执行:
```shell
go get github.com/apache/hugegraph-toolchain/hugegraph-client-go
```
-## 已实现 API
-
-| API | 说明 |
-|---------|-------------|
-| schema | 获取模型 schema |
-| version | 获取版本信息 |
+## 初始化客户端
-## 使用说明
-
-### 1. 初始化客户端
+`NewCommonClient` 要求 `Host` 是 IP 地址;未启用认证时,用户名和密码留空。当前 Server 的图资源路径包含图空间,默认填写 `DEFAULT`。将 `GraphSpace` 留空只适用于仍使用 `/graphs/{graph}` 路径的旧版 Server。
```go
package main
import (
+ "fmt"
"log"
- "os"
- "github.com/apache/hugegraph-toolchain/hugegraph-client-go"
- "github.com/apache/hugegraph-toolchain/hugegraph-client-go/hgtransport"
+ hugegraph "github.com/apache/hugegraph-toolchain/hugegraph-client-go"
)
func main() {
client, err := hugegraph.NewCommonClient(hugegraph.Config{
- Host: "127.0.0.1",
- Port: 8080,
- Graph: "hugegraph",
- Username: "", // 根据实际情况填写用户名
- Password: "", // 根据实际情况填写密码
- Logger: &hgtransport.ColorLogger{
- Output: os.Stdout,
- EnableRequestBody: true,
- EnableResponseBody: true,
- },
+ Host: "127.0.0.1",
+ Port: 8080,
+ GraphSpace: "DEFAULT",
+ Graph: "hugegraph",
+ Username: "",
+ Password: "",
})
-
if err != nil {
- log.Fatalf("Error creating the client: %s\n", err)
+ log.Fatal(err)
}
- // 使用 client 进行操作...
- _ = client // 避免 "imported and not used" 错误
-}
-```
-
-### 2. 获取 HugeGraph 版本
-
-#### 使用 SDK 获取版本信息
-
-```go
-package main
-
-import (
- "fmt"
- "log"
- "os"
-
- "github.com/apache/hugegraph-toolchain/hugegraph-client-go"
- "github.com/apache/hugegraph-toolchain/hugegraph-client-go/hgtransport"
-)
-
-// initClient 初始化并返回一个 HugeGraph 客户端实例
-func initClient() *hugegraph.CommonClient {
- client, err := hugegraph.NewCommonClient(hugegraph.Config{
- Host: "127.0.0.1",
- Port: 8080,
- Graph: "hugegraph",
- Username: "",
- Password: "",
- Logger: &hgtransport.ColorLogger{
- Output: os.Stdout,
- EnableRequestBody: true,
- EnableResponseBody: true,
- },
- })
+ response, err := client.Version()
if err != nil {
- log.Fatalf("Error creating the client: %s\n", err)
- }
- return client
-}
-
-func getVersion() {
- client := initClient()
- // 假设 client 有一个 Version 方法返回版本信息和一个错误
- // res, err := client.Version() // 实际调用
- // 模拟返回,因为原始 README 中的 client.Version() 返回类型与此处使用不完全匹配
- type VersionInfo struct {
- Versions struct {
- Version string `json:"version"`
- Core string `json:"core"`
- Gremlin string `json:"gremlin"`
- API string `json:"api"`
- } `json:"versions"`
- // Body io.ReadCloser // 假设有 Body 用于关闭,根据实际 SDK 调整
- }
-
- // 模拟 API 调用和返回
- res := &VersionInfo{
- Versions: struct {
- Version string `json:"version"`
- Core string `json:"core"`
- Gremlin string `json:"gremlin"`
- API string `json:"api"`
- }{
- Version: "1.0.0", // 示例版本
- Core: "1.0.0",
- Gremlin: "3.x.x",
- API: "v1",
- },
+ log.Fatal(err)
}
- // err := error(nil) // 假设没有错误
+ defer response.Body.Close()
- // if err != nil {
- // log.Fatalf("Error getting the response: %s\n", err)
- // }
- // defer res.Body.Close() // 如果有 Body,需要关闭
-
- fmt.Println(res.Versions)
- fmt.Println(res.Versions.Version)
-}
-
-func main() {
- getVersion()
+ fmt.Println(response.Versions.Version)
}
```
-#### 返回值的结构
+`Version()` 返回的 `Versions` 包含 HugeGraph Server、Core、Gremlin 和 REST API 版本。若使用源码提供的 `NewDefaultCommonClient()`,默认连接 `127.0.0.1:8080` 下的 `hugegraph` 图,并使用 `admin`/`pa` 认证;生产代码通常应显式传入配置。
-```go
-package main
+## 已实现的入口
-// VersionResponse 定义了版本 API 返回的结构体
-type VersionResponse struct {
- Versions struct {
- Version string `json:"version"` // hugegraph version
- Core string `json:"core"` // hugegraph core version
- Gremlin string `json:"gremlin"` // hugegraph gremlin version
- API string `json:"api"` // hugegraph api version
- } `json:"versions"`
-}
-```
+`CommonClient` 当前公开以下入口:
-## API 文档参考
+| 入口 | 用途 |
+|---|---|
+| `Version()` | 查询服务端版本 |
+| `Schema()` | 查询完整 Schema |
+| `Propertykey` | 管理 PropertyKey |
+| `VertexLabel` | 管理 VertexLabel |
+| `EdgeLabel` | 管理 EdgeLabel |
+| `Vertex` | 创建、批量创建和更新顶点属性 |
+| `Gremlin` | 通过 GET 或 POST 执行 Gremlin |
-<!-- 可以在此部分添加指向更详细 API 文档的链接 -->
+完整调用方式可参考各 API 目录中的测试,例如 [`version_test.go`](https://github.com/apache/hugegraph-toolchain/blob/master/hugegraph-client-go/api/v1/version_test.go) 和 [`vertexlabel_test.go`](https://github.com/apache/hugegraph-toolchain/blob/master/hugegraph-client-go/api/v1/vertexlabel/vertexlabel_test.go)。
diff --git a/content/cn/docs/quickstart/client/hugegraph-client-python.md b/content/cn/docs/quickstart/client/hugegraph-client-python.md
index d904a6e9f..0c88f1e42 100644
--- a/content/cn/docs/quickstart/client/hugegraph-client-python.md
+++ b/content/cn/docs/quickstart/client/hugegraph-client-python.md
@@ -4,185 +4,109 @@ linkTitle: "Python 客户端"
weight: 2
---
-`hugegraph-python-client` 是 HugeGraph 图数据库的 Python 客户端/SDK。
+`hugegraph-python-client` 是 HugeGraph 的 Python SDK,可管理 Schema、读写图数据并执行 Gremlin 查询。HugeGraph-LLM 和 HugeGraph-ML 也使用这个客户端。
-它用于定义图结构、对图数据执行 CRUD 操作、管理 Schema 以及执行 Gremlin 查询。`hugegraph-llm` 和 `hugegraph-ml` 模块都依赖于这个基础库。
+## 环境要求
-## 安装
+- Python 3.9 或更高版本
+- 可访问的 HugeGraph Server
+- `uv`(推荐)或 `pip`
-### 安装已发布的包(稳定版)
+## 安装
-要安装 `hugegraph-python-client`,您可以使用 uv/pip 或从源码构建:
+PyPI 上的包名目前是 `hugegraph-python`:
```bash
-# uv 是可选的,您可以直接使用 pip
-uv pip install hugegraph-python # 注意:可能不是最新版本,建议从源码安装
-# WIP:我们很快会将 'hugegraph-python-client' 作为包名
+uv pip install hugegraph-python
+# 也可以使用 pip install hugegraph-python
```
-### 从源码安装(最新代码)
-
-要从源码安装,请克隆仓库并安装所需的依赖项:
+如需使用仓库中的最新代码,请从 HugeGraph-AI 仓库根目录同步 workspace:
```bash
git clone https://github.com/apache/hugegraph-ai.git
-cd hugegraph-ai/hugegraph-python-client
-
-# 普通安装
-uv pip install .
-
-# (可选) 安装开发版本
-uv pip install -e .
+cd hugegraph-ai
+uv sync
+source .venv/bin/activate
```
-## 使用示例
-
-### 定义图结构
-
-您可以使用 `hugegraph-python-client` 来定义图结构。以下是如何定义图的示例:
+## 连接并写入数据
```python
from pyhugegraph.client import PyHugeClient
-# 初始化客户端
-# 对于 HugeGraph API 版本 ≥ v3:(或启用 graphspace 功能)
-# - 如果启用了 graphspace,则 'graphspace' 参数变得相关(默认名称为 'DEFAULT')
-# - 否则,graphspace 参数是可选的,可以忽略。
-client = PyHugeClient("127.0.0.1", "8080", user="admin", pwd="admin", graph="hugegraph", graphspace="DEFAULT")
-
-""""
-注意:
-可以参考您 HugeGraph 版本的官方 REST-API 文档以获取准确的详细信息。
-如果某些 API 与预期不符,请提交 issue 或联系我们。
-"""
+client = PyHugeClient(
+ "127.0.0.1:8080",
+ graph="hugegraph",
+ user="admin",
+ pwd="admin",
+ graphspace="DEFAULT",
+)
+
schema = client.schema()
schema.propertyKey("name").asText().ifNotExist().create()
schema.propertyKey("birthDate").asText().ifNotExist().create()
-schema.vertexLabel("Person").properties("name", "birthDate").usePrimaryKeyId().primaryKeys("name").ifNotExist().create()
-schema.vertexLabel("Movie").properties("name").usePrimaryKeyId().primaryKeys("name").ifNotExist().create()
-schema.edgeLabel("ActedIn").sourceLabel("Person").targetLabel("Movie").ifNotExist().create()
-
-print(schema.getVertexLabels())
-print(schema.getEdgeLabels())
-print(schema.getRelations())
-
-# 初始化图
-g = client.graph()
-v_al_pacino = g.addVertex("Person", {"name": "Al Pacino", "birthDate": "1940-04-25"})
-v_robert = g.addVertex("Person", {"name": "Robert De Niro", "birthDate": "1943-08-17"})
-v_godfather = g.addVertex("Movie", {"name": "The Godfather"})
-v_godfather2 = g.addVertex("Movie", {"name": "The Godfather Part II"})
-v_godfather3 = g.addVertex("Movie", {"name": "The Godfather Coda The Death of Michael Corleone"})
-
-g.addEdge("ActedIn", v_al_pacino.id, v_godfather.id, {})
-g.addEdge("ActedIn", v_al_pacino.id, v_godfather2.id, {})
-g.addEdge("ActedIn", v_al_pacino.id, v_godfather3.id, {})
-g.addEdge("ActedIn", v_robert.id, v_godfather2.id, {})
-
-res = g.getVertexById(v_al_pacino.id).label
-print(res)
-g.close()
+schema.vertexLabel("Person").properties("name", "birthDate") \
+ .usePrimaryKeyId().primaryKeys("name").ifNotExist().create()
+schema.vertexLabel("Movie").properties("name") \
+ .usePrimaryKeyId().primaryKeys("name").ifNotExist().create()
+schema.edgeLabel("ActedIn").sourceLabel("Person").targetLabel("Movie") \
+ .ifNotExist().create()
+
+graph = client.graph()
+person = graph.addVertex(
+ "Person", {"name": "Al Pacino", "birthDate": "1940-04-25"}
+)
+movie = graph.addVertex("Movie", {"name": "The Godfather"})
+edge = graph.addEdge("ActedIn", person.id, movie.id, {})
+
+print(graph.getVertexById(person.id))
+print(graph.getEdgeById(edge.id))
+graph.close()
```
-### Schema 管理
-
-`hugegraph-python-client` 提供了全面的 Schema 管理功能。
+如果 HugeGraph 没有启用 GraphSpace,可以省略 `graphspace`。启用后请传入实际空间名;默认空间通常是 `DEFAULT`。
-#### 定义属性键 (Property Key)
-
-```python
-# 定义属性键
-client.schema().propertyKey('name').dataType('STRING').cardinality('SINGLE').create()
-```
-
-#### 定义顶点标签 (Vertex Label)
-
-```python
-# 定义顶点标签
-client.schema().vertexLabel('person').properties('name', 'age').primaryKeys('name').create()
-```
-
-#### 定义边标签 (Edge Label)
-
-```python
-# 定义边标签
-client.schema().edgeLabel('knows').sourceLabel('person').targetLabel('person').properties('since').create()
-```
+## 常用操作
-#### 定义索引标签 (Index Label)
+### 查询 Schema
```python
-# 定义索引标签
-client.schema().indexLabel('personByName').onV('person').by('name').secondary().create()
+schema = client.schema()
+print(schema.getPropertyKeys())
+print(schema.getVertexLabels())
+print(schema.getEdgeLabels())
+print(schema.getIndexLabels())
```
-### CRUD 操作
+### 更新和删除图数据
-客户端允许您对图数据执行 CRUD 操作。以下是如何创建、读取、更新和删除顶点和边的示例:
-
-#### 创建顶点和边
+图接口直接接收对象属性字典:
```python
-# 创建顶点
-v1 = client.graph().addVertex('person').property('name', 'John').property('age', 29).create()
-v2 = client.graph().addVertex('person').property('name', 'Jane').property('age', 25).create()
-
-# 创建边
-client.graph().addEdge(v1, 'knows', v2).property('since', '2020').create()
+graph = client.graph()
+graph.appendVertex(person.id, {"birthDate": "1940-04-25"})
+graph.removeEdgeById(edge.id)
+graph.removeVertexById(person.id)
+graph.close()
```
-#### 读取顶点和边
+### 执行 Gremlin
```python
-# 通过 ID 获取顶点
-vertex = client.graph().getVertexById(v1.id)
-print(vertex)
-
-# 通过 ID 获取边
-edge = client.graph().getEdgeById(edge.id) # 假设 edge 对象已定义并有 id 属性
-print(edge)
-```
-
-#### 更新顶点和边
-
-```python
-# 更新顶点
-client.graph().updateVertex(v1.id).property('age', 30).update()
-
-# 更新边
-client.graph().updateEdge(edge.id).property('since', '2021').update() # 假设 edge 对象已定义并有 id 属性
+gremlin = client.gremlin()
+result = gremlin.exec("g.V().limit(5)")
+print(result)
```
-#### 删除顶点和边
+接口参数会随 HugeGraph REST API 版本变化。遇到不兼容时,先核对当前 Server 的 REST API 文档与客户端测试用例。
-```python
-# 删除顶点
-client.graph().deleteVertex(v1.id)
-
-# 删除边
-client.graph().deleteEdge(edge.id) # 假设 edge 对象已定义并有 id 属性
-```
+## 开发检查
-### 执行 Gremlin 查询
+在 HugeGraph-AI 仓库根目录运行格式与静态检查:
-客户端还支持执行 Gremlin 查询:
-
-```python
-# 执行 Gremlin 查询
-g = client.gremlin()
-res = g.exec("g.V().limit(5)")
-print(res)
+```bash
+./style/code_format_and_analysis.sh
```
-其他信息正在建设中 🚧 (欢迎为此添加更多文档,用户可以参考 [java-client-doc](https://hugegraph.apache.org/docs/clients/hugegraph-client/) 获取类似用法)
-
-## API 文档参考
-
-<!-- 可以在此部分添加指向更详细 API 文档的链接 -->
-
-## 贡献
-
-* 欢迎为 `hugegraph-python-client` 做出贡献。请参阅 [贡献指南](https://hugegraph.apache.org/docs/contribution-guidelines/) 获取更多信息。
-* 代码格式:请在提交 PR 前运行 `./style/code_format_and_analysis.sh` 来格式化您的代码。
-
-感谢所有已经为 `hugegraph-python-client` 做出贡献的人!
+源码与测试位于 `hugegraph-python-client/src/pyhugegraph/` 和 `hugegraph-python-client/src/tests/`。
diff --git a/content/cn/docs/quickstart/client/hugegraph-client.md b/content/cn/docs/quickstart/client/hugegraph-client.md
index 994d722b8..4251008c9 100644
--- a/content/cn/docs/quickstart/client/hugegraph-client.md
+++ b/content/cn/docs/quickstart/client/hugegraph-client.md
@@ -6,17 +6,14 @@ weight: 1
### 1 HugeGraph-Client 概述
-[HugeGraph-Client](https://github.com/apache/hugegraph-toolchain) 向 HugeGraph-Server 发出 HTTP 请求,获取并解析 Server 的执行结果。
-提供了 Java/Go/[Python](https://github.com/apache/hugegraph-ai/tree/main/hugegraph-python-client) 版,
-用户可以使用 [Client-API](/cn/docs/clients/hugegraph-client) 编写代码操作 HugeGraph,比如元数据和图数据的增删改查,或者执行 gremlin 语句等。
-后文主要是 Java 使用示例 (其他语言 SDK 可参考对应 `READEME` 页面)
+[HugeGraph Java Client](https://github.com/apache/hugegraph-toolchain/tree/master/hugegraph-client) 将 Java API 转换为 HugeGraph Server 的 REST 请求,支持管理 Schema 和图数据、执行 Gremlin 及调用 Traverser API。详细接口见 [Client API](/cn/docs/clients/hugegraph-client),本文给出 Java 项目的接入示例。
-> 现在已经支持基于 Go/Python 语言的 HugeGraph [Client SDK](https://github.com/apache/hugegraph-toolchain/blob/master/hugegraph-client-go/README.md) (version >=1.2.0)
+其他语言可使用 [Go Client](/cn/docs/quickstart/client/hugegraph-client-go) 或 HugeGraph-AI 仓库中的 [Python Client](https://github.com/apache/hugegraph-ai/tree/main/hugegraph-python-client)。
### 2 环境要求
-- java 11 (兼容 java 8)
-- maven 3.5+
+- JDK 11(当前 CI 使用版本;源码目标版本为 Java 8)
+- Maven 3.6+
### 3 使用流程
@@ -47,12 +44,12 @@ weight: 1
<dependency>
<groupId>org.apache.hugegraph</groupId>
<artifactId>hugegraph-client</artifactId>
- <!-- Update to the latest release version -->
+ <!-- 请按下载页选择已发布版本 -->
<version>1.7.0</version>
</dependency>
</dependencies>
```
-> 注:Graph 所有组件版本号均保持一致
+> Client 与 Server 的开发版本可能不同。升级前应按对应发布说明核对兼容性。
#### 4.3 Example
diff --git a/content/cn/docs/quickstart/computing/_index.md b/content/cn/docs/quickstart/computing/_index.md
index bbce7c1c1..0b499d218 100644
--- a/content/cn/docs/quickstart/computing/_index.md
+++ b/content/cn/docs/quickstart/computing/_index.md
@@ -1,11 +1,12 @@
---
-title: "HugeGraph Computing (OLAP)"
-linkTitle: "HugeGraph Computing (OLAP)"
+title: "HugeGraph 图计算(OLAP)"
+linkTitle: "图计算(OLAP)"
weight: 4
---
-> DeepWiki 提供实时更新的项目文档,内容更全面准确,适合快速了解项目最新情况。
->
-> 📖 [https://deepwiki.com/apache/hugegraph-computer](https://deepwiki.com/apache/hugegraph-computer)
+HugeGraph-Computer 仓库包含两套 OLAP 系统:Java 实现的分布式 BSP 框架 Computer,以及 Go 实现的内存图计算平台 Vermeer。
-**GitHub 访问:** <i class="fab fa-github"></i> [https://github.com/apache/hugegraph-computer](https://github.com/apache/hugegraph-computer)
\ No newline at end of file
+- [Vermeer 快速入门](./hugegraph-vermeer.md)
+- [Computer 快速入门](./hugegraph-computer.md)
+- [Computer 配置参考](./hugegraph-computer-config.md)
+- [源代码](https://github.com/apache/hugegraph-computer)
diff --git a/content/cn/docs/quickstart/computing/hugegraph-computer-config.md b/content/cn/docs/quickstart/computing/hugegraph-computer-config.md
index 783446d73..da5a140f8 100644
--- a/content/cn/docs/quickstart/computing/hugegraph-computer-config.md
+++ b/content/cn/docs/quickstart/computing/hugegraph-computer-config.md
@@ -4,13 +4,9 @@ linkTitle: "Computer 配置参考"
weight: 3
---
-### Computer 配置选项
+## Computer 配置选项
-> **默认值说明:**
-> - 以下配置项显示的是**代码默认值**(定义在 `ComputerOptions.java` 中)
-> - 当**打包配置文件**(`conf/computer.properties` 分发包中)指定了不同的值时,会以 `值 (打包: 值)` 的形式标注
-> - 示例:`300000 (打包: 100000)` 表示代码默认值为 300000,但分发包默认值为 100000
-> - 对于生产环境部署,除非明确覆盖,否则打包默认值优先生效
+表格中的默认值来自 `computer-api` 模块的 `ComputerOptions.java`。分发包的 `conf/computer.properties` 显式覆盖某项时,表格以“代码默认值(打包:实际值)”标注;程序启动后以配置文件中的值为准。
---
@@ -25,8 +21,8 @@ HugeGraph-Computer 核心作业设置。
| hugegraph.username | "" (空) | HugeGraph 认证用户名(如果未启用认证则留空)。 |
| hugegraph.password | "" (空) | HugeGraph 认证密码(如果未启用认证则留空)。 |
| job.id | local_0001 (打包: local_001) | YARN 集群或 K8s 集群上的作业标识符。 |
-| job.namespace | "" (空) | 作业命名空间,可以分隔不同的数据源。🔒 **由系统管理 - 不要手动修改**。 |
-| job.workers_count | 1 | 执行一个图算法作业的 Worker 数量。🔒 **在 K8s 中由系统管理 - 不要手动修改**。 |
+| job.namespace | "" (空) | 作业命名空间,可以分隔不同的数据源。该项由运行系统管理。 |
+| job.workers_count | 1 | 执行一个图算法作业的 Worker 数量。在 K8s 中由 Operator 设置。 |
| job.partitions_count | 1 | 执行一个图算法作业的分区数量。 |
| job.partitions_thread_nums | 4 | 分区并行计算的线程数量。 |
@@ -38,9 +34,9 @@ HugeGraph-Computer 核心作业设置。
| 配置项 | 默认值 | 说明 |
|--------|--------|------|
-| algorithm.params_class | org.apache.hugegraph.computer.core.config.Null | ⚠️ **必填** 在算法运行前用于传递算法参数的类。 |
-| algorithm.result_class | org.apache.hugegraph.computer.core.config.Null | 顶点值的类,用于存储顶点的计算结果。 |
-| algorithm.message_class | org.apache.hugegraph.computer.core.config.Null | 计算顶点时传递的消息类。 |
+| algorithm.params_class | `ComputerOptions.Null` 占位类 | 必填。用于在算法运行前传递算法参数的类。 |
+| algorithm.result_class | `ComputerOptions.Null` 占位类 | 顶点值的类,用于存储顶点的计算结果。 |
+| algorithm.message_class | `ComputerOptions.Null` 占位类 | 计算顶点时传递的消息类。 |
---
@@ -53,8 +49,8 @@ HugeGraph-Computer 核心作业设置。
| 配置项 | 默认值 | 说明 |
|--------|--------|------|
| input.source_type | hugegraph-server | 加载输入数据的源类型,允许值:['hugegraph-server', 'hugegraph-loader']。'hugegraph-loader' 表示使用 hugegraph-loader 从 HDFS 或文件加载数据。如果使用 'hugegraph-loader',请配置 'input.loader_struct_path' 和 'input.loader_schema_path'。 |
-| input.loader_struct_path | "" (空) | Loader 输入的结构路径,仅在 input.source_type=loader 启用时生效。 |
-| input.loader_schema_path | "" (空) | Loader 输入的 schema 路径,仅在 input.source_type=loader 启用时生效。 |
+| input.loader_struct_path | "" (空) | Loader 输入的结构路径,仅在 `input.source_type=hugegraph-loader` 时生效。 |
+| input.loader_schema_path | "" (空) | Loader 输入的 Schema 路径,仅在 `input.source_type=hugegraph-loader` 时生效。 |
#### 3.2 输入分片
@@ -235,8 +231,8 @@ Worker 和 Master 之间网络通信的配置。
| 配置项 | 默认值 | 说明 |
|--------|--------|------|
-| transport.server_host | 127.0.0.1 | 🔒 **由系统管理** 监听传输数据的服务器主机名或 IP。不要手动修改。 |
-| transport.server_port | 0 | 🔒 **由系统管理** 监听传输数据的服务器端口。如果设置为 0,系统将分配一个随机端口。不要手动修改。 |
+| transport.server_host | 127.0.0.1 | 监听传输数据的主机名或 IP,由运行系统管理。 |
+| transport.server_port | 0 | 监听传输数据的端口;0 表示分配随机端口。该项由运行系统管理。 |
| transport.server_threads | 4 | 服务器传输线程的数量。 |
#### 7.2 客户端配置
@@ -326,7 +322,7 @@ HGKV(HugeGraph Key-Value)存储引擎和值文件的配置。
| 配置项 | 默认值 | 说明 |
|--------|--------|------|
-| bsp.etcd_endpoints | http://localhost:2379 | 🔒 **在 K8s 中由系统管理** 访问 etcd 的端点。对于多个端点,使用逗号分隔列表:`http://host1:port1,http://host2:port2`。不要在 K8s 部署中手动修改。 |
+| bsp.etcd_endpoints | http://localhost:2379 | etcd 端点;多个地址用逗号分隔。K8s 部署中由 Operator 设置。 |
| bsp.max_super_step | 10 (打包: 2) | 算法的最大超步数。 |
| bsp.register_timeout | 300000 (打包: 100000) | 等待 master 和 worker 注册的最大超时时间(毫秒)。 |
| bsp.wait_workers_timeout | 86400000 (24 小时) | 等待 worker BSP 事件的最大超时时间(毫秒)。 |
@@ -348,7 +344,7 @@ HGKV(HugeGraph Key-Value)存储引擎和值文件的配置。
### 11. 系统管理配置
-⚠️ **由系统管理的配置项 - 禁止用户手动修改。**
+以下配置由运行系统管理,不应由作业配置覆盖。
以下配置项由 K8s Operator、Driver 或运行时系统自动管理。手动修改将导致集群通信失败或作业调度错误。
@@ -394,7 +390,7 @@ HGKV(HugeGraph Key-Value)存储引擎和值文件的配置。
### HugeGraph-Computer CRD
-> CRD: https://github.com/apache/hugegraph-computer/blob/master/computer-k8s-operator/manifest/hugegraph-computer-crd.v1.yaml
+> CRD: https://github.com/apache/hugegraph-computer/blob/master/computer/computer-k8s-operator/manifest/hugegraph-computer-crd.v1.yaml
| 字段 | 默认值 | 说明 | 必填 |
|------|--------|------|------|
diff --git a/content/cn/docs/quickstart/computing/hugegraph-computer.md b/content/cn/docs/quickstart/computing/hugegraph-computer.md
index c401ff844..346b7e9da 100644
--- a/content/cn/docs/quickstart/computing/hugegraph-computer.md
+++ b/content/cn/docs/quickstart/computing/hugegraph-computer.md
@@ -1,158 +1,98 @@
---
-title: "HugeGraph-Computer Quick Start"
+title: "HugeGraph-Computer 快速入门"
linkTitle: "使用 Computer 进行 OLAP 分析"
weight: 2
---
-## 1 HugeGraph-Computer 概述
+HugeGraph-Computer 是实现 Pregel/BSP 模型的分布式图处理框架,可运行在 Kubernetes、YARN 或本地进程中。它从 HugeGraph 或 Loader 数据读取图,计算过程中可把超出内存阈值的数据落盘,结果可写回 HugeGraph 或 HDFS。
-[`HugeGraph-Computer`](https://github.com/apache/hugegraph-computer) 是分布式图处理系统 (OLAP). 它是 [Pregel](https://kowshik.github.io/JPregel/pregel_paper.pdf)的一个实现。它可以运行在 Kubernetes(K8s)/Yarn 上。(它侧重可支持百亿~千亿的图数据量下进行图计算, 会使用磁盘进行排序和加速, 这是它和 Vermeer 相对最大的区别之一)
+## 环境要求
-### 特性
+- JDK 11 或更高版本
+- Maven 3.5 或更高版本
+- HugeGraph Server
+- etcd,用于 BSP 节点协调
-- 支持分布式 MPP 图计算,集成 HugeGraph 作为图输入输出存储。
-- 算法基于 BSP(Bulk Synchronous Parallel) 模型,通过多次并行迭代进行计算,每一次迭代都是一次超步。
-- 自动内存管理。该框架永远不会出现 OOM(内存不足),因为如果它没有足够的内存来容纳所有数据,它会将一些数据拆分到磁盘。
-- 边的部分或超级节点的消息可以在内存中,所以你永远不会丢失它。
-- 您可以从 HDFS 或 HugeGraph 或任何其他系统加载数据。
-- 您可以将结果输出到 HDFS 或 HugeGraph,或任何其他系统。
-- 易于开发新算法。您只需要像在单个服务器中一样专注于仅顶点处理,而不必担心消息传输和内存存储管理。
+集成测试还依赖 HDFS、Kubernetes 和 HugeGraph;普通源码编译不需要启动整套测试环境。
-## 2 依赖
-
-### 2.1 安装 Java 11 (JDK 11)
-
-**必须**在 ≥ `Java 11` 的环境上启动 `Computer`,然后自行配置。
-
-**在往下阅读之前务必执行 `java -version` 命令查看 jdk 版本**
-
-## 3 开始
-
-### 3.1 在本地运行 PageRank 算法
-
-> 要使用 HugeGraph-Computer 运行算法,必须装有 Java 11 或更高版本。
->
-> 还需要首先部署 HugeGraph-Server 和 [Etcd](https://etcd.io/docs/v3.5/quickstart/).
-
-有两种方式可以获取 HugeGraph-Computer:
-
-- 下载已编译的压缩包
-- 克隆源码编译打包
-
-#### 3.1.1 下载已编译的压缩包
-
-下载最新版本的 HugeGraph-Computer release 包:
-
-```bash
-wget https://downloads.apache.org/hugegraph/${version}/apache-hugegraph-computer-incubating-${version}.tar.gz
-tar zxvf apache-hugegraph-computer-incubating-${version}.tar.gz -C hugegraph-computer
-```
-
-#### 3.1.2 克隆源码编译打包
-
-克隆最新版本的 HugeGraph-Computer 源码包:
+## 从源码构建
```bash
-$ git clone https://github.com/apache/hugegraph-computer.git
-```
+git clone https://github.com/apache/hugegraph-computer.git
+cd hugegraph-computer/computer
-编译生成 tar 包:
+# 编译
+mvn clean compile -Dmaven.javadoc.skip=true
-```bash
-cd hugegraph-computer
+# 生成分发包
mvn clean package -DskipTests
```
-#### 3.1.3 启动 master 节点
+分发内容由 `computer-dist` 模块生成,包含 `bin/start-computer.sh`、`conf/computer.properties`、依赖库和内置算法 JAR。
-> 您可以使用 `-c` 参数指定配置文件,更多 computer 配置请看:[Computer Config Options](/docs/quickstart/computing/hugegraph-computer-config#computer-config-options)
+## 本地运行 PageRank
-```bash
-cd hugegraph-computer
-bin/start-computer.sh -d local -r master
-```
+先启动 HugeGraph Server 和 etcd。然后在分发目录编辑 `conf/computer.properties`:
-#### 3.1.4 启动 worker 节点
+```properties
+job.id=local_001
+job.workers_count=1
-```bash
-bin/start-computer.sh -d local -r worker
-```
+transport.server_host=127.0.0.1
+transport.server_port=0
+rpc.server_host=127.0.0.1
+rpc.server_port=8190
-#### 3.1.5 查询算法结果
+bsp.etcd_endpoints=http://127.0.0.1:2379
+bsp.max_super_step=20
-2.5.1 为 server 启用 `OLAP` 索引查询
+hugegraph.url=http://127.0.0.1:8080
+hugegraph.name=hugegraph
+hugegraph.username=
+hugegraph.password=
-如果没有启用 OLAP 索引,则需要启用,更多参考:[modify-graphs-read-mode](/docs/clients/restful-api/graphs/#634-modify-graphs-read-mode-this-operation-requires-administrator-privileges)
-
-```http
-PUT http://localhost:8080/graphs/hugegraph/graph_read_mode
-
-"ALL"
+algorithm.params_class=org.apache.hugegraph.computer.algorithm.centrality.pagerank.PageRankParams
```
-3.1.5.2 查询 `page_rank` 属性值:
-
-```bash
-curl "http://localhost:8080/graphs/hugegraph/graph/vertices?page&limit=3" | gunzip
-```
-
-### 3.2 在 Kubernetes 中运行 PageRank 算法
-
-> 要使用 HugeGraph-Computer 运行算法,您需要先部署 HugeGraph-Server
-
-#### 3.2.1 安装 HugeGraph-Computer CRD
+分别在两个终端启动 master 和 worker。启动脚本以前台进程运行,第一条命令不会自行返回:
```bash
-# Kubernetes version >= v1.16
-kubectl apply -f https://raw.githubusercontent.com/apache/hugegraph-computer/master/computer-k8s-operator/manifest/hugegraph-computer-crd.v1.yaml
-
-# Kubernetes version < v1.16
-kubectl apply -f https://raw.githubusercontent.com/apache/hugegraph-computer/master/computer-k8s-operator/manifest/hugegraph-computer-crd.v1beta1.yaml
+bin/start-computer.sh -d local -r master
+bin/start-computer.sh -d local -r worker
```
-#### 3.2.2 显示 CRD
+脚本还支持:
-```bash
-kubectl get crd
+- `-c, --conf`:指定 properties 文件。
+- `-a, --algorithm`:加入自定义算法 JAR。
+- `-l, --log4`:指定 Log4j2 配置。
+- `-d, --drive`:选择 `local`、`k8s` 或 `yarn`。
+- `-r, --role`:选择 `master` 或 `worker`。
-NAME CREATED AT
-hugegraphcomputerjobs.hugegraph.apache.org 2021-09-16T08:01:08Z
-```
+计算结果写回 HugeGraph OLAP 属性后,需要让 Server 的图读取模式包含 OLAP 数据,再查询对应属性。具体写回类和属性名由算法参数及 `output.*` 配置决定。
-#### 3.2.3 安装 hugegraph-computer-operator&etcd-server
+## 在 Kubernetes 中提交作业
-```bash
-kubectl apply -f https://raw.githubusercontent.com/apache/hugegraph-computer/master/computer-k8s-operator/manifest/hugegraph-computer-operator.yaml
-```
-
-#### 3.2.4 等待 hugegraph-computer-operator&etcd-server 部署完成
+仓库提供 v1 和 v1beta1 两份 CRD。Kubernetes 1.16 及以上版本使用 v1:
```bash
-kubectl get pod -n hugegraph-computer-operator-system
-
-NAME READY STATUS RESTARTS AGE
-hugegraph-computer-operator-controller-manager-58c5545949-jqvzl 1/1 Running 0 15h
-hugegraph-computer-operator-etcd-28lm67jxk5 1/1 Running 0 15h
+kubectl apply -f https://raw.githubusercontent.com/apache/hugegraph-computer/master/computer/computer-k8s-operator/manifest/hugegraph-computer-crd.v1.yaml
+kubectl apply -f https://raw.githubusercontent.com/apache/hugegraph-computer/master/computer/computer-k8s-operator/manifest/hugegraph-computer-operator.yaml
```
-#### 3.2.5 提交作业
-
-> 更多 computer crd spec 请看:[Computer CRD](/docs/quickstart/computing/hugegraph-computer-config#hugegraph-computer-crd)
->
-> 更多 Computer 配置请看:[Computer Config Options](/docs/quickstart/computing/hugegraph-computer-config#computer-config-options)
+提交 PageRank 示例:
```yaml
-cat <<EOF | kubectl apply --filename -
apiVersion: hugegraph.apache.org/v1
kind: HugeGraphComputerJob
metadata:
namespace: hugegraph-computer-operator-system
- name: &jobName pagerank-sample
+ name: pagerank-sample
spec:
- jobId: *jobName
+ jobId: pagerank-sample
algorithmName: page_rank
- image: hugegraph/hugegraph-computer:latest # algorithm image url
- jarFile: /hugegraph/hugegraph-computer/algorithm/builtin-algorithm.jar # algorithm jar path
+ image: hugegraph/hugegraph-computer:latest
+ jarFile: /hugegraph/hugegraph-computer/algorithm/builtin-algorithm.jar
pullPolicy: Always
workerCpu: "4"
workerMemory: "4Gi"
@@ -160,80 +100,38 @@ spec:
computerConf:
job.partitions_count: "20"
algorithm.params_class: org.apache.hugegraph.computer.algorithm.centrality.pagerank.PageRankParams
- hugegraph.url: http://${hugegraph-server-host}:${hugegraph-server-port} # hugegraph server url
- hugegraph.name: hugegraph # hugegraph graph name
-EOF
+ hugegraph.url: http://hugegraph-server:8080
+ hugegraph.name: hugegraph
```
-#### 3.2.6 显示作业
+查看作业和日志:
```bash
kubectl get hcjob/pagerank-sample -n hugegraph-computer-operator-system
-
-NAME JOBID JOBSTATUS
-pagerank-sample pagerank-sample RUNNING
+kubectl logs -l component=pagerank-sample-master \
+ -n hugegraph-computer-operator-system
+kubectl logs -l component=pagerank-sample-worker \
+ -n hugegraph-computer-operator-system
```
-#### 3.2.7 显示节点日志
+## 内置算法
-```bash
-# Show the master log
-kubectl logs -l component=pagerank-sample-master -n hugegraph-computer-operator-system
-
-# Show the worker log
-kubectl logs -l component=pagerank-sample-worker -n hugegraph-computer-operator-system
+`computer-algorithm` 当前包含:
-# Show diagnostic log of a job
-# 注意: 诊断日志仅在作业失败时存在,并且只会保存一小时。
-kubectl get event --field-selector reason=ComputerJobFailed --field-selector involvedObject.name=pagerank-sample -n hugegraph-computer-operator-system
-```
+- 中心性:PageRank、Betweenness Centrality、Closeness Centrality、Degree Centrality。
+- 社区与结构:Clustering Coefficient、K-core、LPA、Triangle Count、WCC。
+- 路径与采样:Rings Detection、带过滤的 Rings Detection、Single Source Shortest Path、Random Walk。
-#### 3.2.8 显示作业的成功事件
+完整类清单以 [`computer-algorithm`](https://github.com/apache/hugegraph-computer/tree/master/computer/computer-algorithm/src/main/java/org/apache/hugegraph/computer/algorithm) 为准。
-> NOTE: it will only be saved for one hour
+## 开发和测试
```bash
-kubectl get event --field-selector reason=ComputerJobSucceed --field-selector involvedObject.name=pagerank-sample -n hugegraph-computer-operator-system
+cd hugegraph-computer/computer
+mvn test -P unit-test
+mvn apache-rat:check
```
-#### 3.2.9 查询算法结果
-
-如果输出到 `Hugegraph-Server` 则与 Locally 模式一致,如果输出到 `HDFS` ,请检查 `hugegraph-computerresults{jobId}`目录下的结果文件。
-
-## 4 内置算法文档
-
-### 4.1 支持的算法列表:
-
-#### 中心性算法:
-
-* PageRank
-* BetweennessCentrality
-* ClosenessCentrality
-* DegreeCentrality
-
-#### 社区算法:
-
-* ClusteringCoefficient
-* Kcore
-* Lpa
-* TriangleCount
-* Wcc
-
-#### 路径算法:
-
-* RingsDetection
-* RingsDetectionWithFilter
-
-更多算法请看:[Built-In algorithms](https://github.com/apache/hugegraph-computer/tree/master/computer-algorithm/src/main/java/org/apache/hugegraph/computer/algorithm)
-
-### 4.2 算法描述
-
-TODO
-
-## 5 算法开发指南
-
-TODO
-
-## 6 注意事项
+K8s 模块依赖 operator 生成的 CRD 类。相关类不存在时,先在 `computer-k8s-operator` 模块执行 `mvn clean install`,而不是只运行 `mvn compile`。
-- 如果 computer-k8s 模块下面的某些类不存在,你需要运行`mvn compile`来提前生成对应的类。
+所有配置键及代码默认值见 [Computer 配置参考](./hugegraph-computer-config.md)。
diff --git a/content/cn/docs/quickstart/computing/hugegraph-vermeer.md b/content/cn/docs/quickstart/computing/hugegraph-vermeer.md
index e725fe927..4308908bd 100644
--- a/content/cn/docs/quickstart/computing/hugegraph-vermeer.md
+++ b/content/cn/docs/quickstart/computing/hugegraph-vermeer.md
@@ -8,17 +8,15 @@ weight: 1
### 1.1 运行架构
-Vermeer 是一个 `Go`编写的高性能内存优先的图计算框架 (一次启动,任意执行),支持 15+ OLAP 图算法的极速计算 (大部分秒~分钟级别完成执行),包含 master 和 worker 两种角色。master 目前只有一个 (可增加 HA),worker 可以有多个。
-
-master 是负责通信、转发、汇总的节点,计算量和占用资源量较少。worker 是计算节点,用于存储图数据和运行计算任务,占用大量内存和 cpu。grpc 和 rest 模块分别负责内部通信和外部调用。
-
-该框架的运行配置可以通过命令行参数传入,也可以通过位于 `config/` 目录下的配置文件指定,`--env` 参数可以指定使用哪个配置文件,例如 `--env=master` 指定使用 `master.ini`。需要注意 master 需要指定监听的端口号,worker 需要指定监听端口号和 master 的 `ip:port`。
+Vermeer 是 Go 编写的内存图计算平台,采用 master-worker 架构。master 负责调度,worker 保存图数据并执行计算;当前源码注册了 19 个算法。
+
+节点间使用 gRPC,外部请求使用 REST API。默认 master HTTP/gRPC 端口为 `6688`/`6689`,worker 为 `6788`/`6789`。通过 `--env=master` 或 `--env=worker` 读取 `config/master.ini` 或 `config/worker.ini`。
### 1.2 运行方法
-1. **方案一:Docker Compose(推荐)**
+1. **方案一:Docker Compose**
-确保docker-compose.yaml存在于您的项目根目录中。如果没有,以下是一个示例:
+仓库 `vermeer/docker-compose.yaml` 已提供 master 和 worker 示例。修改挂载目录和 worker 的 `master_peer` 后启动即可。不要把整个主目录挂进容器;只挂载包含 `master.ini`、`worker.ini` 的配置目录。
```yaml
services:
@@ -26,7 +24,7 @@ services:
image: hugegraph/vermeer
container_name: vermeer-master
volumes:
- - ~/.config:/go/bin/config # Change here to your actual config path
+ - /home/user/vermeer-config:/go/bin/config
command: --env=master
networks:
vermeer_network:
@@ -36,7 +34,7 @@ services:
image: hugegraph/vermeer
container_name: vermeer-worker
volumes:
- - ~/:/go/bin/config # Change here to your actual config path
+ - /home/user/vermeer-config:/go/bin/config
command: --env=worker
networks:
vermeer_network:
@@ -50,32 +48,28 @@ networks:
- subnet: 172.20.0.0/24 # Define the subnet for your network
```
-修改 docker-compose.yaml
-- **Volume**:例如将两处 ~/:/go/bin/config 改为 /home/user/config:/go/bin/config(或您自己的配置目录)。
-- **Subnet**:根据实际情况修改子网IP。请注意,每个容器需要访问的端口在config文件中指定,具体请参照项目`config`文件夹下内容。
+修改 `docker-compose.yaml` 中的挂载目录和子网,并把 `worker.ini` 的 `master_peer` 指向 master 的 `6689` 端口。监听地址以 `config/master.ini` 和 `config/worker.ini` 为准。
-在项目目录构建镜像并启动(或者先用 docker build 再 docker-compose up)
+在 `vermeer` 目录构建镜像并启动:
```shell
# 构建镜像(在项目根 vermeer 目录)
-docker build -t hugegraph/vermeer .
-
-# 启动(在 vermeer 根目录)
-docker-compose up -d
-# 或使用新版 CLI:
-# docker compose up -d
-```
+docker build -t hugegraph/vermeer .
+
+# 启动(在 vermeer 根目录)
+docker compose up -d
+```
查看日志 / 停止 / 删除:
```shell
-docker-compose logs -f
-docker-compose down
+docker compose logs -f
+docker compose down
```
2. **方案二:通过 docker run 单独启动(手动创建网络并分配静态 IP)**
-确保CONFIG_DIR对Docker进程具有适当的读取/执行权限。
+`CONFIG_DIR` 需要包含 Vermeer 配置文件,并允许 Docker 读取。
构建镜像:
@@ -96,10 +90,11 @@ docker network create --driver bridge \
```shell
CONFIG_DIR=/home/user/config
-docker run -d \
- --name vermeer-master \
- --network vermeer_network --ip 172.20.0.10 \
- -v ${CONFIG_DIR}:/go/bin/config \
+docker run -d \
+ --name vermeer-master \
+ --network vermeer_network --ip 172.20.0.10 \
+ -p 6688:6688 -p 6689:6689 \
+ -v ${CONFIG_DIR}:/go/bin/config \
hugegraph/vermeer \
--env=master
```
@@ -133,16 +128,17 @@ docker network rm vermeer_network
构建。具体请参照 [Vermeer Readme](https://github.com/apache/hugegraph-computer/tree/master/vermeer)。
```shell
-go build
+make init
+make
```
-在进入文件夹目录后输入 `./vermeer --env=master` 或 `./vermeer --env=worker01`
+`make init` 首次执行时下载 supervisord、protoc 和 Web UI 资源。构建完成后运行 `./vermeer --env=master` 和 `./vermeer --env=worker`;`--env` 对应 `config/` 下的 INI 文件名。
## 二、任务创建类 rest api
### 2.1 简介
-此类 rest api 提供所有创建任务的功能,包括读取图数据和多种计算功能,提供异步返回和同步返回两种接口。返回的内容均包含所创建任务的信息。使用 vermeer 的整体流程是先创建读取图的任务,待图读取完毕后创建计算任务执行计算。图不会自动被删除,在一个图上运行多个计算任务无需多次重复读取,如需删除可用删除图接口。任务状态可分为读取任务状态和计算任务状态。通常情况下客户端仅需了解创建、任务中、任务结束和任务错误四种状态。图状态是图是否可用的判断依据,若图正在读取中或图状态错误,无法使用该图创建计算任务。图删除接口仅在 loaded 和 error 状态且该图无计算任务时可用。
+先创建 load 任务读取图,再创建 compute 任务。异步接口只返回创建结果,客户端需查询状态;同步接口等待任务结束。已加载的图可复用于多个计算任务。只有图处于 `loaded` 或 `error` 且没有计算任务时才能删除。
可以使用的 url 如下:
@@ -151,9 +147,9 @@ go build
### 2.2 加载图数据
-具体参数参考 Vermeer 参数列表文档。
+参数定义见 [`vermeer/apps/options`](https://github.com/apache/hugegraph-computer/tree/master/vermeer/apps/options) 和各数据源在 [`vermeer/apps/graphio`](https://github.com/apache/hugegraph-computer/tree/master/vermeer/apps/graphio) 中的实现。
-vermeer提供三种加载方式:
+Vermeer 提供三种加载方式:
1. 从本地加载
@@ -162,7 +158,7 @@ vermeer提供三种加载方式:
**request 示例:**
```javascript
-POST http://localhost:8688/tasks/create
+POST http://localhost:6688/tasks/create
{
"task_type": "load",
"graph": "testdb",
@@ -181,10 +177,10 @@ POST http://localhost:8688/tasks/create
**request 示例:**
-⚠️ 安全警告:切勿在配置文件或代码中存储真实密码。请改用环境变量或安全的凭据管理系统。
+示例中的密码是占位值。不要把真实密码提交到配置文件或代码仓库。
```javascript
-POST http://localhost:8688/tasks/create
+POST http://localhost:6688/tasks/create
{
"task_type": "load",
"graph": "testdb",
@@ -206,7 +202,7 @@ POST http://localhost:8688/tasks/create
**request 示例:**
```javascript
-POST http://localhost:8688/tasks/create
+POST http://localhost:6688/tasks/create
{
"task_type": "load",
"graph": "testdb",
@@ -230,14 +226,14 @@ POST http://localhost:8688/tasks/create
### 2.3 输出计算结果
-所有的 vermeer 计算任务均支持多种结果输出方式,可自定义输出方式:local、hdfs、afs 或 hugegraph,在发送请求时的 params 参数下加入对应参数,即可生效。指定 output.need_statistics 为 1 时,支持计算结果统计信息输出,结果会写在接口任务信息内。统计模式算子目前支持 "count" 和 "modularity" 。但仅针对社区发现算法适用。
+Vermeer 当前注册了 `local`、`hdfs` 和 `hugegraph` 输出方式。把对应参数放入请求的 `params`。设置 `output.need_statistics=1` 后,任务信息会包含统计结果;`count` 和 `modularity` 统计用于相应的社区发现算法。
-具体参数参考 Vermeer 参数列表文档。
+输出参数定义见 [`vermeer/apps/options`](https://github.com/apache/hugegraph-computer/tree/master/vermeer/apps/options),实现见 [`vermeer/apps/graphio`](https://github.com/apache/hugegraph-computer/tree/master/vermeer/apps/graphio)。
request 示例:
```javascript
-POST http://localhost:8688/tasks/create
+POST http://localhost:6688/tasks/create
{
"task_type": "compute",
"graph": "testdb",
@@ -252,23 +248,18 @@ POST http://localhost:8688/tasks/create
}
```
-## 三、支持的算法
+## 三、支持的算法
+
+当前注册的算法名为:`pagerank`、`ppr`、`betweenness_centrality`、`closeness_centrality`、`degree`、`louvain`、`louvain_weighted`、`lpa`、`slpa`、`wcc`、`scc`、`sssp`、`triangle_count`、`kcore`、`kout`、`clustering_coefficient`、`cycle_detection`、`jaccard` 和 `depth`。下面列出常用请求;未展开的参数以对应 `vermeer/algorithms/*.go` 实现为准。
### 3.1 PageRank
-PageRank 算法又称网页排名算法,是一种由搜索引擎根据网页(节点)之间相互的超链接进行计算的技
-
-术,用来体现网页(节点)的相关性和重要性。
-
-- 如果一个网页被很多其他网页链接到,说明这个网页比较重要,也就是其 PageRank 值会相对较高。
-- 如果一个 PageRank 值很高的网页链接到其他网页,那么被链接到的网页的 PageRank 值会相应地提高。
-
-PageRank 算法适用于网页排序、社交网络重点人物发掘等场景。
+PageRank 根据节点之间的链接迭代计算分数。入边数量和来源节点的分数都会影响结果,可用于网页排序或图中的节点影响力分析。
request 示例:
```javascript
-POST http://localhost:8688/tasks/create
+POST http://localhost:6688/tasks/create
{
"task_type": "compute",
"graph": "testdb",
@@ -285,12 +276,12 @@ POST http://localhost:8688/tasks/create
### 3.2 WCC(弱连通分量)
-弱连通分量,计算无向图中所有联通的子图,输出各顶点所属的弱联通子图 id,表明各个点之间的连通性,区分不同的连通社区。
+弱连通分量把忽略边方向后相互可达的顶点划入同一组,并输出每个顶点所属的分量 ID。
request 示例:
```javascript
-POST http://localhost:8688/tasks/create
+POST http://localhost:6688/tasks/create
{
"task_type": "compute",
"graph": "testdb",
@@ -307,12 +298,12 @@ POST http://localhost:8688/tasks/create
### 3.3 LPA(标签传播)
-标签传递算法,是一种图聚类算法,常用在社交网络中,用于发现潜在的社区。
+标签传播通过相邻顶点间传播标签来划分社区。
request 示例:
```javascript
-POST http://localhost:8688/tasks/create
+POST http://localhost:6688/tasks/create
{
"task_type": "compute",
"graph": "testdb",
@@ -329,12 +320,12 @@ POST http://localhost:8688/tasks/create
### 3.4 Degree Centrality(度中心性)
-度中心性算法,算法用于计算图中每个节点的度中心性值,支持无向图和有向图。度中心性是衡量节点重要性的重要指标,节点与其它节点的边越多,则节点的度中心性值越大,节点在图中的重要性也就越高。在无向图中,度中心性的计算是基于边信息统计节点出现次数,得出节点的度中心性的值,在有向图中则基于边的方向进行筛选,基于输入边或输出边信息统计节点出现次数,得到节点的入度值或出度值。它表明各个点的重要性,一般越重要的点度数越高。
+度中心性统计节点连接的边数。无向图返回度数;有向图可按边方向统计入度或出度。
request 示例:
```javascript
-POST http://localhost:8688/tasks/create
+POST http://localhost:6688/tasks/create
{
"task_type": "compute",
"graph": "testdb",
@@ -351,12 +342,12 @@ POST http://localhost:8688/tasks/create
### 3.5 Closeness Centrality(紧密中心性)
-紧密中心性(Closeness Centrality)用于计算一个节点到所有其他可达节点的最短距离的倒数,进行累积后归一化的值。紧密中心度可以用来衡量信息从该节点传输到其他节点的时间长短。节点的“Closeness Centrality”越大,其在所在图中的位置越靠近中心,适用于社交网络中关键节点发掘等场景。
+紧密中心性根据节点到其他可达节点的最短距离计算。值越大,节点越接近所在连通区域的中心。
request 示例:
```javascript
-POST http://localhost:8688/tasks/create
+POST http://localhost:6688/tasks/create
{
"task_type": "compute",
"graph": "testdb",
@@ -373,12 +364,12 @@ POST http://localhost:8688/tasks/create
### 3.6 Betweenness Centrality(中介中心性算法)
-中介中心性算法(Betweeness Centrality)判断一个节点具有"桥梁"节点的值,值越大说明它作为图中两点间必经路径的可能性越大,典型的例子包括社交网络中的共同关注的人。适用于衡量社群围绕某个节点的聚集程度。
+中介中心性(Betweenness Centrality)统计节点位于其他节点最短路径上的程度。值较高的节点往往连接图中的不同区域。
request 示例:
```javascript
-POST http://localhost:8688/tasks/create
+POST http://localhost:6688/tasks/create
{
"task_type": "compute",
"graph": "testdb",
@@ -395,16 +386,12 @@ POST http://localhost:8688/tasks/create
### 3.7 Triangle Count(三角形计数)
-三角形计数算法,用于计算通过每个顶点的三角形个数,适用于计算用户之间的关系,关联性是不是成三角形。三角形越多,代表图中节点关联程度越高,组织关系越严密。社交网络中的三角形表示存在有凝聚力的社区,识别三角形有助于理解网络中个人或群体的聚类和相互联系。在金融网络或交易网络中,三角形的存在可能表示存在可疑或欺诈活动,三角形计数可以帮助识别可能需要进一步调查的交易模式。
-
-输出的结果为 每个顶点对应一个 Triangle Count,即为每个顶点所在三角形的个数。
-
-注:该算法为无向图算法,忽略边的方向。
+三角形计数返回每个顶点参与的三角形数量。该实现按无向图处理,忽略边的方向。
request 示例:
```javascript
-POST http://localhost:8688/tasks/create
+POST http://localhost:6688/tasks/create
{
"task_type": "compute",
"graph": "testdb",
@@ -420,12 +407,12 @@ POST http://localhost:8688/tasks/create
### 3.8 K-Core
-K-Core 算法,标记所有度数为 K 的顶点,适用于图的剪枝,查找图的核心部分。
+K-Core 反复移除当前度数小于 K 的顶点,得到每个剩余顶点度数至少为 K 的子图。
request 示例:
```javascript
-POST http://localhost:8688/tasks/create
+POST http://localhost:6688/tasks/create
{
"task_type": "compute",
"graph": "testdb",
@@ -447,7 +434,7 @@ POST http://localhost:8688/tasks/create
request 示例:
```javascript
-POST http://localhost:8688/tasks/create
+POST http://localhost:6688/tasks/create
{
"task_type": "compute",
"graph": "testdb",
@@ -469,7 +456,7 @@ POST http://localhost:8688/tasks/create
request 示例:
```javascript
-POST http://localhost:8688/tasks/create
+POST http://localhost:6688/tasks/create
{
"task_type": "compute",
"graph": "testdb",
@@ -487,14 +474,14 @@ POST http://localhost:8688/tasks/create
### 3.11 Louvain
-Louvain 算法是一种基于模块度的社区发现算法。其基本思想是网络中节点尝试遍历所有邻居的社区标签,并选择最大化模块度增量的社区标签。在最大化模块度之后,每个社区看成一个新的节点,重复直到模块度不再增大。
+Louvain 根据模块度增量移动顶点,再将已形成的社区压缩为新顶点,重复计算直到模块度不再提升。
-Vermeer 上实现的分布式 Louvain 算法受节点顺序、并行计算等因素影响,并且由于 Louvain 算法由于其遍历顺序的随机导致社区压缩也具有一定的随机性,导致重复多次执行可能存在不同的结果。但整体趋势不会有大的变化。
+Vermeer 的 Louvain 实现受节点遍历顺序和并行调度影响。同一数据重复执行时,社区划分可能不同。
request 示例:
```javascript
-POST http://localhost:8688/tasks/create
+POST http://localhost:6688/tasks/create
{
"task_type": "compute",
"graph": "testdb",
@@ -514,12 +501,12 @@ POST http://localhost:8688/tasks/create
### 3.12 Jaccard 相似度系数
-Jaccard index , 又称为 Jaccard 相似系数(Jaccard similarity coefficient)用于比较有限样本集之间的相似性与差异性。Jaccard 系数值越大,样本相似度越高。用于计算一个给定的源点,与图中其他所有点的 Jaccard 相似系数。
+Jaccard 相似系数根据两个邻居集合的交集与并集计算相似度。这里以给定源点为基准,计算它与其他顶点的系数。
request 示例:
```javascript
-POST http://localhost:8688/tasks/create
+POST http://localhost:6688/tasks/create
{
"task_type": "compute",
"graph": "testdb",
@@ -537,14 +524,12 @@ POST http://localhost:8688/tasks/create
### 3.13 Personalized PageRank
-个性化的 pagerank 的目标是要计算所有节点相对于用户 u 的相关度。从用户 u 对应的节点开始游走,每到一个节点都以 1-d 的概率停止游走并从 u 重新开始,或者以 d 的概率继续游走,从当前节点指向的节点中按照均匀分布随机选择一个节点往下游走。用于给定一个起点,计算此起点开始游走的个性化 pagerank 得分。适用于社交推荐等场景。
-
-由于计算需要使用出度,需要在读取图时需要设置 load.use_out_degree 为 1。
+个性化 PageRank 从指定源点开始随机游走:以 `1-d` 的概率返回源点,以 `d` 的概率沿出边继续。运行前需在加载任务中设置 `load.use_out_degree=1`。
request 示例:
```javascript
-POST http://localhost:8688/tasks/create
+POST http://localhost:6688/tasks/create
{
"task_type": "compute",
"graph": "testdb",
@@ -562,37 +547,14 @@ POST http://localhost:8688/tasks/create
}
```
-### 3.14 全图 Kout
-
-计算图的所有节点的k度邻居(不包含自己以及1~k-1度的邻居),由于全图kout算法内存膨胀比较厉害,目前k限制在1和2,另外,全局kout算法支持过滤功能( 参数如:"compute.filter":"risk_level==1"),在计算第k度的是时候进行过滤条件的判断,符合过滤条件的进入最终结果集,算法最终输出是符合条件的邻居个数。
-
-request 示例:
-
-```javascript
-POST http://localhost:8688/tasks/create
-{
- "task_type": "compute",
- "graph": "testdb",
- "params": {
- "compute.algorithm": "kout_all",
- "compute.parallel":"10",
- "output.type":"local",
- "output.parallel":"10",
- "output.file_path":"result/kout",
- "compute.max_step":"2",
- "compute.filter":"risk_level==1"
- }
-}
-```
-
-### 3.15 集聚系数 clustering coefficient
+### 3.14 集聚系数 clustering coefficient
-集聚系数表示一个图中节点聚集程度的系数。在现实的网络中,尤其是在特定的网络中,由于相对高密度连接点的关系,节点总是趋向于建立一组严密的组织关系。集聚系数算法(Cluster Coefficient)用于计算图中节点的聚集程度。本算法为局部集聚系数。局部集聚系数可以测量图中每一个结点附近的集聚程度。
+局部聚类系数衡量一个顶点的邻居彼此连接的程度。
request 示例:
```javascript
-POST http://localhost:8688/tasks/create
+POST http://localhost:6688/tasks/create
{
"task_type": "compute",
"graph": "testdb",
@@ -607,12 +569,12 @@ POST http://localhost:8688/tasks/create
}
```
-### 3.16 SCC(强连通分量)
+### 3.15 SCC(强连通分量)
-在有向图的数学理论中,如果一个图的每一个顶点都可从该图其他任意一点到达,则称该图是强连通的。在任意有向图中能够实现强连通的部分我们称其为强连通分量。它表明各个点之间的连通性,区分不同的连通社区。
+强连通分量是有向图中任意两点相互可达的最大顶点集合。
```javascript
-POST http://localhost:8688/tasks/create
+POST http://localhost:6688/tasks/create
{
"task_type": "compute",
"graph": "testdb",
@@ -627,5 +589,5 @@ POST http://localhost:8688/tasks/create
}
```
-> 🚧, 后续随时更新完善,欢迎随时提出建议和意见。
+其余算法可使用相同的计算任务结构,把 `compute.algorithm` 换成上方列出的注册名,并按实现提供所需参数。
diff --git a/content/cn/docs/quickstart/hugegraph-ai/_index.md b/content/cn/docs/quickstart/hugegraph-ai/_index.md
index 08ed7294a..a162e090a 100644
--- a/content/cn/docs/quickstart/hugegraph-ai/_index.md
+++ b/content/cn/docs/quickstart/hugegraph-ai/_index.md
@@ -4,180 +4,71 @@ linkTitle: "HugeGraph-AI"
weight: 3
---
-[](https://www.apache.org/licenses/LICENSE-2.0.html)
-[](https://deepwiki.com/apache/hugegraph-ai)
+`hugegraph-ai` 提供 HugeGraph 的 Python 客户端、图机器学习工具,以及面向知识图谱构建和 GraphRAG 的 LLM 工具。
-> DeepWiki 提供实时更新的项目文档,内容更全面准确,适合快速了解项目最新情况。
->
-> 📖 [https://deepwiki.com/apache/hugegraph-ai](https://deepwiki.com/apache/hugegraph-ai)
+## 模块
-`hugegraph-ai` 整合了 [HugeGraph](https://github.com/apache/hugegraph) 与人工智能功能,为开发者构建 AI 驱动的图应用提供全面支持。
+- [hugegraph-llm](https://github.com/apache/hugegraph-ai/tree/main/hugegraph-llm):知识图谱构建、GraphRAG 和自然语言图查询。
+- [hugegraph-ml](https://github.com/apache/hugegraph-ai/tree/main/hugegraph-ml):从 HugeGraph 读取图数据并运行图学习模型。
+- [hugegraph-python-client](https://github.com/apache/hugegraph-ai/tree/main/hugegraph-python-client):管理 Schema、图数据和 Gremlin 查询的 Python SDK。
+- [vermeer-python-client](https://github.com/apache/hugegraph-ai/tree/main/vermeer-python-client):调用 Vermeer 图计算服务的 Python SDK。
-## ✨ 核心功能
+仓库使用 `uv` workspace 管理 LLM 和 Python 客户端。HugeGraph-ML 是路径依赖模块,不在 workspace members 中。
-- **GraphRAG**:利用图增强检索构建智能问答系统
-- **Text2Gremlin**:自然语言到图查询的转换,支持 REST API
-- **知识图谱构建**:使用大语言模型从文本自动构建图谱
-- **图机器学习**:集成 21 种图学习算法(GCN、GAT、GraphSAGE 等)
-- **Python 客户端**:易于使用的 HugeGraph Python 操作接口
-- **AI 智能体**:提供智能图分析与推理能力
+## 环境要求
-### 🎉 v1.5.0 新特性
+- HugeGraph-LLM:Python 3.10 或 3.11
+- HugeGraph-ML、Python 客户端:Python 3.10 或更高版本
+- `uv` 0.7 或更高版本
+- HugeGraph Server 1.5 或更高版本
-- **Text2Gremlin REST API**:通过 REST 端点将自然语言查询转换为 Gremlin 命令
-- **多模型向量支持**:每个图实例可以使用独立的嵌入模型
-- **双语提示支持**:支持英文和中文提示词切换(EN/CN)
-- **半自动 Schema 生成**:从文本数据智能推断 Schema
-- **半自动 Prompt 生成**:上下文感知的提示词模板
-- **增强的 Reranker 支持**:集成 Cohere 和 SiliconFlow 重排序器
-- **LiteLLM 多供应商支持**:统一接口支持 OpenAI、Anthropic、Gemini 等
+## Docker Compose 部署
-## 🚀 快速开始
-
-> [!NOTE]
-> 如需完整的部署指南和详细示例,请参阅 [hugegraph-llm/README.md](https://github.com/apache/hugegraph-ai/blob/main/hugegraph-llm/README.md)。
-
-### 环境要求
-- Python 3.10+(hugegraph-llm 必需)
-- [uv](https://docs.astral.sh/uv/) 0.7+(推荐的包管理器)
-- HugeGraph Server 1.5+(必需)
-- Docker(可选,用于容器化部署)
-
-### 方案一:Docker 部署(推荐)
+仓库提供同时启动 HugeGraph Server 和 RAG 服务的 Compose 文件:
```bash
-# 克隆仓库
git clone https://github.com/apache/hugegraph-ai.git
cd hugegraph-ai
-
-# 设置环境并启动服务
cp docker/env.template docker/.env
-# 编辑 docker/.env 设置你的 PROJECT_PATH
+# 编辑 docker/.env,将 PROJECT_PATH 改为当前仓库的绝对路径
+touch hugegraph-llm/.env
cd docker
-docker-compose -f docker-compose-network.yml up -d
-
-# 访问服务:
-# - HugeGraph Server: http://localhost:8080
-# - RAG 服务: http://localhost:8001
+docker compose -f docker-compose-network.yml up -d
```
-### 方案二:源码安装
-
-```bash
-# 1. 启动 HugeGraph Server
-docker run -itd --name=server -p 8080:8080 hugegraph/hugegraph
+默认地址:
-# 2. 克隆并设置项目
-git clone https://github.com/apache/hugegraph-ai.git
-cd hugegraph-ai/hugegraph-llm
+- HugeGraph Server:`http://localhost:8080`
+- RAG 服务和 Web 界面:`http://localhost:8001`
-# 3. 安装依赖
-uv venv && source .venv/bin/activate
-uv pip install -e .
+## 从源码启动 RAG 服务
-# 4. 启动演示
+```bash
+git clone https://github.com/apache/hugegraph-ai.git
+cd hugegraph-ai
+uv sync --extra llm
+source .venv/bin/activate
+cd hugegraph-llm
python -m hugegraph_llm.demo.rag_demo.app
-# 访问 http://127.0.0.1:8001
```
-### 基本用法示例
-
-#### GraphRAG - 问答
-```python
-from hugegraph_llm.operators.graph_rag_task import RAGPipeline
+`uv sync` 会创建根目录下的 `.venv`。不要在 `hugegraph-llm` 子目录另建一套环境,否则容易绕过 workspace 锁定的依赖。
-# 初始化 RAG 工作流
-graph_rag = RAGPipeline()
-
-# 对你的图进行提问
-result = (graph_rag
- .extract_keywords(text="给我讲讲 Al Pacino 的故事。")
- .keywords_to_vid()
- .query_graphdb(max_deep=2, max_graph_items=30)
- .synthesize_answer()
- .run())
-```
-
-#### 知识图谱构建
-```python
-from hugegraph_llm.models.llms.init_llm import LLMs
-from hugegraph_llm.operators.kg_construction_task import KgBuilder
-
-# 从文本构建知识图谱
-TEXT = "你的文本内容..."
-builder = KgBuilder(LLMs().get_chat_llm())
-
-(builder
- .import_schema(from_hugegraph="hugegraph")
- .chunk_split(TEXT)
- .extract_info(extract_type="property_graph")
- .commit_to_hugegraph()
- .run())
-```
+## 安装 ML 依赖
-#### 图机器学习
-```python
-from pyhugegraph.client import PyHugeClient
-# 连接 HugeGraph 并运行机器学习算法
-# 详细示例请参阅 hugegraph-ml 文档
+```bash
+cd hugegraph-ai
+uv sync --extra ml
+source .venv/bin/activate
+cd hugegraph-ml/src
```
-## 📦 模块
-
-### [hugegraph-llm](https://github.com/apache/hugegraph-ai/tree/main/hugegraph-llm) [](https://deepwiki.com/apache/hugegraph-ai)
-用于图应用的大语言模型集成:
-- **GraphRAG**:基于图数据的检索增强生成
-- **知识图谱构建**:从文本自动构建知识图谱
-- **自然语言接口**:使用自然语言查询图
-- **AI 智能体**:智能图分析与推理
-
-### [hugegraph-ml](https://github.com/apache/hugegraph-ai/tree/main/hugegraph-ml)
-包含 21 种算法的图机器学习:
-- **节点分类**:GCN、GAT、GraphSAGE、APPNP、AGNN、ARMA、DAGNN、DeeperGCN、GRAND、JKNet、Cluster-GCN
-- **图分类**:DiffPool、GIN
-- **图嵌入**:DGI、BGRL、GRACE
-- **链接预测**:SEAL、P-GNN、GATNE
-- **欺诈检测**:CARE-GNN、BGNN
-- **后处理**:C&S(Correct & Smooth)
-
-### [hugegraph-python-client](https://github.com/apache/hugegraph-ai/tree/main/hugegraph-python-client)
-用于 HugeGraph 操作的 Python 客户端:
-- **Schema 管理**:定义顶点/边标签和属性
-- **CRUD 操作**:创建、读取、更新、删除图数据
-- **Gremlin 查询**:执行图遍历查询
-- **REST API**:完整的 HugeGraph REST API 覆盖
-
-## 📚 了解更多
-
-- [项目主页](https://hugegraph.apache.org/docs/quickstart/hugegraph-ai/)
-- [LLM 快速入门指南](https://github.com/apache/hugegraph-ai/blob/main/hugegraph-llm/quick_start.md)
-- [DeepWiki AI 文档](https://deepwiki.com/apache/hugegraph-ai)
-
-## 🔗 相关项目
-
-- [hugegraph](https://github.com/apache/hugegraph) - 核心图数据库
-- [hugegraph-toolchain](https://github.com/apache/hugegraph-toolchain) - 开发工具(加载器、仪表盘等)
-- [hugegraph-computer](https://github.com/apache/hugegraph-computer) - 图计算系统
-
-## 🤝 贡献
-
-我们欢迎贡献!详情请参阅我们的[贡献指南](https://hugegraph.apache.org/docs/contribution-guidelines/)。
-
-**开发设置:**
-- 使用 [GitHub Desktop](https://desktop.github.com/) 更轻松地管理 PR
-- 提交 PR 前运行 `./style/code_format_and_analysis.sh`
-- 报告错误前检查现有问题
-
-[](https://github.com/apache/hugegraph-ai/graphs/contributors)
-
-## 📄 许可证
-
-hugegraph-ai 采用 [Apache 2.0 许可证](https://github.com/apache/hugegraph-ai/blob/main/LICENSE)。
-
-## 📞 联系我们
+示例脚本位于 `hugegraph-ml/src/hugegraph_ml/examples/`。
-- **GitHub Issues**:[报告错误或请求功能](https://github.com/apache/hugegraph-ai/issues)(响应最快)
-- **电子邮件**:[dev@hugegraph.apache.org](mailto:dev@hugegraph.apache.org)([需要订阅](https://hugegraph.apache.org/docs/contribution-guidelines/subscribe/))
-- **微信**:关注 "Apache HugeGraph" 微信公众号
+## 后续阅读
-<img src="https://raw.githubusercontent.com/apache/hugegraph-doc/master/assets/images/wechat.png" alt="Apache HugeGraph WeChat QR Code" width="200"/>
+- [HugeGraph-LLM](./hugegraph-llm.md)
+- [配置参考](./config-reference.md)
+- [REST API](./rest-api.md)
+- [HugeGraph-ML](./hugegraph-ml.md)
+- [Python 客户端](../client/hugegraph-client-python.md)
diff --git a/content/cn/docs/quickstart/hugegraph-ai/config-reference.md b/content/cn/docs/quickstart/hugegraph-ai/config-reference.md
index 4172ae12e..ffd67e64a 100644
--- a/content/cn/docs/quickstart/hugegraph-ai/config-reference.md
+++ b/content/cn/docs/quickstart/hugegraph-ai/config-reference.md
@@ -4,393 +4,153 @@ linkTitle: "配置参考"
weight: 4
---
-本文档提供 HugeGraph-LLM 所有配置选项的完整参考。
+HugeGraph-LLM 从 `hugegraph-llm/.env` 读取运行配置。提示词单独保存在 `hugegraph-llm/src/hugegraph_llm/resources/demo/config_prompt.yaml`,不会写入 `.env`。
-## 配置文件
-
-- **环境文件**:`.env`(从模板创建或自动生成)
-- **提示词配置**:`src/hugegraph_llm/resources/demo/config_prompt.yaml`
-
-> [!TIP]
-> 运行 `python -m hugegraph_llm.config.generate --update` 可自动生成或更新带有默认值的配置文件。
-
-## 环境变量概览
-
-### 1. 语言和模型类型选择
-
-```bash
-# 提示词语言(影响系统提示词和生成文本)
-LANGUAGE=EN # 选项: EN | CN
-
-# 不同任务的 LLM 类型
-CHAT_LLM_TYPE=openai # 对话/RAG: openai | litellm | ollama/local
-EXTRACT_LLM_TYPE=openai # 实体抽取: openai | litellm | ollama/local
-TEXT2GQL_LLM_TYPE=openai # 文本转 Gremlin: openai | litellm | ollama/local
-
-# 嵌入模型类型
-EMBEDDING_TYPE=openai # 选项: openai | litellm | ollama/local
-
-# Reranker 类型(可选)
-RERANKER_TYPE= # 选项: cohere | siliconflow | (留空表示无)
-```
-
-### 2. OpenAI 配置
-
-每个 LLM 任务(chat、extract、text2gql)都有独立配置:
-
-#### 2.1 Chat LLM(RAG 答案生成)
-
-```bash
-OPENAI_CHAT_API_BASE=https://api.openai.com/v1
-OPENAI_CHAT_API_KEY=sk-your-api-key-here
-OPENAI_CHAT_LANGUAGE_MODEL=gpt-4o-mini
-OPENAI_CHAT_TOKENS=8192 # 对话响应的最大 tokens
-```
-
-#### 2.2 Extract LLM(实体和关系抽取)
-
-```bash
-OPENAI_EXTRACT_API_BASE=https://api.openai.com/v1
-OPENAI_EXTRACT_API_KEY=sk-your-api-key-here
-OPENAI_EXTRACT_LANGUAGE_MODEL=gpt-4o-mini
-OPENAI_EXTRACT_TOKENS=1024 # 抽取任务的最大 tokens
-```
-
-#### 2.3 Text2GQL LLM(自然语言转 Gremlin)
-
-```bash
-OPENAI_TEXT2GQL_API_BASE=https://api.openai.com/v1
-OPENAI_TEXT2GQL_API_KEY=sk-your-api-key-here
-OPENAI_TEXT2GQL_LANGUAGE_MODEL=gpt-4o-mini
-OPENAI_TEXT2GQL_TOKENS=4096 # 查询生成的最大 tokens
-```
-
-#### 2.4 嵌入模型
-
-```bash
-OPENAI_EMBEDDING_API_BASE=https://api.openai.com/v1
-OPENAI_EMBEDDING_API_KEY=sk-your-api-key-here
-OPENAI_EMBEDDING_MODEL=text-embedding-3-small
-```
-
-> [!NOTE]
-> 您可以为每个任务使用不同的 API 密钥/端点,以优化成本或使用专用模型。
-
-### 3. LiteLLM 配置(多供应商支持)
-
-LiteLLM 支持统一访问 100 多个 LLM 供应商(OpenAI、Anthropic、Google、Azure 等)。
-
-#### 3.1 Chat LLM
-
-```bash
-LITELLM_CHAT_API_BASE=http://localhost:4000 # LiteLLM 代理 URL
-LITELLM_CHAT_API_KEY=sk-litellm-key # LiteLLM API 密钥
-LITELLM_CHAT_LANGUAGE_MODEL=anthropic/claude-3-5-sonnet-20241022
-LITELLM_CHAT_TOKENS=8192
-```
-
-#### 3.2 Extract LLM
-
-```bash
-LITELLM_EXTRACT_API_BASE=http://localhost:4000
-LITELLM_EXTRACT_API_KEY=sk-litellm-key
-LITELLM_EXTRACT_LANGUAGE_MODEL=openai/gpt-4o-mini
-LITELLM_EXTRACT_TOKENS=256
-```
-
-#### 3.3 Text2GQL LLM
-
-```bash
-LITELLM_TEXT2GQL_API_BASE=http://localhost:4000
-LITELLM_TEXT2GQL_API_KEY=sk-litellm-key
-LITELLM_TEXT2GQL_LANGUAGE_MODEL=openai/gpt-4o-mini
-LITELLM_TEXT2GQL_TOKENS=4096
-```
-
-#### 3.4 嵌入模型
-
-```bash
-LITELLM_EMBEDDING_API_BASE=http://localhost:4000
-LITELLM_EMBEDDING_API_KEY=sk-litellm-key
-LITELLM_EMBEDDING_MODEL=openai/text-embedding-3-small
-```
-
-**模型格式**: `供应商/模型名称`
-
-示例:
-- `openai/gpt-4o-mini`
-- `anthropic/claude-3-5-sonnet-20241022`
-- `google/gemini-2.0-flash-exp`
-- `azure/gpt-4`
-
-完整列表请参阅 [LiteLLM Providers](https://docs.litellm.ai/docs/providers)。
-
-### 4. Ollama 配置(本地部署)
-
-使用 Ollama 运行本地 LLM,确保隐私和成本控制。
-
-#### 4.1 Chat LLM
+运行以下命令可按配置类的默认值创建或更新文件:
```bash
-OLLAMA_CHAT_HOST=127.0.0.1
-OLLAMA_CHAT_PORT=11434
-OLLAMA_CHAT_LANGUAGE_MODEL=llama3.1:8b
+cd hugegraph-ai/hugegraph-llm
+python -m hugegraph_llm.config.generate --update
```
-#### 4.2 Extract LLM
+`.env` 包含密钥和密码,不要提交到版本库。
-```bash
-OLLAMA_EXTRACT_HOST=127.0.0.1
-OLLAMA_EXTRACT_PORT=11434
-OLLAMA_EXTRACT_LANGUAGE_MODEL=llama3.1:8b
-```
+## 基础选项
-#### 4.3 Text2GQL LLM
+| 配置项 | 默认值 | 说明 |
+|---|---|---|
+| `LANGUAGE` | `EN` | 提示词语言,可选 `EN`、`CN` |
+| `CHAT_LLM_TYPE` | `openai` | 回答模型,可选 `openai`、`litellm`、`ollama/local` |
+| `EXTRACT_LLM_TYPE` | `openai` | 信息抽取模型,取值同上 |
+| `TEXT2GQL_LLM_TYPE` | `openai` | Text2Gremlin 模型,取值同上 |
+| `EMBEDDING_TYPE` | `openai` | 嵌入模型,取值同上,也可以留空 |
+| `RERANKER_TYPE` | 空 | 可选 `cohere`、`siliconflow` |
+| `KEYWORD_EXTRACT_TYPE` | `llm` | 可选 `llm`、`textrank`、`hybrid` |
+| `WINDOW_SIZE` | `3` | TextRank 滑窗,范围 1 到 10 |
+| `HYBRID_LLM_WEIGHTS` | `0.5` | hybrid 模式中 LLM 结果的权重,范围 0 到 1 |
-```bash
-OLLAMA_TEXT2GQL_HOST=127.0.0.1
-OLLAMA_TEXT2GQL_PORT=11434
-OLLAMA_TEXT2GQL_LANGUAGE_MODEL=qwen2.5-coder:7b
-```
+## OpenAI 兼容接口
-#### 4.4 嵌入模型
+聊天、抽取和 Text2Gremlin 可以使用不同端点、密钥和模型。
-```bash
-OLLAMA_EMBEDDING_HOST=127.0.0.1
-OLLAMA_EMBEDDING_PORT=11434
-OLLAMA_EMBEDDING_MODEL=nomic-embed-text
-```
+| 用途 | API 地址 | 密钥 | 模型 | 最大 token 默认值 |
+|---|---|---|---|---|
+| 回答 | `OPENAI_CHAT_API_BASE` | `OPENAI_CHAT_API_KEY` | `OPENAI_CHAT_LANGUAGE_MODEL` | `OPENAI_CHAT_TOKENS=8192` |
+| 抽取 | `OPENAI_EXTRACT_API_BASE` | `OPENAI_EXTRACT_API_KEY` | `OPENAI_EXTRACT_LANGUAGE_MODEL` | `OPENAI_EXTRACT_TOKENS=256` |
+| Text2Gremlin | `OPENAI_TEXT2GQL_API_BASE` | `OPENAI_TEXT2GQL_API_KEY` | `OPENAI_TEXT2GQL_LANGUAGE_MODEL` | `OPENAI_TEXT2GQL_TOKENS=4096` |
+| 嵌入 | `OPENAI_EMBEDDING_API_BASE` | `OPENAI_EMBEDDING_API_KEY` | `OPENAI_EMBEDDING_MODEL` | 不适用 |
-> [!TIP]
-> 下载模型:`ollama pull llama3.1:8b` 或 `ollama pull qwen2.5-coder:7b`
+API 地址默认是 `https://api.openai.com/v1`;三个语言模型默认是 `gpt-4.1-mini`,嵌入模型默认是 `text-embedding-3-small`。
-### 5. Reranker 配置
+`OPENAI_BASE_URL` 和 `OPENAI_API_KEY` 可作为通用回退值。嵌入模型另有 `OPENAI_EMBEDDING_BASE_URL` 和 `OPENAI_EMBEDDING_API_KEY` 回退值。
-Reranker 通过根据相关性重新排序检索结果来提高 RAG 准确性。
+## LiteLLM
-#### 5.1 Cohere Reranker
+| 用途 | API 地址 | 密钥 | 模型 | 最大 token 默认值 |
+|---|---|---|---|---|
+| 回答 | `LITELLM_CHAT_API_BASE` | `LITELLM_CHAT_API_KEY` | `LITELLM_CHAT_LANGUAGE_MODEL` | `LITELLM_CHAT_TOKENS=8192` |
+| 抽取 | `LITELLM_EXTRACT_API_BASE` | `LITELLM_EXTRACT_API_KEY` | `LITELLM_EXTRACT_LANGUAGE_MODEL` | `LITELLM_EXTRACT_TOKENS=256` |
+| Text2Gremlin | `LITELLM_TEXT2GQL_API_BASE` | `LITELLM_TEXT2GQL_API_KEY` | `LITELLM_TEXT2GQL_LANGUAGE_MODEL` | `LITELLM_TEXT2GQL_TOKENS=4096` |
+| 嵌入 | `LITELLM_EMBEDDING_API_BASE` | `LITELLM_EMBEDDING_API_KEY` | `LITELLM_EMBEDDING_MODEL` | 不适用 |
-```bash
-RERANKER_TYPE=cohere
-COHERE_BASE_URL=https://api.cohere.com/v1/rerank
-RERANKER_API_KEY=your-cohere-api-key
-RERANKER_MODEL=rerank-english-v3.0
-```
+三个语言模型默认是 `openai/gpt-4.1-mini`,嵌入模型默认是 `openai/text-embedding-3-small`。模型名通常使用 `供应商/模型` 格式,具体取值由 LiteLLM 服务决定。
-可用模型:
-- `rerank-english-v3.0`(英文)
-- `rerank-multilingual-v3.0`(100+ 种语言)
+## Ollama
-#### 5.2 SiliconFlow Reranker
+| 用途 | 主机 | 端口 | 模型 |
+|---|---|---|---|
+| 回答 | `OLLAMA_CHAT_HOST` | `OLLAMA_CHAT_PORT` | `OLLAMA_CHAT_LANGUAGE_MODEL` |
+| 抽取 | `OLLAMA_EXTRACT_HOST` | `OLLAMA_EXTRACT_PORT` | `OLLAMA_EXTRACT_LANGUAGE_MODEL` |
+| Text2Gremlin | `OLLAMA_TEXT2GQL_HOST` | `OLLAMA_TEXT2GQL_PORT` | `OLLAMA_TEXT2GQL_LANGUAGE_MODEL` |
+| 嵌入 | `OLLAMA_EMBEDDING_HOST` | `OLLAMA_EMBEDDING_PORT` | `OLLAMA_EMBEDDING_MODEL` |
-```bash
-RERANKER_TYPE=siliconflow
-RERANKER_API_KEY=your-siliconflow-api-key
-RERANKER_MODEL=BAAI/bge-reranker-v2-m3
-```
-
-### 6. HugeGraph 连接
-
-配置与 HugeGraph 服务器实例的连接。
-
-```bash
-# 服务器连接
-GRAPH_IP=127.0.0.1
-GRAPH_PORT=8080
-GRAPH_NAME=hugegraph # 图实例名称
-GRAPH_USER=admin # 用户名
-GRAPH_PWD=admin-password # 密码
-GRAPH_SPACE= # 图空间(可选,用于多租户)
-```
+主机默认是 `127.0.0.1`,端口默认是 `11434`,模型名没有默认值。使用前先在 Ollama 中拉取对应模型。
-### 7. 查询参数
+## 重排序
-控制图遍历行为和结果限制。
+| 配置项 | 默认值 | 说明 |
+|---|---|---|
+| `COHERE_BASE_URL` | `https://api.cohere.com/v1/rerank` | Cohere rerank 接口;`CO_API_URL` 可作为回退值 |
+| `RERANKER_API_KEY` | 空 | Cohere 或 SiliconFlow 密钥 |
+| `RERANKER_MODEL` | 空 | 服务端支持的模型名 |
-```bash
-# 图遍历限制
-MAX_GRAPH_PATH=10 # 图查询的最大路径深度
-MAX_GRAPH_ITEMS=30 # 从图中检索的最大项数
-EDGE_LIMIT_PRE_LABEL=8 # 每个标签类型的最大边数
+## HugeGraph 连接与召回限制
-# 属性过滤
-LIMIT_PROPERTY=False # 限制结果中的属性(True/False)
-```
+| 配置项 | 默认值 | 说明 |
+|---|---|---|
+| `GRAPH_URL` | `127.0.0.1:8080` | HugeGraph 地址,不拆分为 IP 和端口 |
+| `GRAPH_NAME` | `hugegraph` | 图名 |
+| `GRAPH_USER` | `admin` | 用户名 |
+| `GRAPH_PWD` | `xxx` | 密码 |
+| `GRAPH_SPACE` | 空 | GraphSpace 名称 |
+| `LIMIT_PROPERTY` | `False` | 是否限制返回属性;配置类按字符串读取 |
+| `MAX_GRAPH_PATH` | `10` | 最大图路径长度 |
+| `MAX_GRAPH_ITEMS` | `30` | 图召回的最大项目数 |
+| `EDGE_LIMIT_PRE_LABEL` | `8` | 每个边标签的返回上限 |
+| `VECTOR_DIS_THRESHOLD` | `0.9` | 向量距离阈值;超过阈值的结果会被忽略 |
+| `TOPK_PER_KEYWORD` | `1` | 每个关键词的候选数 |
+| `TOPK_RETURN_RESULTS` | `20` | 重排序后返回的结果数 |
-### 8. 向量搜索配置
+## 外部向量数据库
-配置向量相似性搜索参数。
+默认实现可以使用本地 FAISS。启用可选依赖后还可配置:
-```bash
-# 向量搜索阈值
-VECTOR_DIS_THRESHOLD=0.9 # 最小余弦相似度(0-1,越高越严格)
-TOPK_PER_KEYWORD=1 # 每个提取关键词的 Top-K 结果
-```
+| 配置项 | 默认值 |
+|---|---|
+| `QDRANT_HOST` | 空 |
+| `QDRANT_PORT` | `6333` |
+| `QDRANT_API_KEY` | 空 |
+| `MILVUS_HOST` | 空 |
+| `MILVUS_PORT` | `19530` |
+| `MILVUS_USER` | 空 |
+| `MILVUS_PASSWORD` | 空 |
-### 9. Rerank 配置
+安装对应依赖:
```bash
-# Rerank 结果限制
-TOPK_RETURN_RESULTS=20 # 重排序后的 top 结果数
+cd hugegraph-ai
+uv sync --package hugegraph-llm --extra vectordb
```
-## 配置优先级
-
-系统按以下顺序加载配置(后面的来源覆盖前面的):
-
-1. **默认值**(在 `*_config.py` 文件中)
-2. **环境变量**(来自 `.env` 文件)
-3. **运行时更新**(通过 Web UI 或 API 调用)
+## 登录与日志接口
-## 配置示例
+| 配置项 | 默认值 | 说明 |
+|---|---|---|
+| `ENABLE_LOGIN` | `False` | 是否要求 Bearer token;配置类按字符串读取 |
+| `USER_TOKEN` | `4321` | Web 页面和普通 API 的 token |
+| `ADMIN_TOKEN` | `xxxx` | `/logs` 使用的管理员 token |
-### 最小配置(OpenAI)
+`ADMIN_TOKEN` 为空或仍为 `xxxx` 时,`/logs` 会直接返回 403。生产环境应同时替换用户 token 和管理员 token。
-```bash
-# 语言
-LANGUAGE=EN
+## 最小 OpenAI 配置
-# LLM 类型
+```properties
+LANGUAGE=CN
CHAT_LLM_TYPE=openai
EXTRACT_LLM_TYPE=openai
TEXT2GQL_LLM_TYPE=openai
EMBEDDING_TYPE=openai
-# OpenAI 凭据(所有任务共用一个密钥)
-OPENAI_API_BASE=https://api.openai.com/v1
-OPENAI_API_KEY=sk-your-api-key-here
-OPENAI_LANGUAGE_MODEL=gpt-4o-mini
+OPENAI_API_KEY=your-api-key
+OPENAI_BASE_URL=https://api.openai.com/v1
+OPENAI_CHAT_LANGUAGE_MODEL=gpt-4.1-mini
+OPENAI_EXTRACT_LANGUAGE_MODEL=gpt-4.1-mini
+OPENAI_TEXT2GQL_LANGUAGE_MODEL=gpt-4.1-mini
OPENAI_EMBEDDING_MODEL=text-embedding-3-small
-# HugeGraph 连接
-GRAPH_IP=127.0.0.1
-GRAPH_PORT=8080
+GRAPH_URL=127.0.0.1:8080
GRAPH_NAME=hugegraph
GRAPH_USER=admin
-GRAPH_PWD=admin
-```
-
-### 生产环境配置(LiteLLM + Reranker)
-
-```bash
-# 双语支持
-LANGUAGE=EN
-
-# 灵活使用 LiteLLM
-CHAT_LLM_TYPE=litellm
-EXTRACT_LLM_TYPE=litellm
-TEXT2GQL_LLM_TYPE=litellm
-EMBEDDING_TYPE=litellm
-
-# LiteLLM 代理
-LITELLM_CHAT_API_BASE=http://localhost:4000
-LITELLM_CHAT_API_KEY=sk-litellm-master-key
-LITELLM_CHAT_LANGUAGE_MODEL=anthropic/claude-3-5-sonnet-20241022
-LITELLM_CHAT_TOKENS=8192
-
-LITELLM_EXTRACT_API_BASE=http://localhost:4000
-LITELLM_EXTRACT_API_KEY=sk-litellm-master-key
-LITELLM_EXTRACT_LANGUAGE_MODEL=openai/gpt-4o-mini
-LITELLM_EXTRACT_TOKENS=256
-
-LITELLM_TEXT2GQL_API_BASE=http://localhost:4000
-LITELLM_TEXT2GQL_API_KEY=sk-litellm-master-key
-LITELLM_TEXT2GQL_LANGUAGE_MODEL=openai/gpt-4o-mini
-LITELLM_TEXT2GQL_TOKENS=4096
-
-LITELLM_EMBEDDING_API_BASE=http://localhost:4000
-LITELLM_EMBEDDING_API_KEY=sk-litellm-master-key
-LITELLM_EMBEDDING_MODEL=openai/text-embedding-3-small
-
-# Cohere Reranker 提高准确性
-RERANKER_TYPE=cohere
-COHERE_BASE_URL=https://api.cohere.com/v1/rerank
-RERANKER_API_KEY=your-cohere-key
-RERANKER_MODEL=rerank-multilingual-v3.0
-
-# 带认证的 HugeGraph
-GRAPH_IP=prod-hugegraph.example.com
-GRAPH_PORT=8080
-GRAPH_NAME=production_graph
-GRAPH_USER=rag_user
-GRAPH_PWD=secure-password
-GRAPH_SPACE=prod_space
-
-# 优化的查询参数
-MAX_GRAPH_PATH=15
-MAX_GRAPH_ITEMS=50
-VECTOR_DIS_THRESHOLD=0.85
-TOPK_RETURN_RESULTS=30
-```
-
-### 本地/离线配置(Ollama)
-
-```bash
-# 语言
-LANGUAGE=EN
-
-# 全部通过 Ollama 使用本地模型
-CHAT_LLM_TYPE=ollama/local
-EXTRACT_LLM_TYPE=ollama/local
-TEXT2GQL_LLM_TYPE=ollama/local
-EMBEDDING_TYPE=ollama/local
-
-# Ollama 端点
-OLLAMA_CHAT_HOST=127.0.0.1
-OLLAMA_CHAT_PORT=11434
-OLLAMA_CHAT_LANGUAGE_MODEL=llama3.1:8b
-
-OLLAMA_EXTRACT_HOST=127.0.0.1
-OLLAMA_EXTRACT_PORT=11434
-OLLAMA_EXTRACT_LANGUAGE_MODEL=llama3.1:8b
-
-OLLAMA_TEXT2GQL_HOST=127.0.0.1
-OLLAMA_TEXT2GQL_PORT=11434
-OLLAMA_TEXT2GQL_LANGUAGE_MODEL=qwen2.5-coder:7b
-
-OLLAMA_EMBEDDING_HOST=127.0.0.1
-OLLAMA_EMBEDDING_PORT=11434
-OLLAMA_EMBEDDING_MODEL=nomic-embed-text
-
-# 离线环境不使用 reranker
-RERANKER_TYPE=
-
-# 本地 HugeGraph
-GRAPH_IP=127.0.0.1
-GRAPH_PORT=8080
-GRAPH_NAME=hugegraph
-GRAPH_USER=admin
-GRAPH_PWD=admin
-```
-
-## 配置验证
-
-修改 `.env` 后,验证配置:
-
-1. **通过 Web UI**:访问 `http://localhost:8001` 并检查设置面板
-2. **通过 Python**:
-```python
-from hugegraph_llm.config import settings
-print(settings.llm_config)
-print(settings.hugegraph_config)
-```
-3. **通过 REST API**:
-```bash
-curl http://localhost:8001/config
+GRAPH_PWD=your-password
```
-## 故障排除
+## 配置加载
-| 问题 | 解决方案 |
-|------|---------|
-| "API key not found" | 检查 `.env` 中的 `*_API_KEY` 是否正确设置 |
-| "Connection refused" | 验证 `GRAPH_IP` 和 `GRAPH_PORT` 是否正确 |
-| "Model not found" | 对于 Ollama:运行 `ollama pull <模型名称>` |
-| "Rate limit exceeded" | 减少 `MAX_GRAPH_ITEMS` 或使用不同的 API 密钥 |
-| "Embedding dimension mismatch" | 删除现有向量并使用正确模型重建 |
+配置类先提供代码默认值,再从 `.env` 和进程环境读取覆盖值。Web 页面和配置 API 可以在运行时更新当前设置,并把受支持的字段同步回 `.env`。手工改动 `.env` 后应重启服务;提示词 YAML 可由页面加载逻辑刷新。
-## 另见
+配置定义位于:
-- [HugeGraph-LLM 概述](./hugegraph-llm.md)
-- [REST API 参考](./rest-api.md)
-- [快速入门指南](./quick_start.md)
+- `hugegraph-llm/src/hugegraph_llm/config/llm_config.py`
+- `hugegraph-llm/src/hugegraph_llm/config/hugegraph_config.py`
+- `hugegraph-llm/src/hugegraph_llm/config/admin_config.py`
+- `hugegraph-llm/src/hugegraph_llm/config/prompt_config.py`
diff --git a/content/cn/docs/quickstart/hugegraph-ai/hugegraph-llm.md b/content/cn/docs/quickstart/hugegraph-ai/hugegraph-llm.md
index d376b3de1..cce3adf7e 100644
--- a/content/cn/docs/quickstart/hugegraph-ai/hugegraph-llm.md
+++ b/content/cn/docs/quickstart/hugegraph-ai/hugegraph-llm.md
@@ -4,305 +4,93 @@ linkTitle: "HugeGraph-LLM"
weight: 1
---
-> 本文为中文翻译版本,内容基于英文版进行,我们欢迎您随时提出修改建议。我们推荐您阅读 [AI 仓库 README](https://github.com/apache/hugegraph-ai/tree/main/hugegraph-llm#readme) 以获取最新信息,官网会定期同步更新。
+HugeGraph-LLM 用于知识图谱构建、GraphRAG 和自然语言图查询。演示服务把 Gradio 页面和 FastAPI 接口挂在同一个进程上,默认监听 `8001` 端口。
-> **连接图数据库与大语言模型的桥梁**
+## 环境要求
-> AI 总结项目文档:[](https://deepwiki.com/apache/hugegraph-ai)
+- Python 3.10 或 3.11
+- `uv` 0.7 或更高版本
+- HugeGraph Server 1.5 或更高版本
-## 🎯 概述
+## Docker Compose 部署
-HugeGraph-LLM 是一个功能强大的工具包,它融合了图数据库和大型语言模型的优势,实现了 HugeGraph 与 LLM 之间的无缝集成,助力开发者构建智能应用。
-
-### 核心功能
-- 🏗️ **知识图谱构建**:利用 LLM 和 HugeGraph 自动构建知识图谱。
-- 🗣️ **自然语言查询**:通过自然语言(Gremlin/Cypher)操作图数据库。
-- 🔍 **图增强 RAG**:借助知识图谱提升问答准确性(GraphRAG 和 Graph Agent)。
-
-更多源码文档,请访问我们的 [DeepWiki](https://deepwiki.com/apache/hugegraph-ai) 页面(推荐)。
-
-## 📋 环境要求
-
-> [!IMPORTANT]
-> - **Python**:3.10+(未在 3.12 版本测试)
-> - **HugeGraph Server**:1.3+(推荐 1.5+)
-> - **UV 包管理器**:0.7+
-
-## 🚀 快速开始
-
-请选择您偏好的部署方式:
-
-### 方案一:Docker Compose(推荐)
-
-这是同时启动 HugeGraph Server 和 RAG 服务的最快方法:
+在 HugeGraph-AI 仓库根目录准备环境文件:
```bash
-# 1. 设置环境
+git clone https://github.com/apache/hugegraph-ai.git
+cd hugegraph-ai
cp docker/env.template docker/.env
-# 编辑 docker/.env,将 PROJECT_PATH 设置为您的实际项目路径
-
-# 2. 部署服务
+# 编辑 docker/.env,将 PROJECT_PATH 改为当前仓库的绝对路径
+touch hugegraph-llm/.env
cd docker
-docker-compose -f docker-compose-network.yml up -d
-
-# 3. 验证部署
-docker-compose -f docker-compose-network.yml ps
-
-# 4. 访问服务
-# HugeGraph Server: http://localhost:8080
-# RAG 服务: http://localhost:8001
+docker compose -f docker-compose-network.yml up -d
+docker compose -f docker-compose-network.yml ps
```
-### 方案二:独立 Docker 容器
-
-如果您希望对各组件进行更精细的控制:
+启动后可访问:
-#### 可用镜像
-- **`hugegraph/rag`**:开发镜像,可访问源代码
-- **`hugegraph/rag-bin`**:生产优化的二进制文件(使用 Nuitka 编译)
+- HugeGraph Server:`http://localhost:8080`
+- RAG 服务和 Web 页面:`http://localhost:8001`
-```bash
-# 1. 创建网络
-docker network create -d bridge hugegraph-net
-
-# 2. 启动 HugeGraph Server
-docker run -itd --name=server -p 8080:8080 --network hugegraph-net hugegraph/hugegraph
+## 从源码启动
-# 3. 启动 RAG 服务
-docker pull hugegraph/rag:latest
-docker run -itd --name rag \
- -v /path/to/your/hugegraph-llm/.env:/home/work/hugegraph-llm/.env \
- -p 8001:8001 --network hugegraph-net hugegraph/rag
-
-# 4. 监控日志
-docker logs -f rag
-```
-
-### 方案三:从源码构建
-
-适用于开发和自定义场景:
+依赖应从仓库根目录按 workspace 安装:
```bash
-# 1. 启动 HugeGraph Server
-docker run -itd --name=server -p 8080:8080 hugegraph/hugegraph
-
-# 2. 安装 UV 包管理器
-curl -LsSf https://astral.sh/uv/install.sh | sh
-
-# 3. 克隆并设置项目
git clone https://github.com/apache/hugegraph-ai.git
-cd hugegraph-ai/hugegraph-llm
-
-# 4. 创建虚拟环境并安装依赖
-uv venv && source .venv/bin/activate
-uv pip install -e .
-
-# 5. 启动 RAG 演示
+cd hugegraph-ai
+uv sync --extra llm
+source .venv/bin/activate
+cd hugegraph-llm
python -m hugegraph_llm.demo.rag_demo.app
-# 访问: http://127.0.0.1:8001
-
-# 6. (可选) 自定义主机/端口
-python -m hugegraph_llm.demo.rag_demo.app --host 127.0.0.1 --port 18001
```
-#### 额外设置(可选)
+自定义监听地址和端口:
```bash
-# 下载 NLTK 停用词以优化文本处理
-python ./hugegraph_llm/operators/common_op/nltk_helper.py
-
-# 更新配置文件
-python -m hugegraph_llm.config.generate --update
-```
-
-> [!TIP]
-> 查看我们的[快速入门指南](https://github.com/apache/hugegraph-ai/blob/main/hugegraph-llm/quick_start.md)获取详细用法示例和查询逻辑解释。
-
-## 💡 用法示例
-
-### 知识图谱构建
-
-#### 交互式 Web 界面
-
-使用 Gradio 界面进行可视化知识图谱构建:
-
-**输入选项:**
-- **文本**:直接输入文本用于 RAG 索引创建
-- **文件**:上传 TXT 或 DOCX 文件(支持多选)
-
-**Schema 配置:**
-- **自定义 Schema**:遵循我们[模板](https://github.com/apache/hugegraph-ai/blob/aff3bbe25fa91c3414947a196131be812c20ef11/hugegraph-llm/src/hugegraph_llm/config/config_data.py#L125)的 JSON 格式
-- **HugeGraph Schema**:使用现有图实例的 Schema(例如,“hugegraph”)
-
-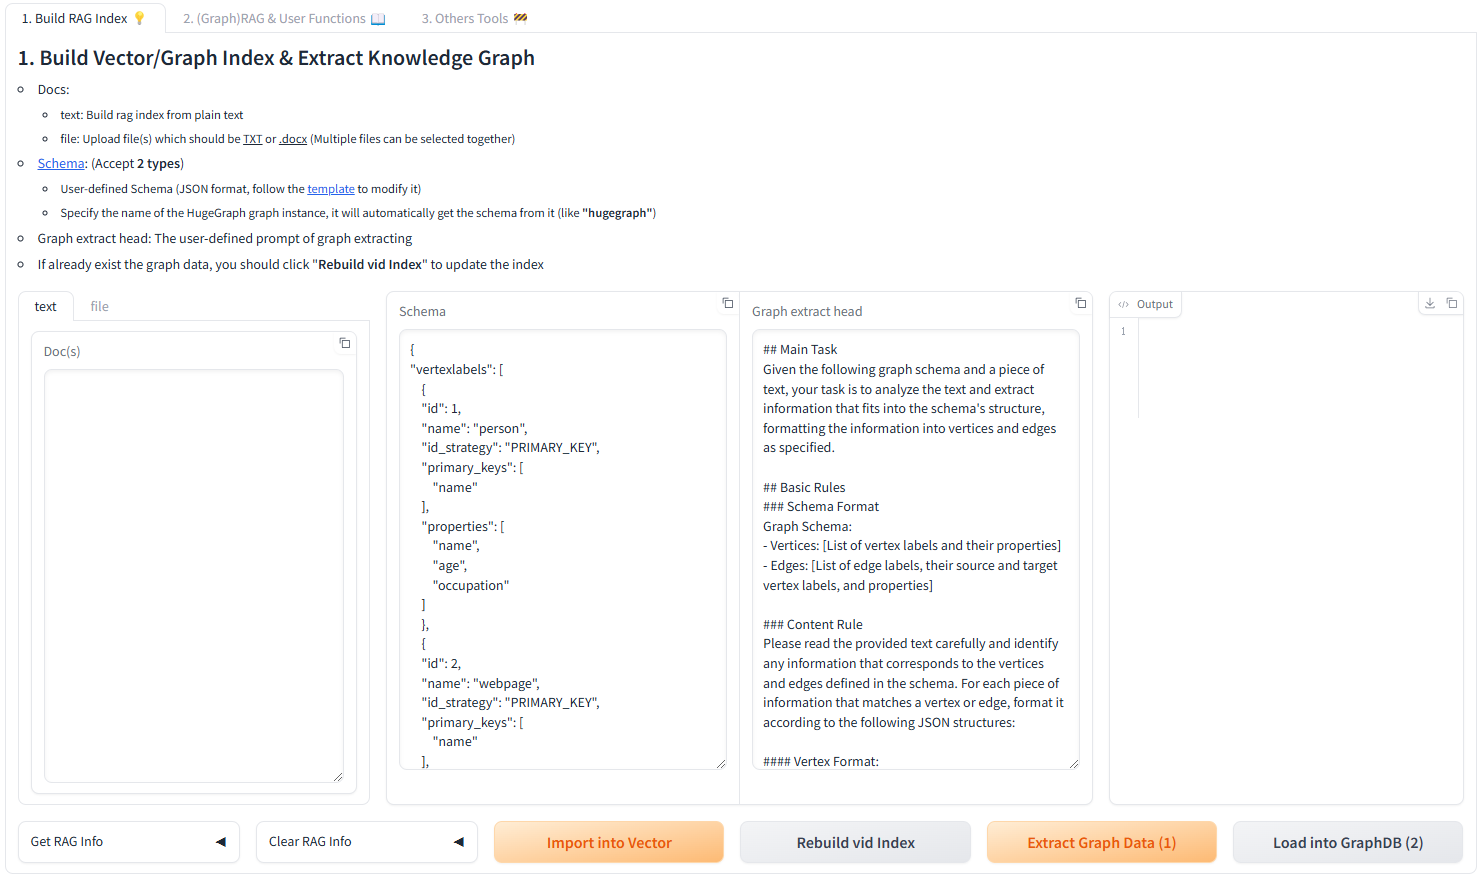
-
-#### 代码构建
-
-使用 `KgBuilder` 类通过代码构建知识图谱:
-
-```python
-from hugegraph_llm.models.llms.init_llm import LLMs
-from hugegraph_llm.operators.kg_construction_task import KgBuilder
-
-# 初始化并链式操作
-TEXT = "在此处输入您的文本内容..."
-builder = KgBuilder(LLMs().get_chat_llm())
-
-(
- builder
- .import_schema(from_hugegraph="talent_graph").print_result()
- .chunk_split(TEXT).print_result()
- .extract_info(extract_type="property_graph").print_result()
- .commit_to_hugegraph()
- .run()
-)
+python -m hugegraph_llm.demo.rag_demo.app \
+ --host 127.0.0.1 \
+ --port 18001
```
-**工作流:**
-```mermaid
-graph LR
- A[导入 Schema] --> B[文本分块]
- B --> C[提取信息]
- C --> D[提交到 HugeGraph]
- D --> E[执行工作流]
-
- style A fill:#fff2cc
- style B fill:#d5e8d4
- style C fill:#dae8fc
- style D fill:#f8cecc
- style E fill:#e1d5e7
-```
+服务以 `hugegraph-llm/.env` 保存模型、HugeGraph 和登录配置。提示词放在 `hugegraph-llm/src/hugegraph_llm/resources/demo/config_prompt.yaml`。缺少文件时,配置代码会按默认值创建。
-### 图增强 RAG
+## 主要功能
-利用 HugeGraph 进行检索增强生成:
+### 构建 RAG 索引
-```python
-from hugegraph_llm.operators.graph_rag_task import RAGPipeline
+Web 页面的第一个标签页可以处理文本或文件,并执行以下操作:
-# 初始化 RAG 工作流
-graph_rag = RAGPipeline()
+1. 切分文本并写入 chunk 向量索引。
+2. 按给定 Schema 从文本抽取顶点和边。
+3. 将抽取结果写入 HugeGraph,并更新顶点向量索引。
-# 执行 RAG 工作流
-(
- graph_rag
- .extract_keywords(text="给我讲讲 Al Pacino 的故事。")
- .keywords_to_vid()
- .query_graphdb(max_deep=2, max_graph_items=30)
- .merge_dedup_rerank()
- .synthesize_answer(vector_only_answer=False, graph_only_answer=True)
- .run(verbose=True)
-)
-```
+Schema 可以是内联 JSON,也可以是现有图名。通过 REST API 使用图名时,必须同时传入匹配的 `client_config.graph`;内联 JSON 不会连接 HugeGraph,也不能附带 `client_config`。
-**RAG 工作流:**
-```mermaid
-graph TD
- A[用户查询] --> B[提取关键词]
- B --> C[匹配图节点]
- C --> D[检索图上下文]
- D --> E[重排序结果]
- E --> F[生成答案]
-
- style A fill:#e3f2fd
- style B fill:#f3e5f5
- style C fill:#e8f5e8
- style D fill:#fff3e0
- style E fill:#fce4ec
- style F fill:#e0f2f1
-```
+### GraphRAG
-## 🔧 配置
+查询流程可以组合直接回答、chunk 向量召回和图召回。图召回先抽取关键词并匹配顶点,再尝试 Text2Gremlin;生成或执行失败时可回退到预定义的图遍历方式。请求参数可控制返回数量、向量距离阈值、模板数量和重排序方式。
-运行演示后,将自动生成配置文件:
+### Text2Gremlin
-- **环境**:`hugegraph-llm/.env`
-- **提示**:`hugegraph-llm/src/hugegraph_llm/resources/demo/config_prompt.yaml`
+`POST /text2gremlin` 根据自然语言、图 Schema 和可选示例生成 Gremlin。自定义提示词必须保留 `{query}`、`{schema}`、`{example}` 和 `{vertices}` 四个占位符。
-> [!NOTE]
-> 使用 Web 界面时,配置更改会自动保存。对于手动更改,刷新页面即可加载更新。
+## 模型与向量后端
-### LLM 提供商配置
-
-本项目使用 [LiteLLM](https://docs.litellm.ai/docs/providers) 实现多提供商 LLM 支持,可统一访问 OpenAI、Anthropic、Google、Cohere 以及 100 多个其他提供商。
-
-#### 方案一:直接 LLM 连接(OpenAI、Ollama)
+聊天、信息抽取和 Text2Gremlin 可以分别使用 OpenAI 兼容接口、Ollama 或 LiteLLM。嵌入模型也可以独立选择。默认向量索引使用 FAISS;安装 `vectordb` 可选依赖后,还可配置 Milvus 或 Qdrant:
```bash
-# .env 配置
-chat_llm_type=openai # 或 ollama/local
-openai_api_key=sk-xxx
-openai_api_base=https://api.openai.com/v1
-openai_language_model=gpt-4o-mini
-openai_max_tokens=4096
+cd hugegraph-ai
+uv sync --package hugegraph-llm --extra vectordb
```
-#### 方案二:LiteLLM 多提供商支持
+完整环境变量见[配置参考](./config-reference.md),HTTP 请求格式见[REST API](./rest-api.md)。
-LiteLLM 作为多个 LLM 提供商的统一代理:
+## 开发检查
```bash
-# .env 配置
-chat_llm_type=litellm
-extract_llm_type=litellm
-text2gql_llm_type=litellm
-
-# LiteLLM 设置
-litellm_api_base=http://localhost:4000 # LiteLLM 代理服务器
-litellm_api_key=sk-1234 # LiteLLM API 密钥
-
-# 模型选择(提供商/模型格式)
-litellm_language_model=anthropic/claude-3-5-sonnet-20241022
-litellm_max_tokens=4096
+cd hugegraph-ai
+./style/code_format_and_analysis.sh
+cd hugegraph-llm
+pytest
```
-
-**支持的提供商**:OpenAI、Anthropic、Google(Gemini)、Azure、Cohere、Bedrock、Vertex AI、Hugging Face 等。
-
-完整提供商列表和配置详情,请访问 [LiteLLM Providers](https://docs.litellm.ai/docs/providers)。
-
-### Reranker 配置
-
-Reranker 通过重新排序检索结果来提高 RAG 准确性。支持的提供商:
-
-```bash
-# Cohere Reranker
-reranker_type=cohere
-cohere_api_key=your-cohere-key
-cohere_rerank_model=rerank-english-v3.0
-
-# SiliconFlow Reranker
-reranker_type=siliconflow
-siliconflow_api_key=your-siliconflow-key
-siliconflow_rerank_model=BAAI/bge-reranker-v2-m3
-```
-
-### Text2Gremlin 配置
-
-将自然语言转换为 Gremlin 查询:
-
-```python
-from hugegraph_llm.operators.graph_rag_task import Text2GremlinPipeline
-
-# 初始化工作流
-text2gremlin = Text2GremlinPipeline()
-
-# 生成 Gremlin 查询
-result = (
- text2gremlin
- .query_to_gremlin(query="查找所有由 Francis Ford Coppola 执导的电影")
- .execute_gremlin_query()
- .run()
-)
-```
-
-**REST API 端点**:有关 HTTP 端点详情,请参阅 [REST API 文档](./rest-api.md)。
-
-## 📚 其他资源
-
-- **图可视化**:使用 [HugeGraph Hubble](https://hub.docker.com/r/hugegraph/hubble) 进行数据分析和 Schema 管理
-- **API 文档**:浏览我们的 REST API 端点以进行集成
-- **社区**:加入我们的讨论并为项目做出贡献
-
----
-
-**许可证**:Apache License 2.0 | **社区**:[Apache HugeGraph](https://hugegraph.apache.org/)
diff --git a/content/cn/docs/quickstart/hugegraph-ai/hugegraph-ml.md b/content/cn/docs/quickstart/hugegraph-ai/hugegraph-ml.md
index baf0481f0..a53281a0f 100644
--- a/content/cn/docs/quickstart/hugegraph-ai/hugegraph-ml.md
+++ b/content/cn/docs/quickstart/hugegraph-ai/hugegraph-ml.md
@@ -4,286 +4,110 @@ linkTitle: "HugeGraph-ML"
weight: 2
---
-HugeGraph-ML 将 HugeGraph 与流行的图学习库集成,支持直接在图数据上进行端到端的机器学习工作流。
-
-## 概述
-
-`hugegraph-ml` 提供了统一接口,用于将图神经网络和机器学习算法应用于存储在 HugeGraph 中的数据。它通过无缝转换 HugeGraph 数据到主流 ML 框架兼容格式,消除了复杂的数据导出/导入流程。
-
-### 核心功能
-
-- **直接 HugeGraph 集成**:无需手动导出即可直接从 HugeGraph 查询图数据
-- **21 种算法实现**:全面覆盖节点分类、图分类、嵌入和链接预测
-- **DGL 后端**:利用深度图库(DGL)进行高效训练
-- **端到端工作流**:从数据加载到模型训练和评估
-- **模块化任务**:可复用的常见 ML 场景任务抽象
+HugeGraph-ML 从 HugeGraph 读取图数据并转换为 DGL 图,供节点嵌入、节点分类和图分类等任务使用。模型实现位于 `hugegraph-ml/src/hugegraph_ml/models/`。
## 环境要求
-- **Python**:3.9+(独立模块)
-- **HugeGraph Server**:1.0+(推荐:1.5+)
-- **UV 包管理器**:0.7+(用于依赖管理)
+- Python 3.10 或更高版本
+- HugeGraph Server 1.0 或更高版本,推荐 1.5 及以上版本
+- `uv` 0.7 或更高版本
## 安装
-### 1. 启动 HugeGraph Server
-
-```bash
-# 方案一:Docker(推荐)
-docker run -itd --name=hugegraph -p 8080:8080 hugegraph/hugegraph
-
-# 方案二:二进制包
-# 参见 https://hugegraph.apache.org/docs/download/download/
-```
-
-### 2. 克隆并设置
-
```bash
git clone https://github.com/apache/hugegraph-ai.git
-cd hugegraph-ai/hugegraph-ml
-```
-
-### 3. 安装依赖
-
-```bash
-# uv sync 自动创建 .venv 并安装所有依赖
-uv sync
-
-# 激活虚拟环境
+cd hugegraph-ai
+uv sync --extra ml
source .venv/bin/activate
+cd hugegraph-ml/src
```
-### 4. 导航到源代码目录
-
-```bash
-cd ./src
-```
-
-> [!NOTE]
-> 所有示例均假定您在已激活的虚拟环境中。
-
-## 已实现算法
-
-HugeGraph-ML 目前实现了跨多个类别的 **21 种图机器学习算法**:
-
-### 节点分类(11 种算法)
-
-基于网络结构和特征预测图节点的标签。
+HugeGraph-ML 是根项目的路径依赖,但不属于 `uv` workspace members。应在仓库根目录选择 `ml` extra,不要在子目录建立另一套锁文件。
-| 算法 | 论文 | 描述 |
-|-----|------|------|
-| **GCN** | [Kipf & Welling, 2017](https://arxiv.org/abs/1609.02907) | 图卷积网络 |
-| **GAT** | [Veličković et al., 2018](https://arxiv.org/abs/1710.10903) | 图注意力网络 |
-| **GraphSAGE** | [Hamilton et al., 2017](https://arxiv.org/abs/1706.02216) | 归纳式表示学习 |
-| **APPNP** | [Klicpera et al., 2019](https://arxiv.org/abs/1810.05997) | 个性化 PageRank 传播 |
-| **AGNN** | [Thekumparampil et al., 2018](https://arxiv.org/abs/1803.03735) | 基于注意力的 GNN |
-| **ARMA** | [Bianchi et al., 2019](https://arxiv.org/abs/1901.01343) | 自回归移动平均滤波器 |
-| **DAGNN** | [Liu et al., 2020](https://arxiv.org/abs/2007.09296) | 深度自适应图神经网络 |
-| **DeeperGCN** | [Li et al., 2020](https://arxiv.org/abs/2006.07739) | 非常深的 GCN 架构 |
-| **GRAND** | [Feng et al., 2020](https://arxiv.org/abs/2005.11079) | 图随机神经网络 |
-| **JKNet** | [Xu et al., 2018](https://arxiv.org/abs/1806.03536) | 跳跃知识网络 |
-| **Cluster-GCN** | [Chiang et al., 2019](https://arxiv.org/abs/1905.07953) | 通过聚类实现可扩展 GCN 训练 |
+## 已实现模型
-### 图分类(2 种算法)
+当前 README 列出的模型如下:
-基于结构和节点特征对整个图进行分类。
+| 模型 | 主要用途 |
+|---|---|
+| AGNN、APPNP、ARMA、Cluster-GCN、DAGNN、DeeperGCN、GRAND、JKNet | 节点分类 |
+| BGNN、CARE-GNN | 欺诈检测 |
+| BGRL、DGI、GRACE | 表示学习 |
+| DiffPool | 图分类 |
+| GATNE、P-GNN、SEAL | 链接预测或网络嵌入 |
+| C&S | 预测结果校正与平滑 |
-| 算法 | 论文 | 描述 |
-|-----|------|------|
-| **DiffPool** | [Ying et al., 2018](https://arxiv.org/abs/1806.08804) | 可微分图池化 |
-| **GIN** | [Xu et al., 2019](https://arxiv.org/abs/1810.00826) | 图同构网络 |
+源码中还包含 `GIN` 图分类实现和供下游分类使用的 `MLPClassifier`。模型数量会随版本变化,以 `src/hugegraph_ml/models/` 为准。
-### 图嵌入(3 种算法)
+## DGI 节点嵌入示例
-学习用于下游任务的无监督节点表示。
-
-| 算法 | 论文 | 描述 |
-|-----|------|------|
-| **DGI** | [Veličković et al., 2019](https://arxiv.org/abs/1809.10341) | 深度图信息最大化(对比学习) |
-| **BGRL** | [Thakoor et al., 2021](https://arxiv.org/abs/2102.06514) | 自举图表示学习 |
-| **GRACE** | [Zhu et al., 2020](https://arxiv.org/abs/2006.04131) | 图对比学习 |
-
-### 链接预测(3 种算法)
-
-预测图中缺失或未来的连接。
-
-| 算法 | 论文 | 描述 |
-|-----|------|------|
-| **SEAL** | [Zhang & Chen, 2018](https://arxiv.org/abs/1802.09691) | 子图提取和标注 |
-| **P-GNN** | [You et al., 2019](http://proceedings.mlr.press/v97/you19b/you19b.pdf) | 位置感知 GNN |
-| **GATNE** | [Cen et al., 2019](https://arxiv.org/abs/1905.01669) | 属性多元异构网络嵌入 |
-
-### 欺诈检测(2 种算法)
-
-检测图中的异常节点(例如欺诈账户)。
-
-| 算法 | 论文 | 描述 |
-|-----|------|------|
-| **CARE-GNN** | [Dou et al., 2020](https://arxiv.org/abs/2008.08692) | 抗伪装 GNN |
-| **BGNN** | [Zheng et al., 2021](https://arxiv.org/abs/2101.08543) | 二部图神经网络 |
-
-### 后处理(1 种算法)
-
-通过标签传播改进预测。
-
-| 算法 | 论文 | 描述 |
-|-----|------|------|
-| **C&S** | [Huang et al., 2020](https://arxiv.org/abs/2010.13993) | 校正与平滑(预测优化) |
-
-## 使用示例
-
-### 示例 1:使用 DGI 进行节点嵌入
-
-使用深度图信息最大化(DGI)在 Cora 数据集上进行无监督节点嵌入。
-
-#### 步骤 1:导入数据集(如需)
+先把 DGL 的 Cora 数据集导入 HugeGraph:
```python
from hugegraph_ml.utils.dgl2hugegraph_utils import import_graph_from_dgl
-# 从 DGL 导入 Cora 数据集到 HugeGraph
import_graph_from_dgl("cora")
```
-#### 步骤 2:转换图数据
+读取图并训练 DGI:
```python
from hugegraph_ml.data.hugegraph2dgl import HugeGraph2DGL
-
-# 将 HugeGraph 数据转换为 DGL 格式
-hg2d = HugeGraph2DGL()
-graph = hg2d.convert_graph(vertex_label="CORA_vertex", edge_label="CORA_edge")
-```
-
-#### 步骤 3:初始化模型
-
-```python
from hugegraph_ml.models.dgi import DGI
-
-# 创建 DGI 模型
-model = DGI(n_in_feats=graph.ndata["feat"].shape[1])
-```
-
-#### 步骤 4:训练并生成嵌入
-
-```python
+from hugegraph_ml.models.mlp import MLPClassifier
+from hugegraph_ml.tasks.node_classify import NodeClassify
from hugegraph_ml.tasks.node_embed import NodeEmbed
-# 训练模型并生成节点嵌入
-node_embed_task = NodeEmbed(graph=graph, model=model)
-embedded_graph = node_embed_task.train_and_embed(
+hg2d = HugeGraph2DGL()
+graph = hg2d.convert_graph(
+ vertex_label="CORA_vertex",
+ edge_label="CORA_edge",
+)
+
+embed_model = DGI(n_in_feats=graph.ndata["feat"].shape[1])
+embed_task = NodeEmbed(graph=graph, model=embed_model)
+embedded_graph = embed_task.train_and_embed(
add_self_loop=True,
n_epochs=300,
- patience=30
+ patience=30,
)
-```
-
-#### 步骤 5:下游任务(节点分类)
-```python
-from hugegraph_ml.models.mlp import MLPClassifier
-from hugegraph_ml.tasks.node_classify import NodeClassify
-
-# 使用嵌入进行节点分类
-model = MLPClassifier(
+classifier = MLPClassifier(
n_in_feat=embedded_graph.ndata["feat"].shape[1],
- n_out_feat=embedded_graph.ndata["label"].unique().shape[0]
+ n_out_feat=embedded_graph.ndata["label"].unique().shape[0],
)
-node_clf_task = NodeClassify(graph=embedded_graph, model=model)
-node_clf_task.train(lr=1e-3, n_epochs=400, patience=40)
-print(node_clf_task.evaluate())
+classify_task = NodeClassify(graph=embedded_graph, model=classifier)
+classify_task.train(lr=1e-3, n_epochs=400, patience=40)
+print(classify_task.evaluate())
```
-**预期输出:**
-```python
-{'accuracy': 0.82, 'loss': 0.5714246034622192}
-```
+完整脚本是 `hugegraph-ml/src/hugegraph_ml/examples/dgi_example.py`。
-**完整示例**:参见 [dgi_example.py](https://github.com/apache/hugegraph-ai/blob/main/hugegraph-ml/src/hugegraph_ml/examples/dgi_example.py)
-
-### 示例 2:使用 GRAND 进行节点分类
-
-使用 GRAND 模型直接对节点进行分类(无需单独的嵌入步骤)。
+## GRAND 节点分类示例
```python
from hugegraph_ml.data.hugegraph2dgl import HugeGraph2DGL
from hugegraph_ml.models.grand import GRAND
from hugegraph_ml.tasks.node_classify import NodeClassify
-# 加载图
hg2d = HugeGraph2DGL()
-graph = hg2d.convert_graph(vertex_label="CORA_vertex", edge_label="CORA_edge")
-
-# 初始化 GRAND 模型
+graph = hg2d.convert_graph(
+ vertex_label="CORA_vertex",
+ edge_label="CORA_edge",
+)
model = GRAND(
n_in_feats=graph.ndata["feat"].shape[1],
- n_out_feats=graph.ndata["label"].unique().shape[0]
-)
-
-# 训练和评估
-node_clf_task = NodeClassify(graph=graph, model=model)
-node_clf_task.train(lr=1e-2, n_epochs=1500, patience=100)
-print(node_clf_task.evaluate())
-```
-
-**完整示例**:参见 [grand_example.py](https://github.com/apache/hugegraph-ai/blob/main/hugegraph-ml/src/hugegraph_ml/examples/grand_example.py)
-
-## 核心组件
-
-### HugeGraph2DGL 转换器
-
-无缝将 HugeGraph 数据转换为 DGL 图格式:
-
-```python
-from hugegraph_ml.data.hugegraph2dgl import HugeGraph2DGL
-
-hg2d = HugeGraph2DGL()
-graph = hg2d.convert_graph(
- vertex_label="person", # 要提取的顶点标签
- edge_label="knows", # 要提取的边标签
- directed=False # 图的方向性
+ n_out_feats=graph.ndata["label"].unique().shape[0],
)
+task = NodeClassify(graph, model)
+task.train(lr=1e-2, weight_decay=5e-4, n_epochs=2000, patience=100)
+print(task.evaluate())
```
-### 任务抽象
-
-用于常见 ML 工作流的可复用任务对象:
-
-| 任务 | 类 | 用途 |
-|-----|-----|------|
-| 节点嵌入 | `NodeEmbed` | 生成无监督节点嵌入 |
-| 节点分类 | `NodeClassify` | 预测节点标签 |
-| 图分类 | `GraphClassify` | 预测图级标签 |
-| 链接预测 | `LinkPredict` | 预测缺失边 |
-
-## 最佳实践
-
-1. **从小数据集开始**:在扩展之前先在小图(例如 Cora、Citeseer)上测试您的流程
-2. **使用早停**:设置 `patience` 参数以避免过拟合
-3. **调整超参数**:根据数据集大小调整学习率、隐藏维度和周期数
-4. **监控 GPU 内存**:大图可能需要批量训练(例如 Cluster-GCN)
-5. **验证 Schema**:确保顶点/边标签与您的 HugeGraph schema 匹配
-
-## 故障排除
-
-| 问题 | 解决方案 |
-|-----|---------|
-| 连接 HugeGraph "Connection refused" | 验证服务器是否在 8080 端口运行 |
-| CUDA 内存不足 | 减少批大小或使用仅 CPU 模式 |
-| 模型收敛问题 | 尝试不同的学习率(1e-2、1e-3、1e-4) |
-| DGL 的 ImportError | 运行 `uv sync` 重新安装依赖 |
-
-## 贡献
-
-添加新算法:
-
-1. 在 `src/hugegraph_ml/models/your_model.py` 创建模型文件
-2. 继承基础模型类并实现 `forward()` 方法
-3. 在 `src/hugegraph_ml/examples/` 添加示例脚本
-4. 更新此文档并添加算法详情
+完整脚本是 `hugegraph-ml/src/hugegraph_ml/examples/grand_example.py`。
-## 另见
+## 排查问题
-- [HugeGraph-AI 概述](../_index.md) - 完整 AI 生态系统
-- [HugeGraph-LLM](./hugegraph-llm.md) - RAG 和知识图谱构建
-- [GitHub 仓库](https://github.com/apache/hugegraph-ai/tree/main/hugegraph-ml) - 源代码和示例
+- 连接失败:检查 HugeGraph Server 地址、端口和认证信息。
+- Schema 不匹配:示例默认使用 `CORA_vertex` 和 `CORA_edge`,自有数据需要传入实际标签。
+- DGL 或 PyTorch 导入失败:回到仓库根目录重新执行 `uv sync --extra ml`,并确认当前 Python 来自根目录 `.venv`。
diff --git a/content/cn/docs/quickstart/hugegraph-ai/quick_start.md b/content/cn/docs/quickstart/hugegraph-ai/quick_start.md
index da148f7e7..d454e9d66 100644
--- a/content/cn/docs/quickstart/hugegraph-ai/quick_start.md
+++ b/content/cn/docs/quickstart/hugegraph-ai/quick_start.md
@@ -1,252 +1,93 @@
---
-title: "GraphRAG UI Details"
-linkTitle: "GraphRAG UI Details"
-weight: 4
+title: "HugeGraph-LLM 使用流程"
+linkTitle: "LLM 使用流程"
+weight: 3
---
-> 接续[主文档](../)介绍基础 UI 功能及详情,欢迎随时更新和改进,谢谢
+本文说明 HugeGraph-LLM Web 页面的处理流程。服务启动方式见 [HugeGraph-LLM](./hugegraph-llm.md)。
-# 1. 项目核心逻辑
+## 1. 构建 RAG 索引
-## 构建 RAG 索引职责:
+第一个标签页负责两类索引:
-- 文本分割和向量化
-- 从文本中提取图(构建知识图谱)并对顶点进行向量化
-
-## (Graph)RAG 和用户功能职责:
-
-- 根据查询从构建的知识图谱和向量数据库中检索相关内容,用于补充提示词。
-
-# 2. (处理流程)构建 RAG 索引
-
-从文本构建知识图谱、分块向量和图顶点向量。
-
-
+- 将文档切分后写入 chunk 向量索引。
+- 按 Schema 从文档抽取顶点和边,写入 HugeGraph,并维护顶点向量索引。
```mermaid
-graph TD;
- A[原始文本] --> B[文本分割]
- B --> C[向量化]
- C --> D[存储到向量数据库]
-
- A --> F[文本分割]
- F --> G[LLM 基于 schema 和分割后的文本提取图]
- G --> H[将图存储到图数据库,\n自动对顶点进行向量化\n并存储到向量数据库]
-
- I[从图数据库检索顶点] --> J[对顶点进行向量化并存储到向量数据库\n注意:增量更新]
-
+flowchart TD
+ A[输入文档] --> B[文本切分]
+ B --> C[生成 chunk 向量]
+ C --> D[写入向量索引]
+ B --> E[LLM 按 Schema 抽取顶点和边]
+ E --> F[写入 HugeGraph]
+ F --> G[更新顶点向量索引]
```
-### 四个输入字段:
-
-- **文档:** 输入文本
-- **Schema:** 图的 schema,可以以 JSON 格式的 schema 提供,或提供图名称(如果数据库中已存在)。
-- **图提取提示词头部:** 提示词的头部
-- **输出:** 显示结果
-
-### 按钮:
-
-- **获取 RAG 信息**
- - **获取向量索引信息:** 检索向量索引信息
- - **获取图索引信息:** 检索图索引信息
-
-- **清除 RAG 数据**
- - **清除分块向量索引:** 清除分块向量
- - **清除图顶点向量索引:** 清除图顶点向量
- - **清除图数据:** 清除图数据
-- **导入到向量:** 将文档中的文本转换为向量(需要先对文本进行分块,然后将分块转换为向量)
-- **提取图数据 (1):** 基于 Schema,使用图提取提示词头部和分块内容作为提示词,从文档中提取图数据
-- **加载到图数据库 (2):** 将提取的图数据存储到数据库(自动调用更新顶点嵌入以将向量存储到向量数据库)
-- **更新顶点嵌入:** 将图顶点转换为向量
-
-### 执行流程:
-
-1. 在**文档**字段中输入文本。
-2. 点击**导入到向量**按钮,对文本进行分割和向量化,存储到向量数据库。
-3. 在 Schema 字段中输入图的 **Schema**。
-4. 点击**提取图数据 (1)** 按钮,将文本提取为图。
-5. 点击**加载到图数据库 (2)** 按钮,将提取的图存储到图数据库(这会自动调用**更新顶点嵌入**以将向量存储到向量数据库)。
-6. 点击**更新顶点嵌入**按钮,将图顶点向量化并存储到向量数据库。
-
-# 3. (处理流程)(Graph)RAG 和用户功能
+页面包含文档、Schema、抽取提示词和结果区域。常用操作有:
-前一个模块中的**导入到向量**按钮将文本(分块)转换为向量,**更新顶点嵌入**按钮将图顶点转换为向量。这些向量分别存储,用于在本模块中补充查询(答案生成)的上下文。换句话说,前一个模块为 RAG 准备数据(向量化),而本模块执行 RAG。
+1. `Import into Vector`:切分文档并建立 chunk 向量索引。
+2. `Extract Graph Data`:按 Schema 抽取图数据。
+3. `Load into GraphDB`:把抽取结果写入 HugeGraph,并更新顶点向量。
+4. `Update Vid Embedding`:重新生成顶点向量。
-本模块包含两个部分:
+页面还可以查看或清除 chunk 索引、顶点索引和图数据。清除操作会删除已有数据,执行前先确认当前图和索引是否仍被其他查询使用。
-- **HugeGraph RAG 查询**
-- **(批量)回测**
+## 2. GraphRAG 查询
-第一部分处理单个查询,第二部分同时处理多个查询。以下是第一部分的说明。
+第二个标签页提供四种回答范围:
-
+- 直接使用 LLM 回答。
+- 只使用 chunk 向量召回。
+- 只使用图召回。
+- 合并图召回与向量召回。
```mermaid
-graph TD;
- A[问题] --> B[将问题向量化并在向量数据库中搜索最相似的分块]
-
- A --> F[使用 LLM 提取关键词]
- F --> G[在图数据库中使用关键词精确匹配顶点;\n在向量数据库中执行模糊匹配(图顶点)]
- G --> H[使用匹配的顶点和查询通过 LLM 生成 Gremlin 查询]
- H --> I[执行 Gremlin 查询;如果成功则完成;如果失败则回退到 BFS]
-
- B --> J[对结果排序]
- I --> J
- J --> K[生成答案]
+flowchart TD
+ Q[问题] --> V[查询 chunk 向量索引]
+ Q --> K[抽取关键词]
+ K --> M[匹配图顶点]
+ M --> T[生成并执行 Gremlin]
+ T -->|失败| B[BFS 图遍历回退]
+ T --> R[整理图结果]
+ B --> R
+ V --> S[合并与重排序]
+ R --> S
+ S --> A[生成答案]
```
-### 输入字段:
+图召回先用关键词精确匹配 HugeGraph 顶点,找不到时再用顶点向量做近似匹配。匹配结果会进入 Text2Gremlin;生成或执行失败时,流程可以回退到预定义的图遍历。
-- **问题:** 输入查询
-- **查询提示词:** 用于向 LLM 提出最终问题的提示词模板
-- **关键词提取提示词:** 用于从问题中提取关键词的提示词模板
-- **模板数量:** < 0 表示禁用 text2gql;= 0 表示不使用模板(零样本);> 0 表示使用指定数量的模板
+`Template Num` 控制 Text2Gremlin 使用的示例数量。小于等于 0 表示不提供模板,大于 0 表示从示例索引中取相应数量的相近模板。
-### 查询范围选择:
+## 3. Text2Gremlin
-- **基础 LLM 答案:** 不使用 RAG 功能
-- **仅向量答案:** 仅使用基于向量的检索(在向量数据库中查询分块向量)
-- **仅图答案:** 仅使用基于图的检索(在向量数据库中查询图顶点向量和图数据库)
-- **图-向量答案:** 同时使用基于图和基于向量的检索
+第三个标签页把自然语言转换成 Gremlin:
-
+1. 读取当前图的 Schema。
+2. 从示例向量索引取回相近的自然语言与 Gremlin 对。
+3. 把问题、Schema、示例和已匹配顶点填入提示词。
+4. 调用 LLM 生成 Gremlin,并按所选输出类型决定是否执行。
-### 执行流程:
+自定义提示词必须包含 `{query}`、`{schema}`、`{example}` 和 `{vertices}`。缺少任一占位符时,REST API 会拒绝请求。
-#### **仅图答案:**
+## 4. 图工具与管理工具
-- 使用**关键词提取提示词**从**问题**中提取关键词。
+`Graph Tools` 标签页用于直接执行图操作。`Admin Tools` 提供日志等管理能力。启用登录后,页面和 API 需要使用 `USER_TOKEN`;日志接口还要求单独配置安全的 `ADMIN_TOKEN`。
-
+## 5. 提示词语言
-- 使用提取的关键词:
- - 首先,在图数据库中进行精确匹配。
- - 如果未找到匹配,在向量数据库(图顶点向量)中进行模糊匹配以检索相关顶点。
+在 `hugegraph-llm/.env` 中设置:
-- **text2gql:** 调用 text2gql 相关接口,使用匹配的顶点作为实体,将**问题**转换为 Gremlin 查询并在图数据库中执行。
-
-- **BFS:** 如果 text2gql 失败(LLM 生成的查询可能无效),回退到使用预定义的**Gremlin 查询模板**执行图查询(本质上是 BFS 遍历)。
-
-#### **仅向量答案:**
-
-- 将**查询**转换为向量。
-- 在向量数据库的**分块向量**数据集中搜索最相似的内容。
-
-#### **排序和答案生成:**
-
-- 执行检索后,对搜索结果进行排序以构建最终的**提示词**。
-- 基于不同的提示词配置生成答案,并在不同的输出字段中显示:
- - **基础 LLM 答案**
- - **仅向量答案**
- - **仅图答案**
- - **图-向量答案**
-
-
-
-# 4. (处理流程)Text2Gremlin
-
-将自然语言查询转换为 Gremlin 查询。
-
-本模块包含两个部分:
-
-- **构建向量模板索引(可选):** 将示例文件中的查询/gremlin 对进行向量化并存储到向量数据库中,用于生成 Gremlin 查询时参考。
-- **自然语言转 Gremlin:** 将自然语言查询转换为 Gremlin 查询。
-
-第一部分较为简单,因此重点介绍第二部分。
-
-
-
-```mermaid
-graph TD;
- A[Gremlin 对文件] --> C[向量化查询]
- C --> D[存储到向量数据库]
-
- F[自然语言查询] --> G[在向量数据库中搜索最相似的查询\n(如果向量数据库中不存在 Gremlin 对,\n将自动使用默认文件进行向量化)\n并检索对应的 Gremlin]
- G --> H[将匹配的对添加到提示词中\n并使用 LLM 生成与自然语言查询\n对应的 Gremlin]
-```
-
-### 第二部分的输入字段:
-
-- **自然语言查询:** 输入要转换为 Gremlin 的自然语言文本。
-
-
-
-- **Schema:** 输入图 schema。
-
-### 执行流程:
-
-1. 在**自然语言查询**字段中输入**查询**(自然语言)。
-2. 在**Schema**字段中输入**图 schema**。
-3. 点击**Text2Gremlin**按钮,执行以下逻辑:
- 1. 将**查询**转换为向量。
- 2. 构建**提示词**:
- - 检索**图 schema**。
- - 在向量数据库中查询示例向量,检索与输入查询相似的查询-gremlin 对(如果向量数据库中缺少示例,将自动使用**resources**文件夹中的示例进行初始化)。
-
-
-
- - 使用构建的提示词生成 Gremlin 查询。
-
-# 5. 图工具
-
-输入 Gremlin 查询以执行相应操作。
-
-# 6. 语言切换 (v1.5.0+)
-
-HugeGraph-LLM 支持双语提示词,以提高跨语言的准确性。
-
-### 在英文和中文之间切换
-
-系统语言影响:
-- **系统提示词**:LLM 使用的内部提示词
-- **关键词提取**:特定语言的提取逻辑
-- **答案生成**:响应格式和风格
-
-#### 配置方法一:环境变量
-
-编辑您的 `.env` 文件:
-
-```bash
-# 英文提示词(默认)
+```properties
+# 英文提示词
LANGUAGE=EN
# 中文提示词
LANGUAGE=CN
```
-更改语言设置后重启服务。
-
-#### 配置方法二:Web UI(动态)
-
-如果您的部署中可用,使用 Web UI 中的设置面板切换语言,无需重启:
-
-1. 导航到**设置**或**配置**选项卡
-2. 选择**语言**:`EN` 或 `CN`
-3. 点击**保存** - 更改立即生效
+修改后重启服务。该配置选择内置提示词语言,不会自动翻译输入文档,也不是 `/rag` 请求体字段。
-#### 特定语言的行为
-
-| 语言 | 关键词提取 | 答案风格 | 使用场景 |
-|-----|-----------|---------|---------|
-| `EN` | 英文 NLP 模型 | 专业、简洁 | 国际用户、英文文档 |
-| `CN` | 中文 NLP 模型 | 自然的中文表达 | 中文用户、中文文档 |
-
-> [!TIP]
-> 将 `LANGUAGE` 设置与您的主要文档语言匹配,以获得最佳 RAG 准确性。
-
-### REST API 语言覆盖
-
-使用 REST API 时,您可以为每个请求指定自定义提示词,以覆盖默认语言设置:
-
-```bash
-curl -X POST http://localhost:8001/rag \
- -H "Content-Type: application/json" \
- -d '{
- "query": "告诉我关于阿尔·帕西诺的信息",
- "graph_only": true,
- "keywords_extract_prompt": "请从以下文本中提取关键实体...",
- "answer_prompt": "请根据以下上下文回答问题..."
- }'
-```
+## 6. REST 调用
-完整参数详情请参阅 [REST API 参考](./rest-api.md)。
+Web 页面和 REST API 使用同一套流程。需要程序集成时使用 `/rag`、`/rag/graph`、`/graph/extract` 和 `/text2gremlin`;请求结构见 [REST API](./rest-api.md)。
diff --git a/content/cn/docs/quickstart/hugegraph-ai/rest-api.md b/content/cn/docs/quickstart/hugegraph-ai/rest-api.md
index 349ff4c06..b0d301ee0 100644
--- a/content/cn/docs/quickstart/hugegraph-ai/rest-api.md
+++ b/content/cn/docs/quickstart/hugegraph-ai/rest-api.md
@@ -1,428 +1,231 @@
---
-title: "REST API 参考"
+title: "HugeGraph-LLM REST API"
linkTitle: "REST API"
weight: 5
---
-HugeGraph-LLM 提供 REST API 端点,用于将 RAG 和 Text2Gremlin 功能集成到您的应用程序中。
+HugeGraph-LLM 演示进程同时提供 Web 页面和 REST API。默认地址是 `http://localhost:8001`:
-## 基础 URL
-
-```
-http://localhost:8001
-```
-
-启动服务时更改主机/端口:
```bash
-python -m hugegraph_llm.demo.rag_demo.app --host 127.0.0.1 --port 8001
+cd hugegraph-ai/hugegraph-llm
+python -m hugegraph_llm.demo.rag_demo.app \
+ --host 127.0.0.1 \
+ --port 8001
```
## 认证
-目前 API 支持可选的基于令牌的认证:
-
-```bash
-# 在 .env 中启用认证
-ENABLE_LOGIN=true
-USER_TOKEN=your-user-token
-ADMIN_TOKEN=your-admin-token
-```
+在 `.env` 中启用登录:
-在请求头中传递令牌:
-```bash
-Authorization: Bearer <token>
+```properties
+ENABLE_LOGIN=True
+USER_TOKEN=replace-with-a-secret
```
----
-
-## RAG 端点
-
-### 1. 完整 RAG 查询
-
-**POST** `/rag`
-
-执行完整的 RAG 工作流,包括关键词提取、图检索、向量搜索、重排序和答案生成。
-
-#### 请求体
+启用后,请求需要 Bearer token:
-```json
-{
- "query": "给我讲讲阿尔·帕西诺的电影",
- "raw_answer": false,
- "vector_only": false,
- "graph_only": true,
- "graph_vector_answer": false,
- "graph_ratio": 0.5,
- "rerank_method": "cohere",
- "near_neighbor_first": false,
- "gremlin_tmpl_num": 5,
- "max_graph_items": 30,
- "topk_return_results": 20,
- "vector_dis_threshold": 0.9,
- "topk_per_keyword": 1,
- "custom_priority_info": "",
- "answer_prompt": "",
- "keywords_extract_prompt": "",
- "gremlin_prompt": "",
- "client_config": {
- "url": "127.0.0.1:8080",
- "graph": "hugegraph",
- "user": "admin",
- "pwd": "admin",
- "gs": ""
- }
-}
+```http
+Authorization: Bearer replace-with-a-secret
```
-**参数说明:**
-
-| 字段 | 类型 | 必需 | 默认值 | 描述 |
-|-----|------|------|-------|------|
-| `query` | string | 是 | - | 用户的自然语言问题 |
-| `raw_answer` | boolean | 否 | false | 返回 LLM 答案而不检索 |
-| `vector_only` | boolean | 否 | false | 仅使用向量搜索(无图) |
-| `graph_only` | boolean | 否 | false | 仅使用图检索(无向量) |
-| `graph_vector_answer` | boolean | 否 | false | 结合图和向量结果 |
-| `graph_ratio` | float | 否 | 0.5 | 图与向量结果的比例(0-1) |
-| `rerank_method` | string | 否 | "" | 重排序器:"cohere"、"siliconflow"、"" |
-| `near_neighbor_first` | boolean | 否 | false | 优先选择直接邻居 |
-| `gremlin_tmpl_num` | integer | 否 | 5 | 尝试的 Gremlin 模板数量 |
-| `max_graph_items` | integer | 否 | 30 | 图检索的最大项数 |
-| `topk_return_results` | integer | 否 | 20 | 重排序后的 Top-K |
-| `vector_dis_threshold` | float | 否 | 0.9 | 向量相似度阈值(0-1) |
-| `topk_per_keyword` | integer | 否 | 1 | 每个关键词的 Top-K 向量 |
-| `custom_priority_info` | string | 否 | "" | 要优先考虑的自定义上下文 |
-| `answer_prompt` | string | 否 | "" | 自定义答案生成提示词 |
-| `keywords_extract_prompt` | string | 否 | "" | 自定义关键词提取提示词 |
-| `gremlin_prompt` | string | 否 | "" | 自定义 Gremlin 生成提示词 |
-| `client_config` | object | 否 | null | 覆盖图连接设置 |
-
-#### 响应
+## RAG
-```json
-{
- "query": "给我讲讲阿尔·帕西诺的电影",
- "graph_only": {
- "answer": "阿尔·帕西诺主演了《教父》(1972 年),由弗朗西斯·福特·科波拉执导...",
- "context": ["《教父》是 1972 年的犯罪电影...", "..."],
- "graph_paths": ["..."],
- "keywords": ["阿尔·帕西诺", "电影"]
- }
-}
-```
+### `POST /rag`
-#### 示例(curl)
+根据开关返回一种或多种回答。未显式指定时只启用 `graph_only`。
```bash
curl -X POST http://localhost:8001/rag \
- -H "Content-Type: application/json" \
+ -H 'Content-Type: application/json' \
-d '{
- "query": "给我讲讲阿尔·帕西诺",
+ "query": "Al Pacino 出演过哪些电影?",
+ "raw_answer": false,
+ "vector_only": false,
"graph_only": true,
- "max_graph_items": 30
+ "graph_vector_answer": false,
+ "max_graph_items": 30,
+ "topk_return_results": 20,
+ "vector_dis_threshold": 0.9,
+ "topk_per_keyword": 1,
+ "gremlin_tmpl_num": 1,
+ "client_config": {
+ "url": "127.0.0.1:8080",
+ "graph": "hugegraph",
+ "user": "admin",
+ "pwd": "admin",
+ "gs": "DEFAULT"
+ }
}'
```
-### 2. 仅图检索
-
-**POST** `/rag/graph`
-
-检索图上下文而不生成答案。用于调试或自定义处理。
-
-#### 请求体
+响应只包含已启用的回答字段:
```json
{
- "query": "阿尔·帕西诺的电影",
- "max_graph_items": 30,
- "topk_return_results": 20,
- "vector_dis_threshold": 0.9,
- "topk_per_keyword": 1,
- "gremlin_tmpl_num": 5,
- "rerank_method": "cohere",
- "near_neighbor_first": false,
- "custom_priority_info": "",
- "gremlin_prompt": "",
- "get_vertex_only": false,
- "client_config": {
- "url": "127.0.0.1:8080",
- "graph": "hugegraph",
- "user": "admin",
- "pwd": "admin",
- "gs": ""
- }
+ "query": "Al Pacino 出演过哪些电影?",
+ "graph_only": "..."
}
```
-**额外参数:**
-
-| 字段 | 类型 | 默认值 | 描述 |
-|-----|------|-------|------|
-| `get_vertex_only` | boolean | false | 仅返回顶点 ID,不返回完整详情 |
+其他可选参数包括 `graph_ratio`、`rerank_method`(`bleu` 或 `reranker`)、`near_neighbor_first`、`custom_priority_info`,以及三类自定义提示词。
-#### 响应
-
-```json
-{
- "graph_recall": {
- "query": "阿尔·帕西诺的电影",
- "keywords": ["阿尔·帕西诺", "电影"],
- "match_vids": ["1:阿尔·帕西诺", "2:教父"],
- "graph_result_flag": true,
- "gremlin": "g.V('1:阿尔·帕西诺').outE().inV().limit(30)",
- "graph_result": [
- {"id": "1:阿尔·帕西诺", "label": "person", "properties": {"name": "阿尔·帕西诺"}},
- {"id": "2:教父", "label": "movie", "properties": {"title": "教父"}}
- ],
- "vertex_degree_list": [5, 12]
- }
-}
-```
+### `POST /rag/graph`
-#### 示例(curl)
+只执行图召回,不生成最终自然语言答案:
```bash
curl -X POST http://localhost:8001/rag/graph \
- -H "Content-Type: application/json" \
+ -H 'Content-Type: application/json' \
-d '{
- "query": "阿尔·帕西诺",
- "max_graph_items": 30,
- "get_vertex_only": false
+ "query": "Al Pacino 出演过哪些电影?",
+ "get_vertex_only": false,
+ "gremlin_tmpl_num": 1,
+ "rerank_method": "bleu"
}'
```
----
+响应的 `graph_recall` 可能包含 `keywords`、`match_vids`、`gremlin`、`graph_result` 和 `vertex_degree_list`。设置 `get_vertex_only=true` 可在顶点匹配后提前返回。
-## Text2Gremlin 端点
+## 图抽取
-### 3. 自然语言转 Gremlin
+### `POST /graph/extract`
-**POST** `/text2gremlin`
+使用内联 Schema 时不会连接 HugeGraph:
-将自然语言查询转换为可执行的 Gremlin 命令。
+```bash
+curl -X POST http://localhost:8001/graph/extract \
+ -H 'Content-Type: application/json' \
+ -d '{
+ "texts": ["Alice 在 Acme 工作。"],
+ "schema": {
+ "vertexlabels": [
+ {"name": "person", "properties": ["name"]},
+ {"name": "company", "properties": ["name"]}
+ ],
+ "edgelabels": [
+ {
+ "name": "works_at",
+ "source_label": "person",
+ "target_label": "company",
+ "properties": []
+ }
+ ]
+ },
+ "language": "zh",
+ "split_type": "sentence",
+ "include_meta": true
+ }'
+```
+
+`texts` 可以是字符串或字符串数组。`language` 可选 `zh`、`en`,`split_type` 可选 `document`、`paragraph`、`sentence`。
-#### 请求体
+若 `schema` 传现有图名,必须同时传入 `client_config`,且 `client_config.graph` 必须和图名相同:
```json
{
- "query": "查找所有由弗朗西斯·福特·科波拉执导的电影",
- "example_num": 5,
- "gremlin_prompt": "",
- "output_types": ["GREMLIN", "RESULT"],
+ "texts": "Alice 在 Acme 工作。",
+ "schema": "hugegraph",
"client_config": {
- "url": "127.0.0.1:8080",
"graph": "hugegraph",
"user": "admin",
"pwd": "admin",
- "gs": ""
+ "gs": "DEFAULT"
}
}
```
-**参数说明:**
+成功响应固定包含 `status`、`result.vertices`、`result.edges`、`warnings` 和 `meta`。
-| 字段 | 类型 | 必需 | 默认值 | 描述 |
-|-----|------|------|-------|------|
-| `query` | string | 是 | - | 自然语言查询 |
-| `example_num` | integer | 否 | 5 | 使用的示例模板数量 |
-| `gremlin_prompt` | string | 否 | "" | Gremlin 生成的自定义提示词 |
-| `output_types` | array | 否 | null | 输出类型:["GREMLIN", "RESULT", "CYPHER"] |
-| `client_config` | object | 否 | null | 图连接覆盖 |
+## Text2Gremlin
-**输出类型:**
-- `GREMLIN`:生成的 Gremlin 查询
-- `RESULT`:图的执行结果
-- `CYPHER`:Cypher 查询(如果请求)
-
-#### 响应
-
-```json
-{
- "gremlin": "g.V().has('person','name','弗朗西斯·福特·科波拉').out('directed').hasLabel('movie').values('title')",
- "result": [
- "教父",
- "教父 2",
- "现代启示录"
- ]
-}
-```
-
-#### 示例(curl)
+### `POST /text2gremlin`
```bash
curl -X POST http://localhost:8001/text2gremlin \
- -H "Content-Type: application/json" \
+ -H 'Content-Type: application/json' \
-d '{
- "query": "查找所有由弗朗西斯·福特·科波拉执导的电影",
- "output_types": ["GREMLIN", "RESULT"]
+ "query": "查找所有 person 顶点",
+ "example_num": 1,
+ "output_types": ["template_gremlin", "template_execution_result"]
}'
```
----
-
-## 配置端点
+`output_types` 可包含:
-### 4. 更新图连接
+- `match_result`
+- `template_gremlin`
+- `raw_gremlin`
+- `template_execution_result`
+- `raw_execution_result`
-**POST** `/config/graph`
+省略该字段时默认只返回 `template_gremlin`;传空数组表示由实现返回全部输出。自定义 `gremlin_prompt` 必须包含 `{query}`、`{schema}`、`{example}` 和 `{vertices}`。
-动态更新 HugeGraph 连接设置。
+## 运行时配置
-#### 请求体
+### `POST /config/graph`
```json
{
"url": "127.0.0.1:8080",
- "name": "hugegraph",
+ "graph": "hugegraph",
"user": "admin",
"pwd": "admin",
- "gs": ""
+ "gs": "DEFAULT"
}
```
-#### 响应
-
-```json
-{
- "status_code": 201,
- "message": "图配置更新成功"
-}
-```
-
-### 5. 更新 LLM 配置
-
-**POST** `/config/llm`
+### `POST /config/llm` 与 `POST /config/embedding`
-运行时更新聊天/提取 LLM 设置。
-
-#### 请求体(OpenAI)
+两个端点使用同一个请求模型。OpenAI 或 LiteLLM 示例:
```json
{
"llm_type": "openai",
- "api_key": "sk-your-api-key",
+ "api_key": "your-key",
"api_base": "https://api.openai.com/v1",
- "language_model": "gpt-4o-mini",
- "max_tokens": 4096
+ "language_model": "gpt-4.1-mini",
+ "max_tokens": "4096"
}
```
-#### 请求体(Ollama)
+Ollama 请求仍要提供公共字段;`api_key` 和 `api_base` 可传空字符串:
```json
{
"llm_type": "ollama/local",
+ "api_key": "",
+ "api_base": "",
+ "language_model": "qwen2.5:7b",
"host": "127.0.0.1",
- "port": 11434,
- "language_model": "llama3.1:8b"
-}
-```
-
-### 6. 更新嵌入配置
-
-**POST** `/config/embedding`
-
-更新嵌入模型设置。
-
-#### 请求体
-
-```json
-{
- "llm_type": "openai",
- "api_key": "sk-your-api-key",
- "api_base": "https://api.openai.com/v1",
- "language_model": "text-embedding-3-small"
-}
-```
-
-### 7. 更新 Reranker 配置
-
-**POST** `/config/rerank`
-
-配置重排序器设置。
-
-#### 请求体(Cohere)
-
-```json
-{
- "reranker_type": "cohere",
- "api_key": "your-cohere-key",
- "reranker_model": "rerank-multilingual-v3.0",
- "cohere_base_url": "https://api.cohere.com/v1/rerank"
+ "port": "11434"
}
```
-#### 请求体(SiliconFlow)
+### `POST /config/rerank`
```json
{
"reranker_type": "siliconflow",
- "api_key": "your-siliconflow-key",
- "reranker_model": "BAAI/bge-reranker-v2-m3"
+ "reranker_model": "BAAI/bge-reranker-v2-m3",
+ "api_key": "your-key"
}
```
----
+`reranker_type` 可选 `cohere`、`siliconflow`。Cohere 还可以传 `cohere_base_url`。
+
+这些配置端点会改动进程当前配置,并可能同步到 `.env`。`/rag`、`/rag/graph` 和 `/text2gremlin` 的 `client_config` 只在单次请求期间覆盖 HugeGraph 连接;当前实现仍会临时改动进程全局设置,不适合用不同连接并发发起长请求。
-## 错误响应
+## 日志
-所有端点返回标准 HTTP 状态码:
+### `POST /logs`
-| 代码 | 含义 |
-|-----|------|
-| 200 | 成功 |
-| 201 | 已创建(配置已更新) |
-| 400 | 错误请求(无效参数) |
-| 500 | 内部服务器错误 |
-| 501 | 未实现 |
+该接口要求 `.env` 中的 `ADMIN_TOKEN` 已改成安全值。请求体示例:
-错误响应格式:
```json
{
- "detail": "描述错误的消息"
-}
-```
-
----
-
-## Python 客户端示例
-
-```python
-import requests
-
-BASE_URL = "http://localhost:8001"
-
-# 1. 配置图连接
-graph_config = {
- "url": "127.0.0.1:8080",
- "name": "hugegraph",
- "user": "admin",
- "pwd": "admin"
+ "admin_token": "replace-with-an-admin-secret",
+ "log_file": "llm-server.log"
}
-requests.post(f"{BASE_URL}/config/graph", json=graph_config)
-
-# 2. 执行 RAG 查询
-rag_request = {
- "query": "给我讲讲阿尔·帕西诺",
- "graph_only": True,
- "max_graph_items": 30
-}
-response = requests.post(f"{BASE_URL}/rag", json=rag_request)
-print(response.json())
-
-# 3. 从自然语言生成 Gremlin
-text2gql_request = {
- "query": "查找所有与阿尔·帕西诺合作的导演",
- "output_types": ["GREMLIN", "RESULT"]
-}
-response = requests.post(f"{BASE_URL}/text2gremlin", json=text2gql_request)
-print(response.json())
```
----
-
-## 另见
-
-- [配置参考](./config-reference.md) - 完整的 .env 配置指南
-- [HugeGraph-LLM 概述](./hugegraph-llm.md) - 架构和功能
-- [快速入门指南](./quick_start.md) - Web UI 入门
+`log_file` 只能是 `logs/` 目录下的文件名,不能包含路径分隔符。
diff --git a/content/cn/docs/quickstart/hugegraph-spark.md b/content/cn/docs/quickstart/hugegraph-spark.md
index b66cfe203..5ffb2a691 100644
--- a/content/cn/docs/quickstart/hugegraph-spark.md
+++ b/content/cn/docs/quickstart/hugegraph-spark.md
@@ -5,7 +5,7 @@ draft: true
weight: 100
---
-> Note: HugeGraph-Spark 已经停止维护, 不再更新, 请转向使用 hugegraph-computer, 感谢理解
+> HugeGraph-Spark 已停止维护。新的图计算任务请使用 [HugeGraph-Computer](/cn/docs/quickstart/computing/hugegraph-computer)。本文仅保留为旧版本使用记录。
### 1 HugeGraph-Spark 概述 (Deprecated)
@@ -13,7 +13,7 @@ HugeGraph-Spark 是一个连接 HugeGraph 和 Spark GraphX 的工具,能够读
### 2 环境依赖
-在使用 HugeGraph-Spark 前,需要依赖 HugeGraph Server 服务,下载和启动 Server 请参考 [HugeGraph-Server Quick Start](/docs/quickstart/hugegraph/hugegraph-server)。另外,由于 HugeGraph-Spark 需要使用 Spark GraphX,所以还需要下载 spark,本文的示例使用的是 apache-spark-2.1.1。
+HugeGraph-Spark 依赖 HugeGraph Server,安装方法见 [HugeGraph-Server 快速入门](/cn/docs/quickstart/hugegraph/hugegraph-server)。它还依赖 Spark GraphX;下面保留的旧示例使用 Apache Spark 2.1.1。
```
wget https://archive.apache.org/dist/spark/spark-2.1.1/spark-2.1.1-bin-hadoop2.7.tgz
diff --git a/content/cn/docs/quickstart/hugegraph/_index.md b/content/cn/docs/quickstart/hugegraph/_index.md
index a7d5fa164..3b0e31891 100644
--- a/content/cn/docs/quickstart/hugegraph/_index.md
+++ b/content/cn/docs/quickstart/hugegraph/_index.md
@@ -6,6 +6,6 @@ weight: 1
> DeepWiki 提供实时更新的项目文档,内容更全面准确,适合快速了解项目最新情况。
>
-> 📖 [https://deepwiki.com/apache/hugegraph](https://deepwiki.com/apache/hugegraph)
+源码导航:[DeepWiki:apache/hugegraph](https://deepwiki.com/apache/hugegraph)
-**GitHub 访问:** <i class="fab fa-github"></i> [https://github.com/apache/hugegraph](https://github.com/apache/hugegraph)
\ No newline at end of file
+**GitHub 访问:** <i class="fab fa-github"></i> [https://github.com/apache/hugegraph](https://github.com/apache/hugegraph)
diff --git a/content/cn/docs/quickstart/hugegraph/hugegraph-hstore.md b/content/cn/docs/quickstart/hugegraph/hugegraph-hstore.md
index 79a0ddfc5..e86fb11aa 100644
--- a/content/cn/docs/quickstart/hugegraph/hugegraph-hstore.md
+++ b/content/cn/docs/quickstart/hugegraph/hugegraph-hstore.md
@@ -6,7 +6,7 @@ weight: 3
### 1 HugeGraph-Store 概述
-HugeGraph-Store 是 HugeGraph 分布式版本的存储节点组件,负责实际存储和管理图数据。它与 HugeGraph-PD 协同工作,共同构成 HugeGraph 的分布式存储引擎,提供高可用性和水平扩展能力。
+HugeGraph-Store 是分布式存储节点,负责保存图数据,并通过 HugeGraph-PD 获取分区和集群元数据。
### 2 依赖
@@ -29,10 +29,10 @@ HugeGraph-Store 是 HugeGraph 分布式版本的存储节点组件,负责实
从 Apache HugeGraph 官方下载页面下载最新版本的 HugeGraph-Store:
```bash
-# 用最新版本号替换 {version},例如 1.5.0
-wget https://downloads.apache.org/hugegraph/{version}/apache-hugegraph-incubating-{version}.tar.gz
-tar zxf apache-hugegraph-incubating-{version}.tar.gz
-cd apache-hugegraph-incubating-{version}/apache-hugegraph-hstore-incubating-{version}
+# 1.7.0 是毕业前发布的历史制品,文件名和目录名仍带 incubating
+wget https://downloads.apache.org/hugegraph/1.7.0/apache-hugegraph-incubating-1.7.0.tar.gz
+tar zxf apache-hugegraph-incubating-1.7.0.tar.gz
+cd apache-hugegraph-incubating-1.7.0/apache-hugegraph-hstore-incubating-1.7.0
```
#### 3.2 源码编译
@@ -45,9 +45,9 @@ git clone https://github.com/apache/hugegraph.git
cd hugegraph
mvn clean install -DskipTests=true
-# 3. 编译成功后,Store 模块的构建产物将位于
-# apache-hugegraph-incubating-{version}/apache-hugegraph-hstore-incubating-{version}
-# target/apache-hugegraph-incubating-{version}.tar.gz
+# 3. 编译成功后,Store 目录和完整发布包分别位于
+# hugegraph-store/apache-hugegraph-store-{version}
+# target/apache-hugegraph-{version}.tar.gz
```
#### 3.3 Docker 部署
@@ -277,7 +277,7 @@ curl http://localhost:8520/actuator/health
如果返回 `{"status":"UP"}`,则表示 Store 服务已成功启动。
-此外,可以通过 PD 的 API 查看集群中的 Store 节点状态:
+也可以通过 PD API 查看集群中的 Store 节点状态:
```bash
curl http://localhost:8620/v1/stores
@@ -297,7 +297,7 @@ curl http://localhost:8620/v1/stores
"raftAddress": "127.0.0.1:8510",
"version": "",
"state": "Up",
- "deployPath": "/Users/{your_user_name}/hugegraph/apache-hugegraph-incubating-1.5.0/apache-hugegraph-store-incubating-1.5.0/lib/hg-store-node-1.5.0.jar",
+ "deployPath": "/Users/{your_user_name}/hugegraph/hugegraph-store/apache-hugegraph-store-{version}/lib/hg-store-node-{version}.jar",
"dataPath": "./storage",
"startTimeStamp": 1754027127969,
"registedTimeStamp": 1754027127969,
diff --git a/content/cn/docs/quickstart/hugegraph/hugegraph-pd.md b/content/cn/docs/quickstart/hugegraph/hugegraph-pd.md
index 032e8993c..9688b4f98 100644
--- a/content/cn/docs/quickstart/hugegraph/hugegraph-pd.md
+++ b/content/cn/docs/quickstart/hugegraph/hugegraph-pd.md
@@ -6,7 +6,7 @@ weight: 2
### 1 HugeGraph-PD 概述
-HugeGraph-PD (Placement Driver) 是 HugeGraph 分布式版本的元数据管理组件,负责管理图数据的分布和存储节点的协调。它在分布式 HugeGraph 中扮演着核心角色,维护集群状态并协调 HugeGraph-Store 存储节点。
+HugeGraph-PD(Placement Driver)管理分布式集群的元数据、分区和 Store 节点调度。
### 2 依赖
@@ -28,10 +28,10 @@ HugeGraph-PD (Placement Driver) 是 HugeGraph 分布式版本的元数据管理
从 Apache HugeGraph 官方下载页面下载最新版本的 HugeGraph-PD:
```bash
-# 用最新版本号替换 {version},例如 1.5.0
-wget https://downloads.apache.org/hugegraph/{version}/apache-hugegraph-incubating-{version}.tar.gz
-tar zxf apache-hugegraph-incubating-{version}.tar.gz
-cd apache-hugegraph-incubating-{version}/apache-hugegraph-pd-incubating-{version}
+# 1.7.0 是毕业前发布的历史制品,文件名和目录名仍带 incubating
+wget https://downloads.apache.org/hugegraph/1.7.0/apache-hugegraph-incubating-1.7.0.tar.gz
+tar zxf apache-hugegraph-incubating-1.7.0.tar.gz
+cd apache-hugegraph-incubating-1.7.0/apache-hugegraph-pd-incubating-1.7.0
```
#### 3.2 源码编译
@@ -44,9 +44,9 @@ git clone https://github.com/apache/hugegraph.git
cd hugegraph
mvn clean install -DskipTests=true
-# 3. 编译成功后,PD 模块的构建产物将位于
-# apache-hugegraph-incubating-{version}/apache-hugegraph-pd-incubating-{version}
-# target/apache-hugegraph-incubating-{version}.tar.gz
+# 3. 编译成功后,PD 目录和完整发布包分别位于
+# hugegraph-pd/apache-hugegraph-pd-{version}
+# target/apache-hugegraph-{version}.tar.gz
```
#### 3.3 Docker 部署
@@ -192,7 +192,7 @@ curl http://localhost:8620/actuator/health
如果返回 `{"status":"UP"}`,则表示 PD 服务已成功启动。
-此外,也可以通过 PD API 查看 Store 节点状态:
+也可以通过 PD API 查看 Store 节点状态:
```bash
curl http://localhost:8620/v1/stores
diff --git a/content/cn/docs/quickstart/hugegraph/hugegraph-server.md b/content/cn/docs/quickstart/hugegraph/hugegraph-server.md
index 2be45ba4f..2fbe62381 100644
--- a/content/cn/docs/quickstart/hugegraph/hugegraph-server.md
+++ b/content/cn/docs/quickstart/hugegraph/hugegraph-server.md
@@ -19,11 +19,11 @@ Core 模块是 Tinkerpop 接口的实现,Backend 模块用于管理数据存
#### 2.1 安装 Java 11 (JDK 11)
-建议在 Java 11 环境中运行 `HugeGraph-Server`(1.5.0 之前的版本仍保留对 Java 8 的基本兼容)。
+HugeGraph-Server 1.7.0 的源码以 Java 11 编译,运行和源码构建均需使用 Java 11 或更高版本。
**在继续阅读前,请先执行 `java -version` 命令确认 JDK 版本。**
-> 注:使用 Java 8 启动 HugeGraph-Server 会失去部分**安全性**保障,也会影响性能表现。请尽早升级或迁移,1.7.0 起已不再支持 Java 8。
+> 1.7.0 起不再支持 Java 8。
### 3 部署
@@ -34,7 +34,7 @@ Core 模块是 Tinkerpop 接口的实现,Backend 模块用于管理数据存
- 方式 3:源码编译
- 方式 4:使用 tools 工具部署 (Outdated)
-> ⚠️ **SEC 提醒**:由于图查询语言 (如 Gremlin/Cypher) 的高度灵活性,直接暴露原生查询接口会带来潜在的安全隐患,因此**请避免直接在公网环境中暴露任何查询相关接口**。生产环境中务必开启 **[鉴权体系 (Auth)](/cn/docs/config/config-authentication/)** 配合 **IP 白名单** 构成双重保障机制,同时建议辅以 Audit Log (审计日志) 追踪具体查询语句。推荐整体采用 **[容器化环境 (Docker/K8s)](#31-使用-docker-容器-便于测试)** 进行部署以获得更好的系统级安全隔离。
+> 不要把 Gremlin、Cypher 等查询接口直接暴露到公网。生产环境应启用[认证与授权](/cn/docs/config/config-authentication/),限制网络访问并保留审计日志;部署建议见[安全指南](/cn/docs/guides/security/)。
#### 3.1 使用 Docker 容器 (便于**测试**)
<!-- 3.1 is linked by another place. if change 3.1's title, please check -->
@@ -82,9 +82,9 @@ HUGEGRAPH_VERSION=1.7.0 docker compose up -d
#### 3.2 下载 tar 包
```bash
-# use the latest version, here is 1.7.0 for example
-wget https://downloads.apache.org/hugegraph/{version}/apache-hugegraph-incubating-{version}.tar.gz
-tar zxf *hugegraph*.tar.gz
+# 1.7.0 是毕业前发布的历史制品,文件名仍带 incubating
+wget https://downloads.apache.org/hugegraph/1.7.0/apache-hugegraph-incubating-1.7.0.tar.gz
+tar zxf apache-hugegraph-incubating-1.7.0.tar.gz
```
#### 3.3 源码编译
@@ -105,29 +105,10 @@ cd hugegraph
mvn package -DskipTests
```
-执行日志如下:
+构建成功时日志中会出现:
```bash
-......
-[INFO] Reactor Summary for hugegraph 1.5.0:
-[INFO]
-[INFO] hugegraph .......................................... SUCCESS [ 2.405 s]
-[INFO] hugegraph-core ..................................... SUCCESS [ 13.405 s]
-[INFO] hugegraph-api ...................................... SUCCESS [ 25.943 s]
-[INFO] hugegraph-cassandra ................................ SUCCESS [ 54.270 s]
-[INFO] hugegraph-scylladb ................................. SUCCESS [ 1.032 s]
-[INFO] hugegraph-rocksdb .................................. SUCCESS [ 34.752 s]
-[INFO] hugegraph-mysql .................................... SUCCESS [ 1.778 s]
-[INFO] hugegraph-palo ..................................... SUCCESS [ 1.070 s]
-[INFO] hugegraph-hbase .................................... SUCCESS [ 32.124 s]
-[INFO] hugegraph-postgresql ............................... SUCCESS [ 1.823 s]
-[INFO] hugegraph-dist ..................................... SUCCESS [ 17.426 s]
-[INFO] hugegraph-example .................................. SUCCESS [ 1.941 s]
-[INFO] hugegraph-test ..................................... SUCCESS [01:01 min]
-[INFO] ------------------------------------------------------------------------
[INFO] BUILD SUCCESS
-[INFO] ------------------------------------------------------------------------
-......
```
执行成功后,在 hugegraph 目录下生成 `*hugegraph-*.tar.gz` 文件,就是编译生成的 tar 包。
@@ -222,6 +203,8 @@ pd.peers=127.0.0.1:8686
```properties
usePD=true
+# 从 graphs 目录加载上面的 hugegraph.properties;源码默认值为 false
+graph.load_from_local_config=true
# 注意,1.7.0 必须在 rest-server.properties 配置 pd.peers
pd.peers=127.0.0.1:8686,127.0.0.1:8687,127.0.0.1:8688
@@ -273,13 +256,6 @@ host: 127.0.0.1
port: 8182
```
-初始化数据库:
-
-```bash
-cd *hugegraph-${version}
-bin/init-store.sh
-```
-
启动 Server:
```bash
@@ -289,13 +265,14 @@ bin/start-hugegraph.sh
使用分布式存储引擎的启动顺序为:
1. 启动 HugeGraph-PD
2. 启动 HugeGraph-Store
-3. 初始化数据库(仅首次)
-4. 启动 HugeGraph-Server
+3. 启动 HugeGraph-Server
+
+HStore 的元数据和存储由 PD、Store 管理,`init-store` 会跳过该后端,不需要单独执行初始化脚本。
验证服务是否正常启动:
```bash
-curl http://localhost:8081/graphs
+curl http://localhost:8081/graphspaces/DEFAULT/graphs
# 应返回:{"graphs":["hugegraph"]}
```
@@ -339,6 +316,14 @@ curl http://localhost:8620/v1/stores
##### 5.1.2 RocksDB / ToplingDB
+以下从本地 properties 文件启动图的示例要求在 `conf/rest-server.properties` 中设置:
+
+```properties
+graph.load_from_local_config=true
+```
+
+当前源码默认值是 `false`,上游发布模板尚未写出该选项。
+
<details>
<summary>点击展开/折叠 RocksDB 配置及启动方法</summary>
@@ -357,7 +342,7 @@ rocksdb.wal_path=.
初始化数据库(第一次启动时或在 `conf/graphs/` 下手动添加了新配置时需要进行初始化)
```bash
-cd *hugegraph-${version}
+cd apache-hugegraph-incubating-1.7.0/apache-hugegraph-server-incubating-1.7.0
bin/init-store.sh
```
@@ -401,7 +386,7 @@ hbase.port=2181
初始化数据库(第一次启动时或在 `conf/graphs/` 下手动添加了新配置时需要进行初始化)
```bash
-cd *hugegraph-${version}
+cd apache-hugegraph-incubating-1.7.0/apache-hugegraph-server-incubating-1.7.0
bin/init-store.sh
```
@@ -419,6 +404,9 @@ Connecting to HugeGraphServer (http://127.0.0.1:8080/graphs)....OK
##### 5.1.4 MySQL
+<details>
+<summary>1.5.x 历史后端:MySQL 与 Cassandra</summary>
+
> ⚠️ **已废弃**: 此后端从 HugeGraph 1.7.0 版本开始已移除。如需使用,请参考 1.5.x 版本文档。
<details>
@@ -449,7 +437,7 @@ jdbc.ssl_mode=false
初始化数据库(第一次启动时或在 `conf/graphs/` 下手动添加了新配置时需要进行初始化)
```bash
-cd *hugegraph-${version}
+cd apache-hugegraph-incubating-1.5.0/apache-hugegraph-server-incubating-1.5.0
bin/init-store.sh
```
@@ -493,7 +481,7 @@ cassandra.password=
初始化数据库(第一次启动时或在 `conf/graphs/` 下手动添加了新配置时需要进行初始化)
```bash
-cd *hugegraph-${version}
+cd apache-hugegraph-incubating-1.5.0/apache-hugegraph-server-incubating-1.5.0
bin/init-store.sh
Initing HugeGraph Store...
2017-12-01 11:26:51 1424 [main] [INFO ] org.apache.hugegraph.HugeGraph [] - Opening backend store: 'cassandra'
@@ -524,6 +512,8 @@ Connecting to HugeGraphServer (http://127.0.0.1:8080/graphs)....OK
</details>
+</details>
+
##### 5.1.6 Memory
<details>
@@ -552,6 +542,9 @@ Connecting to HugeGraphServer (http://127.0.0.1:8080/graphs)....OK
##### 5.1.7 ScyllaDB
+<details>
+<summary>1.5.x 历史后端:ScyllaDB</summary>
+
> ⚠️ **已废弃**: 此后端从 HugeGraph 1.7.0 版本开始已移除。如需使用,请参考 1.5.x 版本文档。
<details>
@@ -582,7 +575,7 @@ cassandra.password=
初始化数据库(第一次启动时或在 `conf/graphs/` 下手动添加了新配置时需要进行初始化)
```bash
-cd *hugegraph-${version}
+cd apache-hugegraph-incubating-1.5.0/apache-hugegraph-server-incubating-1.5.0
bin/init-store.sh
```
@@ -596,6 +589,8 @@ Connecting to HugeGraphServer (http://127.0.0.1:8080/graphs)....OK
</details>
+</details>
+
##### 5.1.8 启动 server 的时候创建示例图
在启动脚本时携带 `-p true` 参数,表示开启 preload,即创建示例图。
@@ -609,7 +604,7 @@ Connecting to HugeGraphServer (http://127.0.0.1:8080/graphs)......OK
并且使用 RESTful API 请求 `HugeGraphServer` 得到如下结果:
```javascript
-> curl "http://localhost:8080/graphs/hugegraph/graph/vertices" | gunzip
+> curl "http://localhost:8080/graphspaces/DEFAULT/graphs/hugegraph/graph/vertices" | gunzip
{"vertices":[{"id":"2:lop","label":"software","type":"vertex","properties":{"name":"lop","lang":"java","price":328}},{"id":"1:josh","label":"person","type":"vertex","properties":{"name":"josh","age":32,"city":"Beijing"}},{"id":"1:marko","label":"person","type":"vertex","properties":{"name":"marko","age":29,"city":"Beijing"}},{"id":"1:peter","label":"person","type":"vertex","properties":{"name":"peter","age":35,"city":"Shanghai"}},{"id":"1:vadas","label":"person","type":"vertex","properti [...]
```
@@ -618,7 +613,7 @@ Connecting to HugeGraphServer (http://127.0.0.1:8080/graphs)......OK
#### 5.2 使用 Docker
-在 [3.1 使用 Docker 容器](#31-使用-docker-容器-便于测试) 中,我们已经介绍了如何使用 `docker` 部署 `hugegraph-server`。此外,也可以通过切换后端存储或设置参数,在 Server 启动时加载样例图。
+在 [3.1 使用 Docker 容器](#31-使用-docker-容器-便于测试) 中,我们已经介绍了如何使用 `docker` 部署 `hugegraph-server`。还可以通过切换后端存储或设置参数,在 Server 启动时加载样例图。
##### 5.2.1 使用 Cassandra 作为后端
@@ -718,7 +713,7 @@ volumes:
使用 RESTful API 请求 `HugeGraphServer` 得到如下结果:
```javascript
-> curl "http://localhost:8080/graphs/hugegraph/graph/vertices" | gunzip
+> curl "http://localhost:8080/graphspaces/DEFAULT/graphs/hugegraph/graph/vertices" | gunzip
{"vertices":[{"id":"2:lop","label":"software","type":"vertex","properties":{"name":"lop","lang":"java","price":328}},{"id":"1:josh","label":"person","type":"vertex","properties":{"name":"josh","age":32,"city":"Beijing"}},{"id":"1:marko","label":"person","type":"vertex","properties":{"name":"marko","age":29,"city":"Beijing"}},{"id":"1:peter","label":"person","type":"vertex","properties":{"name":"peter","age":35,"city":"Shanghai"}},{"id":"1:vadas","label":"person","type":"vertex","properti [...]
```
@@ -740,7 +735,7 @@ jps
`curl` 请求 RESTful API
```bash
-echo `curl -o /dev/null -s -w %{http_code} "http://localhost:8080/graphs/hugegraph/graph/vertices"`
+echo `curl -o /dev/null -s -w %{http_code} "http://localhost:8080/graphspaces/DEFAULT/graphs/hugegraph/graph/vertices"`
```
返回结果 200,代表 server 启动正常
@@ -758,7 +753,7 @@ HugeGraphServer 的 RESTful API 包括多种类型的资源,典型的包括 gr
##### 6.2.1 获取 `hugegraph` 的顶点及相关属性
```bash
-curl http://localhost:8080/graphs/hugegraph/graph/vertices
+curl http://localhost:8080/graphspaces/DEFAULT/graphs/hugegraph/graph/vertices
```
_说明_
@@ -766,7 +761,7 @@ _说明_
1. 由于图的点和边很多,对于 list 型的请求,比如获取所有顶点,获取所有边等,Server 会将数据压缩再返回,所以使用 curl 时得到一堆乱码,可以重定向至 `gunzip` 进行解压。推荐使用 Chrome 浏览器 + Restlet 插件发送 HTTP 请求进行测试。
```
- curl "http://localhost:8080/graphs/hugegraph/graph/vertices" | gunzip
+ curl "http://localhost:8080/graphspaces/DEFAULT/graphs/hugegraph/graph/vertices" | gunzip
```
2. 当前 HugeGraphServer 的默认配置只能是本机访问,可以修改配置,使其能在其他机器访问。
@@ -856,8 +851,8 @@ _说明_
### 7 停止 Server
```bash
-$cd *hugegraph-${version}
-$bin/stop-hugegraph.sh
+cd apache-hugegraph-incubating-1.7.0/apache-hugegraph-server-incubating-1.7.0
+bin/stop-hugegraph.sh
```
### 8 使用 IntelliJ IDEA 调试 Server
diff --git a/content/cn/docs/quickstart/toolchain/_index.md b/content/cn/docs/quickstart/toolchain/_index.md
index 6b318fa74..7af83c61b 100644
--- a/content/cn/docs/quickstart/toolchain/_index.md
+++ b/content/cn/docs/quickstart/toolchain/_index.md
@@ -6,8 +6,6 @@ weight: 2
> **测试指南**:如需在本地运行工具链测试,请参考 [HugeGraph 工具链本地测试指南](/cn/docs/guides/toolchain-local-test)
-> DeepWiki 提供实时更新的项目文档,内容更全面准确,适合快速了解项目最新情况。
->
-> 📖 [https://deepwiki.com/apache/hugegraph-toolchain](https://deepwiki.com/apache/hugegraph-toolchain)
+HugeGraph Toolchain 包含 Java/Go 客户端、Loader、Hubble、Tools 和 Spark Connector。各模块的功能和使用方法见本节文档。
-**GitHub 访问:** <i class="fab fa-github"></i> [https://github.com/apache/hugegraph-toolchain](https://github.com/apache/hugegraph-toolchain)
+源码仓库:<i class="fab fa-github"></i> [apache/hugegraph-toolchain](https://github.com/apache/hugegraph-toolchain)
diff --git a/content/cn/docs/quickstart/toolchain/hugegraph-hubble.md b/content/cn/docs/quickstart/toolchain/hugegraph-hubble.md
index add0f97d9..dcb7a2c46 100644
--- a/content/cn/docs/quickstart/toolchain/hugegraph-hubble.md
+++ b/content/cn/docs/quickstart/toolchain/hugegraph-hubble.md
@@ -6,40 +6,35 @@ weight: 1
### 1 HugeGraph-Hubble 概述
-> **特别注意:** 当前版本的 Hubble 还没有添加 Auth/Login 相关界面和接口和单独防护, 在下一个 Release 版 (> 1.5) 会加入,
-> 请留意避免把它暴露在公网环境或不受信任的网络中,以免引起相关 SEC 问题 (另外也可以使用 **IP & 端口**白名单 + HTTPS)
+Hubble 已提供登录页面和会话校验。部署时仍应限制网络访问,并为 HugeGraph Server 配置认证;不要把未加固的实例直接暴露在公网。
>
> **测试指南**:如需在本地运行 Hubble 测试,请参考 [工具链本地测试指南](/cn/docs/guides/toolchain-local-test)
-**HugeGraph-Hubble** 是 HugeGraph 的一站式可视化分析平台,平台涵盖了从数据建模,到数据快速导入,
-再到数据的在线、离线分析、以及图的统一管理的全过程,实现了图应用的全流程向导式操作,旨在提升用户的使用流畅度,
-降低用户的使用门槛,提供更为高效易用的使用体验。
+HugeGraph-Hubble 是 HugeGraph 的 Web 管理界面,可用于管理图连接和 Schema、导入数据、执行 Gremlin 查询并查看图形化结果。
平台主要包括以下模块:
##### 图管理
-图管理模块通过图的创建,连接平台与图数据,实现多图的统一管理,并实现图的访问、编辑、删除、查询操作。
+图管理用于创建和维护连接,可在多个图之间切换,并执行访问、编辑、删除和查询操作。
##### 元数据建模
-元数据建模模块通过创建属性库,顶点类型,边类型,索引类型,实现图模型的构建与管理,平台提供两种模式,列表模式和图模式,可实时展示元数据模型,更加直观。同时还提供了跨图的元数据复用功能,省去相同元数据繁琐的重复创建过程,极大地提升建模效率,增强易用性。
+元数据建模用于管理 PropertyKey、VertexLabel、EdgeLabel 和 IndexLabel。页面提供列表与图两种视图,也可以在图之间复用元数据。
##### 图分析
-通过输入图遍历语言 Gremlin 可实现图数据的高性能通用分析,并提供顶点的定制化多维路径查询等功能,提供 3 种图结果展示方式,包括:图形式、表格形式、Json 形式,多维度展示数据形态,满足用户使用的多种场景需求。提供运行记录及常用语句收藏等功能,实现图操作的可追溯,以及查询输入的复用共享,快捷高效。支持图数据的导出,导出格式为 Json 格式。
+图分析页面可以执行 Gremlin 和路径查询,并用图、表格或 JSON 显示结果。页面还保存执行记录和收藏语句,查询结果可以导出为 JSON。
##### 任务管理
-对于需要遍历全图的 Gremlin 任务,索引的创建与重建等耗时较长的异步任务,平台提供相应的任务管理功能,实现异步任务的统一的管理与结果查看。
+任务管理页面用于查看 Gremlin 异步任务、索引创建和重建等后台任务。
##### 数据导入 (BETA)
-> 注: 数据导入功能目前适合初步试用,正式数据导入请使用 [hugegraph-loader](/cn/docs/quickstart/toolchain/hugegraph-loader), 性能/稳定性/功能全面许多
+> 数据导入页面适合小规模试用。大批量或生产导入请使用 [HugeGraph Loader](/cn/docs/quickstart/toolchain/hugegraph-loader)。
-数据导入是将用户的业务数据转化为图的顶点和边并插入图数据库中,平台提供了向导式的可视化导入模块,通过创建导入任务,
-实现导入任务的管理及多个导入任务的并行运行,提高导入效能。进入导入任务后,只需跟随平台步骤提示,按需上传文件,填写内容,
-就可轻松实现图数据的导入过程,同时支持断点续传,错误重试机制等,降低导入成本,提升效率。
+数据导入页面按步骤创建任务、上传文件并配置字段映射,可并行运行多个导入任务,也支持断点续传和错误重试。
### 2 部署
@@ -90,9 +85,11 @@ services:
`hubble`项目在`toolchain`项目中,首先下载`toolchain`的 tar 包
```bash
-wget https://downloads.apache.org/hugegraph/{version}/apache-hugegraph-toolchain-incubating-{version}.tar.gz
-tar -xvf apache-hugegraph-toolchain-incubating-{version}.tar.gz
-cd apache-hugegraph-toolchain-incubating-{version}.tar.gz/apache-hugegraph-hubble-incubating-{version}
+export VERSION=1.7.0
+export ARCHIVE="apache-hugegraph-toolchain-incubating-${VERSION}"
+wget "https://downloads.apache.org/hugegraph/${VERSION}/${ARCHIVE}.tar.gz"
+tar -xvf "${ARCHIVE}.tar.gz"
+cd "${ARCHIVE}/apache-hugegraph-hubble-incubating-${VERSION}"
```
运行`hubble`
@@ -101,22 +98,11 @@ cd apache-hugegraph-toolchain-incubating-{version}.tar.gz/apache-hugegraph-hubbl
bin/start-hubble.sh
```
-随后我们可以看到
-
-```shell
-starting HugeGraphHubble ..............timed out with http status 502
-2023-08-30 20:38:34 [main] [INFO ] o.a.h.HugeGraphHubble [] - Starting HugeGraphHubble v1.0.0 on cpu05 with PID xxx (~/apache-hugegraph-toolchain-incubating-1.0.0/apache-hugegraph-hubble-incubating-1.0.0/lib/hubble-be-1.0.0.jar started by $USER in ~/apache-hugegraph-toolchain-incubating-1.0.0/apache-hugegraph-hubble-incubating-1.0.0)
-...
-2023-08-30 20:38:38 [main] [INFO ] c.z.h.HikariDataSource [] - hugegraph-hubble-HikariCP - Start completed.
-2023-08-30 20:38:41 [main] [INFO ] o.a.c.h.Http11NioProtocol [] - Starting ProtocolHandler ["http-nio-0.0.0.0-8088"]
-2023-08-30 20:38:41 [main] [INFO ] o.a.h.HugeGraphHubble [] - Started HugeGraphHubble in 7.379 seconds (JVM running for 8.499)
-```
-
-然后使用浏览器访问 `ip:8088` 可看到`hubble`页面,通过`bin/stop-hubble.sh`则可以停止服务
+启动完成后访问 `http://<host>:8088`。停止服务时执行 `bin/stop-hubble.sh`。
#### 2.3 源码编译
-**注意:** 目前已在 `hugegraph-hubble/hubble-be/pom.xml` 中引入插件 `frontend-maven-plugin`,编译 hubble 时不需要用户本地环境提前安装 `Nodejs V16.x` 与 `yarn` 环境,可直接按下述步骤执行
+Hubble 的构建由 `hugegraph-hubble/hubble-dist/pom.xml` 中的 `frontend-maven-plugin` 安装 Node.js 18.20.8 和 Yarn 1.22.21,无需预先安装这两个工具。
下载 toolchain 源码包
@@ -128,12 +114,12 @@ git clone https://github.com/apache/hugegraph-toolchain.git
```shell
cd hugegraph-toolchain
-sudo pip install -r hugegraph-hubble/hubble-dist/assembly/travis/requirements.txt
+python -m pip install -r hugegraph-hubble/hubble-dist/assembly/travis/requirements.txt
mvn install -pl hugegraph-client,hugegraph-loader -am -Dmaven.javadoc.skip=true -DskipTests -ntp
cd hugegraph-hubble
mvn -e package -Dmaven.javadoc.skip=true -Dmaven.test.skip=true -ntp
-cd apache-hugegraph-hubble-incubating*
+cd apache-hugegraph-hubble-*
```
启动`hubble`
@@ -566,7 +552,17 @@ HugeGraph-Hubble 可以通过 `conf/hugegraph-hubble.properties` 文件进行配
| `hubble.host` | `0.0.0.0` | Hubble 服务绑定的地址 |
| `hubble.port` | `8088` | Hubble 服务监听的端口 |
-#### 5.2 Gremlin 查询限制
+#### 5.2 Server 与 PD
+
+| 配置项 | 默认值 | 说明 |
+|--------|--------|------|
+| `pd.enabled` | `false` | 是否通过 PD 发现服务;单机 Server 保持为 `false` |
+| `server.direct_url` | `http://127.0.0.1:8080` | `pd.enabled=false` 时连接的 Server 地址 |
+| `pd.peers` | `127.0.0.1:8686` | PD 节点地址 |
+| `pd.server` | `127.0.0.1:8620` | PD 服务地址 |
+| `route.type` | `NODE_PORT` | 服务路由方式,可选 `NODE_PORT`、`DDS` 或 `BOTH` |
+
+#### 5.3 Gremlin 查询限制
这些设置控制查询结果限制,防止内存问题:
diff --git a/content/cn/docs/quickstart/toolchain/hugegraph-loader.md b/content/cn/docs/quickstart/toolchain/hugegraph-loader.md
index 622fb8fd1..1be91e09a 100644
--- a/content/cn/docs/quickstart/toolchain/hugegraph-loader.md
+++ b/content/cn/docs/quickstart/toolchain/hugegraph-loader.md
@@ -24,7 +24,7 @@ HugeGraph-Loader 是 HugeGraph 的数据导入组件,能够将多种数据源
### 2 获取 HugeGraph-Loader
-有两种方式可以获取 HugeGraph-Loader:
+可以通过以下三种方式获取 HugeGraph-Loader:
- 使用 Docker 镜像 (便于**测试**)
- 下载已编译的压缩包
@@ -77,8 +77,10 @@ services:
下载最新版本的 `HugeGraph-Toolchain` Release 包,里面包含了 `loader + tool + hubble` 全套工具,如果你已经下载,可跳过重复步骤
```bash
-wget https://downloads.apache.org/hugegraph/{version}/apache-hugegraph-toolchain-incubating-{version}.tar.gz
-tar zxf *hugegraph*.tar.gz
+export VERSION=1.7.0
+export ARCHIVE="apache-hugegraph-toolchain-incubating-${VERSION}"
+wget "https://downloads.apache.org/hugegraph/${VERSION}/${ARCHIVE}.tar.gz"
+tar zxf "${ARCHIVE}.tar.gz"
```
#### 2.3 克隆源码编译安装
@@ -89,8 +91,10 @@ tar zxf *hugegraph*.tar.gz
# 1. get from github
git clone https://github.com/apache/hugegraph-toolchain.git
-# 2. get from direct url (please choose the **latest release** version)
-wget https://downloads.apache.org/hugegraph/{version}/apache-hugegraph-toolchain-incubating-{version}-src.tar.gz
+# 2. 下载发布版源码包
+export VERSION=1.7.0
+export ARCHIVE="apache-hugegraph-toolchain-incubating-${VERSION}"
+wget "https://downloads.apache.org/hugegraph/${VERSION}/${ARCHIVE}-src.tar.gz"
```
<details>
@@ -111,8 +115,8 @@ mvn install:install-file -Dfile=./ojdbc8.jar -DgroupId=com.oracle -DartifactId=o
编译生成 tar 包:
```bash
-cd hugegraph-loader
-mvn clean package -DskipTests
+cd hugegraph-toolchain
+mvn clean package -pl hugegraph-loader -am -DskipTests -ntp
```
### 3 使用流程
@@ -810,9 +814,9 @@ schema: 必填
| 参数 | 默认值 | 是否必传 | 描述信息 |
|-----------------------------------------|-------------|------|-------------------------------------------------------------------|
| `-f` 或 `--file` | | Y | 配置脚本的路径 |
-| `-g` 或 `--graph` | | Y | 图名称 |
+| `-g` 或 `--graph` | hugegraph | | 图名称 |
| `--graphspace` | DEFAULT | | 图空间 |
-| `-s` 或 `--schema` | | Y | schema 文件路径 |
+| `-s` 或 `--schema` | | | schema 文件路径;已有 Schema 时可以不传 |
| `-h` 或 `--host` 或 `-i` | localhost | | HugeGraphServer 的地址 |
| `-p` 或 `--port` | 8080 | | HugeGraphServer 的端口号 |
| `--username` | null | | 当 HugeGraphServer 开启了权限认证时,当前图的 username |
@@ -841,13 +845,13 @@ schema: 必填
| `--max-insert-errors` | 500 | | 最多允许多少行数据插入错误,达到该值则程序退出 |
| `--timeout` | 60 | | 插入结果返回的超时时间(秒) |
| `--shutdown-timeout` | 10 | | 多线程停止的等待时间(秒) |
-| `--retry-times` | 0 | | 发生特定异常时的重试次数 |
+| `--retry-times` | 3 | | 发生超时时的最大重试次数 |
| `--retry-interval` | 10 | | 重试之前的间隔时间(秒) |
| `--check-vertex` | false | | 插入边时是否检查边所连接的顶点是否存在 |
| `--print-progress` | true | | 是否在控制台实时打印导入条数 |
| `--dry-run` | false | | 打开该模式,只解析不导入,通常用于测试 |
| `--help` 或 `-help` | false | | 打印帮助信息 |
-| `--parser-threads` 或 `--parallel-count` | max(2,CPUS) | | 并行读取数据文件最大线程数 |
+| `--parser-threads` 或 `--parallel-count` | max(2,CPUs/2) | | 并行读取管线数;`--parallel-count` 已弃用 |
| `--start-file` | 0 | | 用于部分(分片)导入的起始文件索引 |
| `--end-file` | -1 | | 用于部分导入的截止文件索引 |
| `--scatter-sources` | false | | 分散(并行)读取多个数据源以优化 I/O 性能 |
@@ -1186,7 +1190,7 @@ sh bin/hugegraph-loader.sh -g hugegraph -f example/file/struct.json -s example/f
#### 4.6 使用 spark-loader 导入
> Spark 版本:Spark 3+,其他版本未测试。
-> HugeGraph Toolchain 版本:toolchain-1.0.0
+> 当前源码使用 Spark 3.2.2 和 Scala 2.12;其他组合需自行验证。
>
`spark-loader` 的参数分为两部分,注意:因二者参数名缩写存在重合部分,请使用参数全称。两种参数之间无需保证先后顺序。
- hugegraph 参数(参考:[hugegraph-loader 参数说明](https://hugegraph.apache.org/cn/docs/quickstart/toolchain/hugegraph-loader/#341-%E5%8F%82%E6%95%B0%E8%AF%B4%E6%98%8E) )
diff --git a/content/cn/docs/quickstart/toolchain/hugegraph-spark-connector.md b/content/cn/docs/quickstart/toolchain/hugegraph-spark-connector.md
index 13dec291b..a57ef333d 100644
--- a/content/cn/docs/quickstart/toolchain/hugegraph-spark-connector.md
+++ b/content/cn/docs/quickstart/toolchain/hugegraph-spark-connector.md
@@ -6,7 +6,7 @@ weight: 4
### 1 HugeGraph-Spark-Connector 概述
-HugeGraph-Spark-Connector 是一个用于在 Spark 中以标准格式读写 HugeGraph 数据的连接器应用程序。
+HugeGraph-Spark-Connector 使用 Spark DataFrame API 将批量数据写入 HugeGraph。当前实现提供顶点和边的写入器。
### 2 环境要求
@@ -19,19 +19,23 @@ HugeGraph-Spark-Connector 是一个用于在 Spark 中以标准格式读写 Huge
#### 3.1 不执行测试的编译
+以下命令均在仓库根目录执行。
+
```bash
-mvn clean package -DskipTests
+git clone https://github.com/apache/hugegraph-toolchain.git
+cd hugegraph-toolchain
+mvn clean package -pl hugegraph-spark-connector -am -DskipTests -ntp
```
#### 3.2 执行默认测试的编译
```bash
-mvn clean package
+mvn clean package -pl hugegraph-spark-connector -am -ntp
```
### 4 使用方法
-首先在你的 pom.xml 中添加依赖:
+先在 `pom.xml` 中添加依赖,并将 `${revision}` 换成实际使用的发布版本:
```xml
<dependency>
@@ -144,7 +148,7 @@ df.write
|----------------------|------------|-------------------------------------------------------|
| `host` | `localhost` | HugeGraphServer 的地址 |
| `port` | `8080` | HugeGraphServer 的端口 |
-| `graph` | `hugegraph` | 图空间名称 |
+| `graph` | `hugegraph` | 图名称 |
| `protocol` | `http` | 向服务器发送请求的协议,可选 `http` 或 `https` |
| `username` | `null` | 当 HugeGraphServer 开启权限认证时,当前图的用户名 |
| `token` | `null` | 当 HugeGraphServer 开启权限认证时,当前图的 token |
@@ -156,7 +160,7 @@ df.write
#### 5.2 图数据配置
-图数据配置用于设置图空间的配置。
+图数据配置用于说明 DataFrame 如何映射到顶点或边。
| 参数 | 默认值 | 说明 |
|-------------------|-------|----------------------------------------------------------------------------------------------------------------------------------------------------|
diff --git a/content/cn/docs/quickstart/toolchain/hugegraph-tools.md b/content/cn/docs/quickstart/toolchain/hugegraph-tools.md
index 39e4a47b4..18e01d7ca 100644
--- a/content/cn/docs/quickstart/toolchain/hugegraph-tools.md
+++ b/content/cn/docs/quickstart/toolchain/hugegraph-tools.md
@@ -12,7 +12,7 @@ HugeGraph-Tools 是 HugeGraph 的自动化部署、管理和备份/还原组件
### 2 获取 HugeGraph-Tools
-有两种方式可以获取 HugeGraph-Tools:(它被包含子 Toolchain 中)
+HugeGraph-Tools 包含在 Toolchain 发布包中,可以下载发布包,也可以从源码编译。
- 下载二进制tar包
- 下载源码编译安装
@@ -22,8 +22,10 @@ HugeGraph-Tools 是 HugeGraph 的自动化部署、管理和备份/还原组件
下载最新版本的 HugeGraph-Toolchain 包, 然后进入 tools 子目录
```bash
-wget https://downloads.apache.org/hugegraph/1.0.0/apache-hugegraph-toolchain-incubating-1.0.0.tar.gz
-tar zxf *hugegraph*.tar.gz
+export VERSION=1.7.0
+export ARCHIVE="apache-hugegraph-toolchain-incubating-${VERSION}"
+wget "https://downloads.apache.org/hugegraph/${VERSION}/${ARCHIVE}.tar.gz"
+tar zxf "${ARCHIVE}.tar.gz"
```
#### 2.2 下载源码编译安装
@@ -35,15 +37,17 @@ tar zxf *hugegraph*.tar.gz
# 1. get from github
git clone https://github.com/apache/hugegraph-toolchain.git
-# 2. get from direct (e.g. here is 1.0.0, please choose the latest version)
-wget https://downloads.apache.org/hugegraph/1.0.0/apache-hugegraph-toolchain-incubating-1.0.0-src.tar.gz
+# 2. 下载发布版源码包
+export VERSION=1.7.0
+export ARCHIVE="apache-hugegraph-toolchain-incubating-${VERSION}"
+wget "https://downloads.apache.org/hugegraph/${VERSION}/${ARCHIVE}-src.tar.gz"
```
编译生成 tar 包:
```bash
-cd hugegraph-tools
-mvn package -DskipTests
+cd hugegraph-toolchain
+mvn package -pl hugegraph-tools -am -DskipTests -ntp
```
生成 tar 包 hugegraph-tools-${version}.tar.gz
@@ -75,6 +79,7 @@ Usage: hugegraph [options] [command] [command options]
- --user,当 HugeGraph-Server 开启认证时,传递用户名
- --password,当 HugeGraph-Server 开启认证时,传递用户的密码
- --timeout,连接 HugeGraph-Server 时的超时时间,默认是 30s
+- --protocol,连接协议,可选 http 或 https,默认是 http
- --trust-store-file,证书文件的路径,当 --url 使用 https 时,HugeGraph-Client 使用的 truststore 文件,默认为空,代表使用 hugegraph-tools 内置的 truststore 文件 conf/hugegraph.truststore
- --trust-store-password,证书文件的密码,当 --url 使用 https 时,HugeGraph-Client 使用的 truststore 的密码,默认为空,代表使用 hugegraph-tools 内置的 truststore 文件的密码
@@ -180,10 +185,10 @@ Usage: hugegraph [options] [command] [command options]
- --thread-num 或者 -T,使用的线程数,默认为 Math.min(10, Math.max(4, CPUs / 2))
- -D,用 -Dkey=value 的模式指定动态参数,用来从 HDFS 恢复图时,指定 HDFS 的配置项,例如:-Dfs.default.name=hdfs://localhost:9000
> 只有当 --format 为 json 执行 backup 时,才可以使用 restore 命令恢复
-- migrate, 将当前连接的图迁移至另一个 HugeGraphServer 中
+- migrate,将当前连接的图迁移至另一个 HugeGraphServer 中
- --target-graph,目标图的名字,默认为 hugegraph
- --target-url,目标图所在的 HugeGraphServer,默认为 http://127.0.0.1:8081
- - --target-username,访问目标图的用户名
+ - --target-user,访问目标图的用户名
- --target-password,访问目标图的密码
- --target-timeout,访问目标图的超时时间
- --target-trust-store-file,访问目标图使用的 truststore 文件
@@ -200,9 +205,8 @@ Usage: hugegraph [options] [command] [command options]
- --directory 或者 -d,必填项,指定备份数据的目录
- --backup-num,选填项,指定保存的最新的备份的数目,默认为 3
- --interval,选填项,指定进行备份的周期,格式同 Linux crontab 格式
-- dump,把整张图的顶点和边全部导出,默认以`vertex vertex-edge1 vertex-edge2...`JSON格式存储。
-用户也可以自定义存储格式,只需要在`hugegraph-tools/src/main/java/com/baidu/hugegraph/formatter`
-目录下实现一个继承自`Formatter`的类,例如`CustomFormatter`,使用时指定该类为formatter即可,例如
+- dump,把整张图的顶点和边全部导出,默认以 `vertex vertex-edge1 vertex-edge2...` 的 JSON 格式存储。
+用户也可以自定义存储格式。在 `hugegraph-tools/src/main/java/org/apache/hugegraph/formatter` 下实现一个继承自 `Formatter` 的类,例如 `CustomFormatter`,使用时指定该类为 formatter:
`bin/hugegraph dump -f CustomFormatter`
- --formatter 或者 -f,指定使用的 formatter,默认为 JsonFormatter
- --directory 或者 -d,存储 schema 或者 data 的目录,默认为当前目录
@@ -233,13 +237,13 @@ Usage: hugegraph [options] [command] [command options]
##### 3.8 安装部署类
- deploy,一键下载、安装和启动 HugeGraph-Server 和 HugeGraph-Studio
- - -v,必填项,指明安装的 HugeGraph-Server 和 HugeGraph-Studio 的版本号,最新的是 0.9
+ - -v,必填项,指定要安装的 HugeGraph-Server 和 HugeGraph-Studio 版本
- -p,必填项,指定安装的 HugeGraph-Server 和 HugeGraph-Studio 目录
- -u,选填项,指定下载 HugeGraph-Server 和 HugeGraph-Studio 压缩包的链接
- clear,清理 HugeGraph-Server 和 HugeGraph-Studio 目录和tar包
- -p,必填项,指定要清理的 HugeGraph-Server 和 HugeGraph-Studio 的目录
- start-all,一键启动 HugeGraph-Server 和 HugeGraph-Studio,并启动监控,服务死掉时自动拉起服务
- - -v,必填项,指明要启动的 HugeGraph-Server 和 HugeGraph-Studio 的版本号,最新的是 0.9
+ - -v,必填项,指定已安装的 HugeGraph-Server 和 HugeGraph-Studio 版本
- -p,必填项,指定安装了 HugeGraph-Server 和 HugeGraph-Studio 的目录
- stop-all,一键关闭 HugeGraph-Server 和 HugeGraph-Studio
@@ -579,8 +583,6 @@ Usage: hugegraph [options] [command] [command options]
###### 3. 图模式查看和设置
```bash
-./bin/hugegraph --url http://127.0.0.1:8080 --graph hugegraph graph-mode-set -m RESTORING MERGING NONE
-
./bin/hugegraph --url http://127.0.0.1:8080 --graph hugegraph graph-mode-set -m RESTORING
./bin/hugegraph --url http://127.0.0.1:8080 --graph hugegraph graph-mode-get
@@ -603,7 +605,7 @@ Usage: hugegraph [options] [command] [command options]
###### 6. 周期性的备份
```bash
-./bin/hugegraph --url http://127.0.0.1:8080 --graph hugegraph --interval */2 * * * * schedule-backup -d ./backup-0.10.2
+./bin/hugegraph --url http://127.0.0.1:8080 --graph hugegraph schedule-backup -d ./backup --interval "*/2 * * * *"
```
###### 7. 图恢复